FIELD & FOREST

chocolate

chocolate stout crepes with whiskey ricotta

desserts, spring, sweet, winter, vegetarian, autumnRachel SandersComment
chocolate stout crepes

I spent two hours the other day attempting to roast sweet potatoes before realizing our oven was broken. I've turned it on a bunch since then, both because I forgot it was broken, and because I was sort of hoping that maybe it was just tired (we've been using it a LOT) and would miraculously start working again. So while we wait for it to be fixed, we're experimenting with the broiler (which is, somehow, still working) and learning that it is great at not only toasting bread and cooking salmon, but also at burning the crap out of sweet potatoes! :)

In all honesty, we've been perfectly fine while ovenless, but then Richard sent me a text with the message "St Patrick's Day work potluck! What should I make/bring?" and I traveled down my mental list of Irish recipes before realizing that 95% of my favorites use (drumroll) the oven. Gah. Of course the big deals of the day, the corned beef and cabbage and potatoes, aren't oven dependent, but the soda bread! The chocolate stout cake! The things that don't require access to a slow-cooker in the office!

I spent the next half-hour diving down a "stovetop Irish recipes" Google hole, and actually found some recipes I had never heard of before (I'm really excited to try making soda farls, which look like wedge-shaped stovetop soda bread). But the dessert thing was bothering me. Ever since my sister introduced me to chocolate stout cake, it's been a highly-anticipated cast member of our St Patrick's Day show. What was the stovetop equivalent of that?

chocolate stout crepes

And then I remembered chocolate crepes.

(Before we continue: YES, I realize that crepes are not something that the Irish eat on St Patty's Day, but did you know that most Irish don't eat corned beef for the holiday either? So if we as Irish-Americans (or plain old Americans) are already failing at cultural accuracy, we might as well ride it all the way.)

Our French friend recently told us about putting beer into regular crepes, which seemed like a great idea (especially since we sometimes run out of the milk normally used in crepes, but we rarely run out of beer). And the whiskey that I put in the frosting for the stout cake would be easy enough to add to ricotta to fill the crepes. And the only downside to attempting to translate the cake to crepes, that I could see, was that the recipe would end up being so-so and I'd have to eat chocolate stout crepes for breakfast for the next couple of days.

Such are the sacrifices I make for you all.

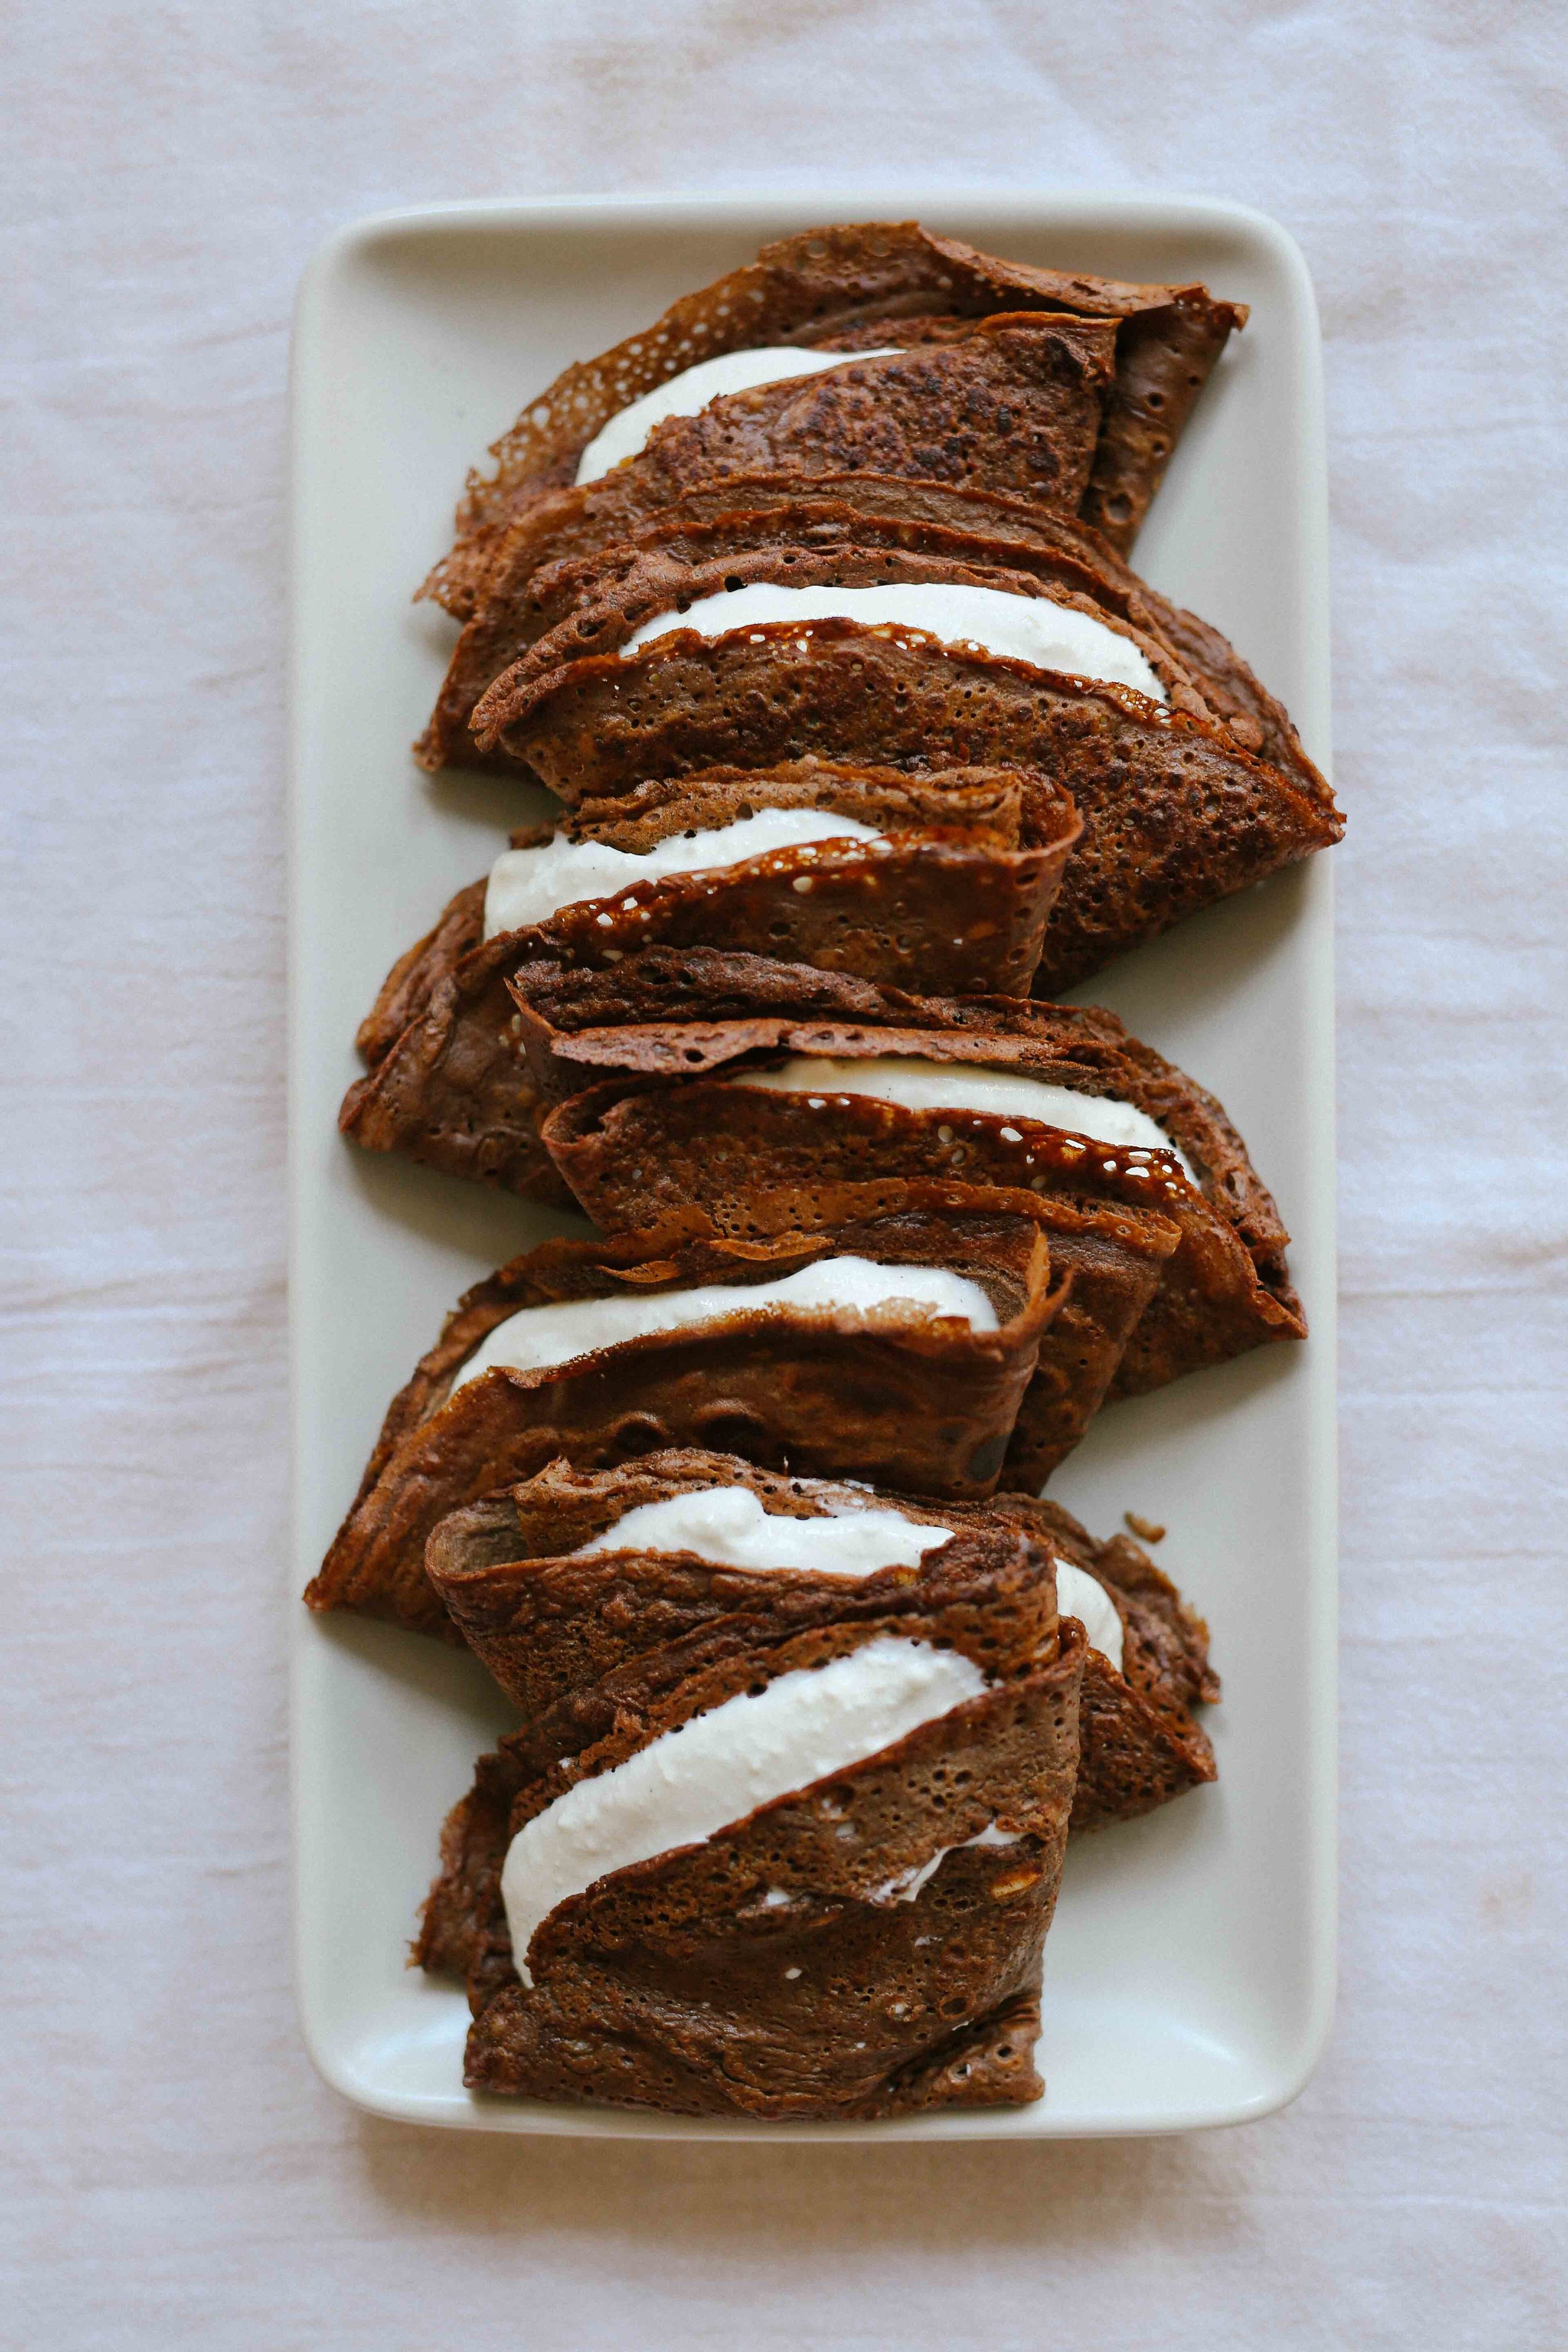
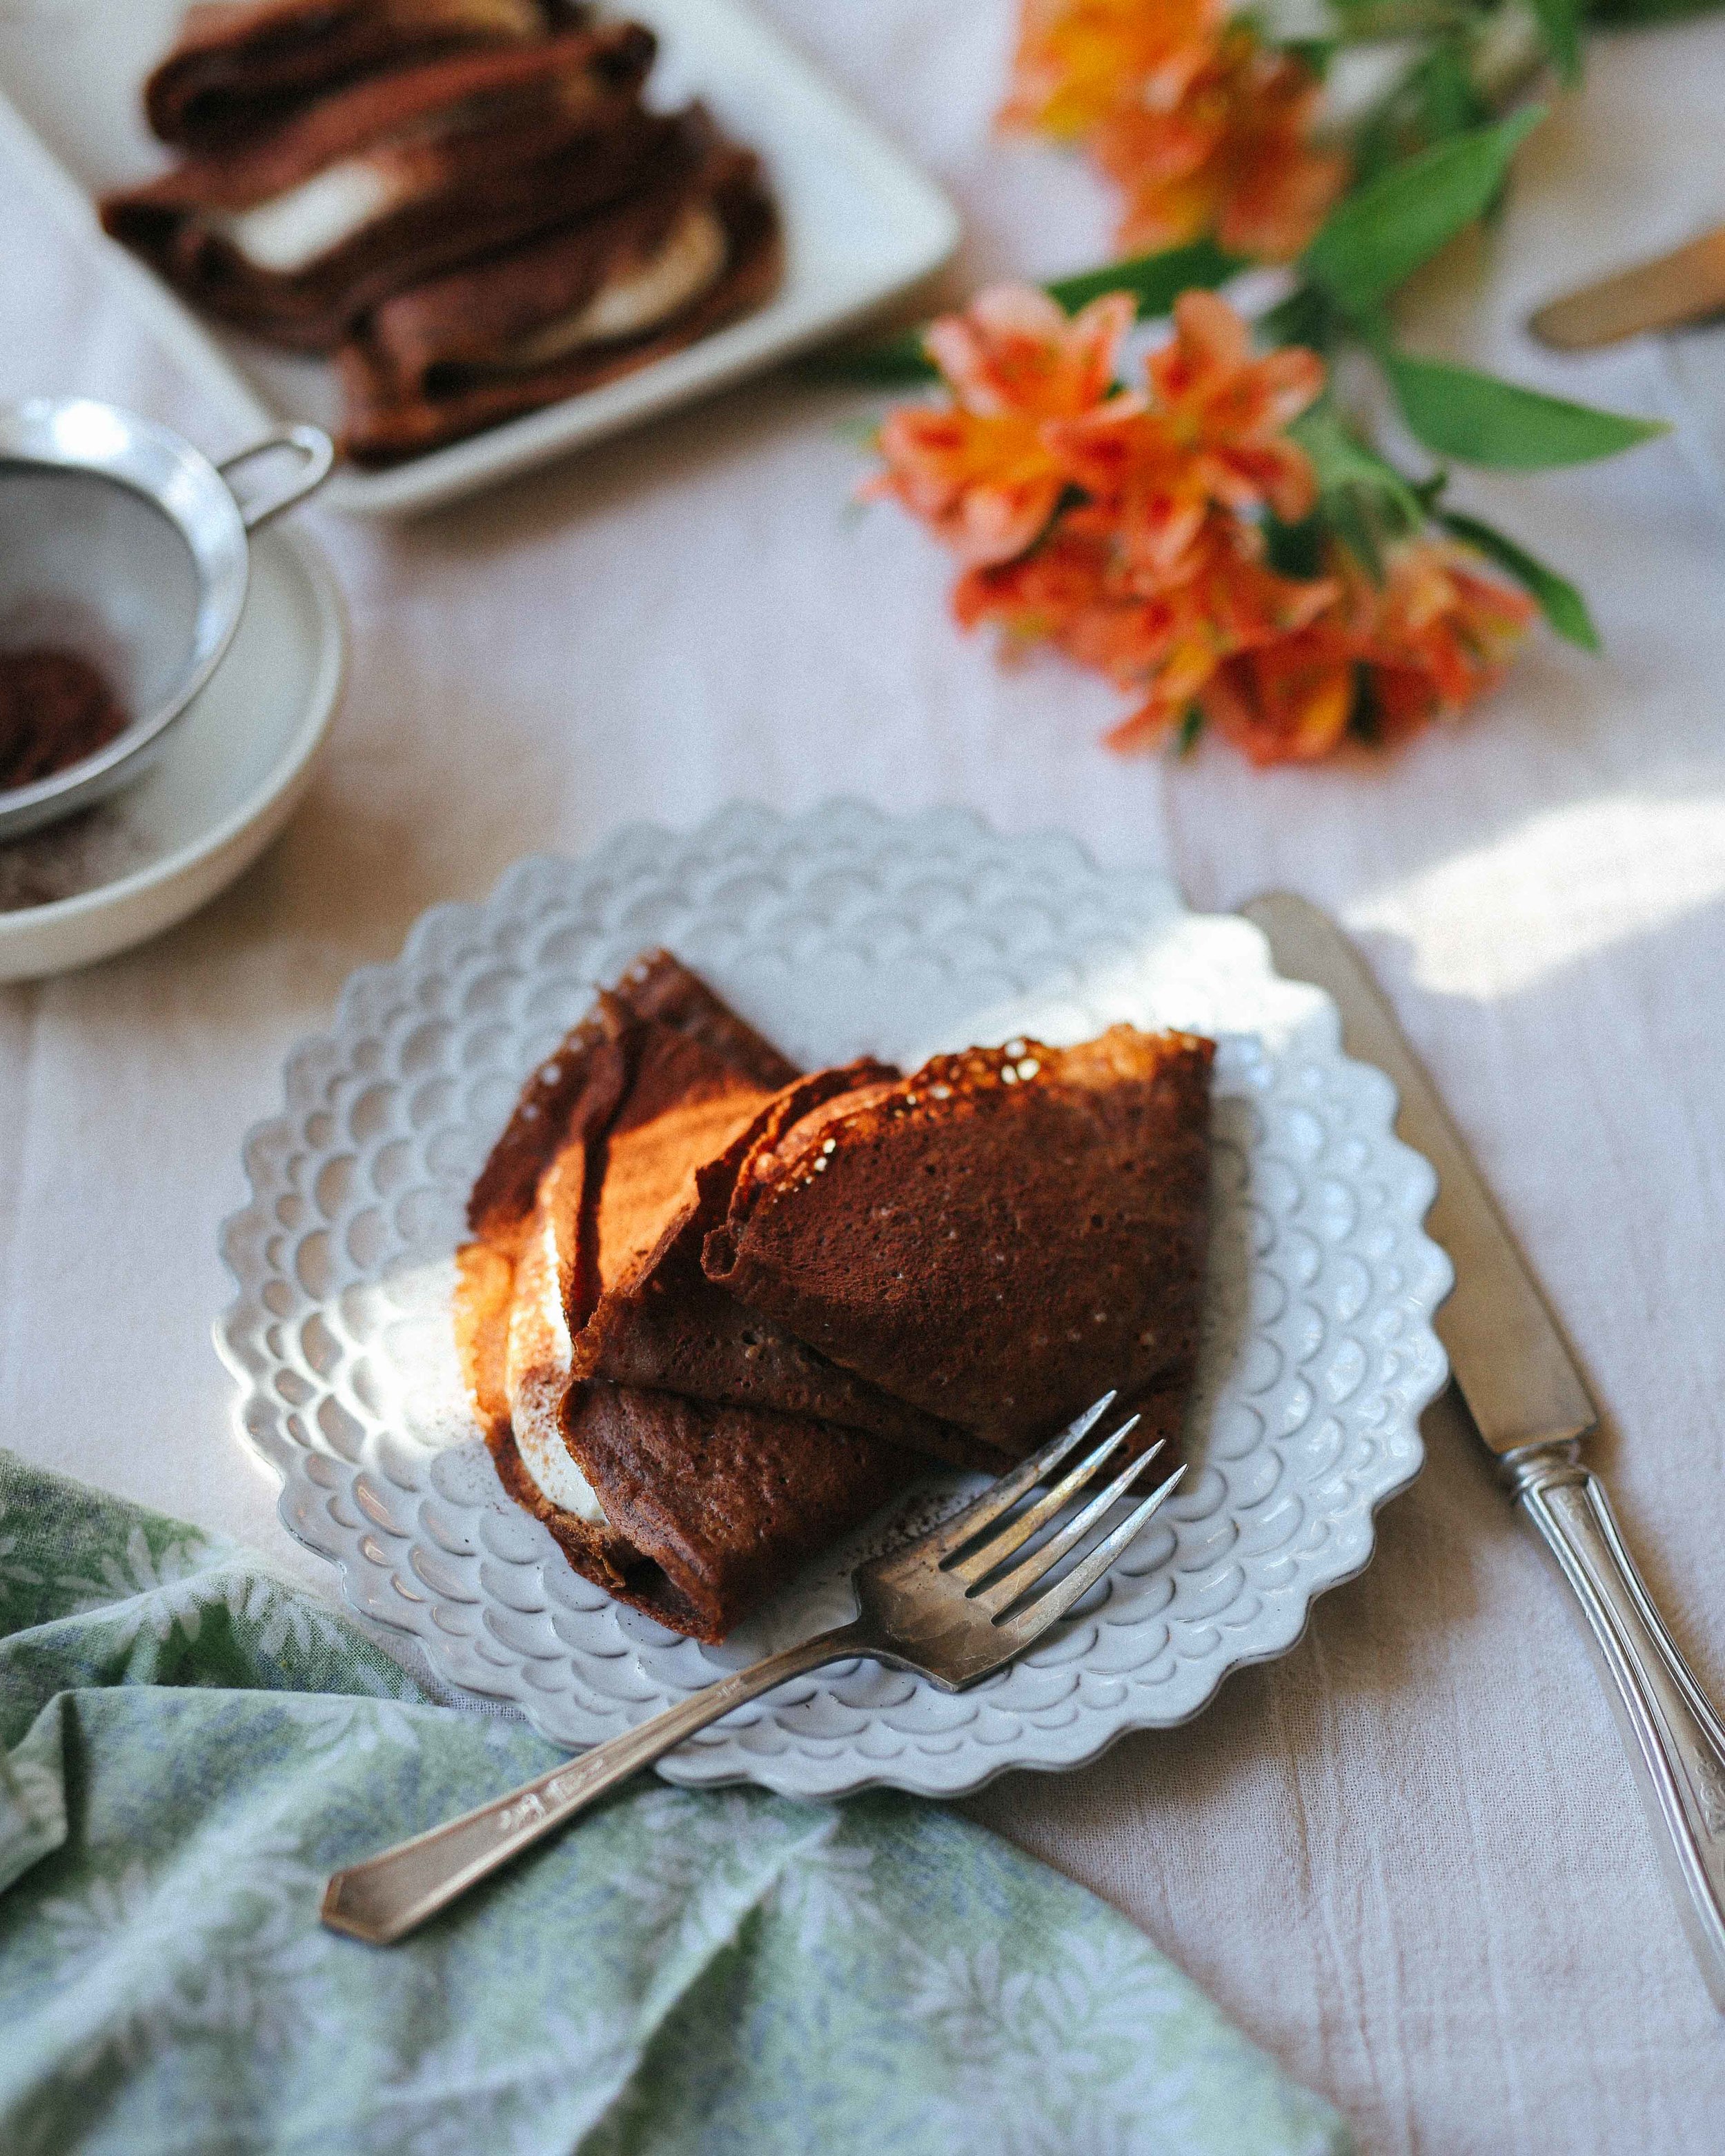
As you may have guessed from this post, it turns out that chocolate stout crepes are DELICIOUS. The beer in the crepes and the whiskey in the ricotta give you the same Irish Car Bomb vibes of the chocolate stout cake, but the crepes are most definitely lighter and a surprisingly delightful change of pace. These are also not terribly sweet, so it wouldn't be inappropriate to take them to the next level with some chocolate sauce or hot caramel... or maybe some Bailey's!

chocolate stout crepes

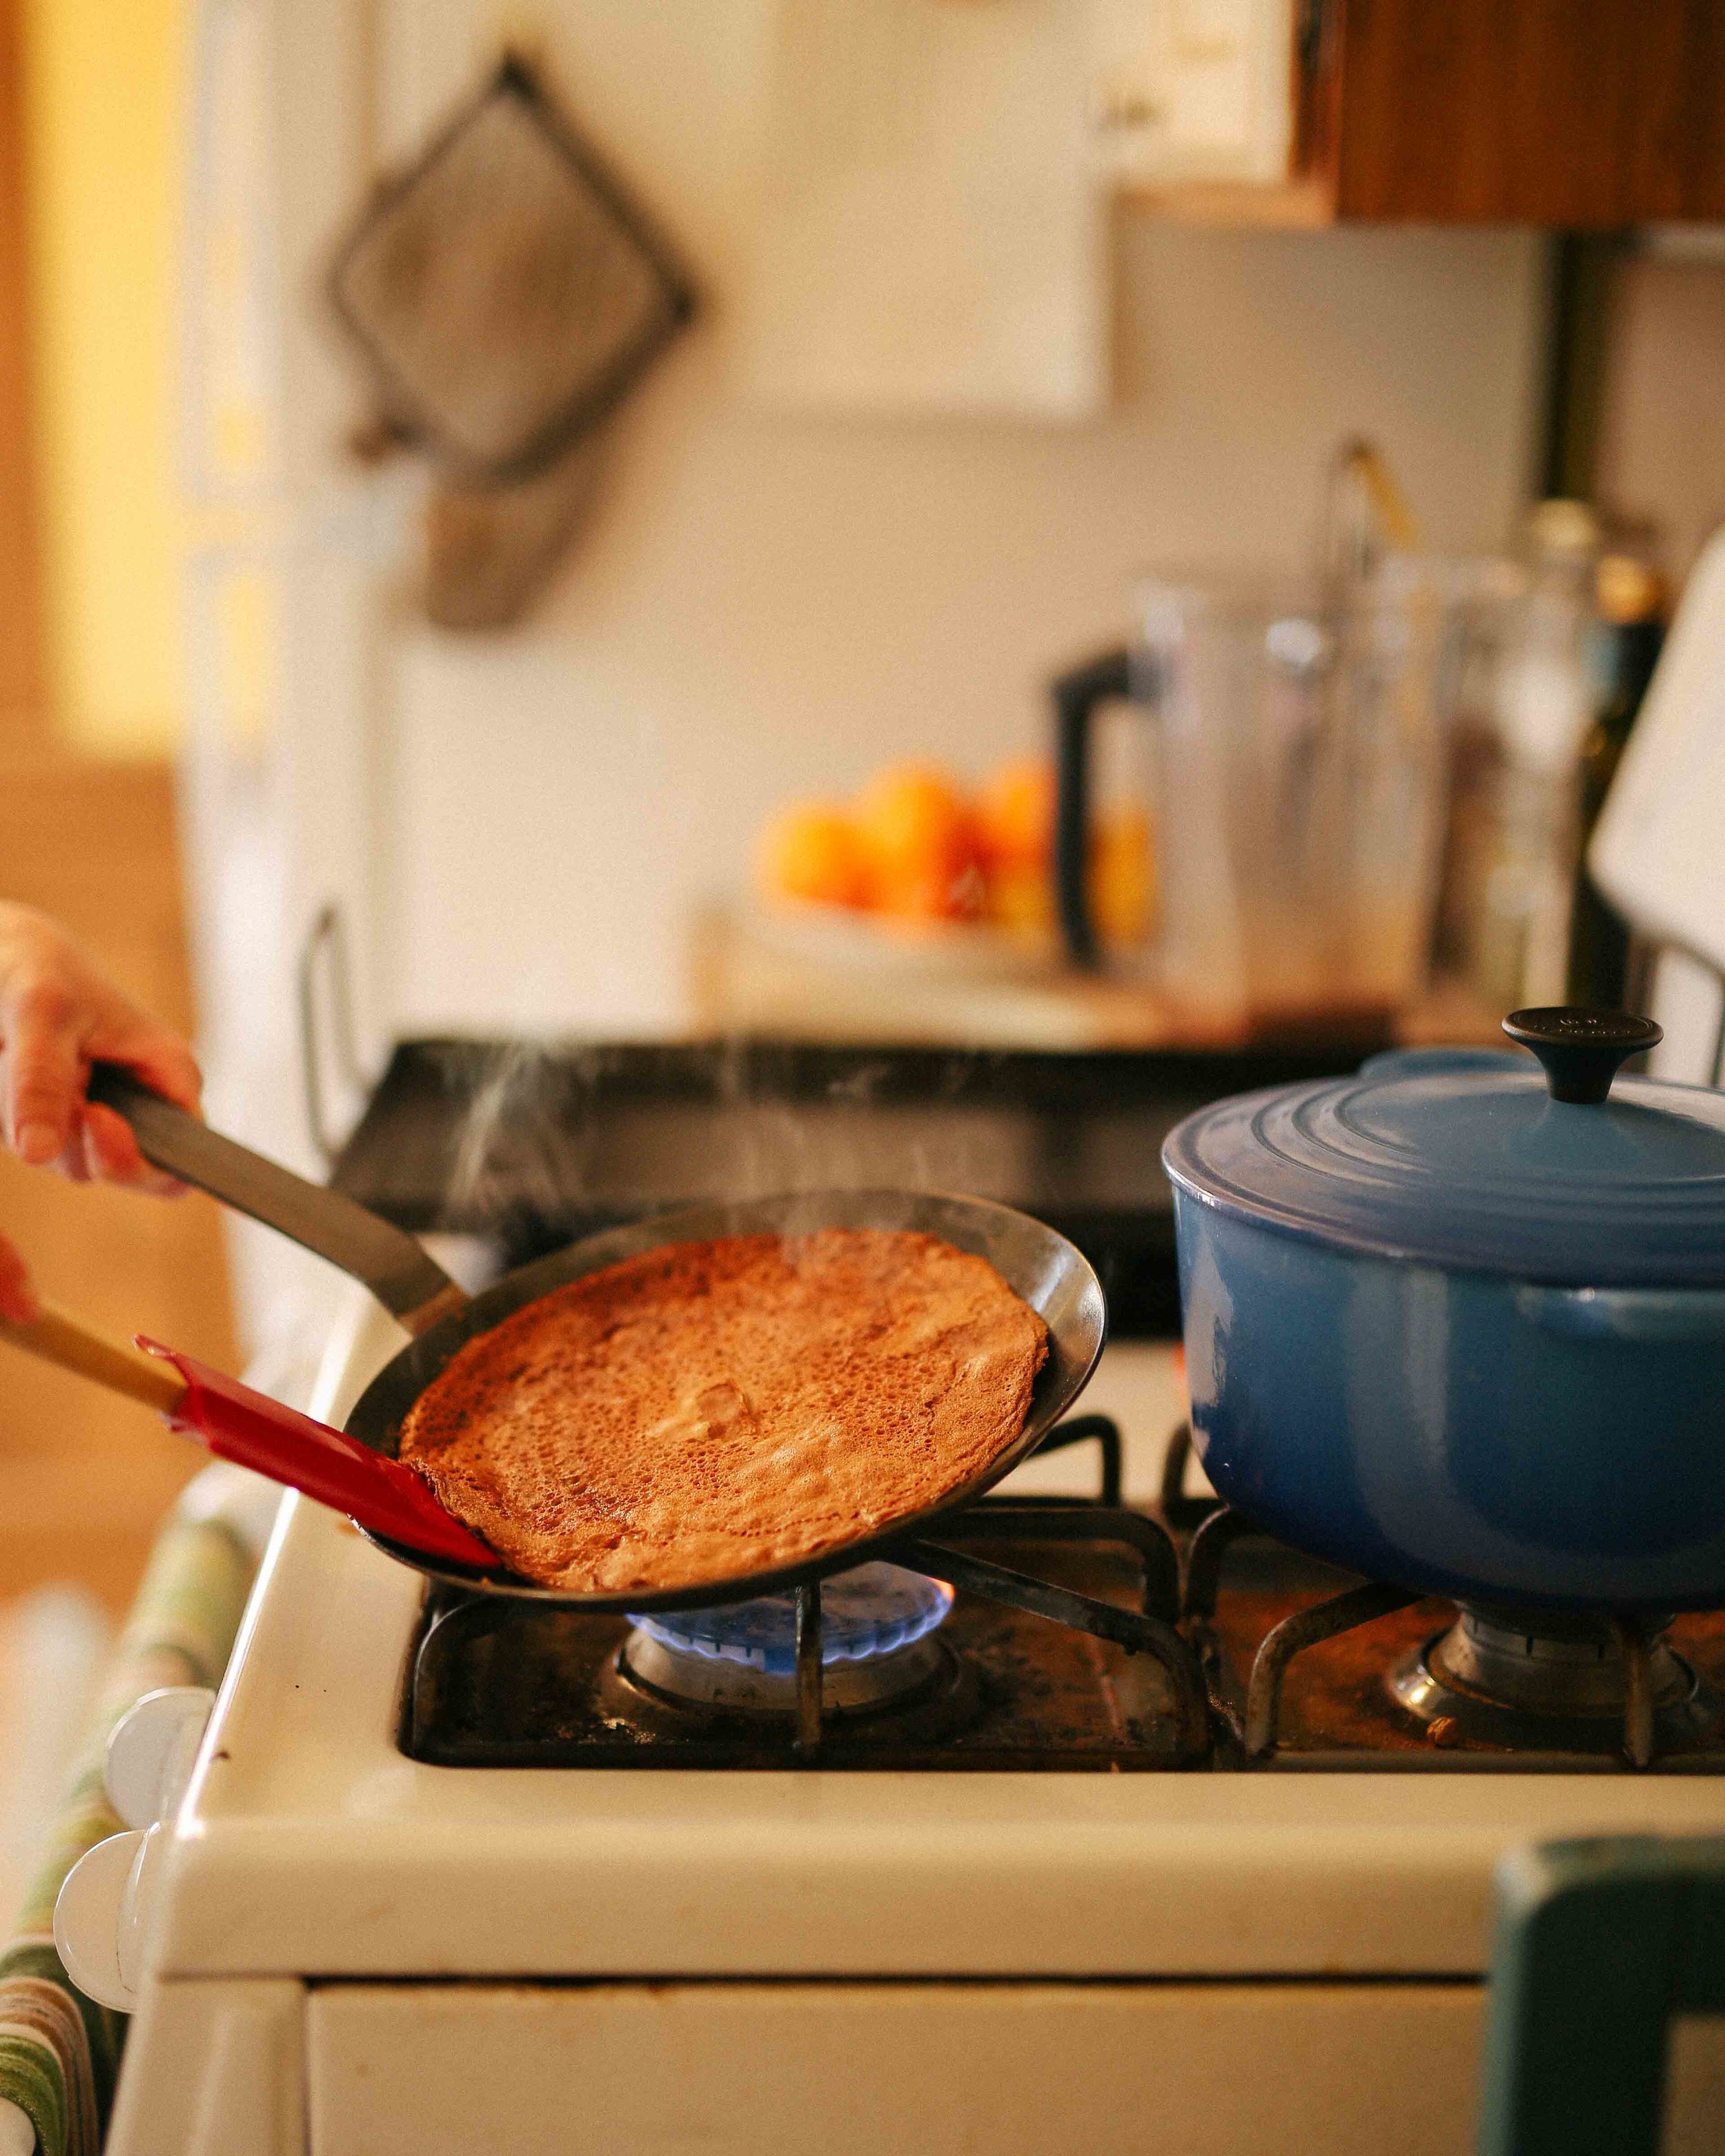
If you've never made crepes before, you shouldn't let anything get in your way. I think it's kind of funny that crepes have this reputation as being complex and fastidious, especially when compared to their fluffier counterparts, pancakes. Crepes are easier to mix up than pancakes, they cook in less time than pancakes, they can sit at room temperature without their texture being adversely affected, and they are much more versatile than pancakes. Plus, you probably have everything you need to make them right now! Not to mention that you can drink the remainder of the beer (since you won't use a full bottle) while you cook the crepes, if that helps take the edge off. ;)


chocolate stout crepes

makes 8-9 filled crepes - serves 4-8

3 large eggs
2/3 cup stout (or porter) beer, at room temperature
1/3 cup cow's milk or plant milk, at room temperature
1 cup all-purpose flour
1/4 cup cocoa powder
2 tablespoons sugar
1/2 teaspoon kosher salt
1/2 teaspoon vanilla extract

2-3 tablespoons unsalted butter, cut into thirds, then cut into thirds again (so you have 9 pieces), plus more if needed

To serve:

Whiskey Ricotta (recipe follows)
Cocoa powder


Have a plate ready with a clean dishtowel laid over it.

Combine all of the ingredients (not including the butter) in order in a blender or large bowl, and blend or whisk thoroughly to combine (combining them in order helps keep pockets of flour from forming at the bottom of the bowl/blender).

Heat a crepe pan or small, nonstick frying pan over medium heat. Add a piece of butter, and swirl it around to evenly coat the bottom and sides of the pan. Pour a generous 1/4 cup of batter into the pan, and, using your wrist, immediately swirl around the pan so the batter forms a thin, even coating. Cook for 2-3 minutes, or until a nonstick spatula can easily slip beneath the crepe. Lift the crepe up from the pan, and flip it over, and let cook on the second side for 1-2 minutes more. Remove the cooked crepe from the pan and set aside on the prepared plate, and cover with the dishtowel to keep warm.

Note: your first crepe will likely look a little sad (mine did) and be the place where you start to get your pancake-making chops back and/or figure out if your pan is at the right temperature... or perhaps you will have a stroke of luck and it will turn out perfectly! But this is where the "8-9" crepes part comes in, because you never know how things are going to go with that first one. Don't be discouraged, and don't be afraid to practice.

Continue with the remaining batter, placing additional crepes under the dishtowel, until all of the crepes have been cooked. Fill and serve immediately, or place in a covered container and refrigerate for up to 3 days.

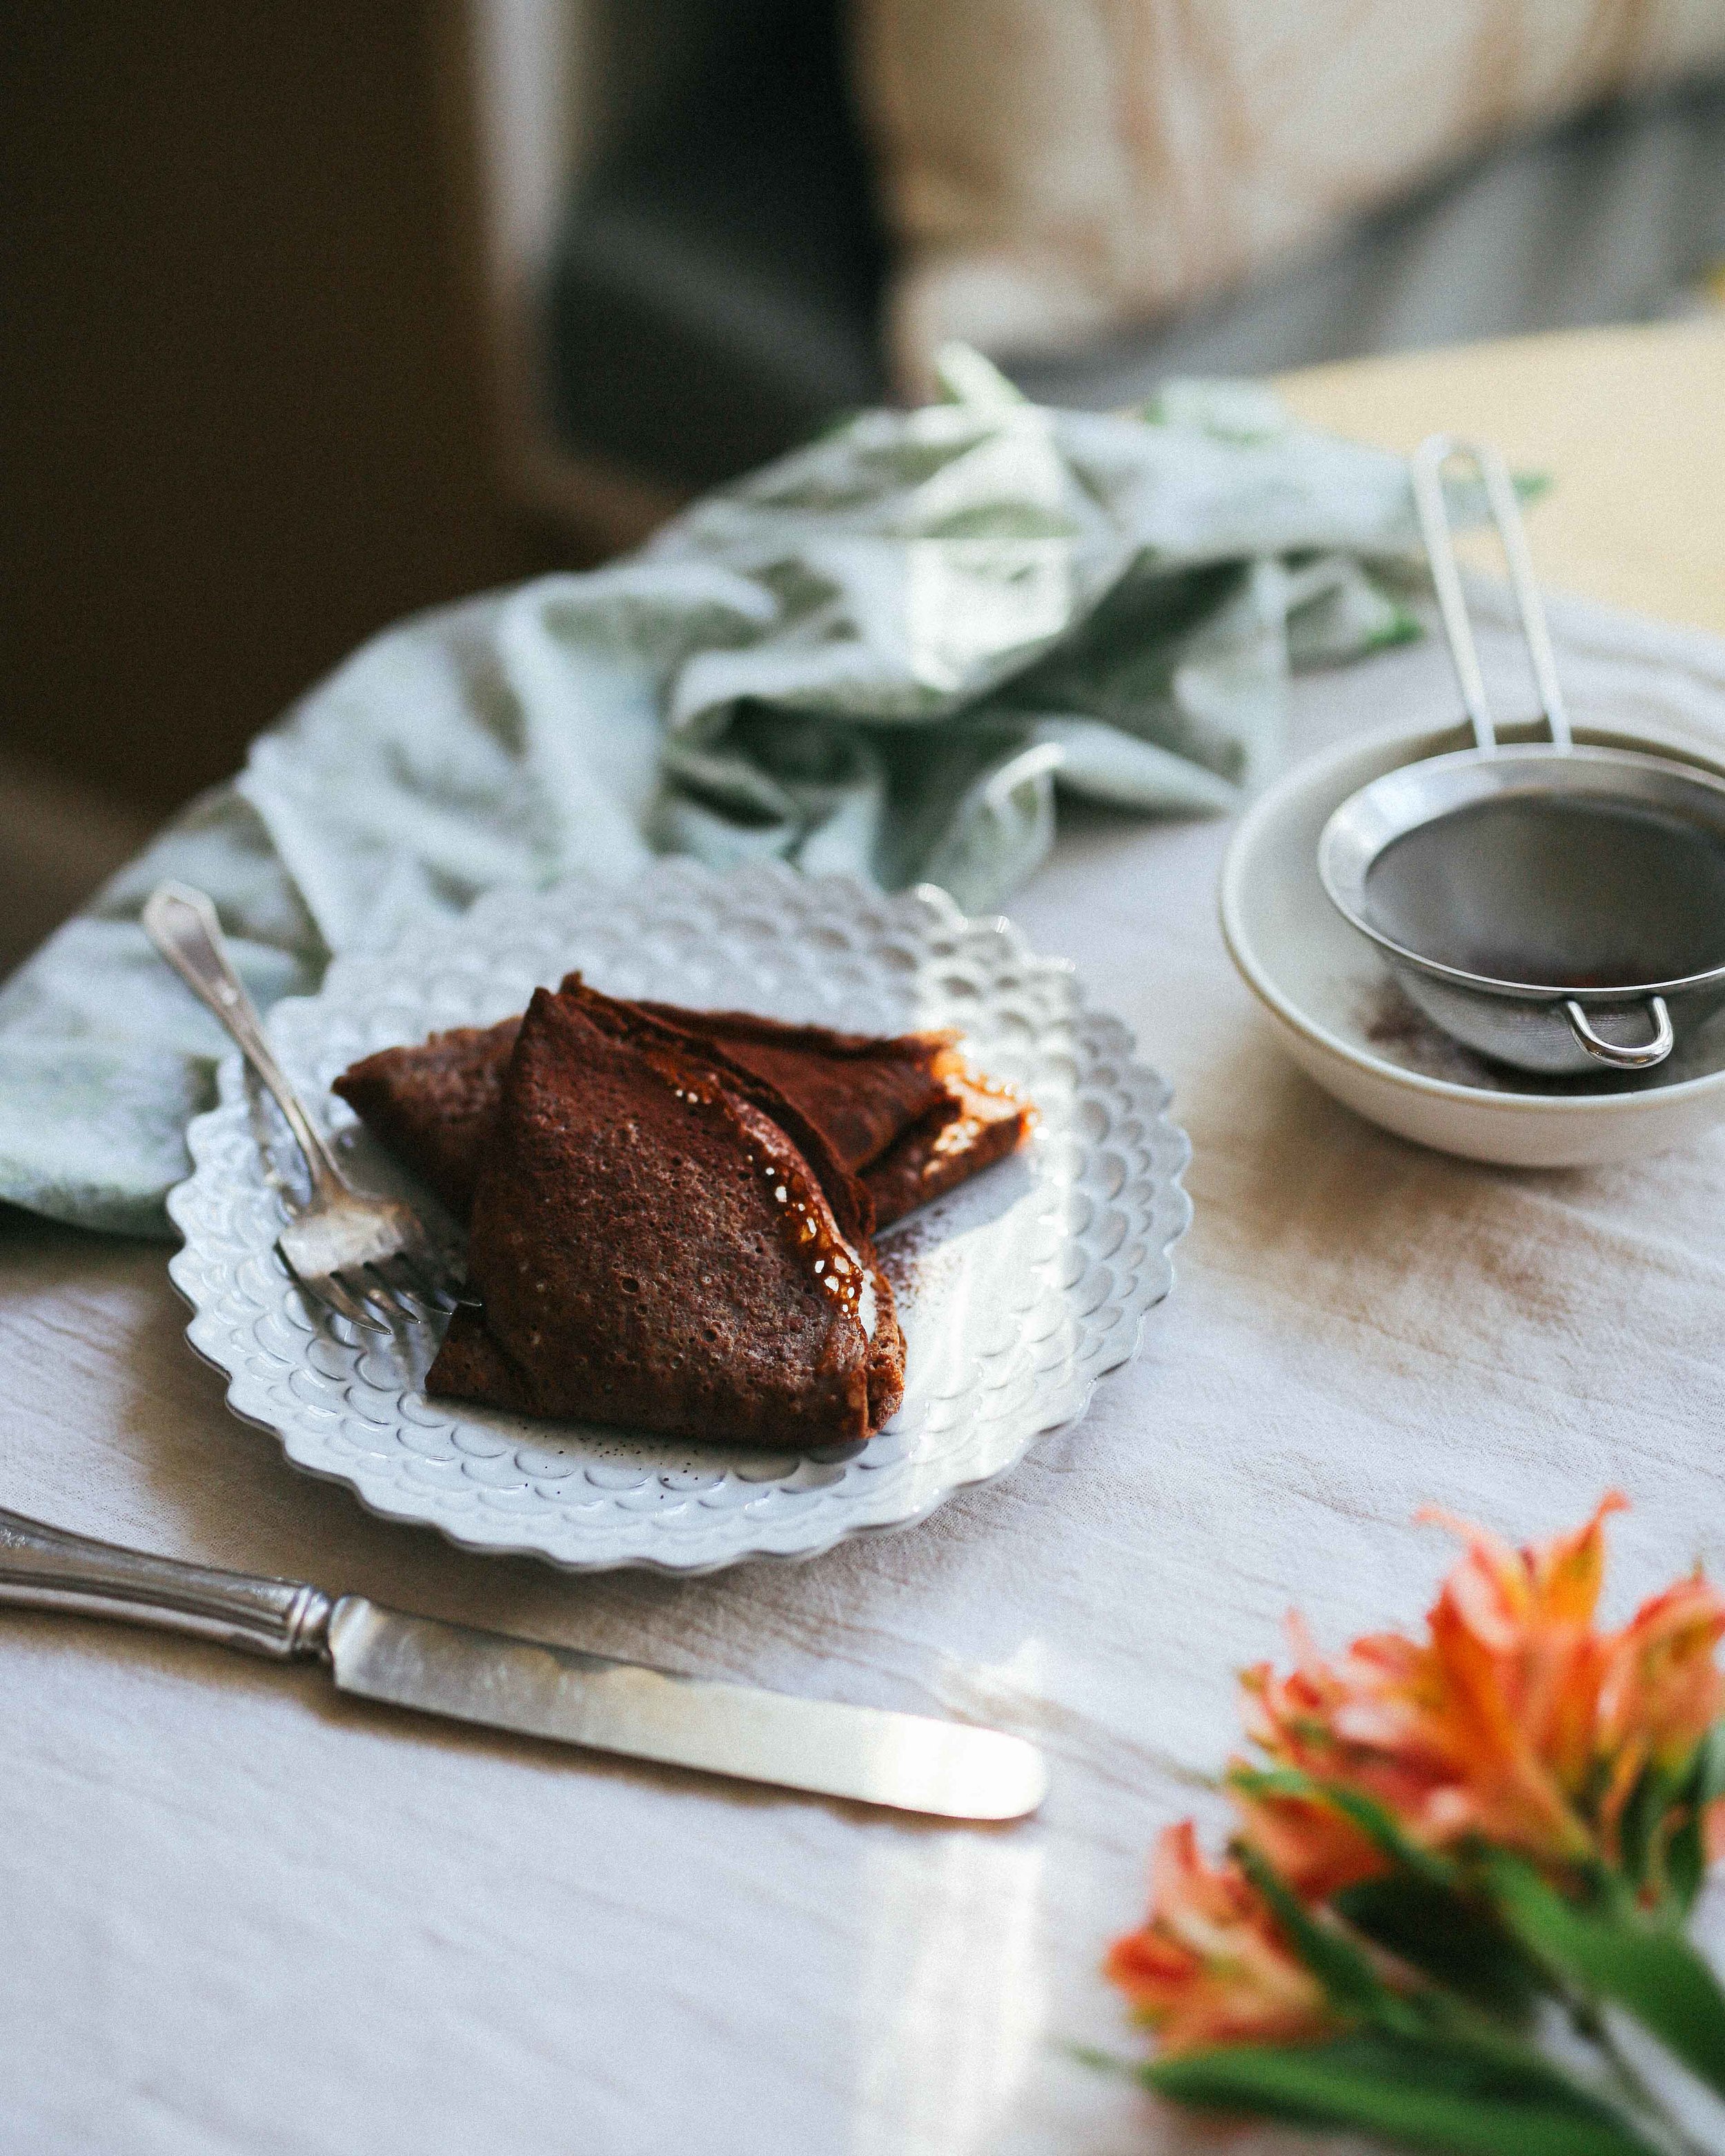
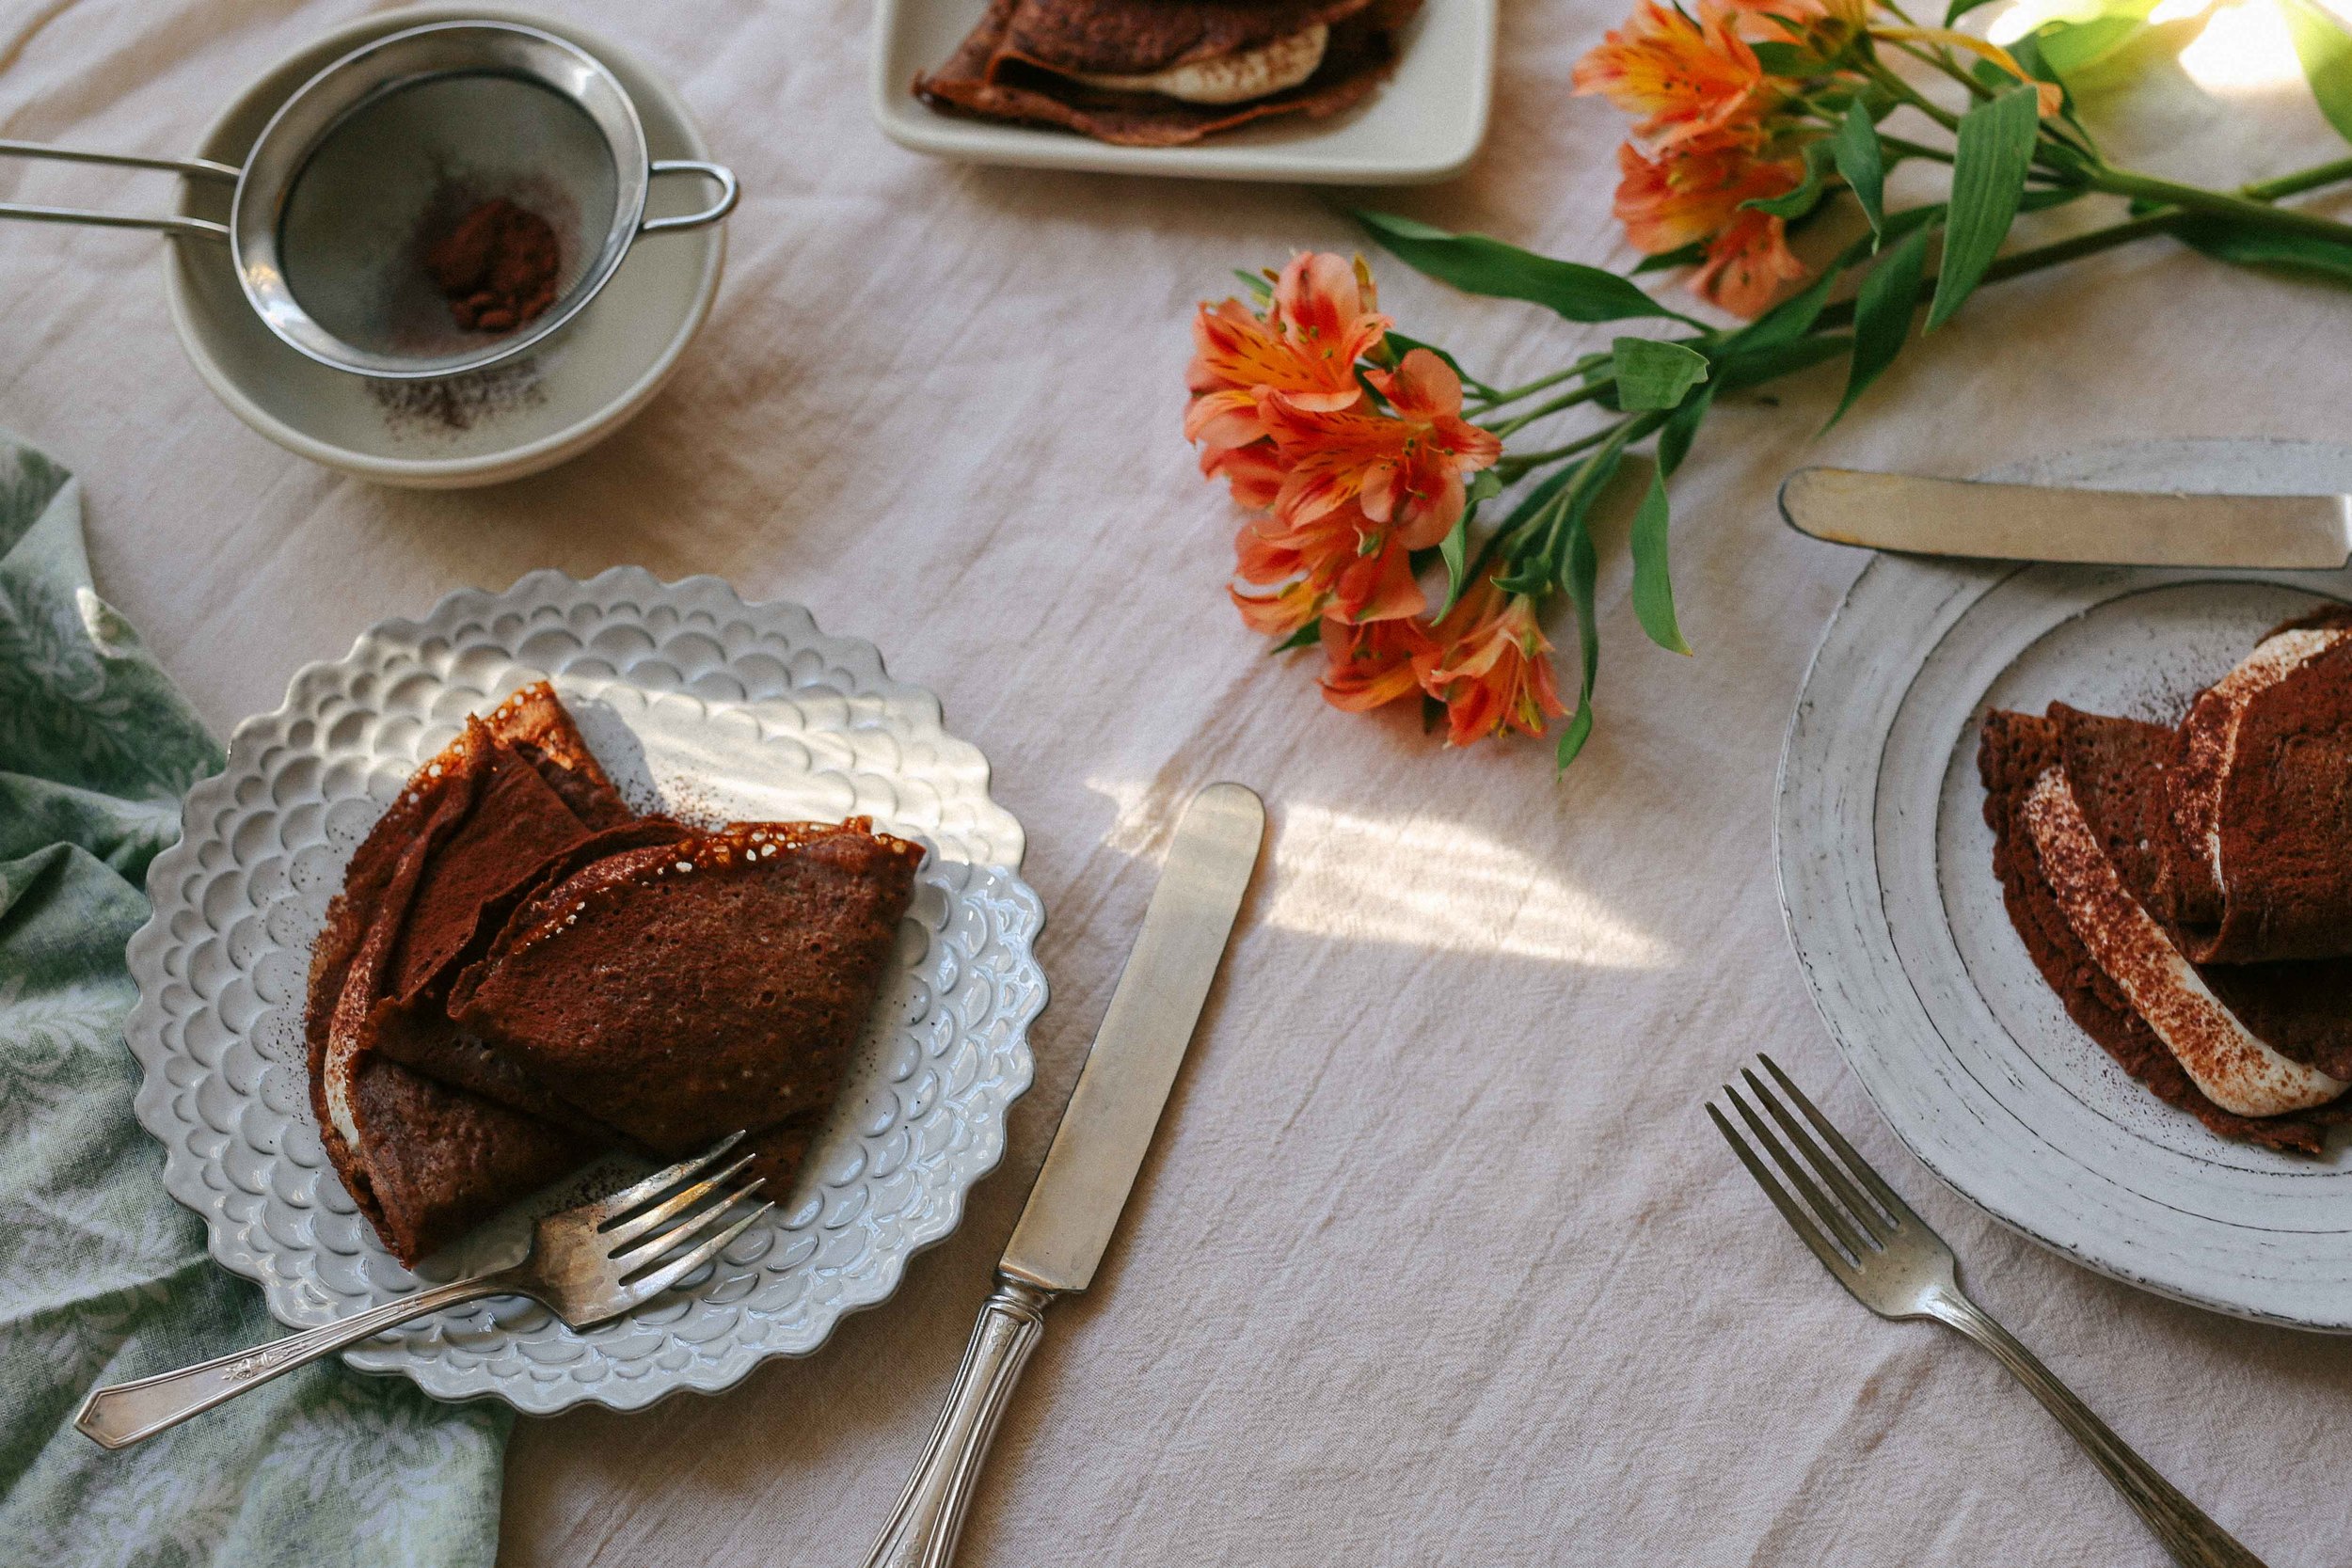
To fill your crepes: place a crepe on a plate, and fold in half, then fold in half again. Gently lift up the top layer of the crepe to create a pocket, and spoon 2-3 tablespoons of whiskey ricotta inside. Place the filled crepe on a serving dish. Repeat with the remaining crepes and ricotta until all are filled. Dust with cocoa powder and serve.


chocolate stout crepes
whiskey ricotta

3/4 cup basket drained ricotta
3/4 cup Greek yogurt (full or low-fat)
1/4 cup sugar
1 1/2 teaspoons vanilla extract or vanilla bean paste
1-2 tablespoons whiskey, or to taste (I don't like my whiskey flavor to be too strong, but you might like it to be stronger)

Place the ricotta, yogurt, sugar, and vanilla in a medium bowl, and whisk together thoroughly. Add the whiskey one tablespoon at a time, whisking and tasting after each addition, until the mixture is at your desired level of booziness.

Use immediately, or refrigerate for up to 3 days.

mayan chocolate roll-out cookies

sweet, vegetarian, winter, autumn, dessertsRachel Sanders4 Comments

Posting a cookie recipe around the holidays always feels like risky business because most folks interested in baking and general merry-making seem to have figured out their cookie game plan. So you should feel like you can take or leave this recipe, but I would encourage you to take it if you have a spare evening and some butter lying around. It is a solid chocolate roll-out dough recipe, and you can leave out the chili powder and cinnamon bells and whistles if that feels like too much for you. But to quote a good friend, the "latent, lingering heat [of the spices] is so pleasing." Sort of like liquid jacket, but with cookies.

I've got your attention now, haven't I? ;-)

If you're new to the business of royal icing, here are some of handy tips for decorating your cookies with maximum enjoyment and minimal frustration:

1. Invest in a piping tip - you have probably seen people ice cookies using a sandwich bag with the end snipped off, but it is difficult to guarantee that you'll be able to pipe in a straight line and that the thickness of your line will be consistent (since the opening may stretch or tear). You'll more likely set yourself up for a frustrating time if you refuse to use a piping tip or other, rigid tip (such as that of a squeeze bottle, which has its own limitations). I put a piping tip into a sandwich bag so that I could seal the bag and save the icing from drying so that it could be used over multiple days. Find icing tips at gourmet specialty shops (such as Sur la Table) or online. I like using a plain, round tip (such as an Ateco #2 or #4) for royal icing since I make mine somewhat fluid and it won't hold textures or ridges.

2. Move your piping tip at the same speed as the icing flows - moving at the same speed means that you're more likely to create straight lines, and that your lines will be the same thickness as the piping tip. Move too quickly, and you'll create thin lines (or your lines might break as you pipe them). Move too slowly, and you may end up with thicker or clumpy sections in your lines, or your lines may look more wobbly. Practice on a few cookies or on parchment paper to get a feel for your icing's consistency/flow rate.

3. Work from the outside in whenever possible - this helps to ensure consistency in your design and makes it a lot easier to create "perfect" looking cookies.

4. Practice, and don't beat yourself up while you're learning! The point is to have fun with this. Worst case, you can always dump sprinkles on your funkiest designs and they will look fabulous.

mayan chocolate roll-out cookies

adapted from this recipe - makes roughly 3 dozen 3.5 inch cookies

This recipe is a little different from some in that some of the dry ingredients are mixed in with the wet ones before the flour is added. I found that I liked being able to beat the hell out of the batter when adding the cocoa powder without worry of gluten development from flour, so I am a big fan of this method for this particular recipe. If you choose to whisk the spices/baking powder/cocoa powder into the flour, then just continue with the "add the flour in three additions" part of the recipe, and be careful not to overmix your dough.

Also, I used the smaller amounts of spices when making this dough the first time, and while they added a really delightful something to the dough, I also like using them in slightly larger quantities to pack more of a punch.


1 cup butter, at room temperature
1 1/4 cups sugar
2 eggs
1 teaspoon vanilla
3/4 teaspoon baking powder
3/4-1 teaspoon chili powder (I used Rancho Gordo)
1/2-3/4 teaspoon cinnamon
1 teaspoon kosher salt
2/3 cup natural cocoa powder
3 cups all-purpose flour

Royal Icing, to decorate (recipe follows)


Cream together the butter and sugar in the bowl of a stand mixer until light and fluffy. Add the eggs one at a time and mix to combine, scraping down the sides of the bowl with a spatula in between each egg. Add the vanilla, and mix to combine.

Whisk together the baking powder, chili powder, cinnamon, and kosher salt, and add to the bowl. Mix well to combine, scraping down the sides of the bowl if necessary. Add the cocoa powder and again mix well to combine (I just left my mixer running for 2-3 minutes at this point).

Add the flour in three additions, scraping down the sides of the bowl and mixing just to combine in between each addition. Do not overmix. Form the dough into a round and wrap in plastic wrap. Chill in the refrigerator for at least 30 minutes or overnight.

While the dough chills, preheat your oven to 350˚F. Line two baking sheets with parchment paper.

Remove the dough from the fridge and divide in half. Place one half on a floured surface, and wrap the second in the plastic while you work with the first. Roll out into a 1/4-inch thick sheet (if the dough cracks or is hard to work with, let it rest for 15-20 minutes to warm up a bit). Cut into desired shapes and place on the parchment lined baking sheet. Once one baking sheet is full, place it in the oven to bake for 7-10 minutes while you cut more cookies.

Once the cookies are baked (I ended up liking the ones in the 8-9 minute bake range the best), remove them to a wire rack to cool (leave the parchment sheet on the pan for more cookies). Place the second pan in the oven to bake while you cut more cookies. Note: make sure to let the pans cool a little bit before putting unbaked cookies on them... this way they don't melt a little or lose their shape before making it to the oven. Reroll and cut any scraps. Repeat cutting/baking with the second round of dough once you've finished with the first.

Once cooled, cookies may be iced or stored in an airtight container at room temperature for up to a week.

ROYAL ICING
makes 1 cup

There are many different ways to make royal icing depending on whether you're using dehydrated egg whites, meringue powder, or fresh egg whites. I couldn't find dehydrated egg whites, and the meringue powder I found had a lot of funky-sounding additives, so I used a fresh egg white. The double-boiler method allows you to cook the egg white without making scrambled eggs and gives you a pure, white color.

If you can find pasteurized egg whites, Alton Brown has a great recipe here.


1 large egg white
1 cup powdered sugar, divided


Combine the egg white with 1/3 cup of powdered sugar in the bowl of a double-boiler (or in a heatproof bowl set over simmering water) and whisk to combine. Cook gently over the simmering water, whisking constantly, until the mixture reads 155˚F on a thermometer (do NOT stop whisking or let it boil). Remove from the heat and add the remaining powdered sugar, whisking constantly to combine until the sugar dissolves (briefly place it back over the heat if necessary to dissolve any lumps). Add a teaspoon or two of water if your icing seems too thick (I like to pick up a little icing with the whisk or a spoon and trail it over the surface - it should leave a ribbon, but be reabsorbed into the rest of the icing within 5 seconds or so).

gjelina's squash, olive oil, and chocolate cake

autumn, breakfast, desserts, winter, vegetarian, sweetRachel SandersComment

I woke up yesterday still wearing my Buddy Christ shirt from Halloween (guess who we were!) and feeling mildly sugar hungover + for reals hungover + a bit discombobulated by how bright it was given that my phone read 7:35 am. So I made coffee and decided to go through this month's Book of the Month, Gjelina, and find some things to make for you all.

This squashy chocolate-studded loaf was one of the very last recipes, and it looked so very pretty and easy enough that my brain could handle making it in spite of the metaphorical coat hanger crammed into my skull. You sift together the dry ingredients, mix up the wet ones, combine them briefly and fold in the chocolate, and pour the whole thing into a pan. If you've ever made pancakes or muffins or put together an IKEA bookcase, this recipe is going to be cake for you (bahaha).

I'm so sorry, all of the candy has made me especially weird today.

I, like most of America, am all about the pumpkin-spiced stuff, but I was somewhat surprised that one of my favorite parts of this recipe ended up being the glaze. It's a simple powdered sugar glaze that is fortified by olive oil, and good lord, is it delicious. I ate most of it out of the bowl and felt thoroughly sugared afterwards, but it was completely worth it. I think I might borrow it and use it to glaze this cake. Travis suggests omitting the glaze if serving this cake for breakfast, but don't do it, I beg of you. It's really fantastic, and it helps to cut through the richness of the cake (which, with the oil content and chocolate, is certainly up there, though in a very good way).

If anything, if you want it to be more breakfasty, halve the chocolate. I know, I can't believe I said that either.


GJELINA'S SQUASH, OLIVE OIL, AND CHOCOLATE CAKE
Makes 1 9x5-inch loaf - serves 8-12

The original recipe calls for you to make your own kabocha squash purée, which adds some depth of squashy flavor. I've adapted the recipe for using canned pumpkin, but if you'd like to make your own purée, there are instructions at the end of the recipe.

1 1/2 cups all-purpose flour
1 1/2 tsp baking powder
1/2 tsp baking soda
1 Tbsp ground cinnamon
2 tsp freshly ground nutmeg
1/4 tsp kosher salt
1 1/3 cups granulated sugar
1 cup extra virgin olive oil
1 cup canned pumpkin purée or homemade squash purée
3 eggs
8 oz bittersweet chocolate, finely chopped

FOR THE GLAZE:
1 1/4 cups confectioner's sugar, sifted, plus more as needed
2 Tbsp hot water, plus more as needed
3 Tbsp extra-virgin olive oil

3 Tbsp pepitas (raw, hulled pumpkin seeds), toasted in a dry skillet until nutty and browned
2 Tbsp crushed cacao nibs


Preheat the oven to 325˚F, and generously butter a 9x5-inch loaf pan.

Whisk (or sift) together the flour, baking powder, baking soda, cinnamon, nutmeg, and salt in a medium bowl. In a large bowl, whisk together the sugar, olive oil, pumpkin purée, and eggs. Add the dry ingredients to the bowl with the wet ingredients and whisk until just combined. (Adding the dry ingredients to the wet ingredients helps to prevent little dry pockets in the bottom of the bowl.) Fold in the chopped chocolate.

Pour the batter into the prepared pan and bake for 75 to 90 minutes, or until a skewer inserted in the center of the cake comes out clean. Let the cake cool in its pan on a wire rack for 20 minutes. Run an icing spatula or a thin knife carefully around the edges, and invert the cake from the pan. Re-invert the cake so that it is right-side-up and let cool on the rack for another 20 minutes. Transfer to a serving plate.

To make the glaze: In a small bowl, whisk the confectioner's sugar with the water until smooth. Add more sugar and/or water until you have a glaze that is the consistency of honey. Slowly drizzle in the olive oil, whisking constantly to combine.

Pour the glaze over the cake, allowing it to drip down the sides. Sprinkle with the pepitas and cacao nibs and let the glaze set completely (about 1 hour) before serving.


To make your own squash purée: Remove the seeds from a 1-pound piece of kabocha squash and drizzle the squash with olive oil. Place squash cut-side down on a baking sheet and roast in a preheated 425˚F oven for 30-45 minutes, until the squash is very soft and beginning to caramelize around the edges. Remove from the oven and let cool. Scrape out the soft flesh into the bowl of a food processor, and pulse until smooth.

Place the puréed squash on a large square of cheesecloth, and wrap into a tight bundle. Put the bundle into a colander, and place over a large bowl. Let drain at least 4 hours, or up to overnight. Twist the top of the bundle to squeeze out any additional liquid. Unwrap the drained squash, and measure out 1 cup of purée for the cake recipe. Cover and refrigerate any remaining purée for another use (may be stored for up to 5 days).

bittersweet chocolate things

autumn, breads, breakfast, desserts, spring, vegetarian, winterFieldandForest2 Comments

Zomg. You guys. YOU GUYS. Mrrgkjslkjglskfs.

I can't even write real words right now, I am so excited.

Because Cheese Board Chocolate Things. In Salt Lake City. In our kitchen. That came out of our oven. If you know what the Cheese Board is, then I know you're excited, too. If you don't know what the Cheese Board is, I hope you are at least intrigued by the sheer volume of chocolate folded into this ball of dough. If you know what the Cheese Board is, but you currently live in Berkeley and are thinking "Whatevs, I can get Chocolate Things whenever I want," then shut it. We don't want to hear about it.

(That's a lie, please tell us everything, because goodness knows we're dying over here without our zucchini-corn pizza and oatmeal scones.)

So anyway. What is this Cheese Board thing. Well, it is one of the many magical places in that mystical land known as the Gourmet Ghetto, and it makes amazing breads (and its next-door sister restaurant, Cheese Board Pizza, makes some of the best pizzas in town) and has a crazy cheese selection sourced from all over the planet, and it is one of THE foodie destinations of Berkeley (and it is across the street from Chez Panisse, so you can ogle another institution while you eat your pizza!). Both the pizzeria and the bakery are part of the same collectively owned business (together they are known as the Cheese Board Collective) and they have a pretty unique story of how they've worked to support other collectives/co-ops, and a number of years ago they did everyone a solid and made a cookbook.

And it is glorious.

Everything I've made out of that book is pure gold and tastes almost exactly how I remember Cheese Board pastries and pizza. Sure, I don't have a deck oven or a proofing cabinet, but the essence of every baked good is there. Ownership of this book (and therefore access to all of its secrets) is enough to make a Bay Area expat plant roots in a red state and say "We're good here."

At least for the time being.

And now a few words from the Voice of Experience to help you achieve your Chocolate Thing dreams! One, do not get super nit-picky about keeping all of the chocolate pieces in the dough when you first mix them in. Some of them will fall out. I'll give you a cheat for working them back in later. Two, use a wire or a floured piece of baker's twine to cut the rolled dough into rounds. This applies equal pressure on all sides of the roll so you end up with neat, photogenic little buns instead of rolls that are all smushed into ovals. Not that there is anything wrong with ovals! We are accepting of all shapes and sizes of rolls over here.

Finally, invite over some friends to help you eat the rolls, because these truly are best eaten warm from the oven while the dough is tender and the chocolate is slightly melty (and this way it saves you from eating all of the rolls yourself in one sitting, though you could probably have worse things happen to you, let's be honest).

Chocolate Things
adapted from the Cheese Board Collective Works cookbook - Makes 12 things

1/2 cup heavy cream
1/2 cup buttermilk
2 1/4 teaspoons active dry yeast
2 1/2 cups unbleached all-purpose flour
6 tablespoons unsalted butter at room temperature
1/3 cup sugar
2 eggs
1 1/2 teaspoon kosher salt
6 ounces dark chocolate, chopped into 1-inch pieces

In a small saucepan, heat the cream and buttermilk over low heat until small bubbles form around the edges of the pan. Pour into a bowl of a stand mixer or a large bowl (if mixing by hand). Let cool until just warm, then whisk in the yeast until dissolved. Let stand for 5 minutes.

If using a stand mixer, add the flour, butter, sugar, 1 of the eggs, and the salt to the bowl. With the paddle attachment on medium speed, mix until the ingredients are combined, about 2 minutes. If the dough is too soupy, add extra flour by the tablespoonful until the dough forms a loose ball around the paddle. Switch to the dough hook and knead on medium speed for 7 minutes, or until the dough is smooth, silky, and elastic. Add the chocolate and knead just long enough to incorporate it (do this step as quickly as possible, as overmixing will result in broken pieces of chocolate and discolored dough).

If making by hand, add the flour, butter, sugar, 1 of the eggs, and the salt to the bowl. Mix with a wooden spoon until combined. If the dough is too soupy, add extra flour by the tablespoonful. Transfer to a lightly floured surface and knead the dough for 10 minutes or until it is smooth, silky, and elastic. Flatten the dough into a 1-inch-thick round and place the chocolate in the center. Gather the dough around the chocolate and knead just long enough to incorporate it.

A quick note: I did a stand mixer/hand mix mash-up where I made the dough with the stand mixer, but kneaded in the chocolate pieces by hand. That seemed easiest to me (and kept chocolate pieces from ricocheting out of my mixer). Just FYI!

Form the dough into a ball and place it in a large oiled bowl. Turn the dough over to cover it with oil. Cover the bowl with plastic wrap or a damp kitchen towel and let rise in a warm, draft-free place for one hour, or until doubled in size. Alternatively, refrigerate the dough to rise slowly overnight. The next morning, remove the dough from the refrigerator and let stand in a warm place for at least an hour before proceeding.

Line a baking sheet with parchment paper or a baking mat. Transfer the dough to a lightly floured surface and roll it out into a 10 by 12-inch rectangle. Don't worry if pieces of chocolate fall out of the dough, just set them aside for the time being. In a small bowl, beat the remaining egg with a whisk. Using a pastry brush (or your fingers, which are easier to clean!) brush a stripe down one of the long edges (and save the leftover egg! You'll use it later!). Take all of the pieces of chocolate that fell out of the dough earlier and scatter them across the dough rectangle. Starting with the non-egg-wash coated edge, roll up the dough lengthwise into a jelly roll shape (rolling up the loose chocolate pieces as you go), using the egg-washed edge to seal the dough roll together. See what we did there? Sneaky, sneaky!

Using a sharp knife, a bench scraper, or a piece of wire or floured baker's twine, cut the roll into twelve 1-inch thick slices and place them on the prepared pan, cut side up, about two inches apart. Cover them with a kitchen towel and let rise in a warm place for 1 hour, or until the rolls are increased in size by one-third.

Fifteen minutes prior to baking, preheat the oven to 350˚F. Using a pastry brush (orrrr your fingerssss), brush the sides and tops of the each roll with the beaten egg. Bake on the middle rack of the oven for 30-35 minutes, or until golden brown. Transfer to a wire rack to cool, or to your face to be eaten.