FIELD & FOREST

main dishes

roasted cauliflower and figs with burrata, mizuna, and almonds

autumn, dinner, lunch, main dishes, salads, winter, vegetarianRachel SandersComment

OMG I'M ALIVE.

Cue blogger apologizing to readers about how sorry she is that she took a break from blogging and that she didn't mean to be away so long blah blah blah.

I am sorry not sorry about being away for so long. There is a good reason, I promise, and all will be revealed (dramatically waves hands) in the next post. I just popped back in because my email let me know that my readership exploded last weekend, and I wanted to say hello to all of you folks old and new. Hello! I'm still figuring out how you all found me, but in spite of how infrequently Field and Forest has been updated as of late, I'm here! I still like talking about/writing about/photographing/eating food! And I appreciate you being here, too!

Here's a present from the archives of recipes and photographs on my computer in the form of a fall salad. I have been a little perturbed by the way in which people have been talking about salads on some food websites as of late, like how "you shouldn't balk at this salad, I promise it is delicious!" Stop. Talking. About. Salads. Like. They. Are. Not. Amazing. And like you think people won't believe you if you talk about how amazing salads are. SALADS ARE AWESOME. Always have been. Always will be.

And full disclosure: the photo of this salad is of a salad with mozzarella, not burrata. Burrata is noticeably creamier (and messier), and I think this recipe came from a time when life was messy and I needed to photograph something neat and reliable. But, if you can get it, burrata is a knock-your-socks-off luxurious addition to this salad and very much worth the mess.

ROASTED CAULIFLOWER AND FRESH FIGS WITH
BURRATA, MIZUNA, AND ALMONDS
serves 4 for a light meal or hearty side salad

Preheat your oven to 425˚F. Spread the cauliflower florets in a single layer on a baking sheet, drizzle generously with olive oil, and toss with your hands to evenly coat the florets. Roast in the oven, stirring once or twice, until crispy and evenly golden (10-20 minutes depending on the size of your florets). Set aside to cool.

Toast the almonds in a dry skillet over medium heat until golden brown, stirring frequently so that they don't burn. Set aside to cool.

Wash and slice figs into whatever shapes you prefer (wedges, halves, rounds). Slice mozzarella or burrata into enough slices that everyone has an equal amount of cheese on their plate (I've been using 6 slices for 2 people, and 8 slices for 4 people); if you are using especially creamy burrata, you may have an easier time cutting it in half, then in half again to make 4 quarters.

To plate: place the cheese on 4 plates, then divide your mizuna or arugula evenly over the cheese. Top with the cauliflower florets and sliced figs. Scatter the toasted almonds over the vegetables, fruit, and cheese. Drizzle with more extra virgin olive oil, some balsamic vinegar, and top each salad with a generous pinch of flaky sea salt and a grind or two of black pepper. Serve immediately.

1 head of cauliflower, cut into florets
Extra virgin olive oil (for roasting the cauliflower and dressing the salad)
1/2 cup almonds, coarsely chopped
1 pound ripe figs
1 pound burrata or buffalo milk mozzarella
a couple of handfuls of mizuna, arugula, or other peppery salad green
aged balsamic vinegar
flaky salt
freshly ground black pepper

west coast rarebit

autumn, breakfast, dinner, lunch, snacks, main dishes, vegetarian, winterRachel SandersComment

I have a big ole lady crush on Charlet Duboc from Munchies, who hosts the Munchies Guide to Scotland and the Munchies Guide to Wales. This is mainly due to her lack of filter during interviews and her rather adorable habit of getting drunk with the locals and then having a wee lie-down on lawns/sidewalks/etc. After being more than a little tired of the Food Network as of late, I would like to note that this is me officially raising my hand and saying that I like the direction in which food journalism is going! More real people doing real things in real places, please.

(BTW, Munchies seems to be killing it in this area. Give them a look-see.)

Sometimes in watching a show about a specific cuisine, I'll feel like a piece of my soul is from that region/country. I really feel this way about India (because spices), Italy (because pasta), France (because garlic and butter and seasonality and my dad's cooking), Hungary (because chicken paprikash and goulash and my mom's and grandma's cooking) Japan (because unagi and miso), and Sweden (because hygge!!).

If any part of my soul is Welsh, it is the part shaped like a piece of cheese toast. Because rarebit.

I would like to take a liberty and describe rarebit (for those of you who aren't sure what it is, which was also me about a week ago) as portable fondue. Yes! I know! How awesome is that. My mom used to make kind of a quick-and-dirty rarebit when we were growing up with aged cheddar and garlic powder, which is still one of my favorite ways to eat cheese on toast, but there wasn't any beer involved and that seems to be key to this whole rarebit thing. Plus some mustard powder and Worchestershire and a little extra added fat in the form of butter, cream, and/or egg yolks to keep the whole thing melty and luxurious.

Imagine everything you like about fondue but on a piece of toast. And now imagine that you are eating this with friends, but you don't have to worry that some gluttonous person is going to have a field day in the fondue pot before you can skewer a cube of bread because you have your VERY OWN piece of toast.

Yeahhhhhh.

The white beans and kale are not key for Welsh rarebit, but they are key for this West Coast rarebit and give you something a little vegetal to help cut through the richness that is the month of December. I also replaced the butter/cream/egg yolks with creme fraîche, which still gives you some needed lipid power albeit in a slightly tangier and lighter form. If you need a legit rarebit recipe, Munchies has you covered, as does the Guardian. You could also use whatever vegetables you have lying around instead of the kale and beans, because few things suck when you smother them in garlic and cheese and beer and get them all bubbly and hot under the broiler.

Toast the bread until barely golden brown on both sides, and set aside while making the rarebit mixture.

Heat the olive oil in a heavy-bottomed skillet over medium heat, and add the white beans in a single layer. Cook until the beans are beginning to get golden brown, stirring occasionally. Once most of the beans are golden in spots, add the kale to the pan and cook, stirring frequently, until the kale is wilted and tender, about 5 minutes. Remove from the heat and let cool.

While the beans and kale cool, preheat your broiler on the high setting, or your oven to 450˚F.

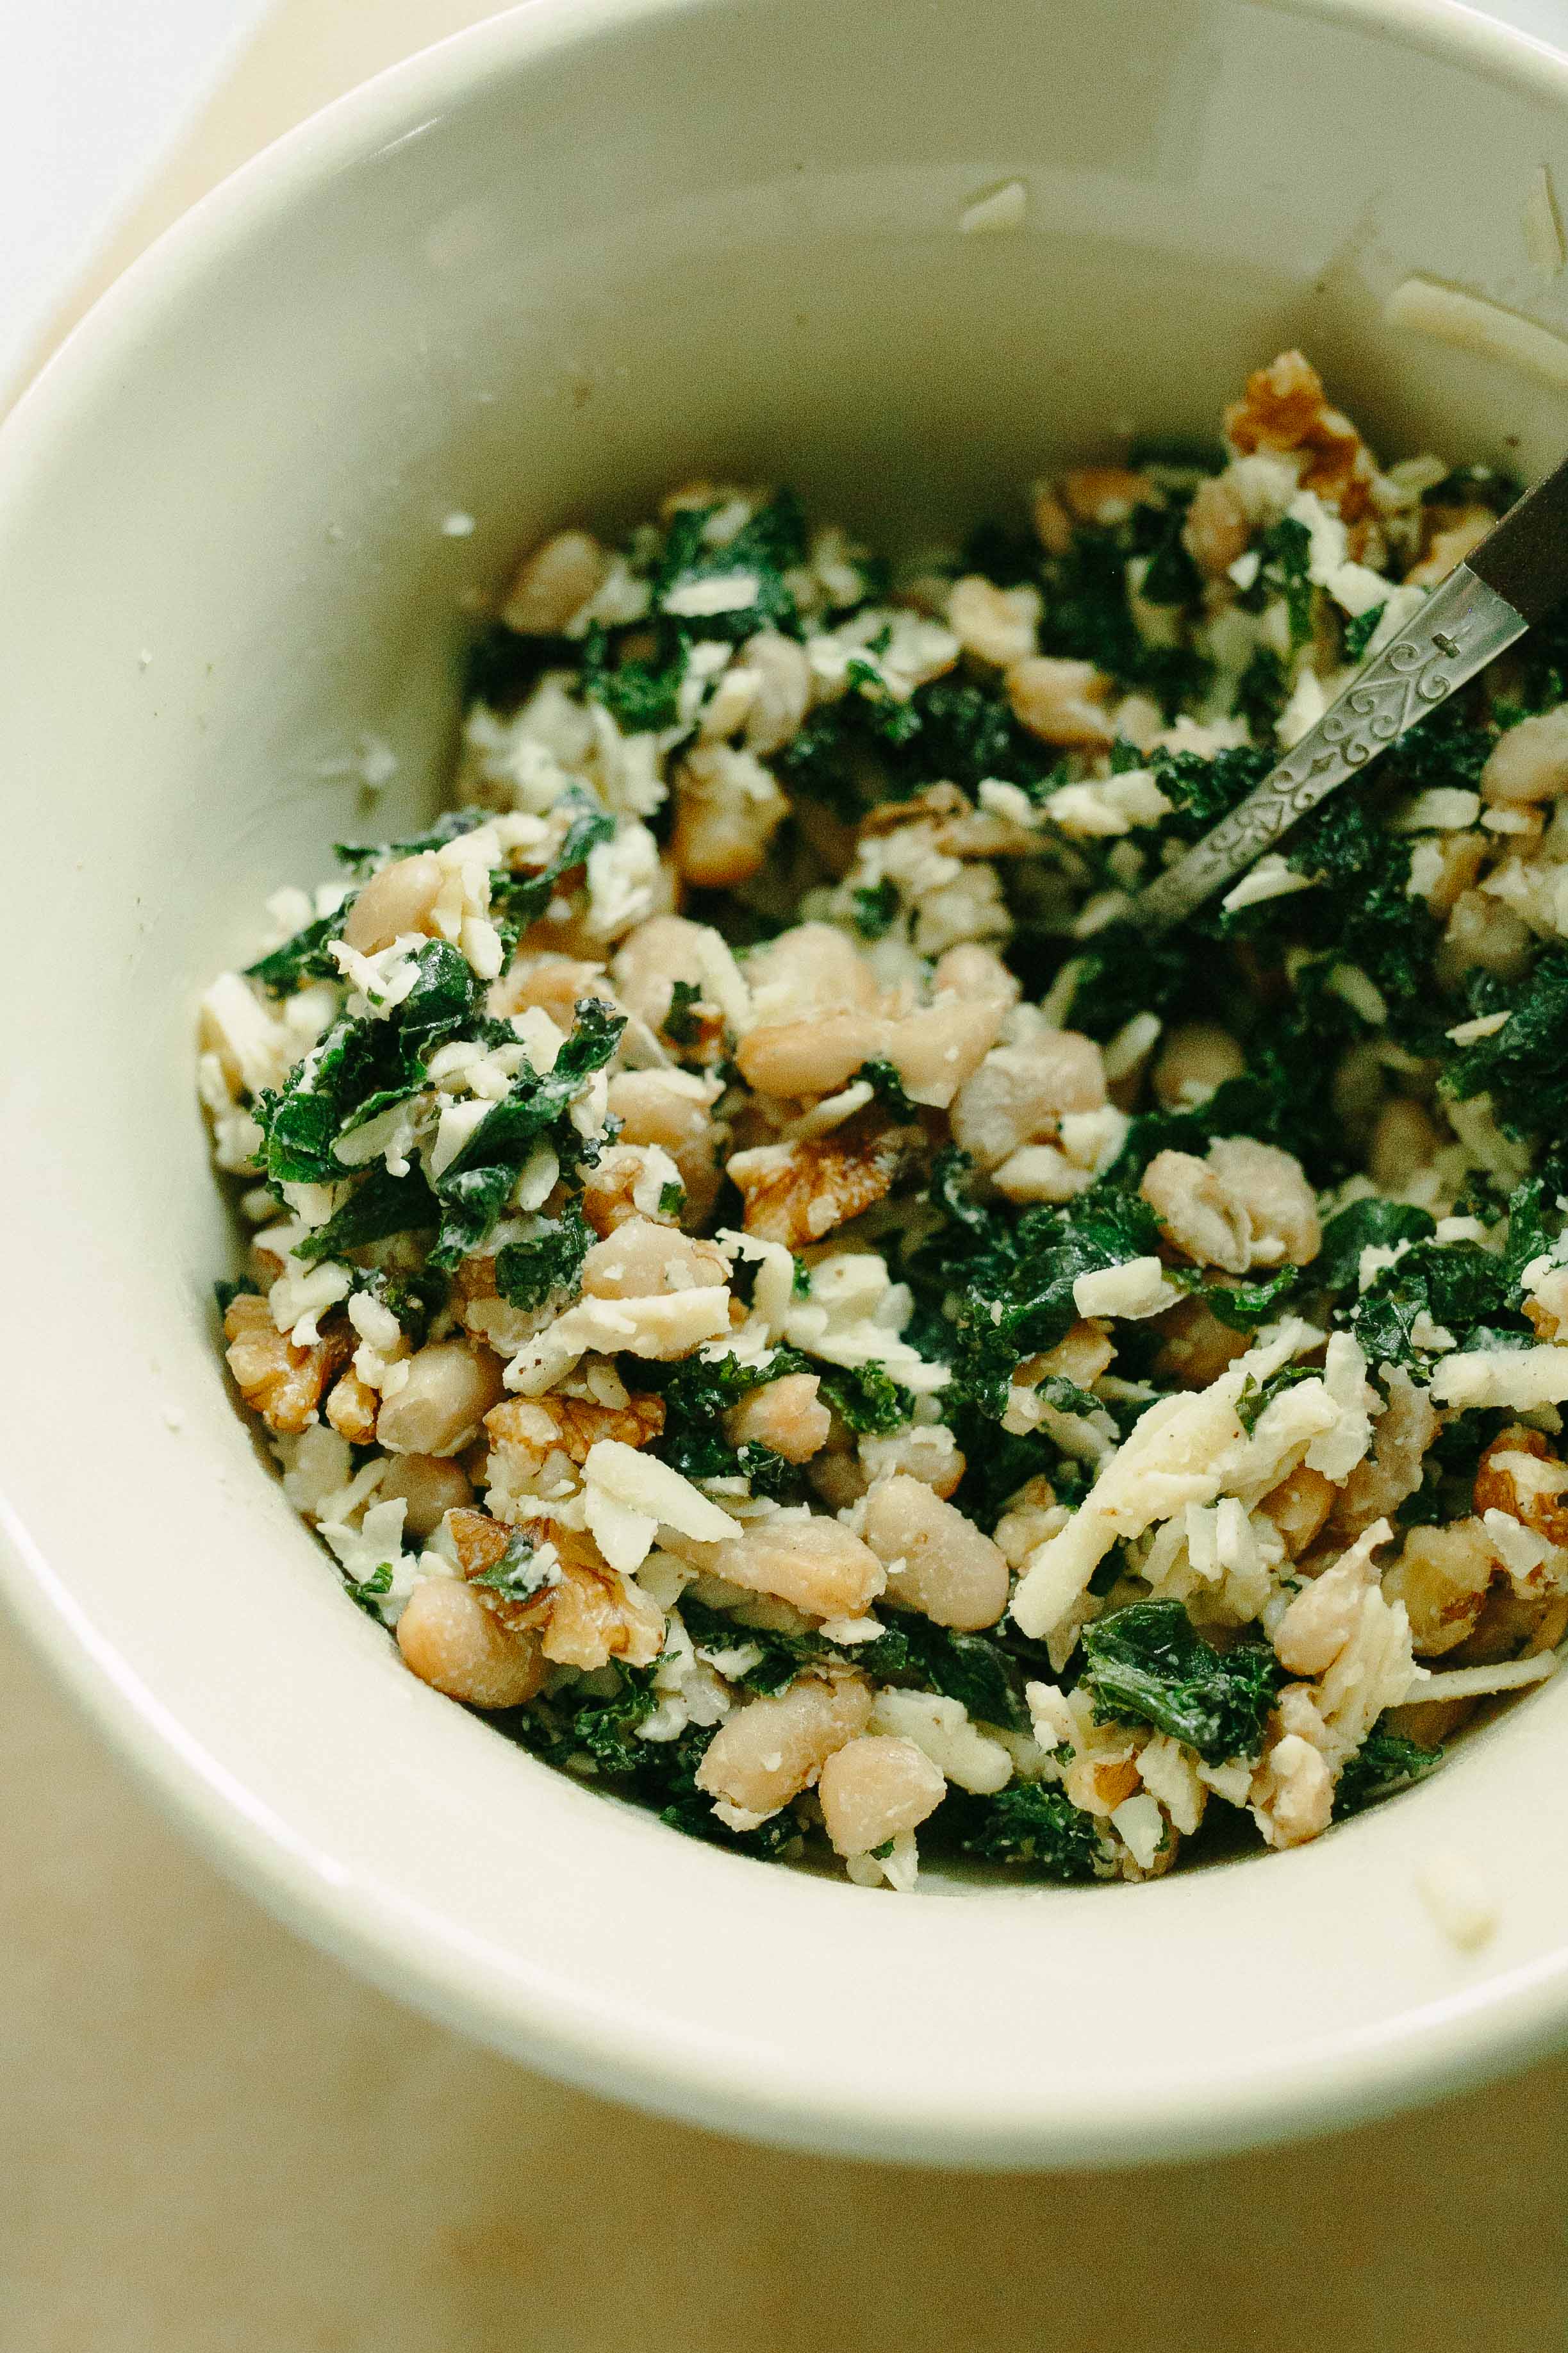
In a medium bowl, combine the creme fraiche, garlic, a hefty pinch of kosher salt, the dry mustard powder, and the Piment d'Espelette. Add the walnuts and cheddar cheese, followed by the cooled beans and kale, and stir to combine. Pour the beer over the mixture, beginning with 1/3 of the can and adding more if the mixture seems dry.

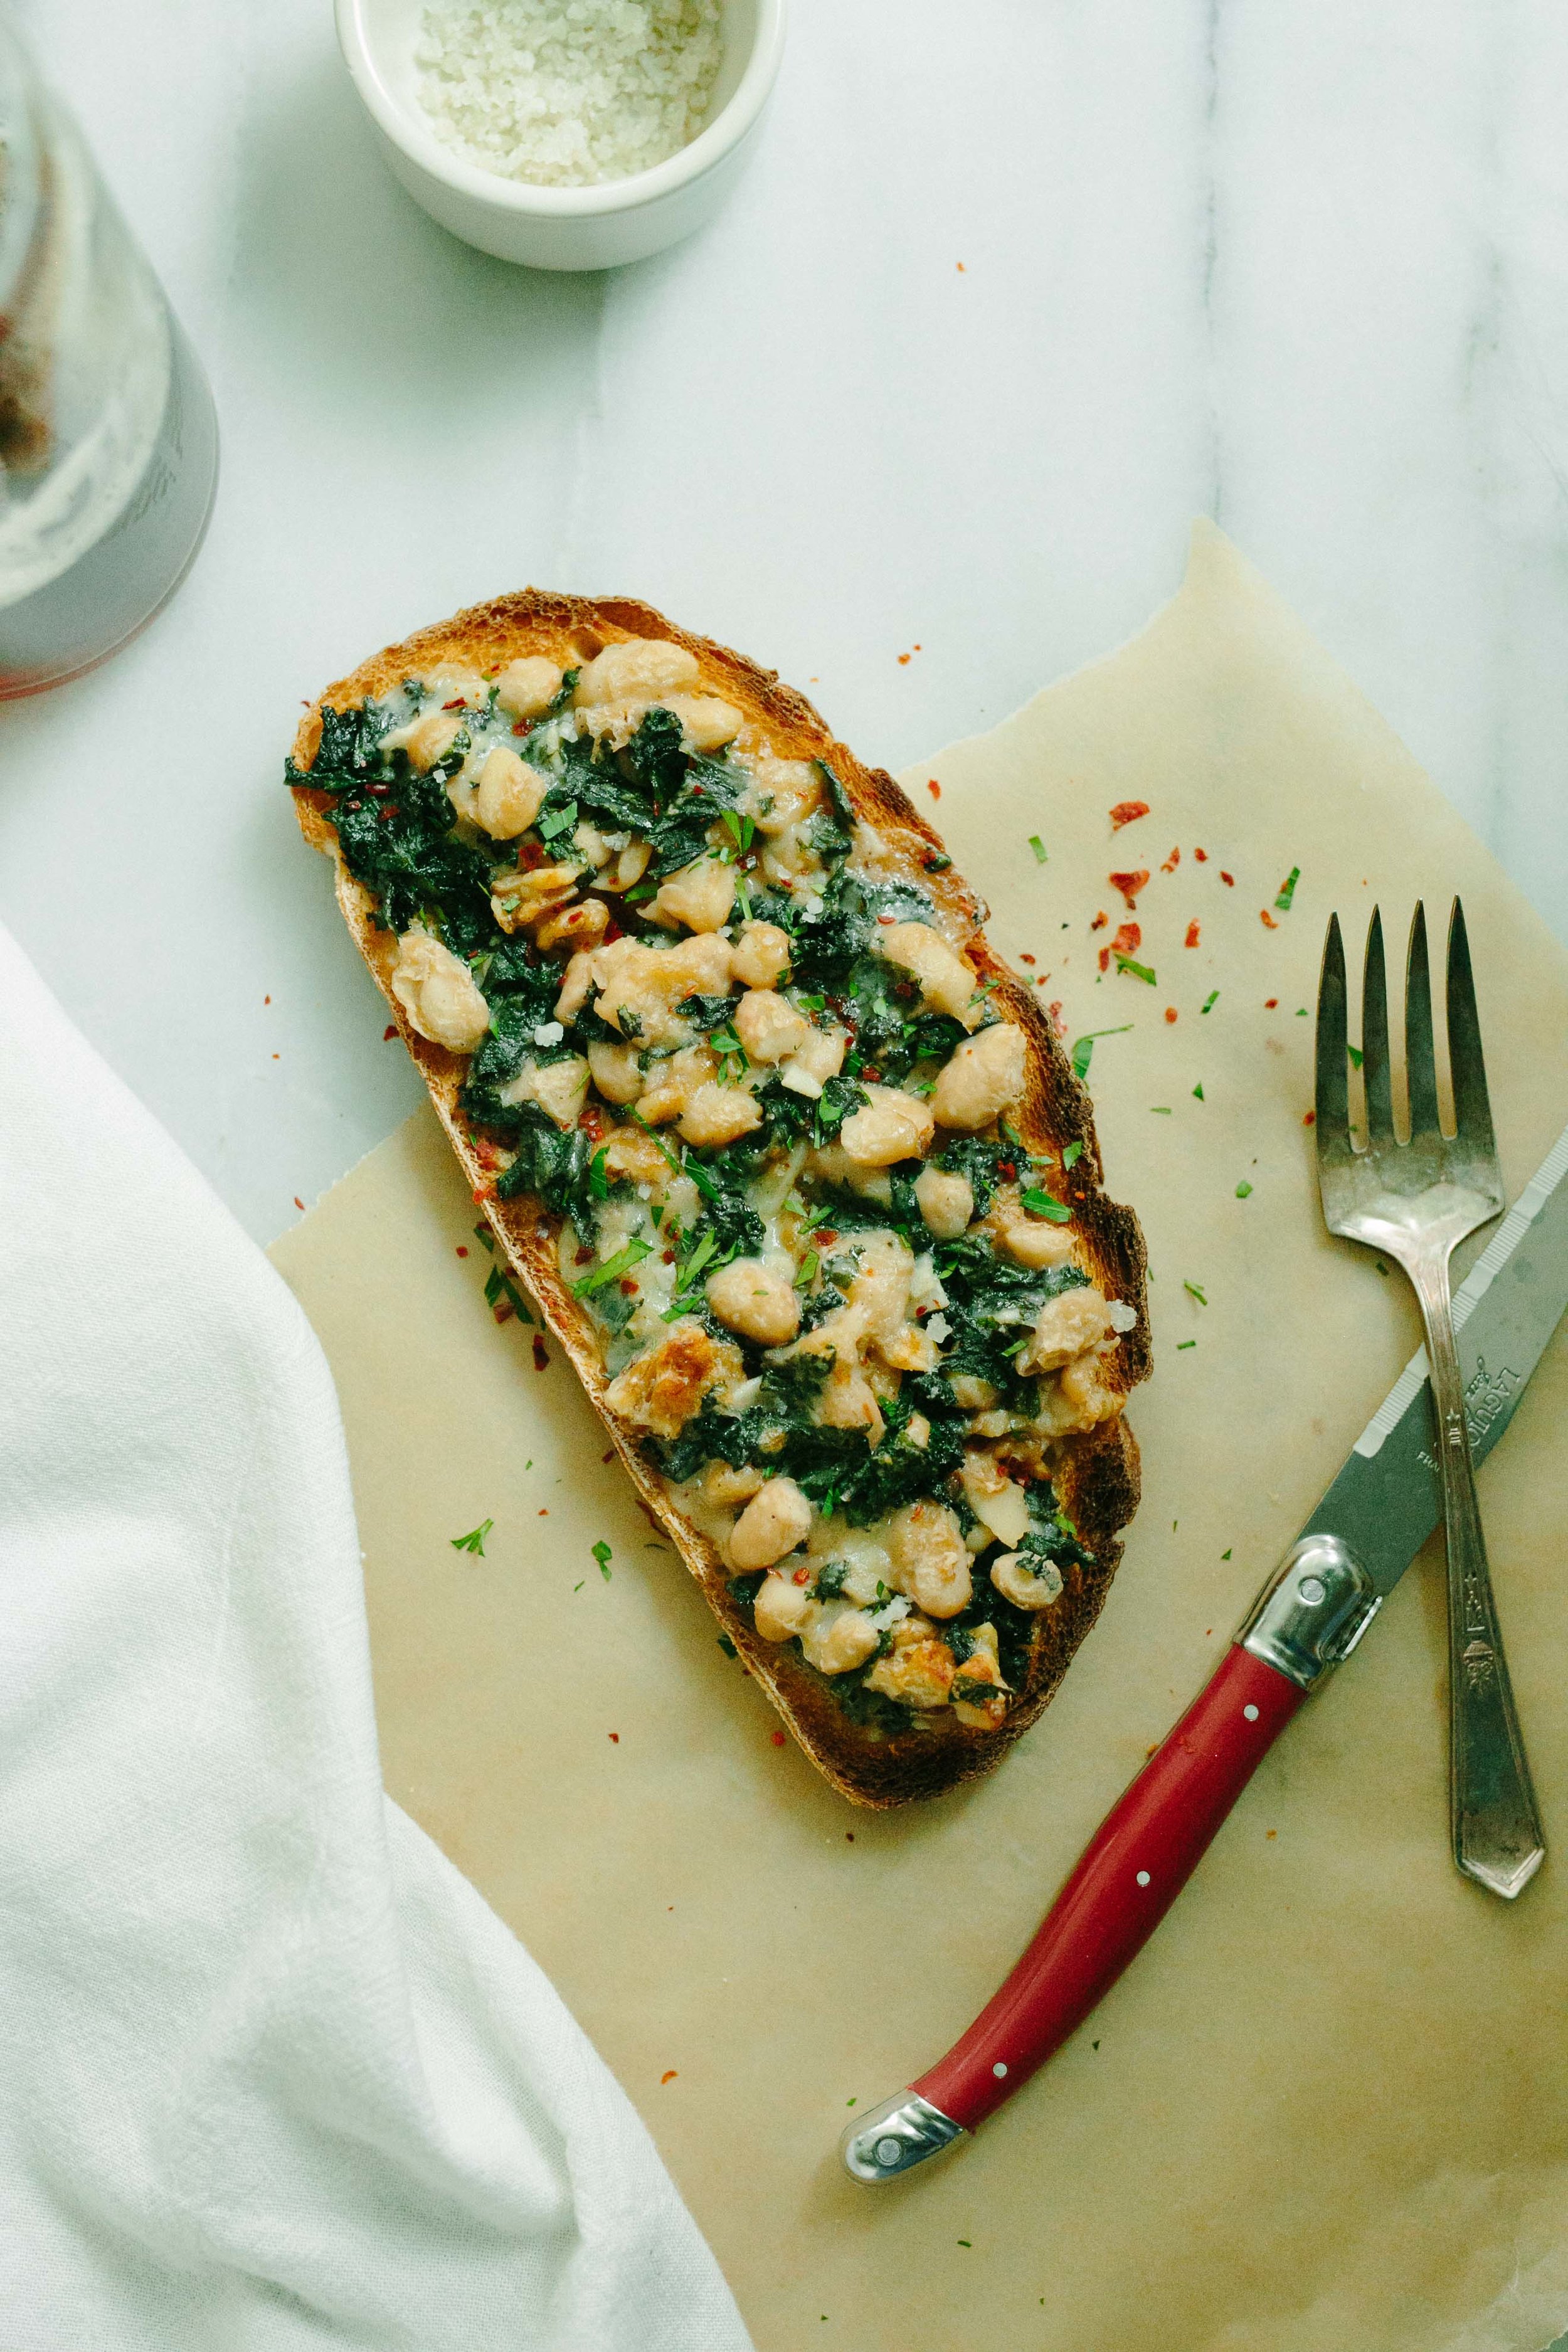
Place the toasts on a baking sheet and divide the mixture evenly among them, spreading it out over each toast in an even layer. Broil or bake until the mixture is bubbly and turning golden, about 4-8 minutes (depending on whether you have a broiler drawer, or are broiling or baking it in the oven, which puts the toast a bit farther from the heating element). Sprinkle with flaky salt, pepper flakes, and chopped parsley, and serve immediately.


4 1/3-inch thick slices of bread (I used sourdough)
1-2 tablespoons olive oil
1 can white beans (such as cannellini, drained and rinsed
1/2 bunch green or Red Russian kale, washed, stemmed and finely chopped (but not minced)
2 tablespoons creme fraiche
2 cloves garlic, minced
kosher salt
1/2 teaspoon dry mustard powder
1/8-1/4 teaspoon Piment d'Espelette or cayenne pepper (I used 1/8 teaspoon and topped the finished rarebit with more pepper flakes)
1/2 cup walnuts, coarsely chopped
1 1/2 cups grated cheddar cheese, preferably an aged/extra sharp variety
1/3-1/2 can beer of your choice (I used a lager, though stout is common in traditional recipes)
flaky salt
pepper flakes (optional)
freshly chopped parsley (optional, but nice for color)


a rather french roasted chicken

autumn, dinner, lunch, main dishes, winterRachel Sanders1 Comment

Oh, hey! It's our old dining room!

I've been saving this recipe for a while because I wanted to tinker with a couple of things and see if it made the chicken even better, but nope! It was perfect to begin with. Go figure.

This is Frances Wilson's recipe, or at least, what my brain remembers of it from cooking school eight years ago. It is very French. There is tarragon and garlic and cream and alcohol and I usually listen to Yann Tiersen when I make it, which I'd like to think adds a little something extra (probably angst, if it is his most recent album). And even more than it is French, it is very simple, even with the addition of a pan sauce. The sauce echoes some of the ingredients from roasting the chicken, so there are fewer additional items you need to make it all come together. Quite practical, non?

If you have never made a pan sauce before, hooray! You are going to love it. Get all your goodies together beforehand, get your pan nice and toasty, and then sauce away. There is almost never enough pan sauce for me, and you could probably stretch it a little bit by adding some good quality (preferably homemade) chicken stock and letting it reduce down to a glaze. But if you don't have good chicken stock, just use the other ingredients and make sure everyone appreciates every drop of sauce they get.

I served this recipe with Suzanne Goin's soubise (which is like risotto with an inverted ratio of onions to rice) and some of those [roasted] Dr. Seuss carrots which Whole Foods has been carrying recently. You can serve it with whatever starch/veg you like (roasted potatoes would be awesome), though I'd keep the seasoning strictly to salt and possibly pepper, just so nothing takes away from your pan sauce.

I don't truss my chicken because 1) I am lazy, and 2) it cooks more quickly when it isn't trussed or stuffed (because the heat gets inside, yo). Also, 3) because part of the way I check a chicken for doneness is by sticking a fork in the cavity and tipping it up a little in the pan to see if the juices that start to run out are clear (if they are reddish pink, your chicken is not done). You can also use a thermometer to check for doneness by taking a reading in the meaty part of a thigh (avoid touching the bone for an accurate reading). Take your chicken out at 165˚F; the temp will continue to rise about 5˚F further out of the oven.

Also because 4) then the skin around the cavity and on the legs gets nice and crispy, mmm.

The flipping bit comes from Alice Waters' method for roasting chicken. I sometimes leave the chicken breast-side down for only ten minutes if it seems like the bird is browning very fast (adding the extra five minutes to the final portion while breast side-up), so be sure to keep an eye on your chicken during this part.


To make the roasted chicken: Preheat the oven to 425˚F. Lightly oil a heavy-bottomed roasting pan or cast iron skillet.

Remove any innards still inside of the chicken and pat the outside and inside dry.

Combine the rest of the ingredients for roasting the chicken in a small bowl, smushing everything together with your fingers. Ta-da! You've made a compound butter.

Gently lift the skin from the breast of the chicken just enough so that you can spread some of the butter around on the meat underneath the skin (this helps to lock in the flavor, baste the meat, and keep the garlic/herbs/zest from burning. Spread 2/3 of the butter on the breasts, then spread the remaining 1/3 underneath the skin of the thighs. Try your very best not to tear the skin of the chicken; you want it to stay in place to help keep the meat from drying out during cooking. Sprinkle a little salt inside of the chicken cavity and place in your pan breast side-up.

Put the pan with the chicken in the oven and reduce the heat to 400˚F (the extra bit of heat helps the skin to begin browning). Roast for 20 minutes, then flip the bird over breast-side down, and roast for 15 minutes. Flip again, and continue to roast for 20-15 minutes, or until the chicken is 165˚F at the thigh, the skin is browned and crisp, and the juices inside run clear when the chicken is tilted neck-up in the pan.

Remove the chicken from the pan and let rest, loosely tented with foil, while you make the pan sauce.

To make the pan sauce: place the roasting pan (still with its drippings) over medium-high heat and add the shallots, stirring constantly. Cook for 15-30 seconds, then deglaze the pan with brandy, scraping the pans bottom to stir up all of the fond (cooked on drippings/leftover meat bits) into the sauce. Let reduce by 1/2, then add the chicken broth, (if using) and reduce again until the sauce is viscous and approaching the consistency of a glaze.

Remove the pan from the heat, add a generous squeeze of lemon, the fresh tarragon, and the cream, and stir to combine. Taste, and add additional salt and/or lemon if necessary. The sauce may be held briefly on the lowest possible flame while you carve the chicken, though you may need to whisk it briefly before serving (do not let it boil once you've added the cream, or it may separate and become greasy looking).

Serve the carved chicken straightaway with the sauce.

FOR THE ROASTED CHICKEN:

1 whole chicken, preferably organic and air-chilled
2 tablespoons unsalted butter, at room temperature
zest of 1 lemon (save the rest of the lemon for the pan sauce)
1 generous pinch kosher salt, plus additional salt for the chicken cavity
a little freshly ground black pepper (but not very much, just a grind or two)
2 teaspoons finely chopped tarragon
2 cloves garlic, finely minced

FOR THE PAN SAUCE:

1 medium shallot, minced
1/2 cup brandy
1/2 cup homemade/good quality chicken stock (optional; omit if not good quality)
lemon juice, to taste
2 teaspoons finely chopped tarragon
1/4-1/3 cup cream
kosher salt (optional! Taste the sauce before adding, it may be salty enough from the chicken drippings)


fridge clean-out minestrone

autumn, dinner, lunch, main dishes, soups, spring, vegan, vegetarian, winterRachel SandersComment

One of my New Year's resolutions from like, 2012, was to get better at using up all of the odds and ends that accumulate in our fridge. For the most part, we've failed. We still fill up a little compost container with past-their-prime veggies/fruits/cheese ends/what have you every month or so. 

But, had I known the recipe for building this skill was one part Richard saying "I want soup" and two parts us being too lazy to travel 2.5 blocks to the store, we might have cracked this fridge clean-out thing a loooong time ago.

I feel funny sometimes when I share these kinds of recipes with you because they aren't flashy or profound or beautifully styled. This is base-level practicality at its core. But geez, there is so much gorgeous food inspiration among the cookbooks and the Instagram and the Pinterest that I sometimes really need someone to slap me across the face and say "put down the pea shoots and make some goddamn food with what you goddamn have."

(I picture this someone as one (or both) of my economical depression-era grandmas, which makes me feel happy in spite of the slapping.)

I'm guessing your fridge looks different than my fridge, and since this is about making the most of what's available to you in the moment, you shouldn't feel constrained by amounts of things or by particular ingredients. An onion, some olive oil, an acid, and maybe a little meat will be enough to carry any veggies pretty far along, and you can even get away with using water if you don't have veggie/chicken/beef broth hanging out somewhere. This soup will not be French Laundry soup by any means but it will be inexpensive and healthy and nourishing and soul-satisfying and delicious.

Pretty much everything we need.

butter
olive oil
2 leeks, halved lengthwise, cut into 1/4-inch slices, and rinsed (white and light green parts only), OR 1 large onion, chopped
salt
1 bunch carrots (~5 carrots) (alternately, use parsnips/sweet potatoes/what have you), peeled and cut into 1/4-inch slices
3 cloves garlic, chopped
a few sprigs of thyme or 1 of rosemary
1/2 cup dry white wine
6 cups broth, water, or a mixture of broth and water
1 can chickpeas (alternately, use cannellini beans or other canned/cooked beans), drained and rinsed
1 cup ditalini (or other small) pasta (alternately, break up long pasta into small pieces)
1/2 bunch red Russian kale, chopped (alternately, other robust greens, chopped, or whole leaf baby spinach)
black pepper
zest and juice of 1/2 a lemon
(optional: cooked sausage, bacon, or shredded cooked chicken)

To serve: shaved parmesan, red pepper flakes, olive oil

In a pot set over medium-low heat, melt a small knob of butter (a tablespoon or so) and add a quick swig of olive oil. Add the leeks (or chopped onion) along with a pinch of salt and sauté, stirring frequently, until they become soft and translucent. Add the carrots and garlic and cook for 5  (adding more oil or butter if the vegetables are sticking to the pot) until the carrots are just beginning to soften.

Turn the heat up to medium and add the wine. Let the wine cook down until the pan is almost dry again, then add the water or broth. Bring the pot to a boil, add the chickpeas and pasta, and cook for 5 minutes. Lower the heat to maintain a brisk simmer, add the kale, and continue to cook until the greens have softened and the pasta is al dente. (If you are including leftover cooked meat in your soup, add it along with the kale.)

Taste the soup and season with more salt, a little pepper, and the lemon zest and juice. Serve immediately, with shaved parmesan, red pepper flakes, and olive oil on the side.

roasted veggie tacos + a video!

autumn, dinner, lunch, main dishes, vegan, vegetarian, winterRachel SandersComment

So remember a little (er, long) while ago when I said you'd be getting a taco recipe soon? Well, rejoice! Soon is now.

This is one of my favorite recipes. And, it's vegan! You'd never know! I actually forgot it was vegan the last time we made it until halfway through my second taco.

That's actually the kind of vegan cooking I prefer. We're not vegan, but we really don't eat meat more than once or twice a week, if that. We save the meat for dishes that really need it, like sausage bolognese and meat lasagna and roasted chicken (not quite sure how one would make this without the chicken), and focus on the vegetables the rest of the time. I will probably always eat this way, mainly because I have never met a vegan lasagna that can hold a candle to normal lasagna (mainly because I have never met a vegan cheese that can hold a candle to cheese).

My friend Andrew and I made this video back in January (note my pre-spring skiing alabaster complexion), and then I promptly sat on it for a number of months while moving/working/traveling/being a bum. So now that squash is back in season, it's high time I made good on my taco promises and gave you this recipe already, especially since it's ideal camping season in most parts of Utah. Even though I roast the veggies in the oven and cook the kale on the stovetop, the ingredients for these tacos are robust enough that you can make them ahead of time, pack them in your cooler, and reheat them in the backcountry with no discernable changes in quality or texture. They've been a featured item on more than one trip, and since getting fresh veggies in our tummies while camping is sometimes an issue for us, I'm always super happy when these are part of the rotation.

(Some of you are going to balk at the homemade tortillas thing, since that is admittedly a more time-consuming element of these tacos. I mean, I like these tortillas a lot, but you don't have to make them if you don't want to. I'll still be your friend. And even I don't bother with making the tortillas when we take this camping, mainly because we'll eat more than I can practically make. But seriously, do make the orange sauce, because it is like liquid crack and you can use it on your eggs/chips/burgers/veggies/significant other, so you'll definitely use up the full batch.)

Huge thanks and the biggest of bear hugs to Andrew for shooting this video with me and for helping me to eat all of the tacos afterward! Do yourselves a favor and check out his other work at andrewjamesfilm.com.


a few good squash (I used 1 large butternut and two delicata, but feel free to use whatever densely-fleshed squash is your favorite)
1 pound carrots
olive oil
1 bunch lacinato (dino) kale or Red Russian kale
kosher salt

TACO ACCESSORIES - tortillas, orange sauce, chopped cilantro + white onion, sliced avocado, toasted pepitas

Peel the squash (delicata squash can be unpeeled), remove any seeds, and cut into 1/2-inch cubes. Peel the carrots and cut into 1/2-inch thick rounds or half-moons. Place the veggies in a single layer on two baking sheets, drizzle with olive oil, and toss lightly with your hands to evenly coat. Place both baking sheets on separate racks in your oven, and turn the oven temperature to 400˚F. Roast for 20-30 minutes, rotating the sheet pans once, until the edges of the veggies are becoming crispy and the insides are custardy.

While the veggies are roasting, stem, chop, and rinse your kale (do not dry it). Heat a cast-iron pan over a medium flame. Drizzle a tablespoon of olive oil into the pan and let heat for a few seconds before adding the kale. Sauté the kale until it begins to wilt (the water from rinsing will help the kale to steam and break down). Add a pinch of kosher salt, and continue to cook for another 5-10 minutes, until the kale is soft and easy to bite through.

Remove the vegetables from the oven, sprinkle with kosher salt, and add to the pan with the kale. Set aside while you heat the tortillas, and gently reheat if necessary before serving.


ORANGE SAUCE (makes 2 cups)

Note: this recipe is inspired by both a salsa from Tacolicious and one from the beloved Q'ero in Encinitas, CA.

Turn your broiler to high. Lay the onion slices in a single layer on a baking sheet, and place under the broiler until they begin to blacken on one side, about 5-10 minutes.

While the onions broil, heat a heavy bottomed skillet over a medium flame and add a couple of teaspoons of canola oil. Add the chiles de arbol and the garlic cloves to the pan, and cook until the chiles are beginning to turn dark, the garlic is beginning to turn golden, and the whole thing smells smokey and delicious (this only takes a few minutes if that, so keep your eye on the pan).

Remove the chiles and garlic from the heat, and pour into the cup of an immersion blender or the carafe of a stand blender. Add the broiled onion slices, and pour about 1/4-1/3 of a cup of boiling hot water over the vegetables and let sit for 5 minutes (this will help them soften for blending).

Add the aji amarillo purée or tomatoes, the vinegar, and a large pinch of salt to the carafe and blend until puréed (it's okay if there is still a little bit of texture). Add the agave nectar and oil, and blend again until thoroughly mixed. Taste the sauce and add more vinegar/salt/agave/oil as necessary to get your desired balance of flavors.

The sauce will keep, refrigerated, for up to two weeks.

1 red onion, peeled, halved, and cut into 1/2-inch thick slices
canola oil or other neutral oil
1/2 cup dried chiles de arbol
6 large cloves garlic
boiling hot water
1/3 cup aji amarillo purée or two medium tomatoes
1/3 cup apple cider vinegar
kosher salt
1 tablespoon agave nectar (syrup) or 1 tablespoon sugar
1/3 cup canola oil


BLUE CORN TORTILLA (makes 8-12)
adapted from King Arthur Flour

Combine the flour and cornmeal in a medium bowl, and add the oil, mixing to combine. Dissolve the salt in the water and add to the bowl, mixing to combine with your hands or a wooden spoon.

Turn the mixture out onto a lightly floured surface, and knead briefly until the dough is smooth and no longer sticky, adding a little more flour to the board if necessary. Divide the dough into 8-12 equal pieces (depending on how large you would like your tortillas) and roll each piece into a ball. Set on a plate or baking sheet, cover with a damp dishtowel, and leave to rest for 30 minutes.

Working with one piece of dough at a time, leaving the rest covered, press the dough ball using a tortilla press (if you don't have a press, which I don't, place the dough ball on a large piece of plastic wrap, fold the wrap loosely over the ball, and press using the bottom of a dish or a pan). Place pressed tortillas on a plate and cover with a damp dishtowel while you work with the rest of the dough.

Once the tortillas have all been pressed, heat an ungreased skillet or griddle over medium heat and line a dish with a dishtowel or large piece of foil. Cook the tortillas for 1-2 minutes on each side, until the color is light with some golden spots. Remove cooked tortillas to the lined dish, and keep covered with the towel or wrapped in foil while the others cook.

Serve immediately.

1 1/3 cups all-purpose flour
2/3 cup blue cornmeal
4 tablespoons canola oil
1/2 teaspoon kosher salt
1/2 cup + one tablespoon water