FIELD & FOREST

adventure guide - bell and little wild horse canyons

spring, autumn, adventure, travelRachel Sanders1 Comment

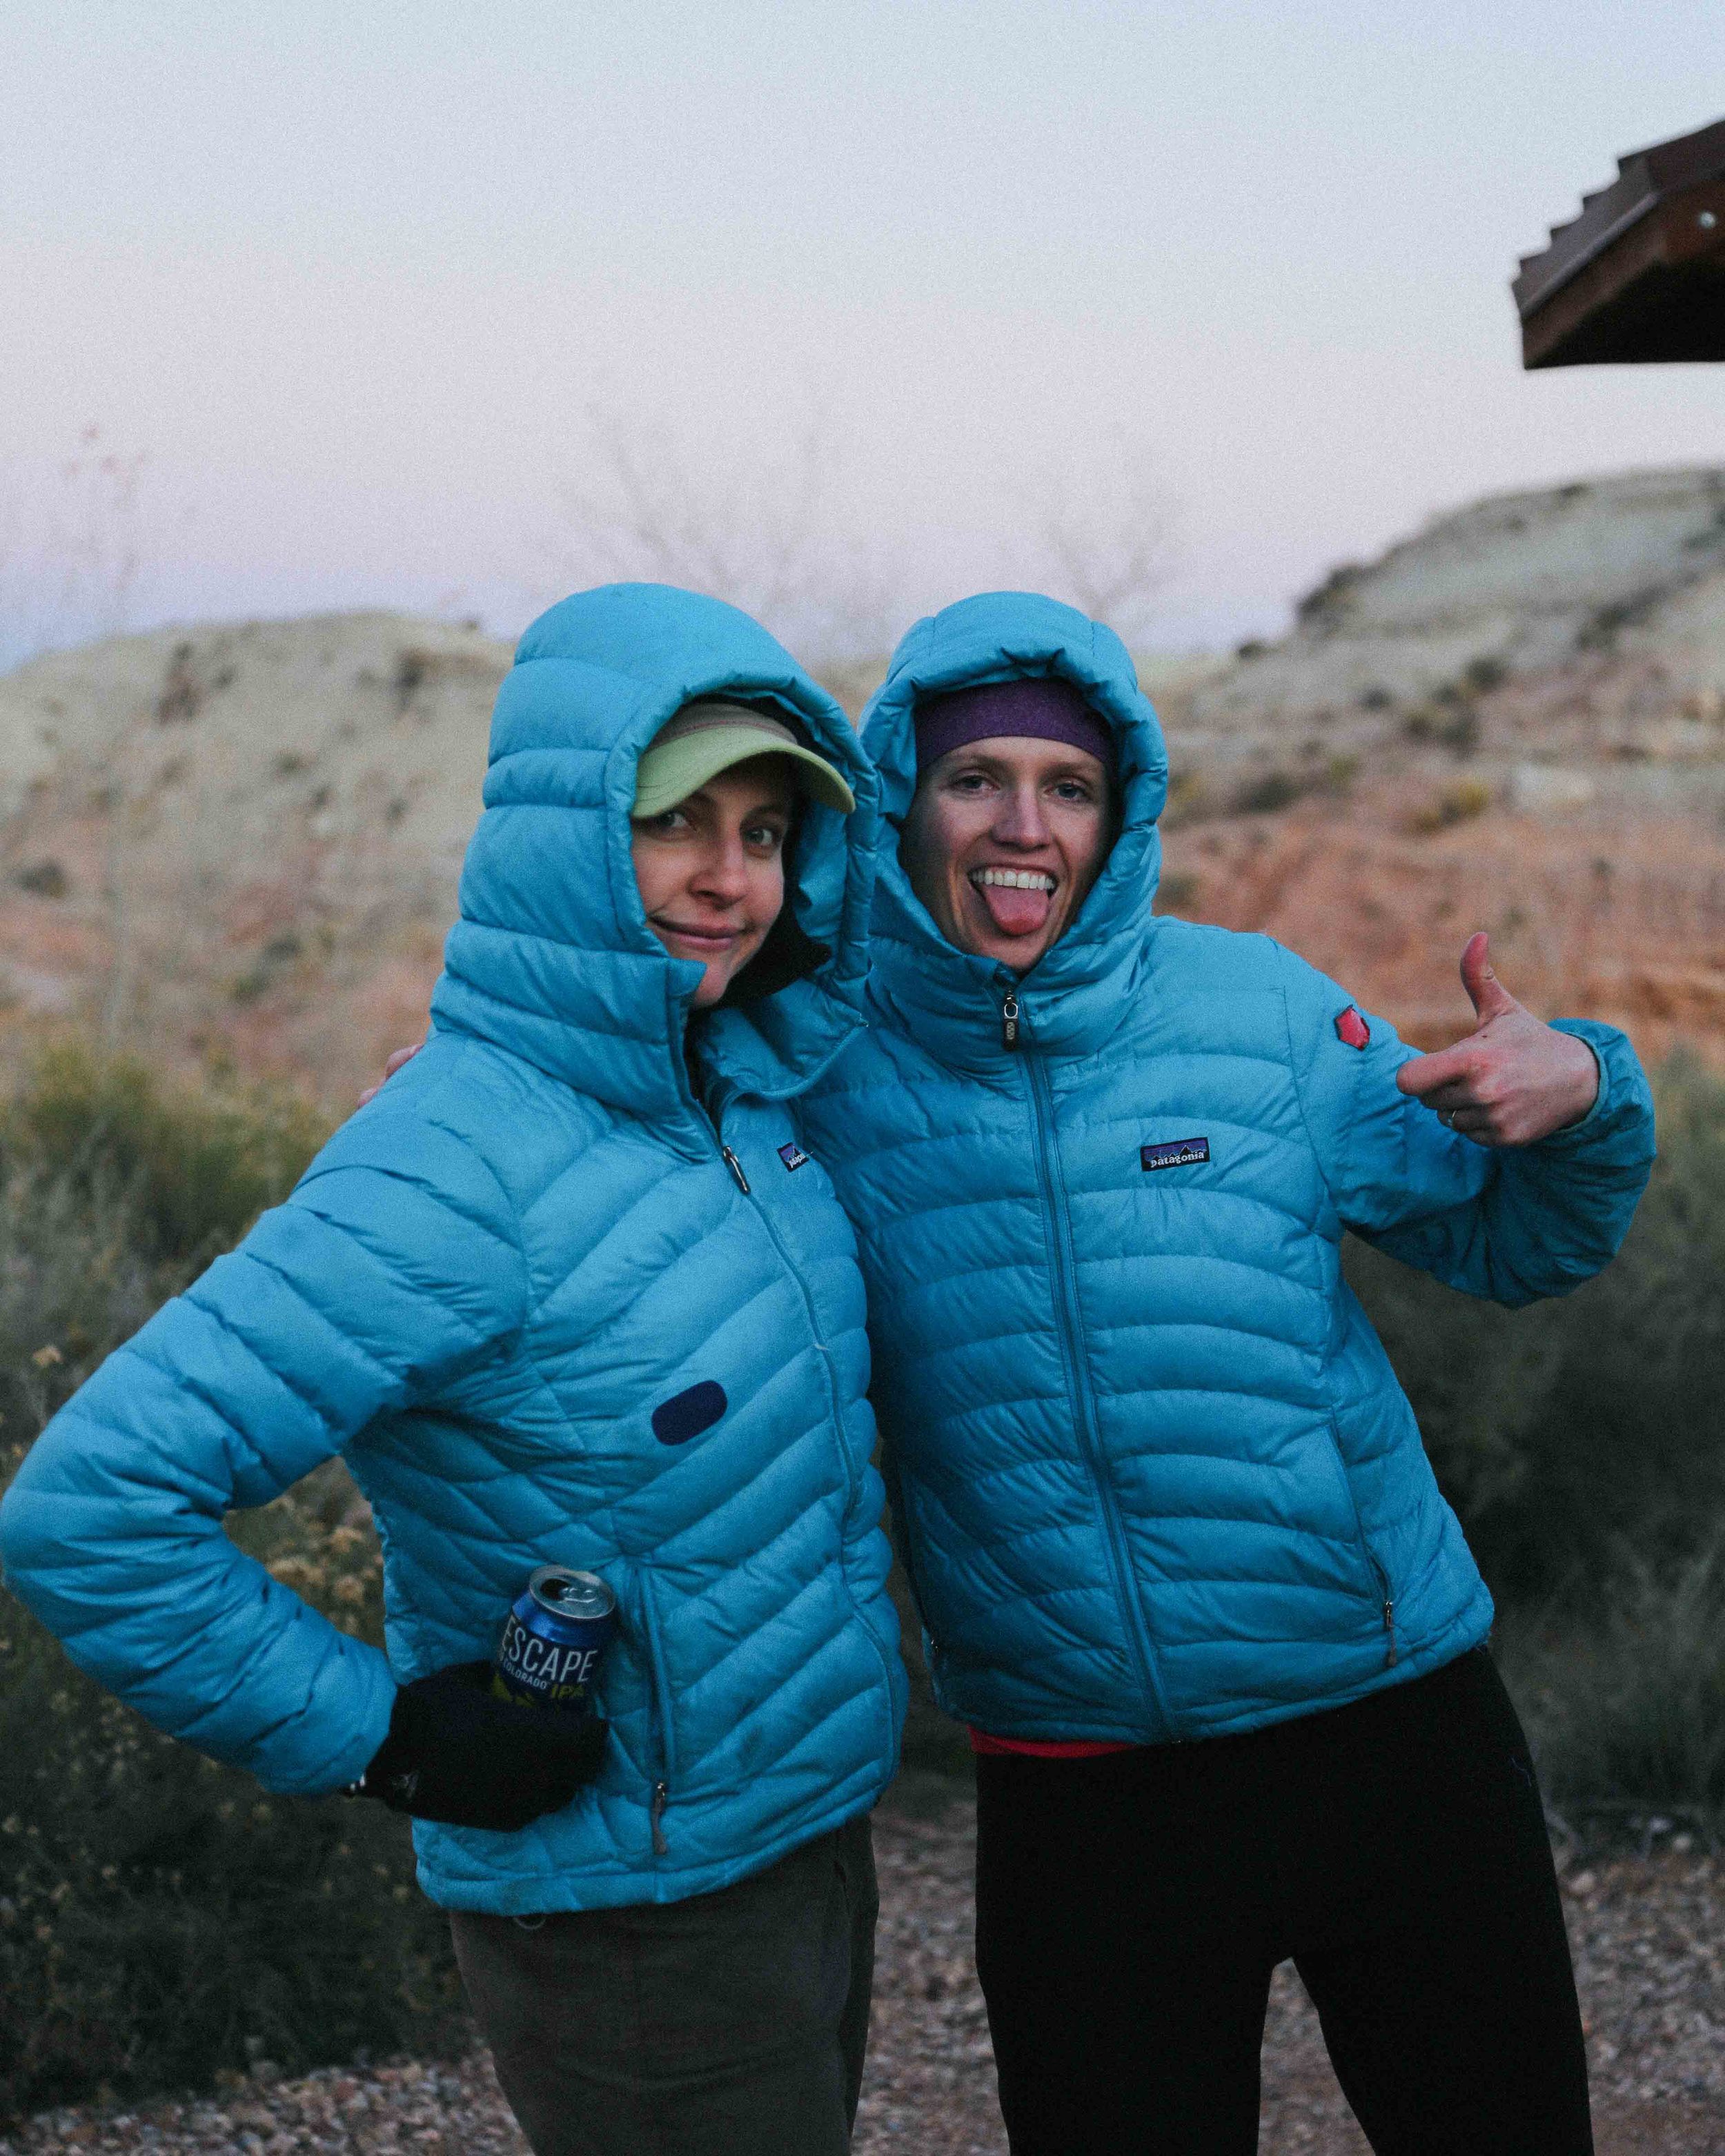
Ermagahd. How kerhl are rocks?

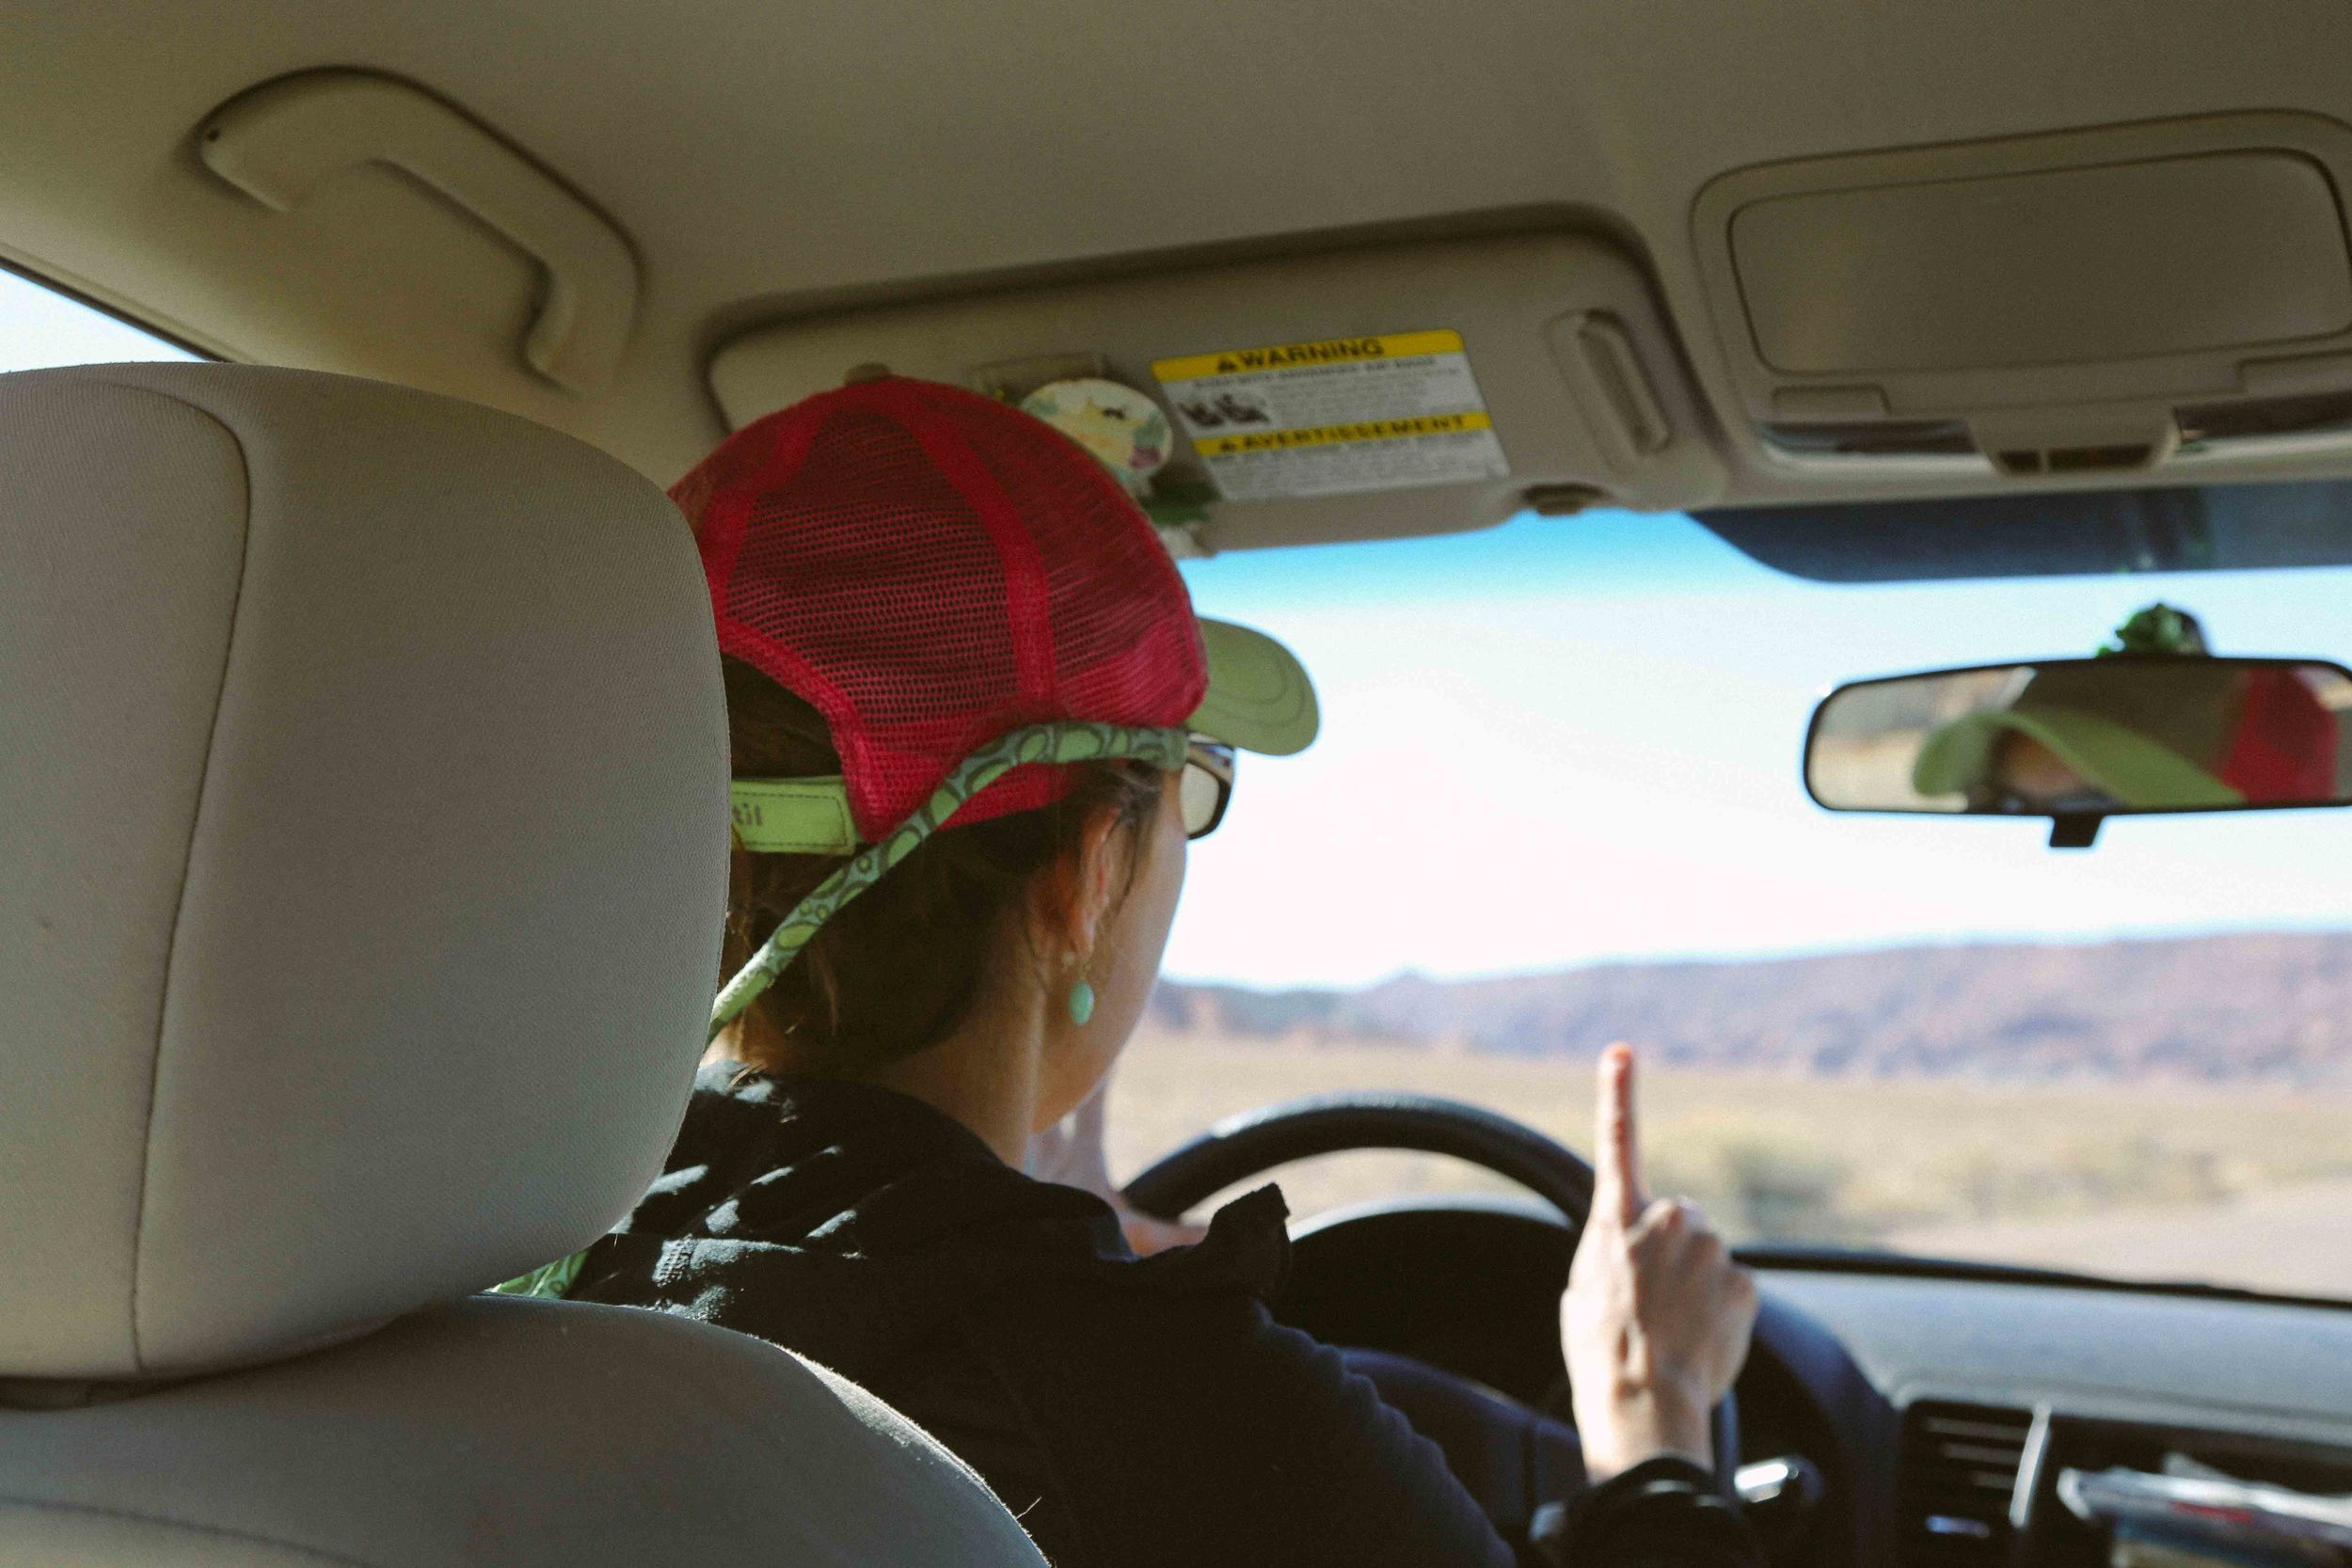
If you are planning a vacation in the near future, here is some math: you can pay 1300 clams for a ticket to Paris and see La Tour Effiel, OR you can throw your ass into the back of your friend's car and pay $40-60 for gas and go and hang out in arguably one of the most visually stunning places in Utah (and there are LOTS of visually stunning places here) and camp on BLM land for days for FREE. Plus you'll get some exercise and probably return home with a sweet tan. Though, admittedly, there are few if any croissants.

I totally get it if that is a deal-breaker for you.

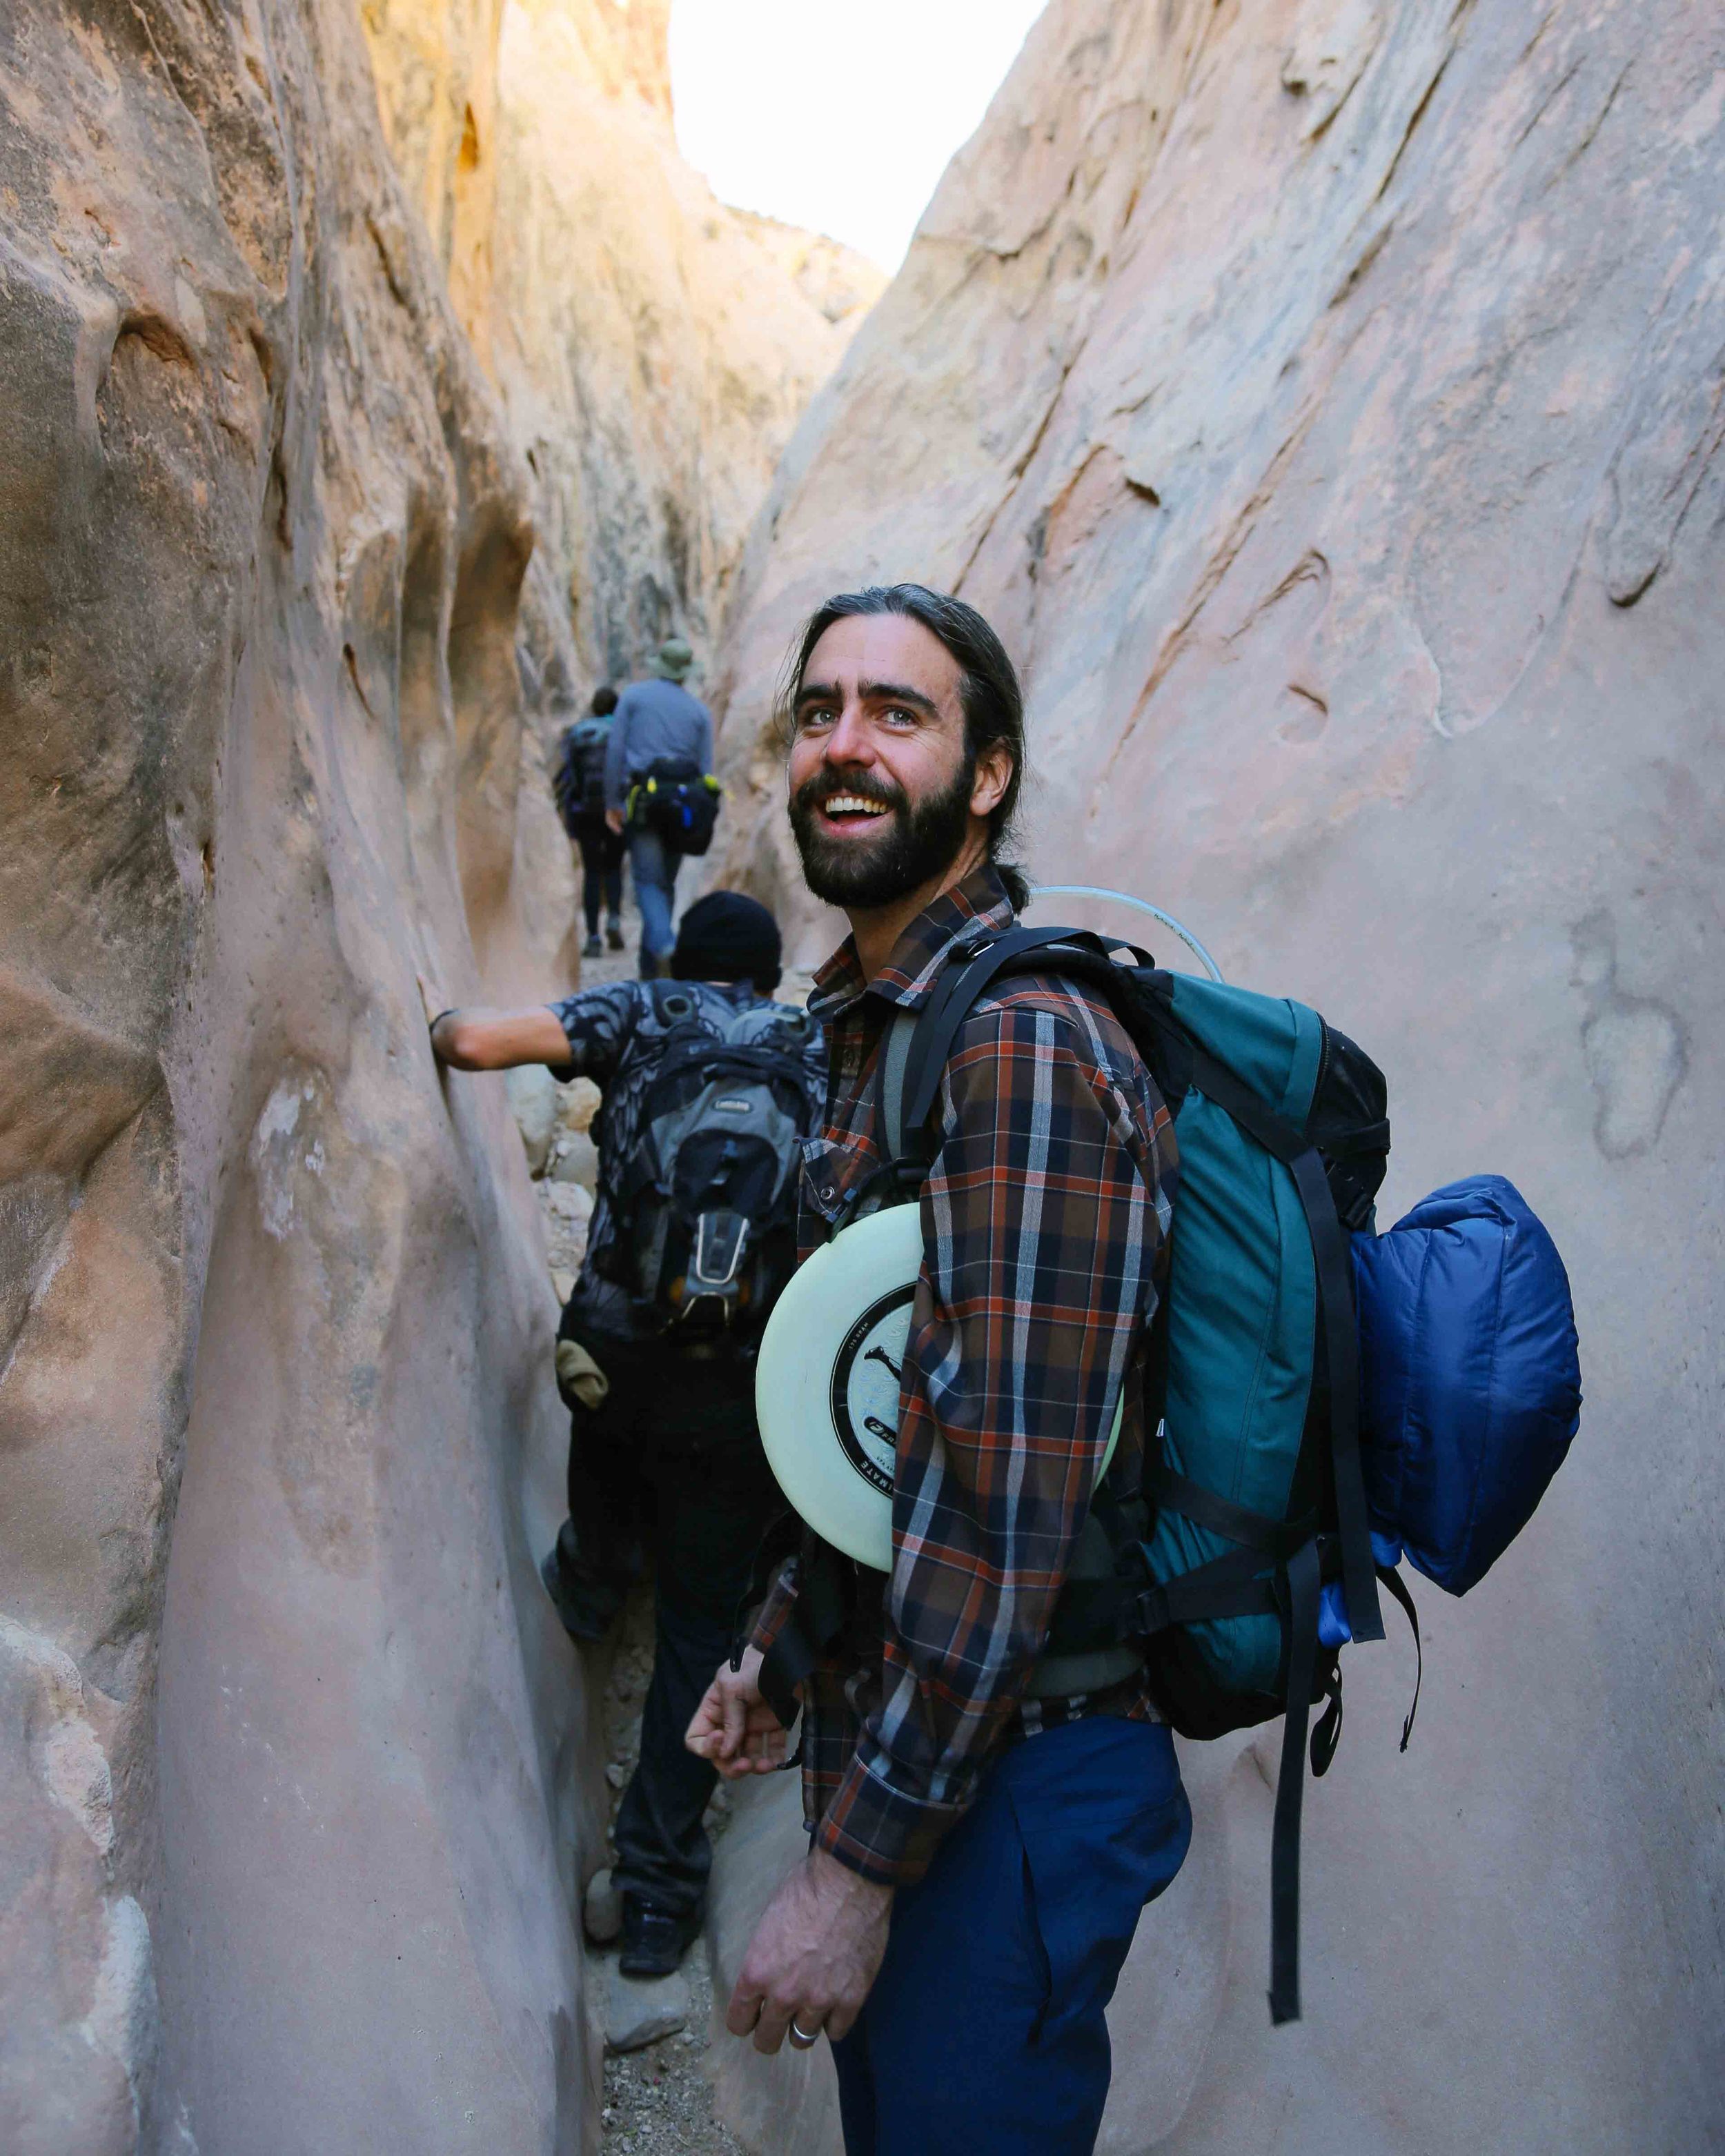
But when Richard is given the choice between rock-hopping and pastries for his birthday, he chooses rocks. And tacos! Because nothing motivates you to book it through a canyon or up and down a mountain like the knowledge that tacos are waiting for you at the end.

(Spoiler alert: you'll be getting a taco recipe soon! In the meantime, scroll through the photos below and read on for notes on our slot canyon adventure.)

DISTANCE (bell & little wild horse canyon loop) ~ 8.65 MILES

Trail type(s) - exposed/rocky/slot canyon/possible shallow pools

ELEVATION GAIN/LOSS - +721 feet

LOWEST ELEVATION (trailhead) - 4,952 FEET

HIGHEST ELEVATION - 5,673 FEET

DIFFICULTY - MODERATE (involves some class 3 climbing)

WATER SOURCE - none (nearest tap water - goblin valley state park)
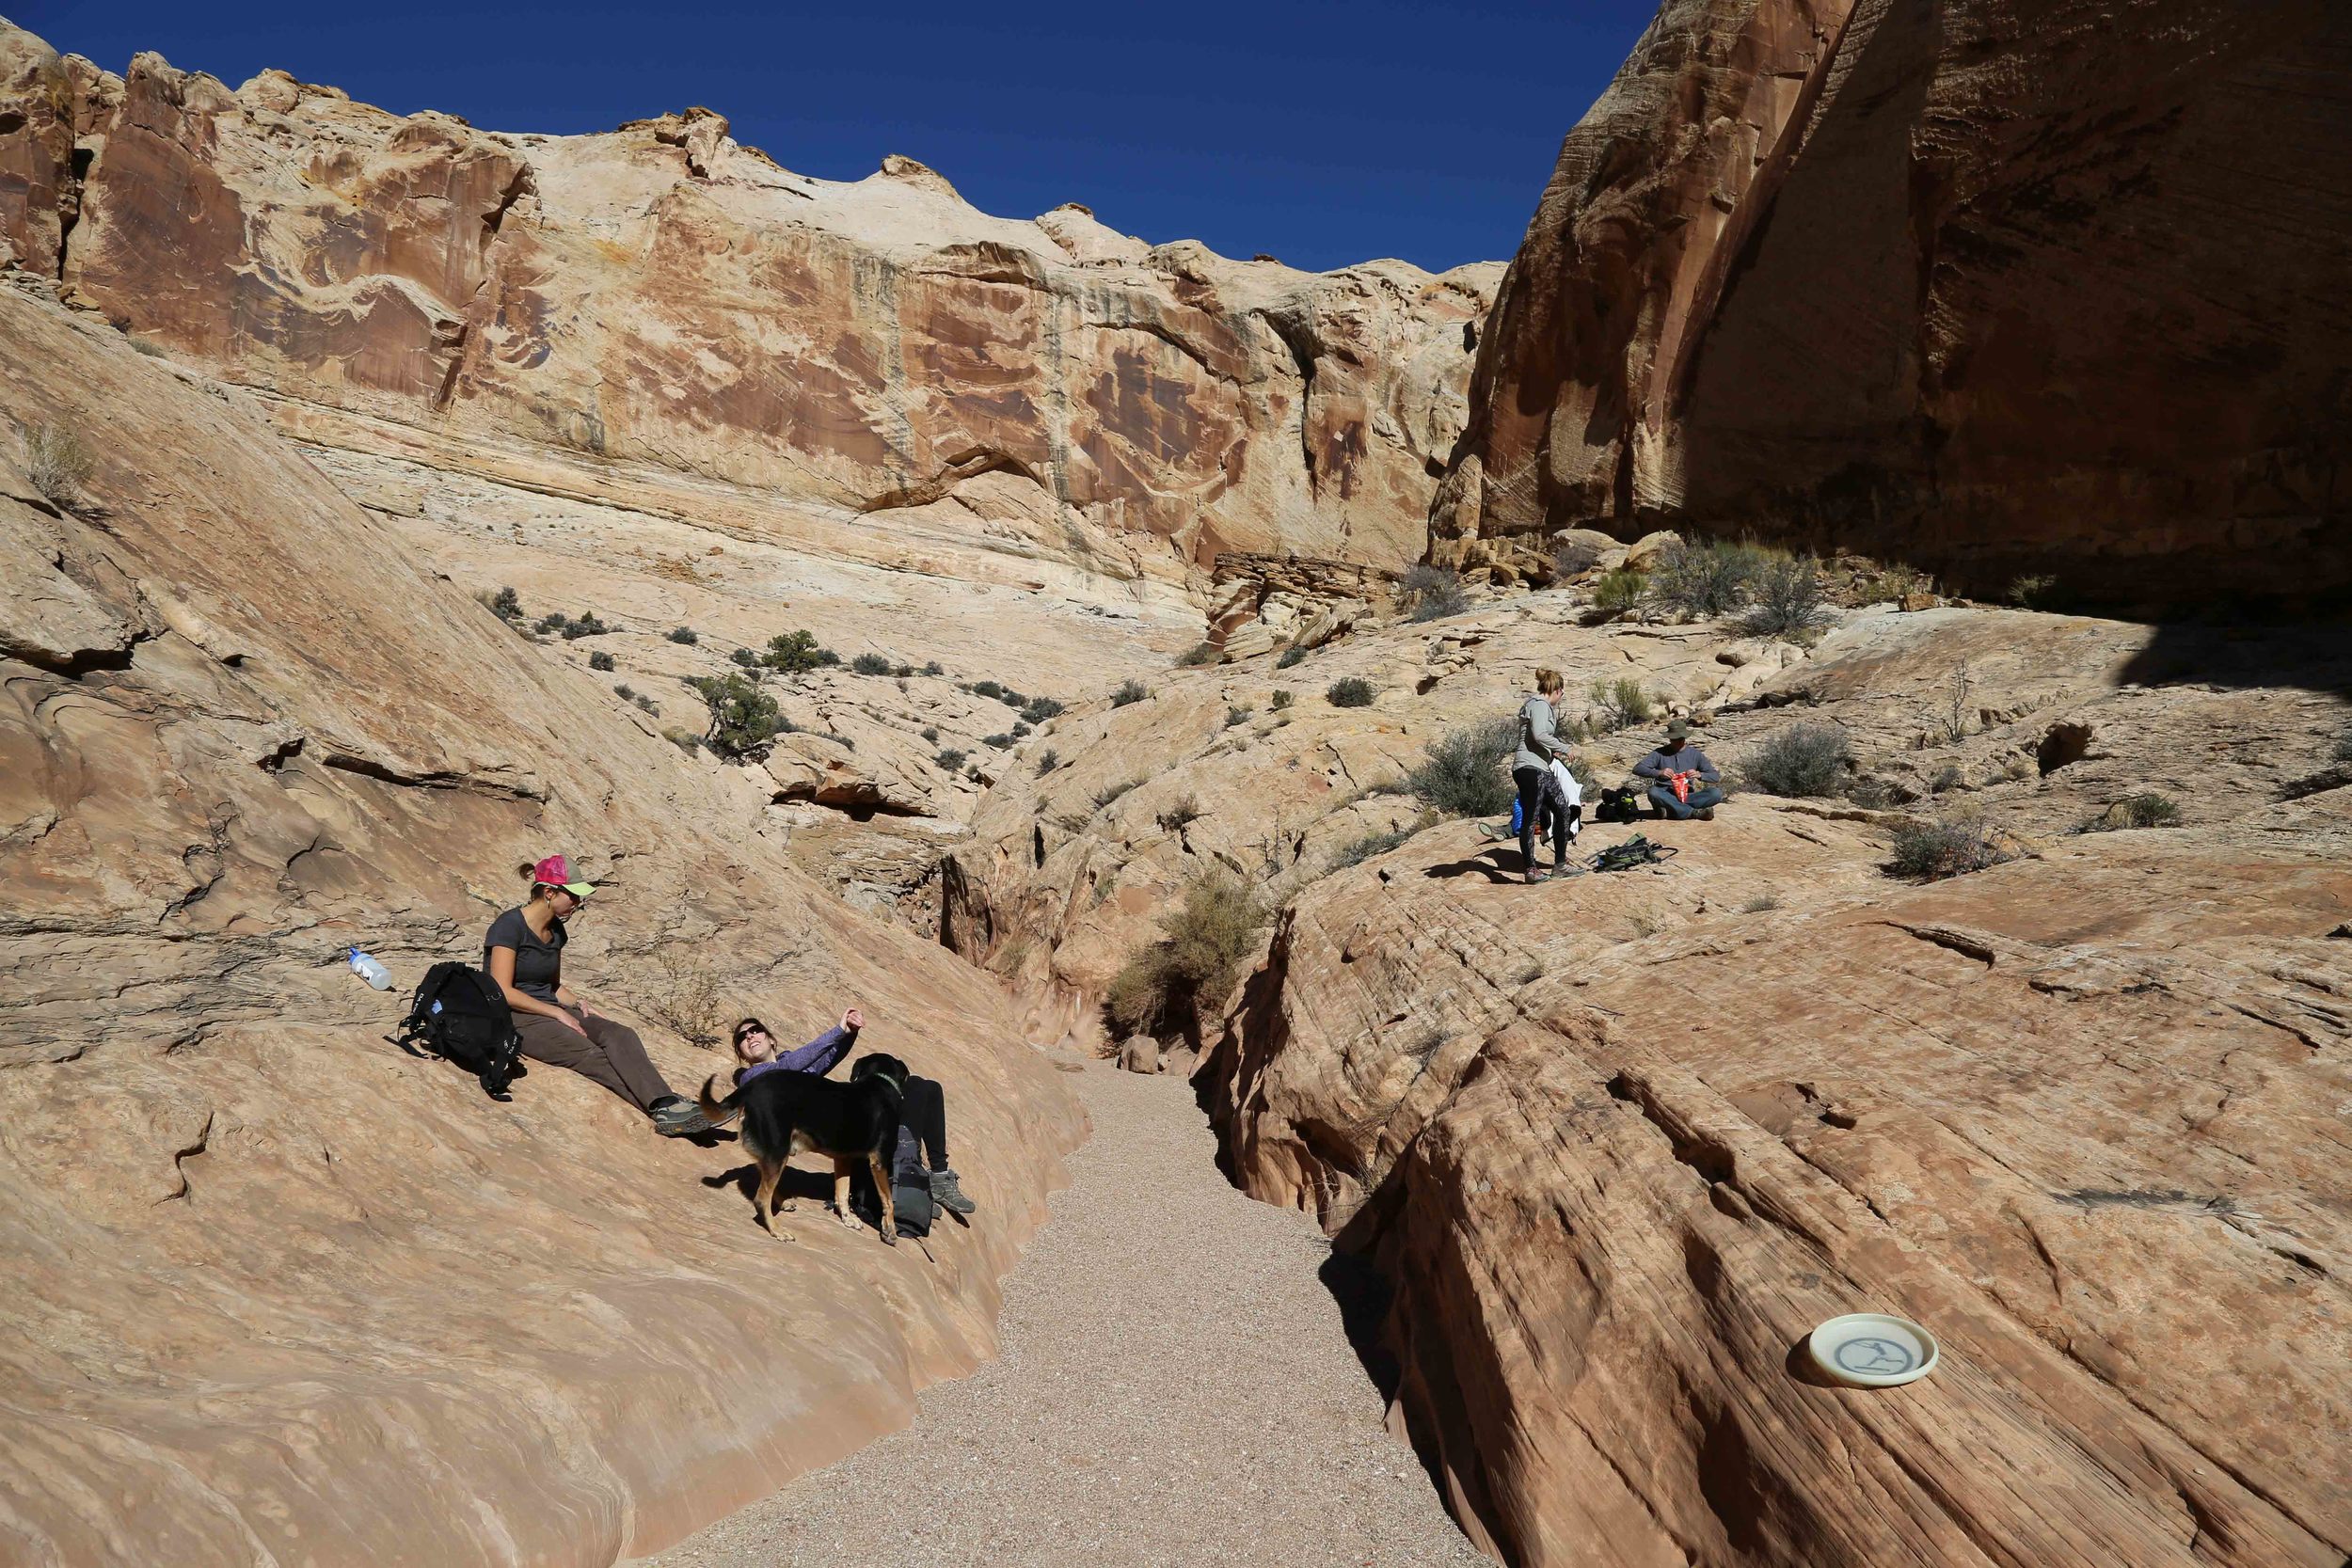
DOG-FRIENDLY - YES

PARKING FEE - N/A

IDEAL SEASON(s) TO hike/CAMP - spring, fall

Closest RANGER STATION - goblin valley state park

CLOSEST DEVELOPED CAMPING - GOBLIN VALLEY STATE PARK


TRAIL OVERVIEW:

Some scrambling/climbing is required, though it can be completed without aid.

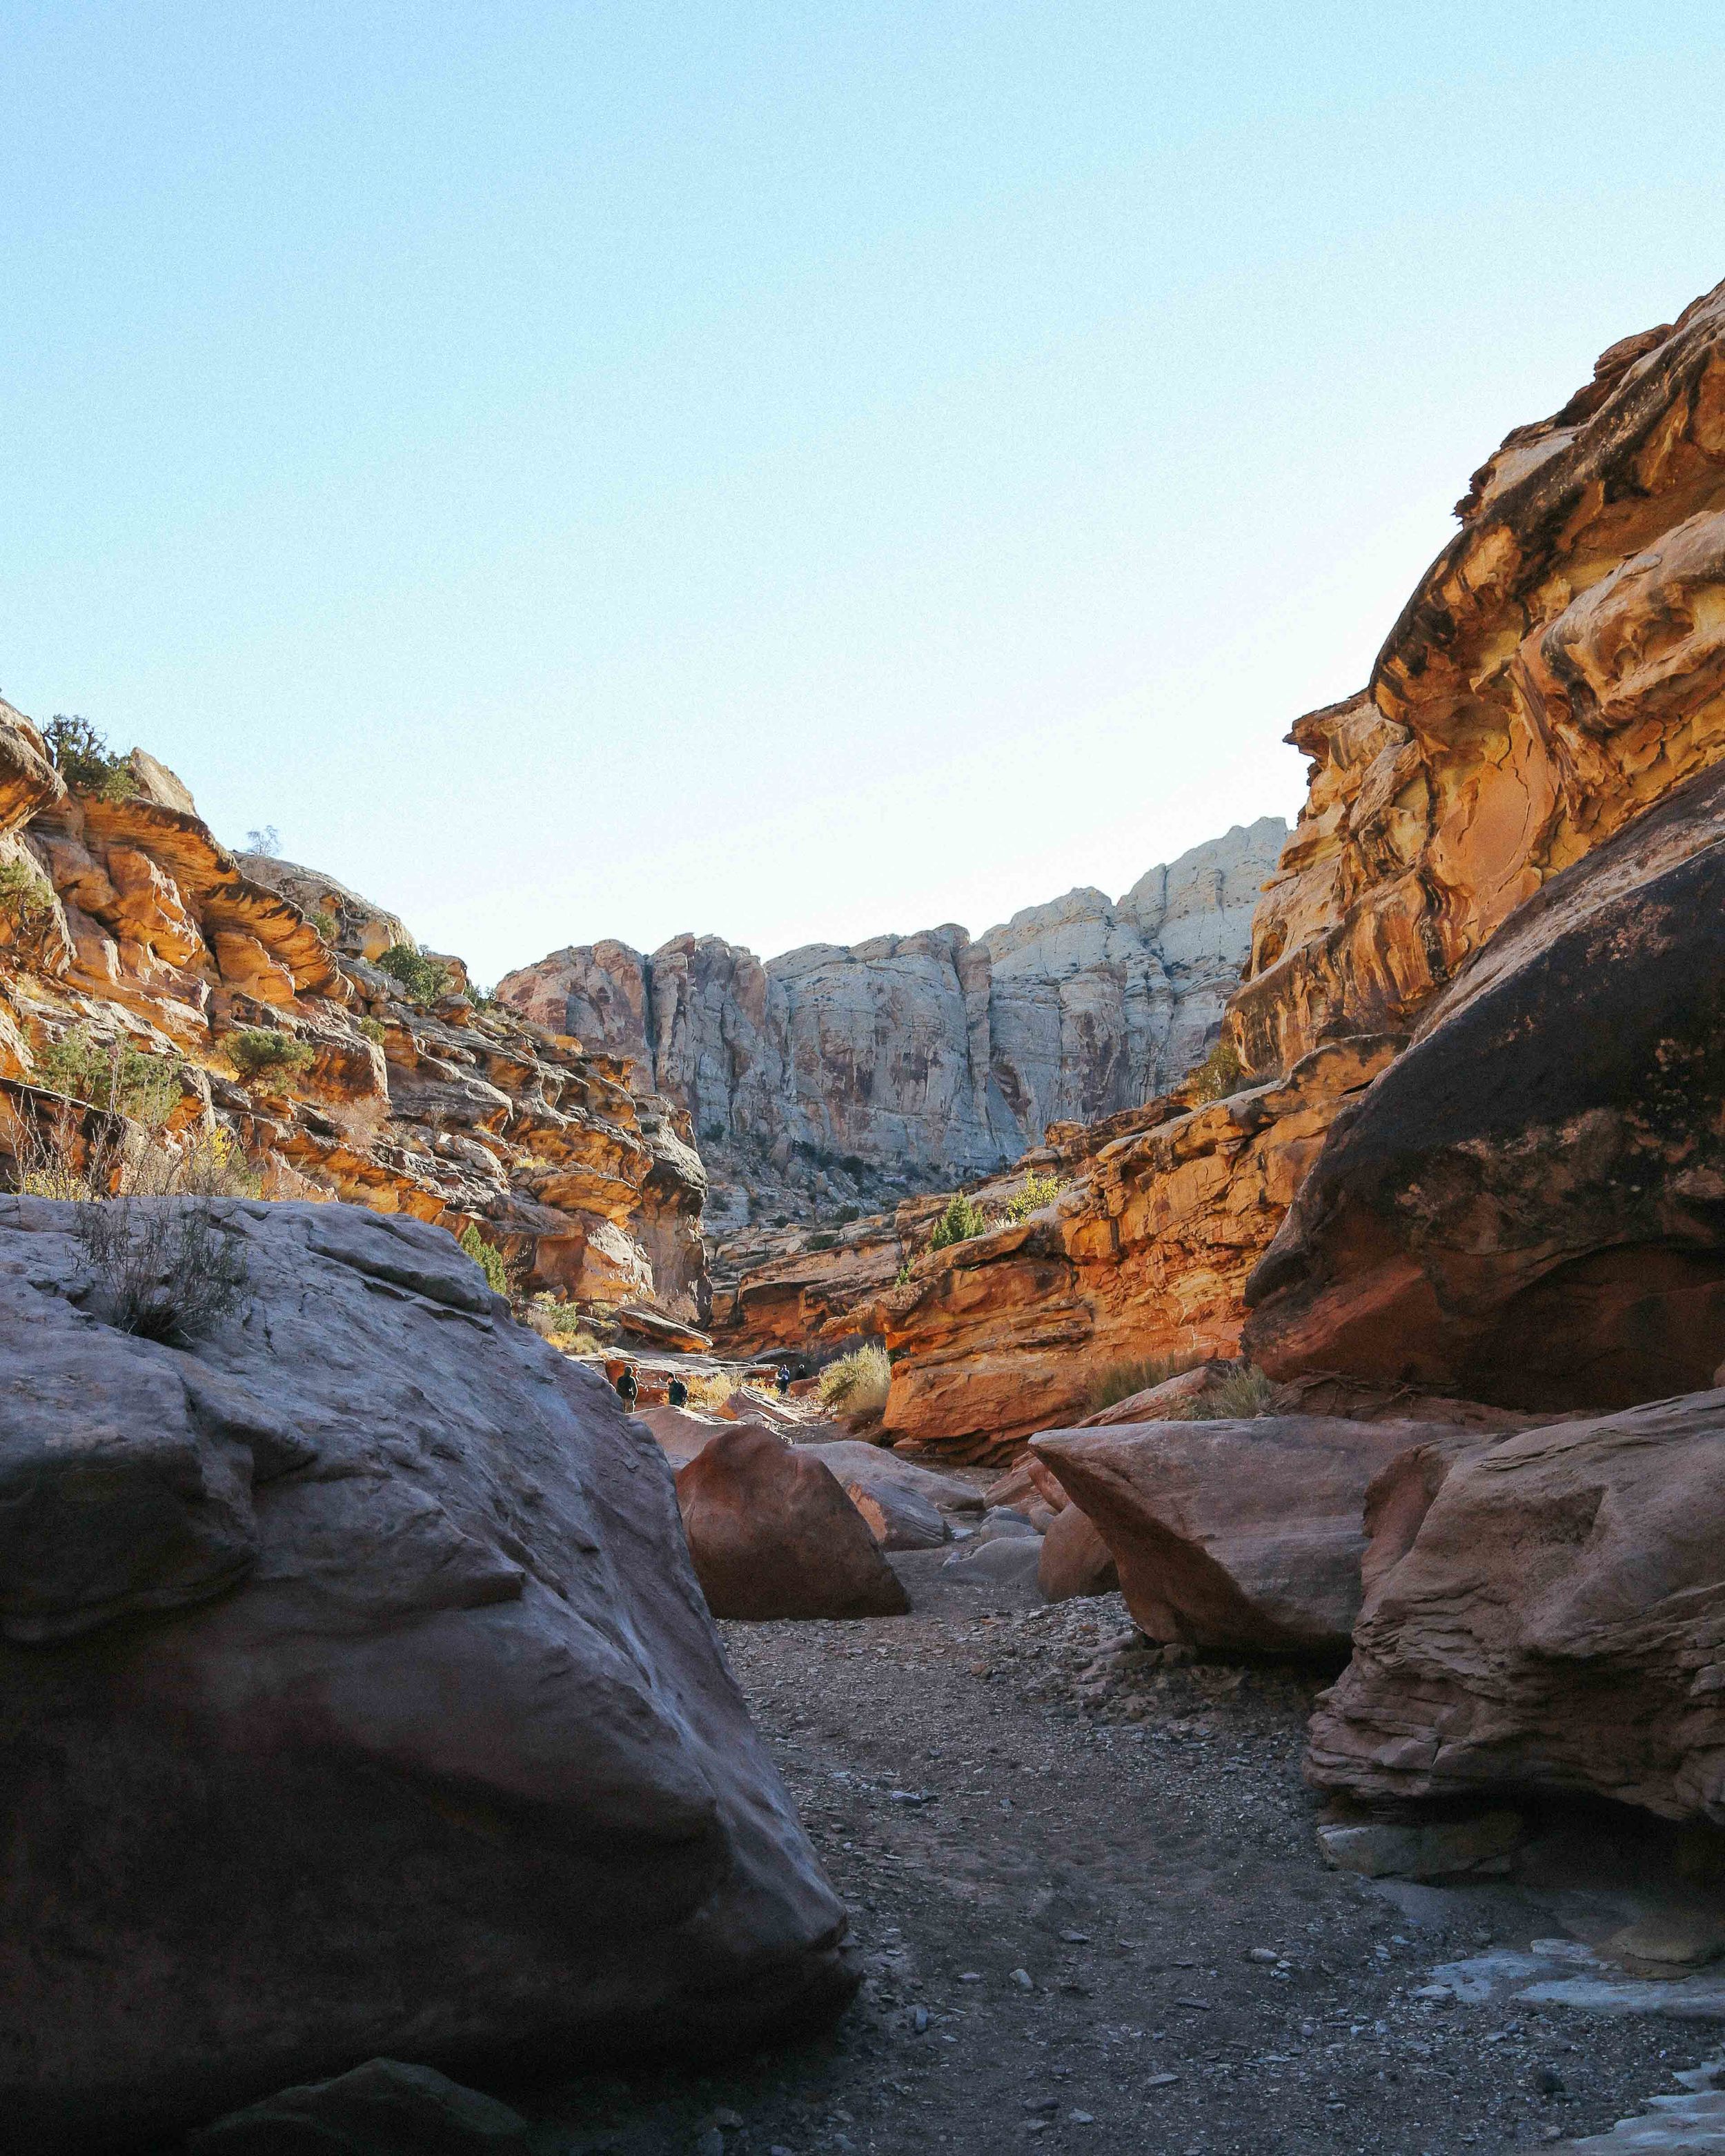
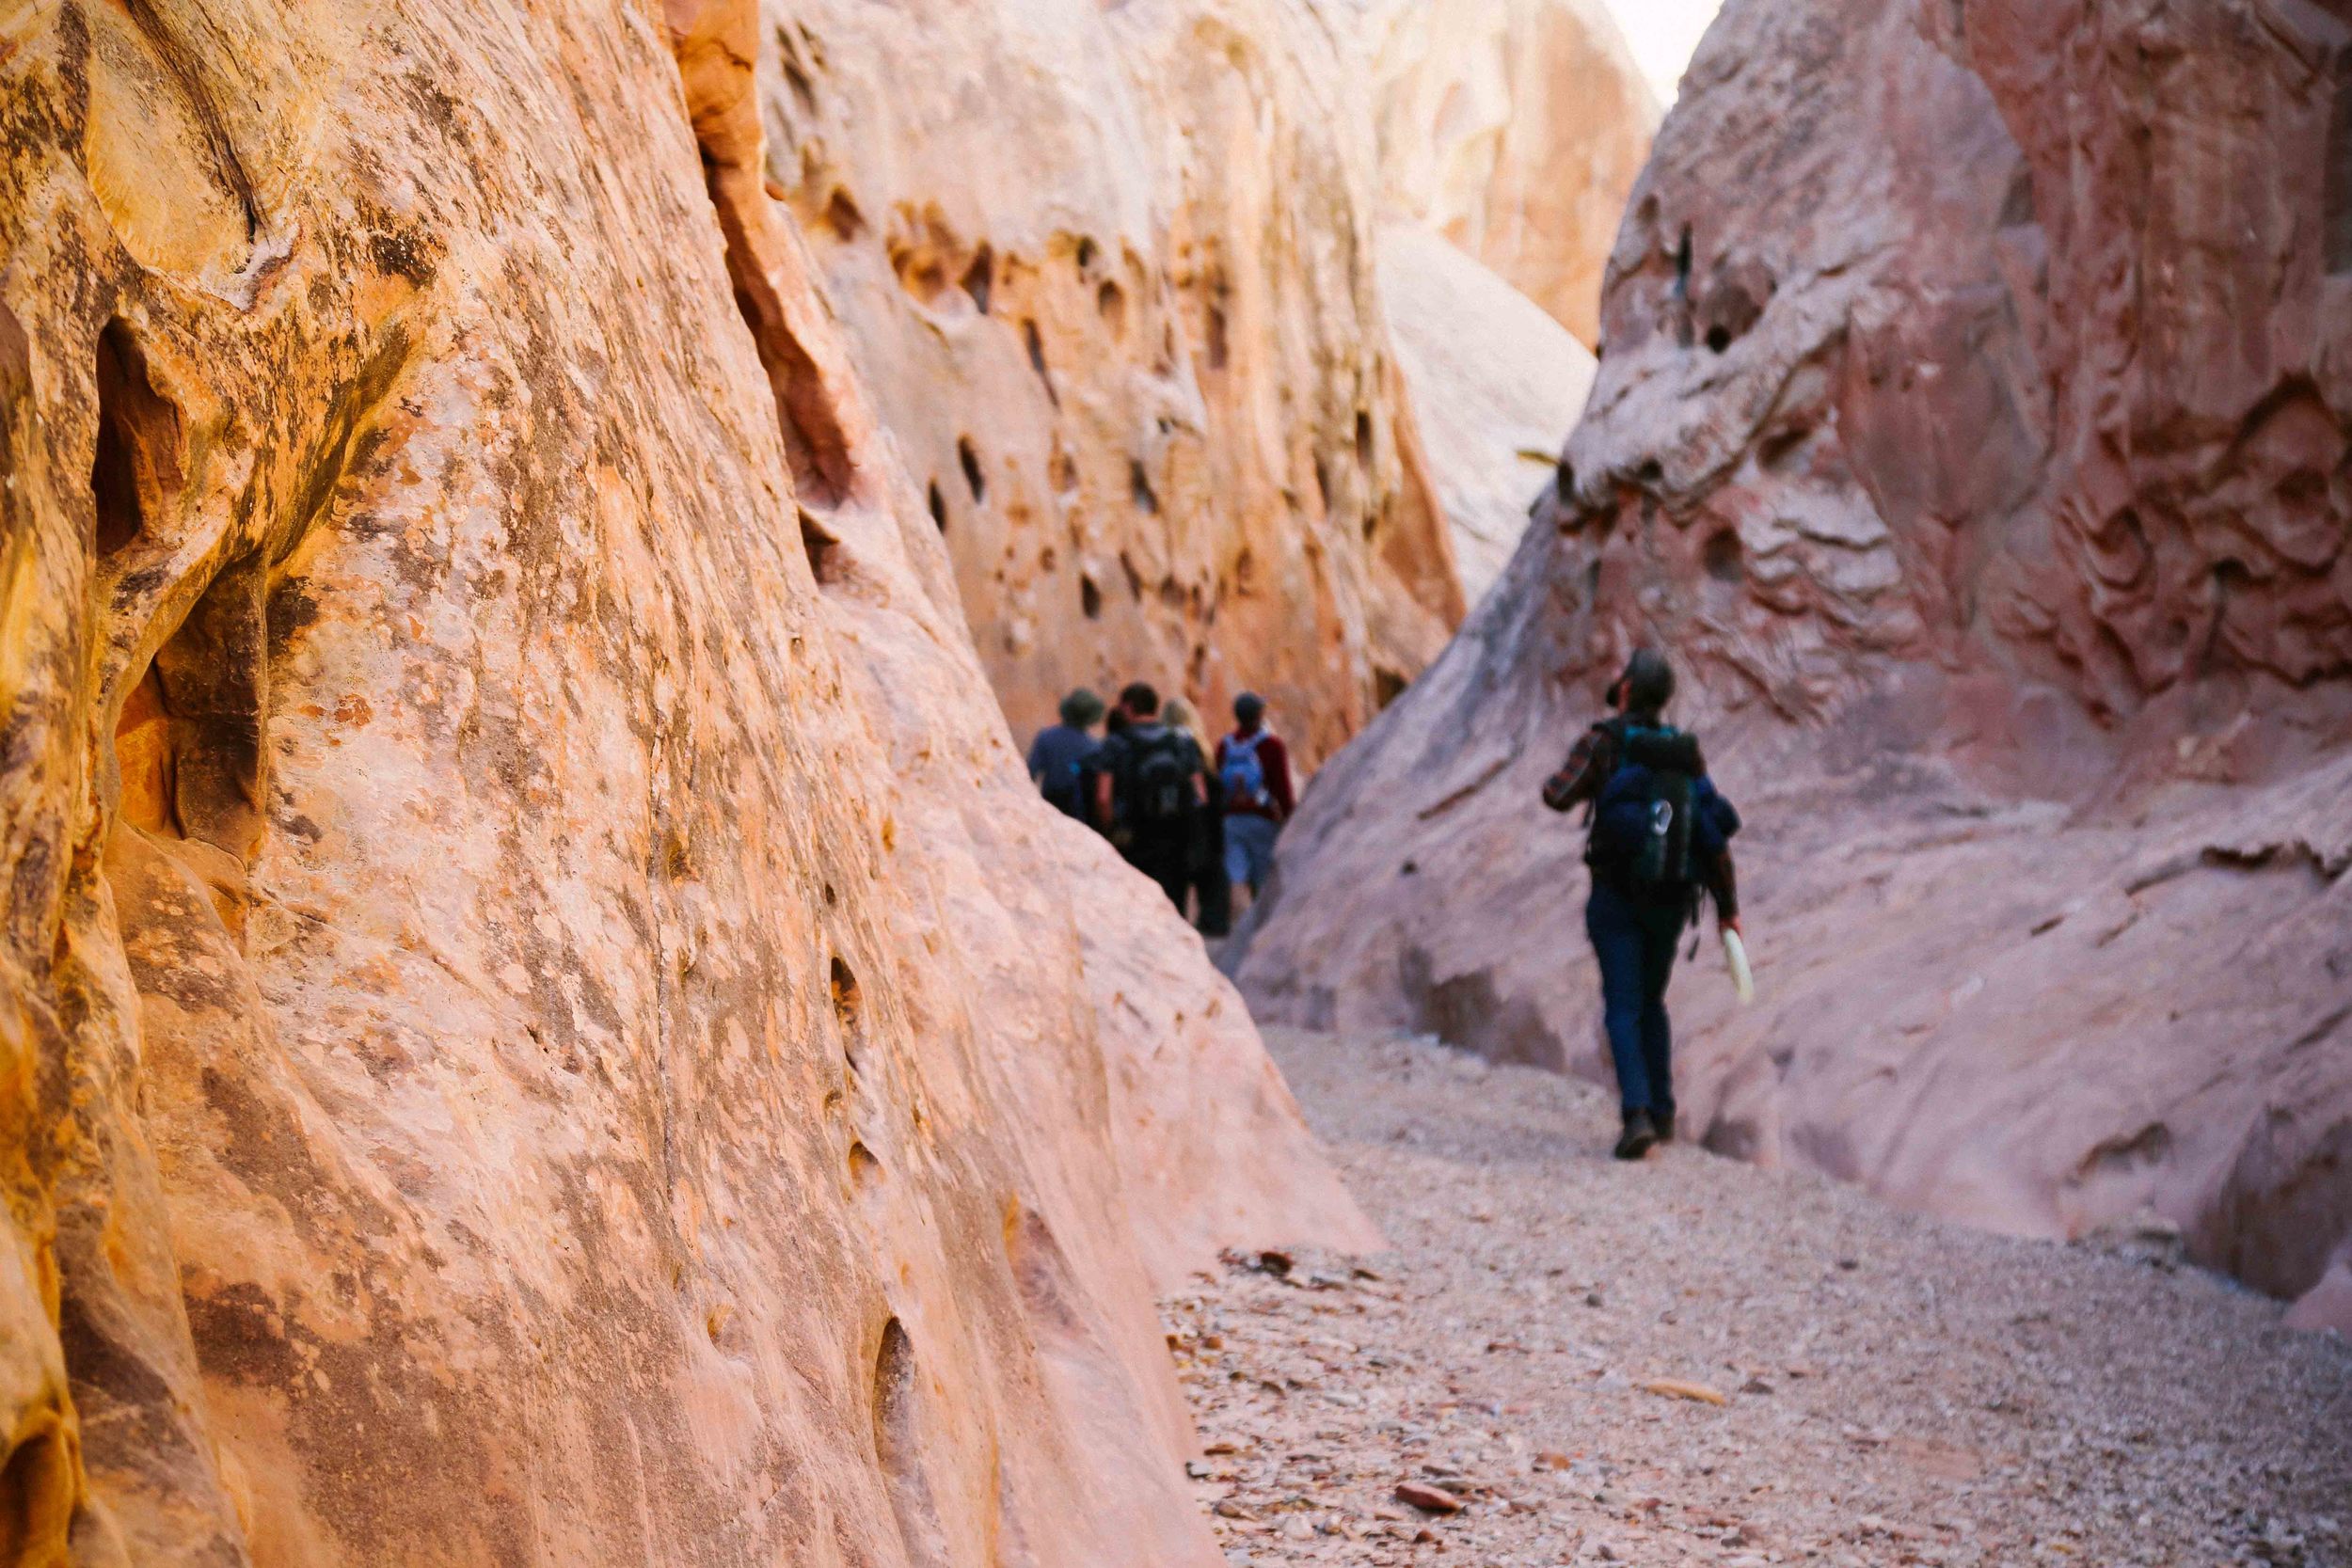
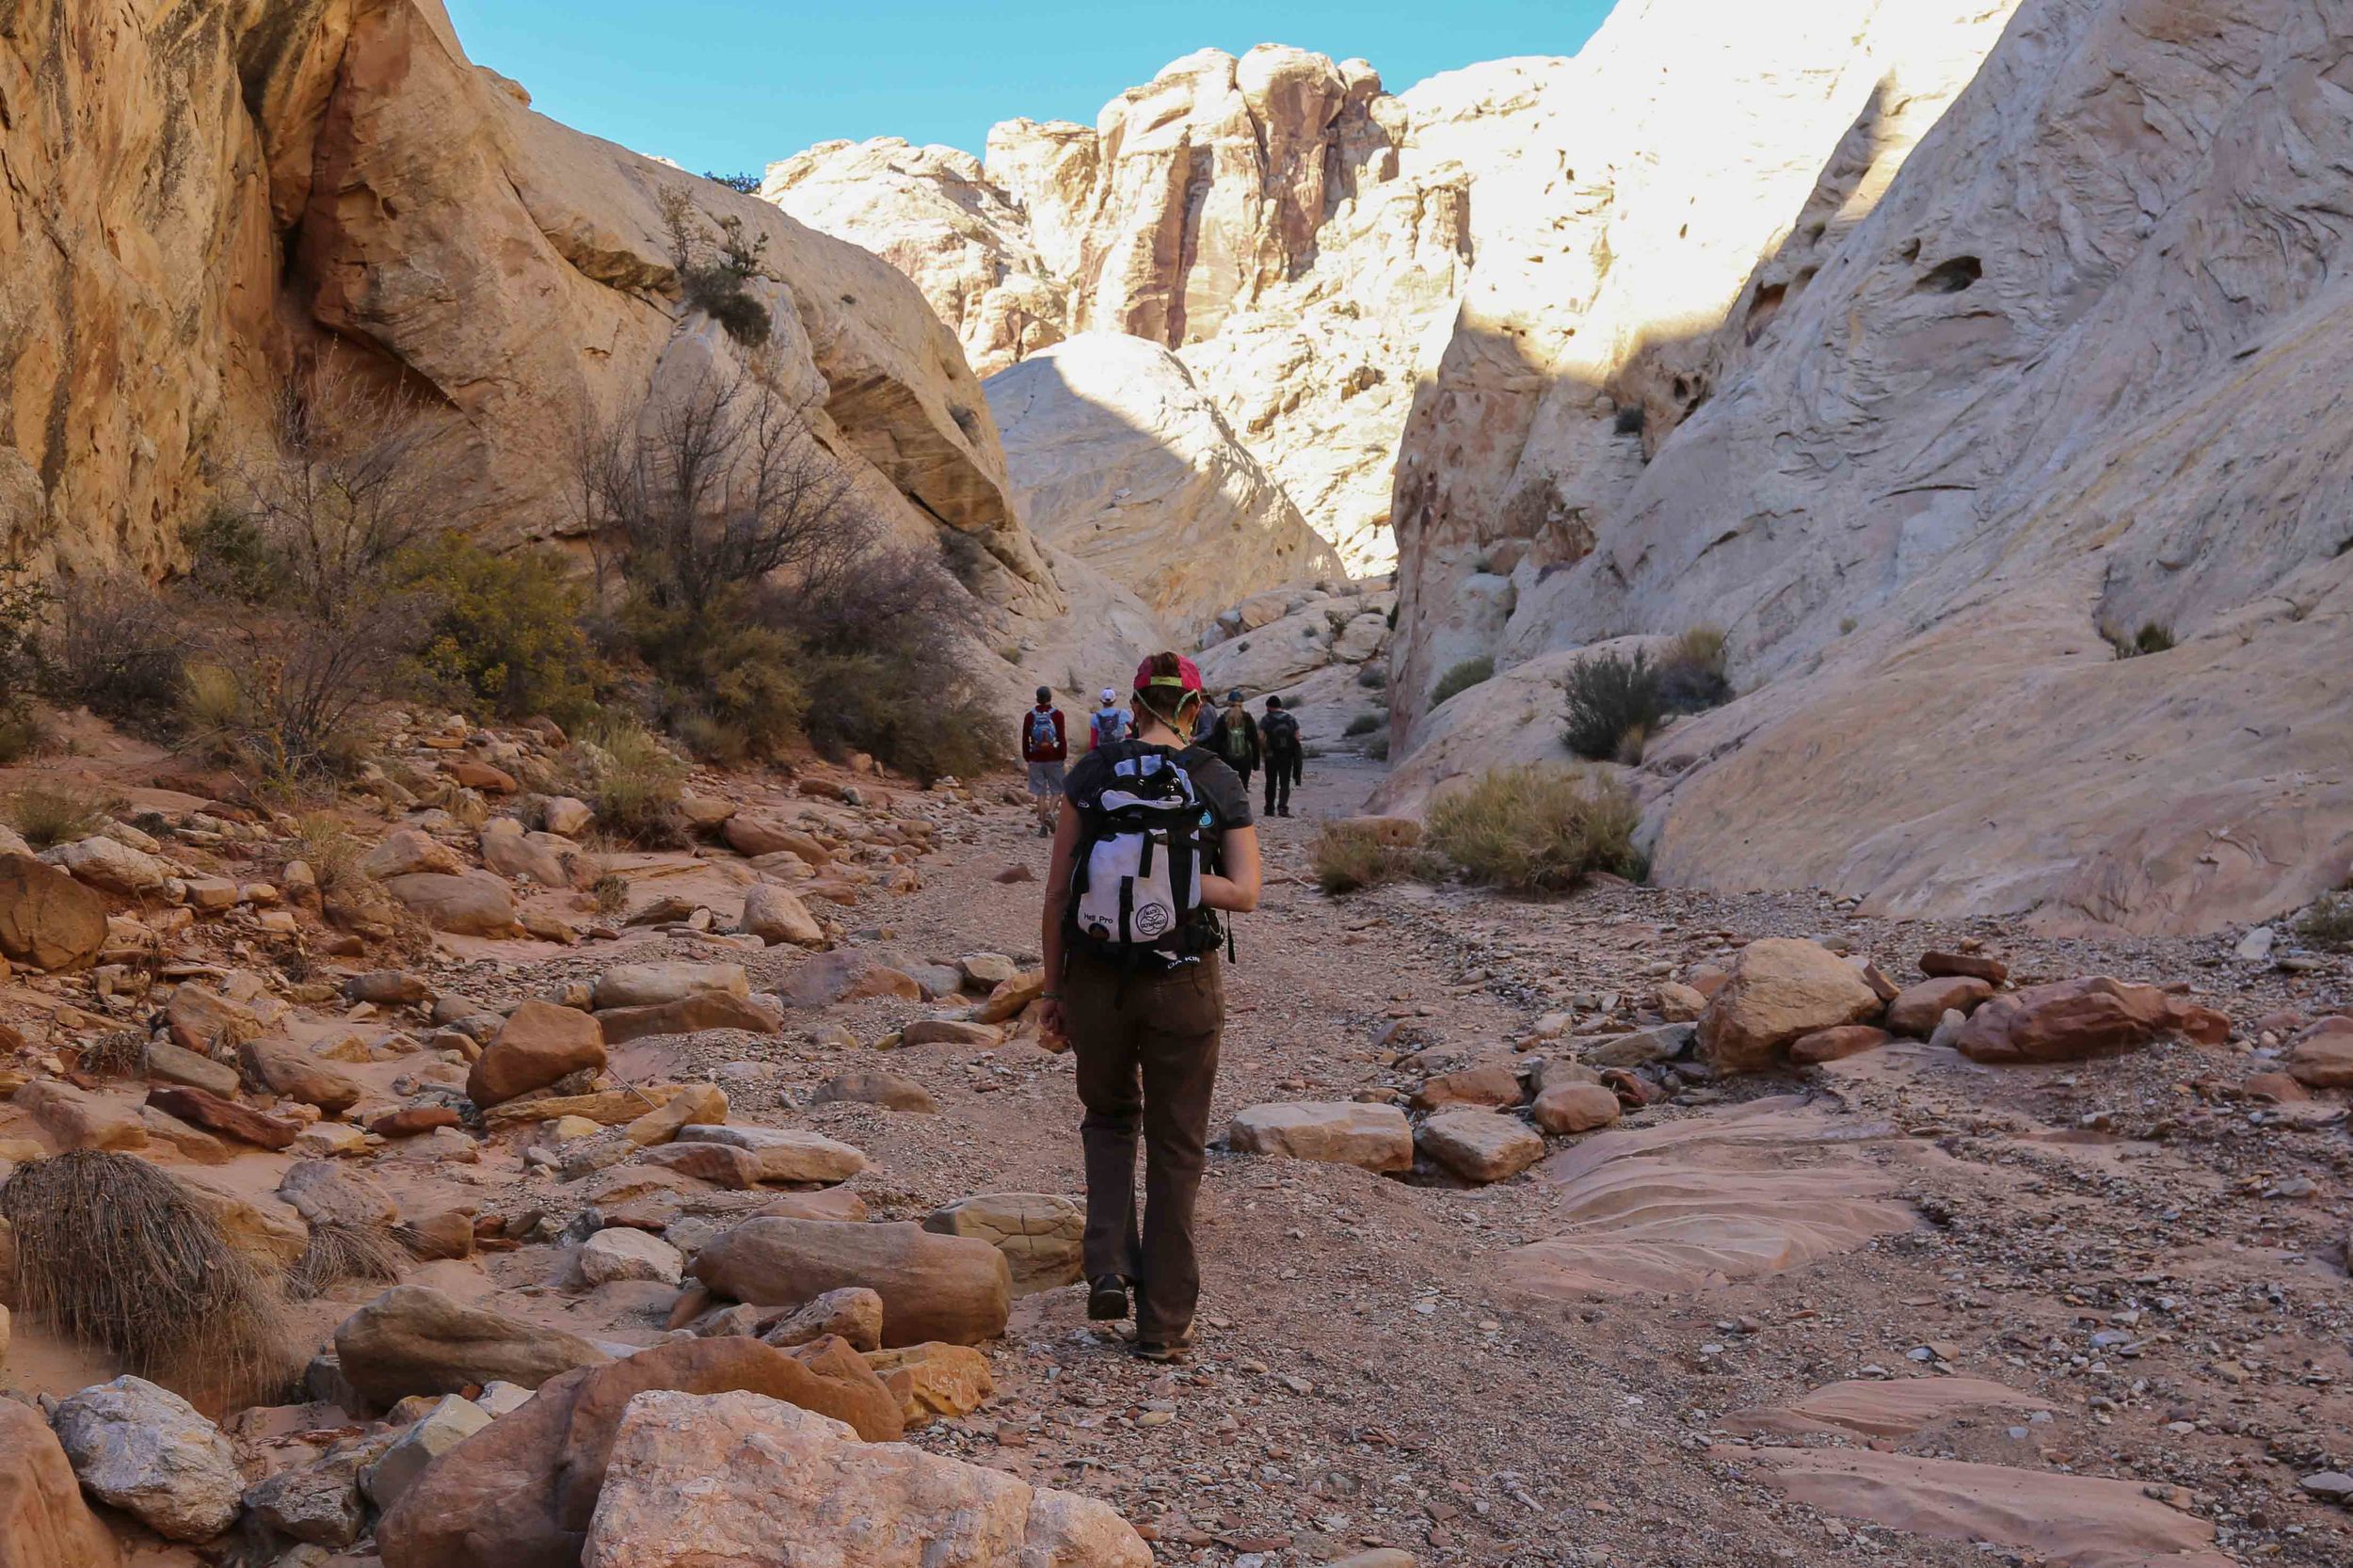
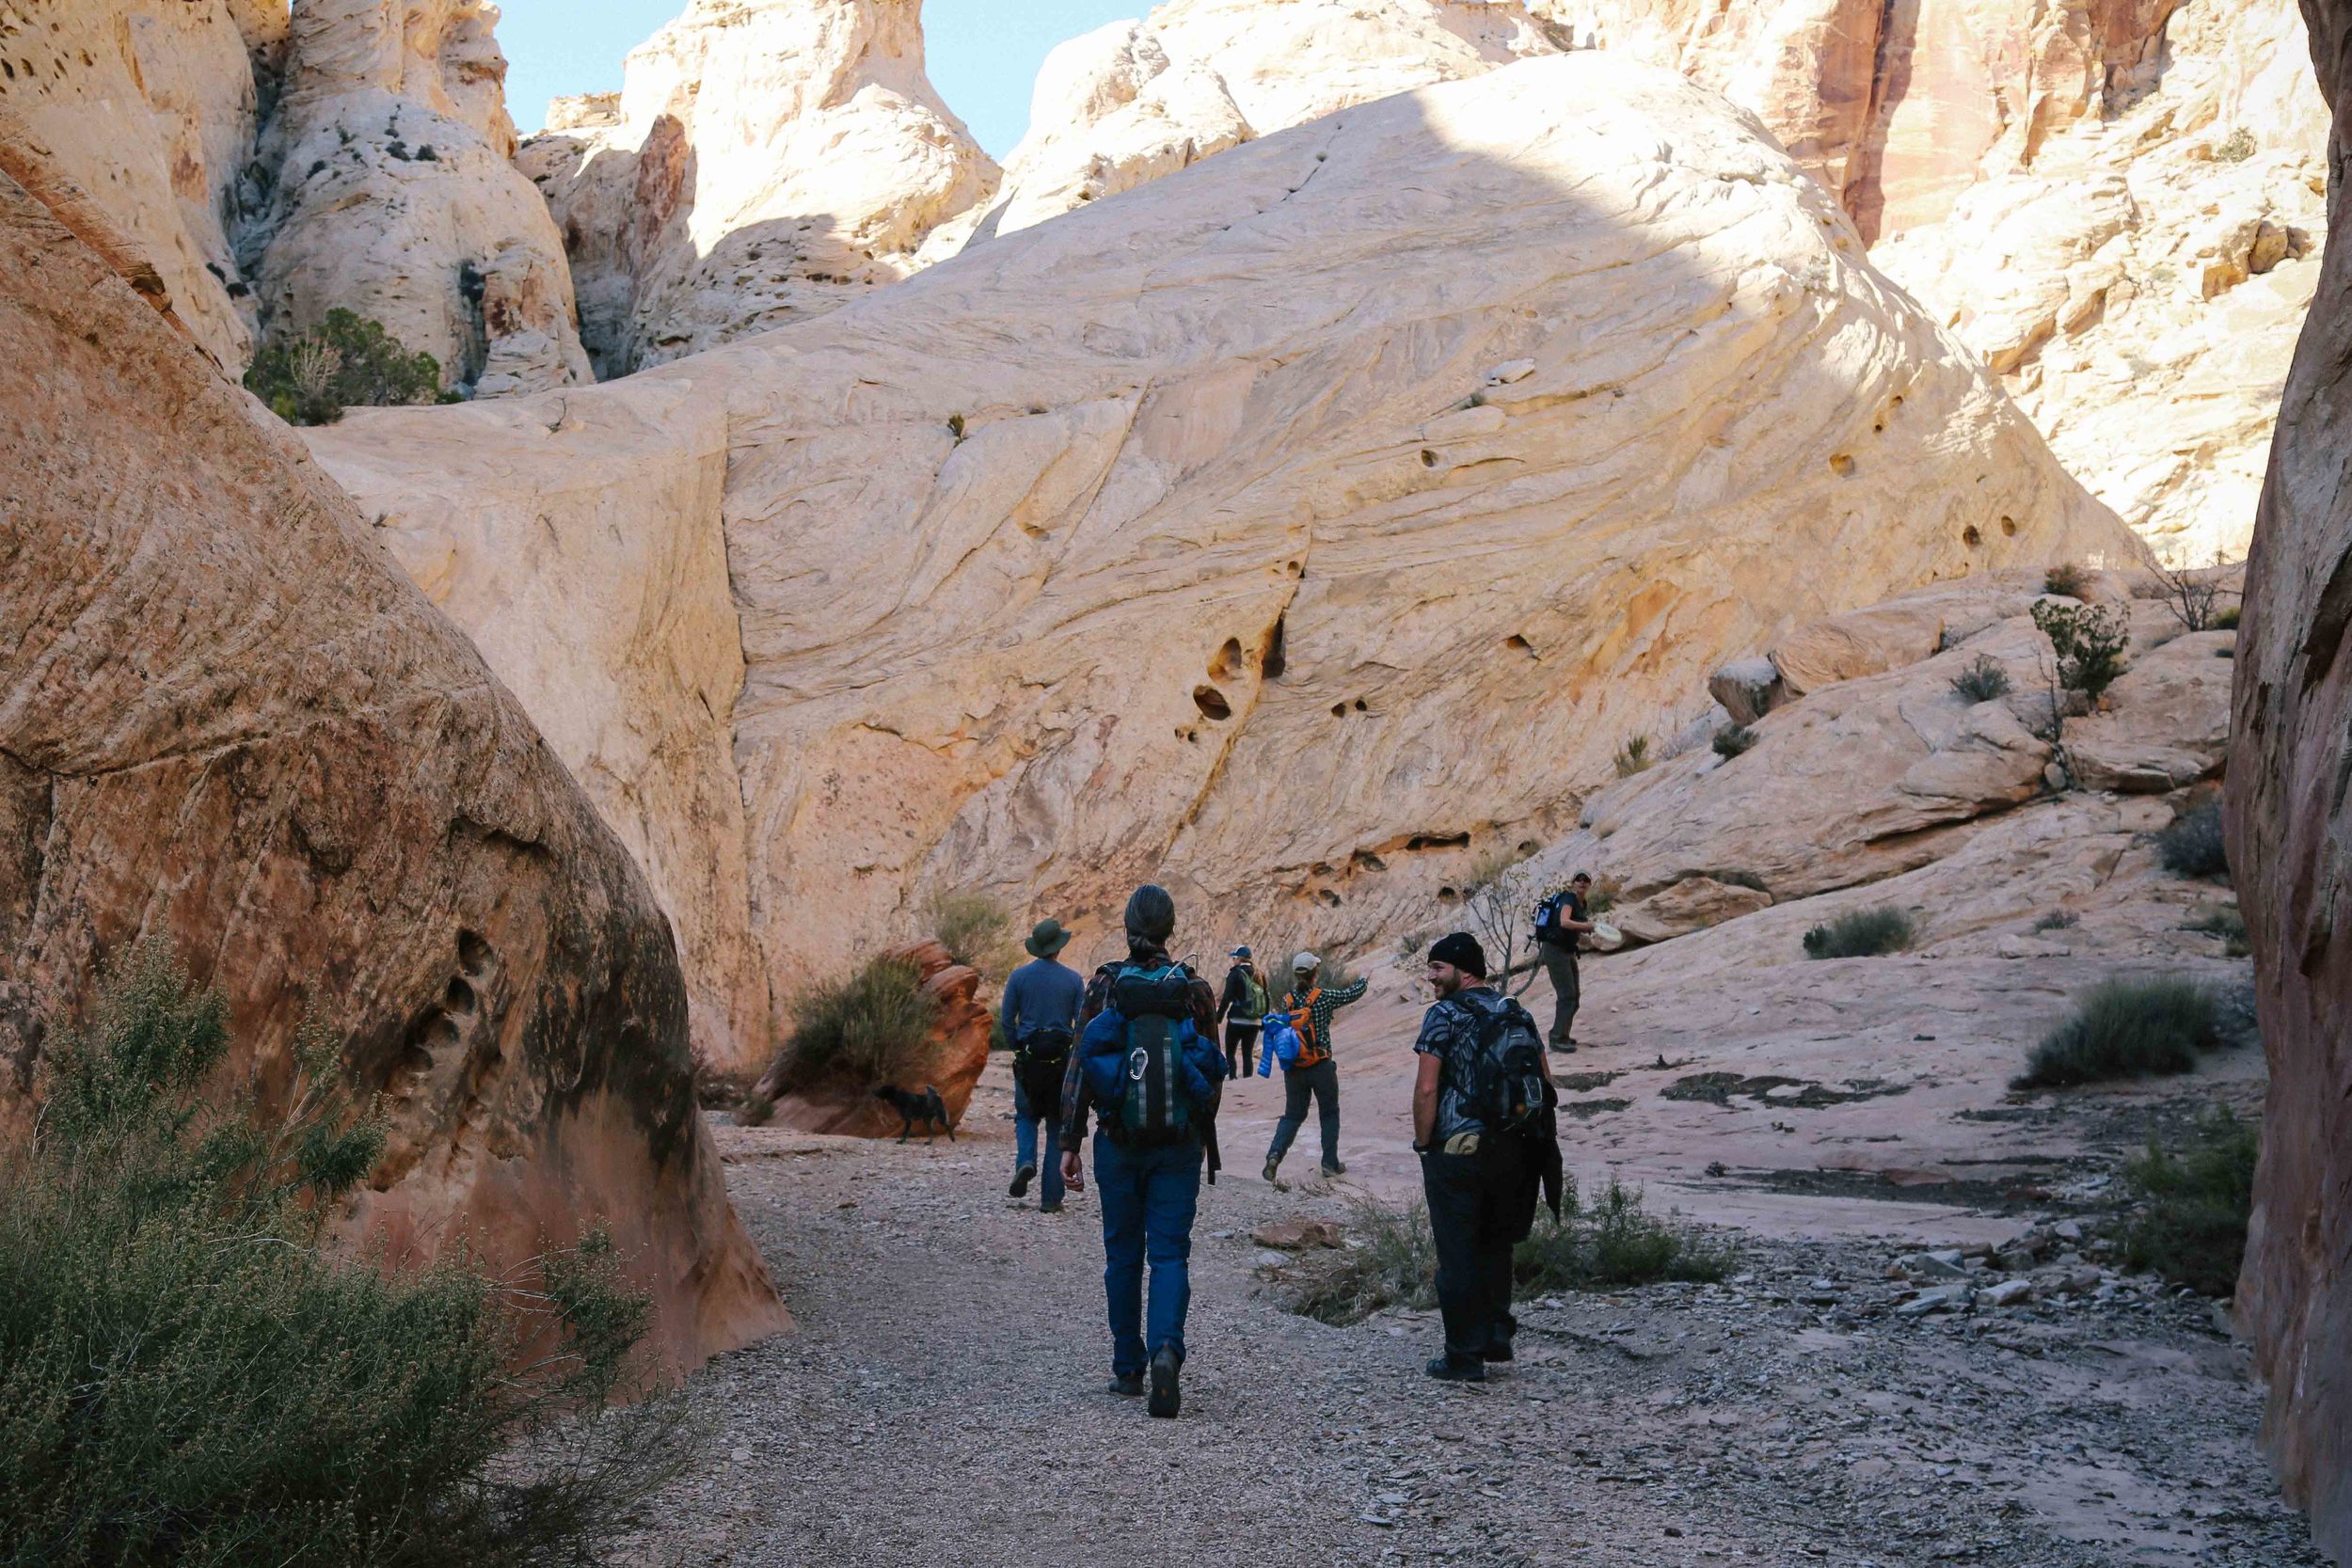
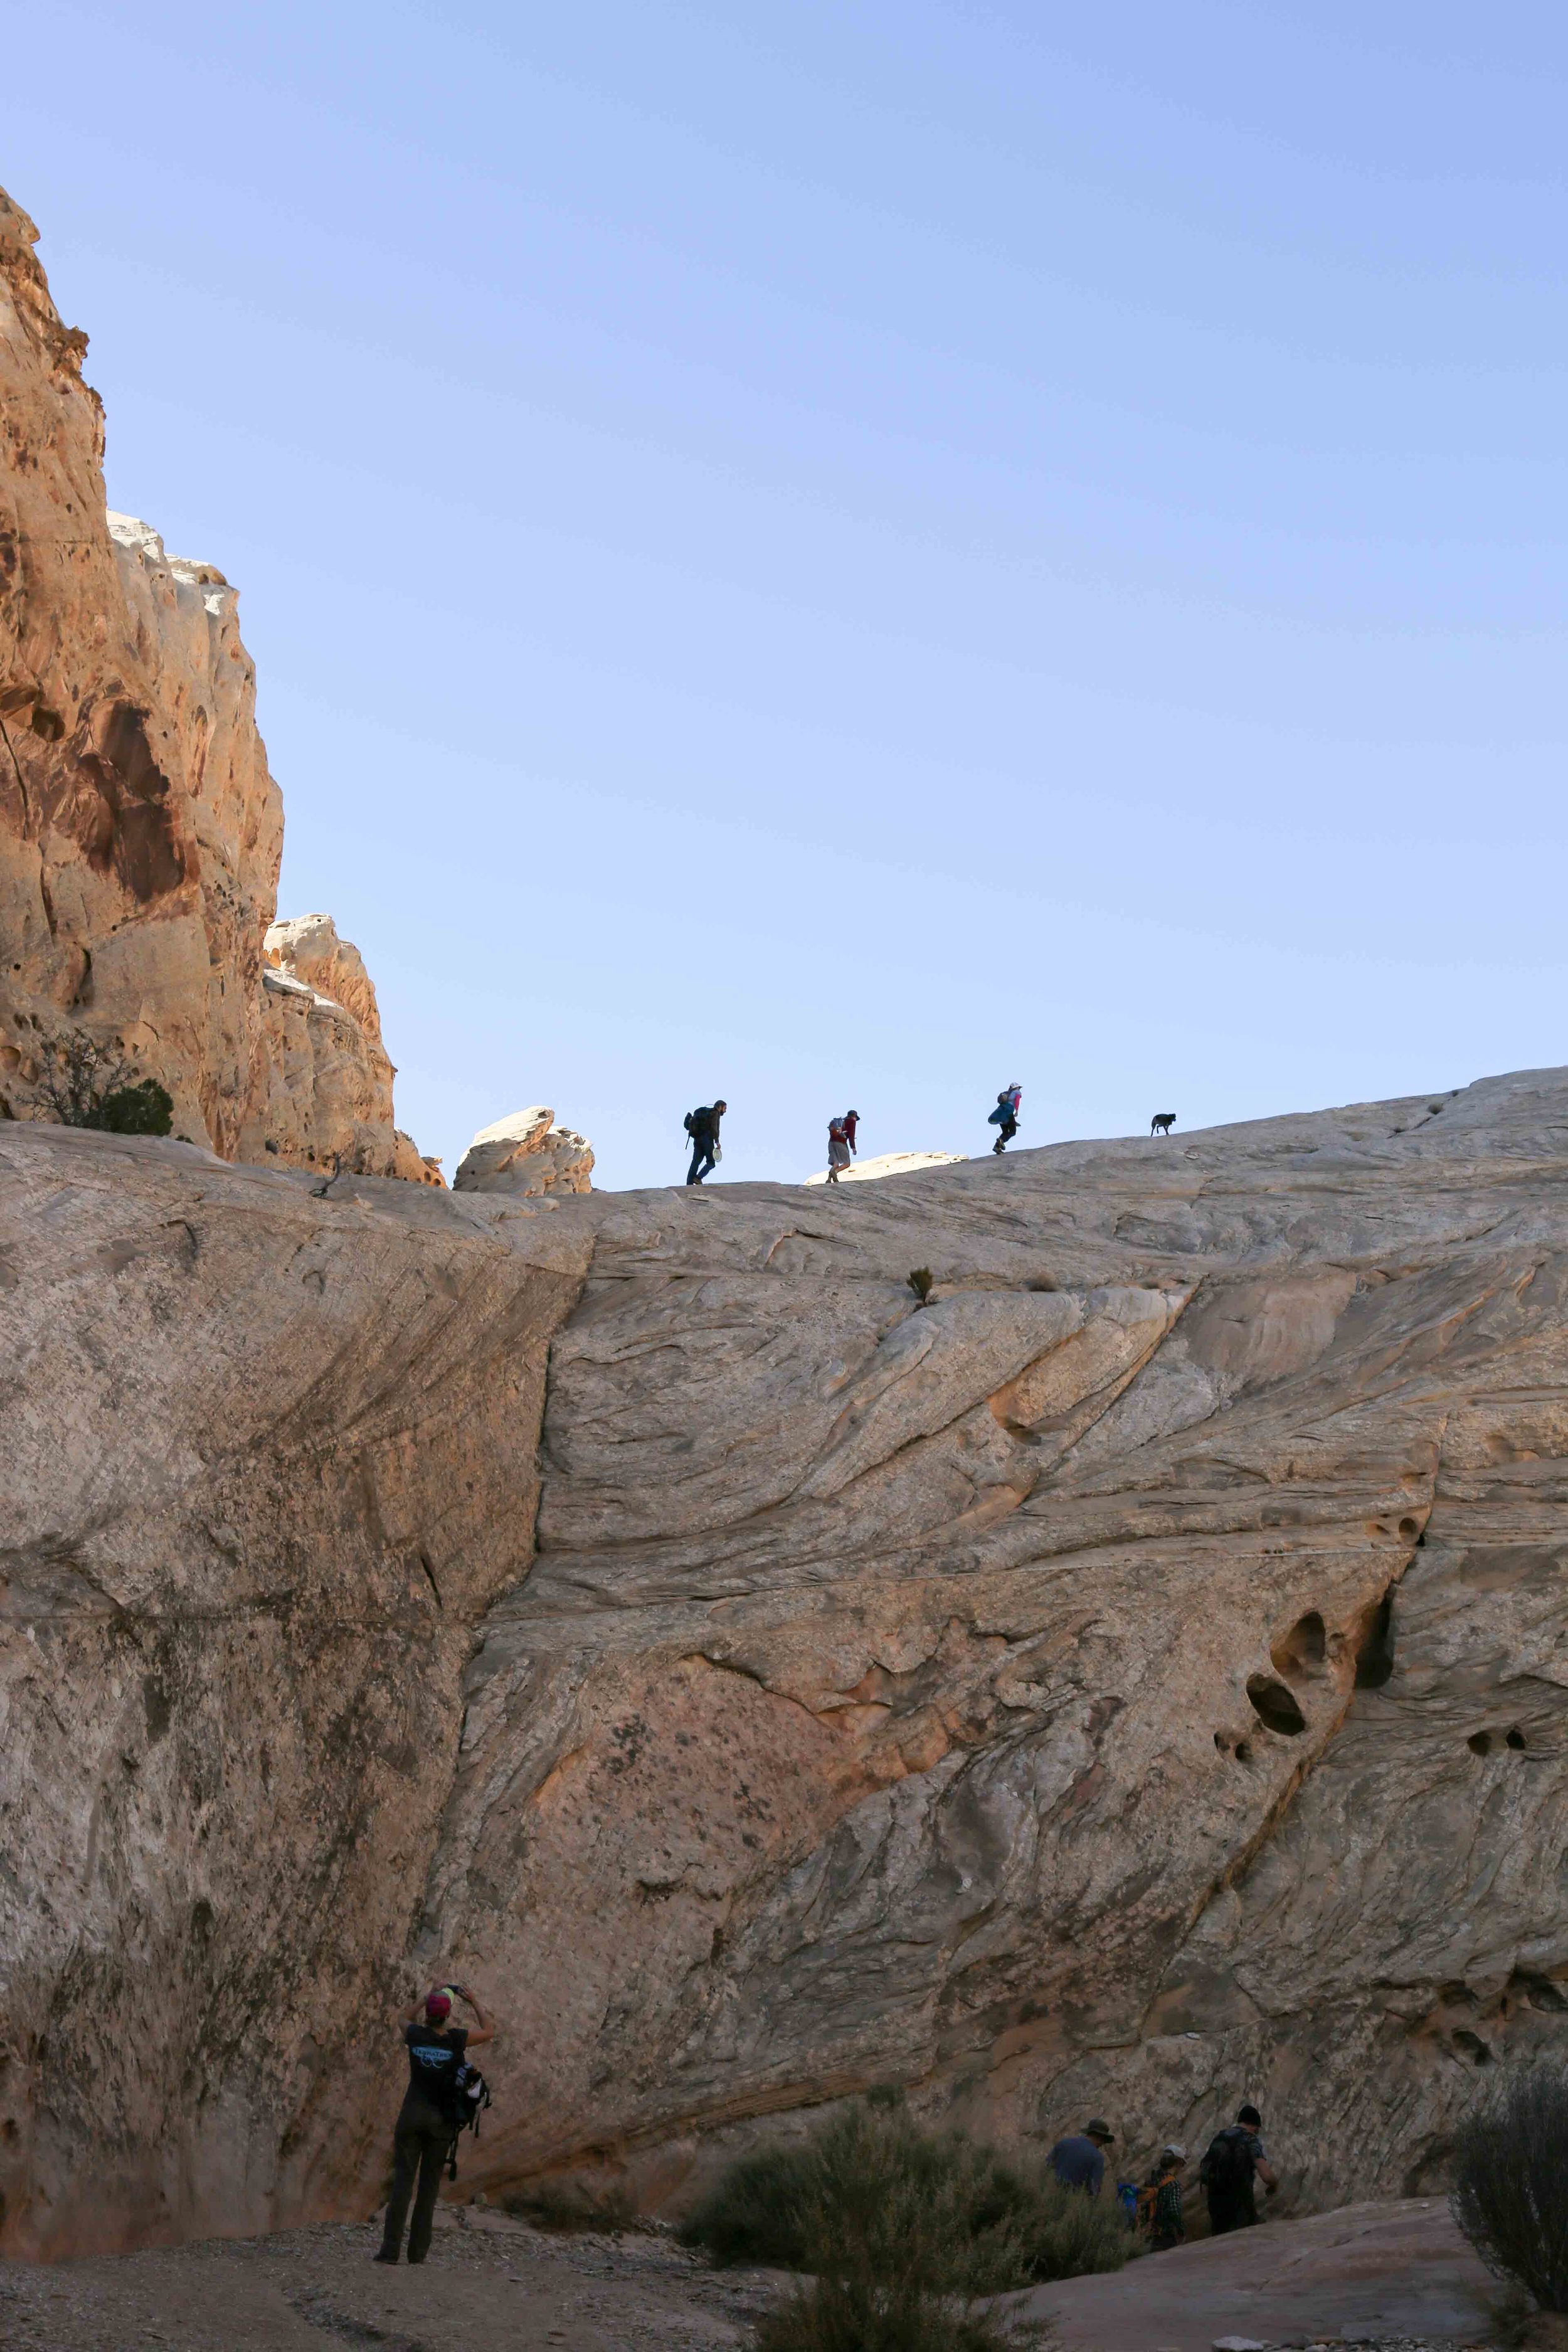
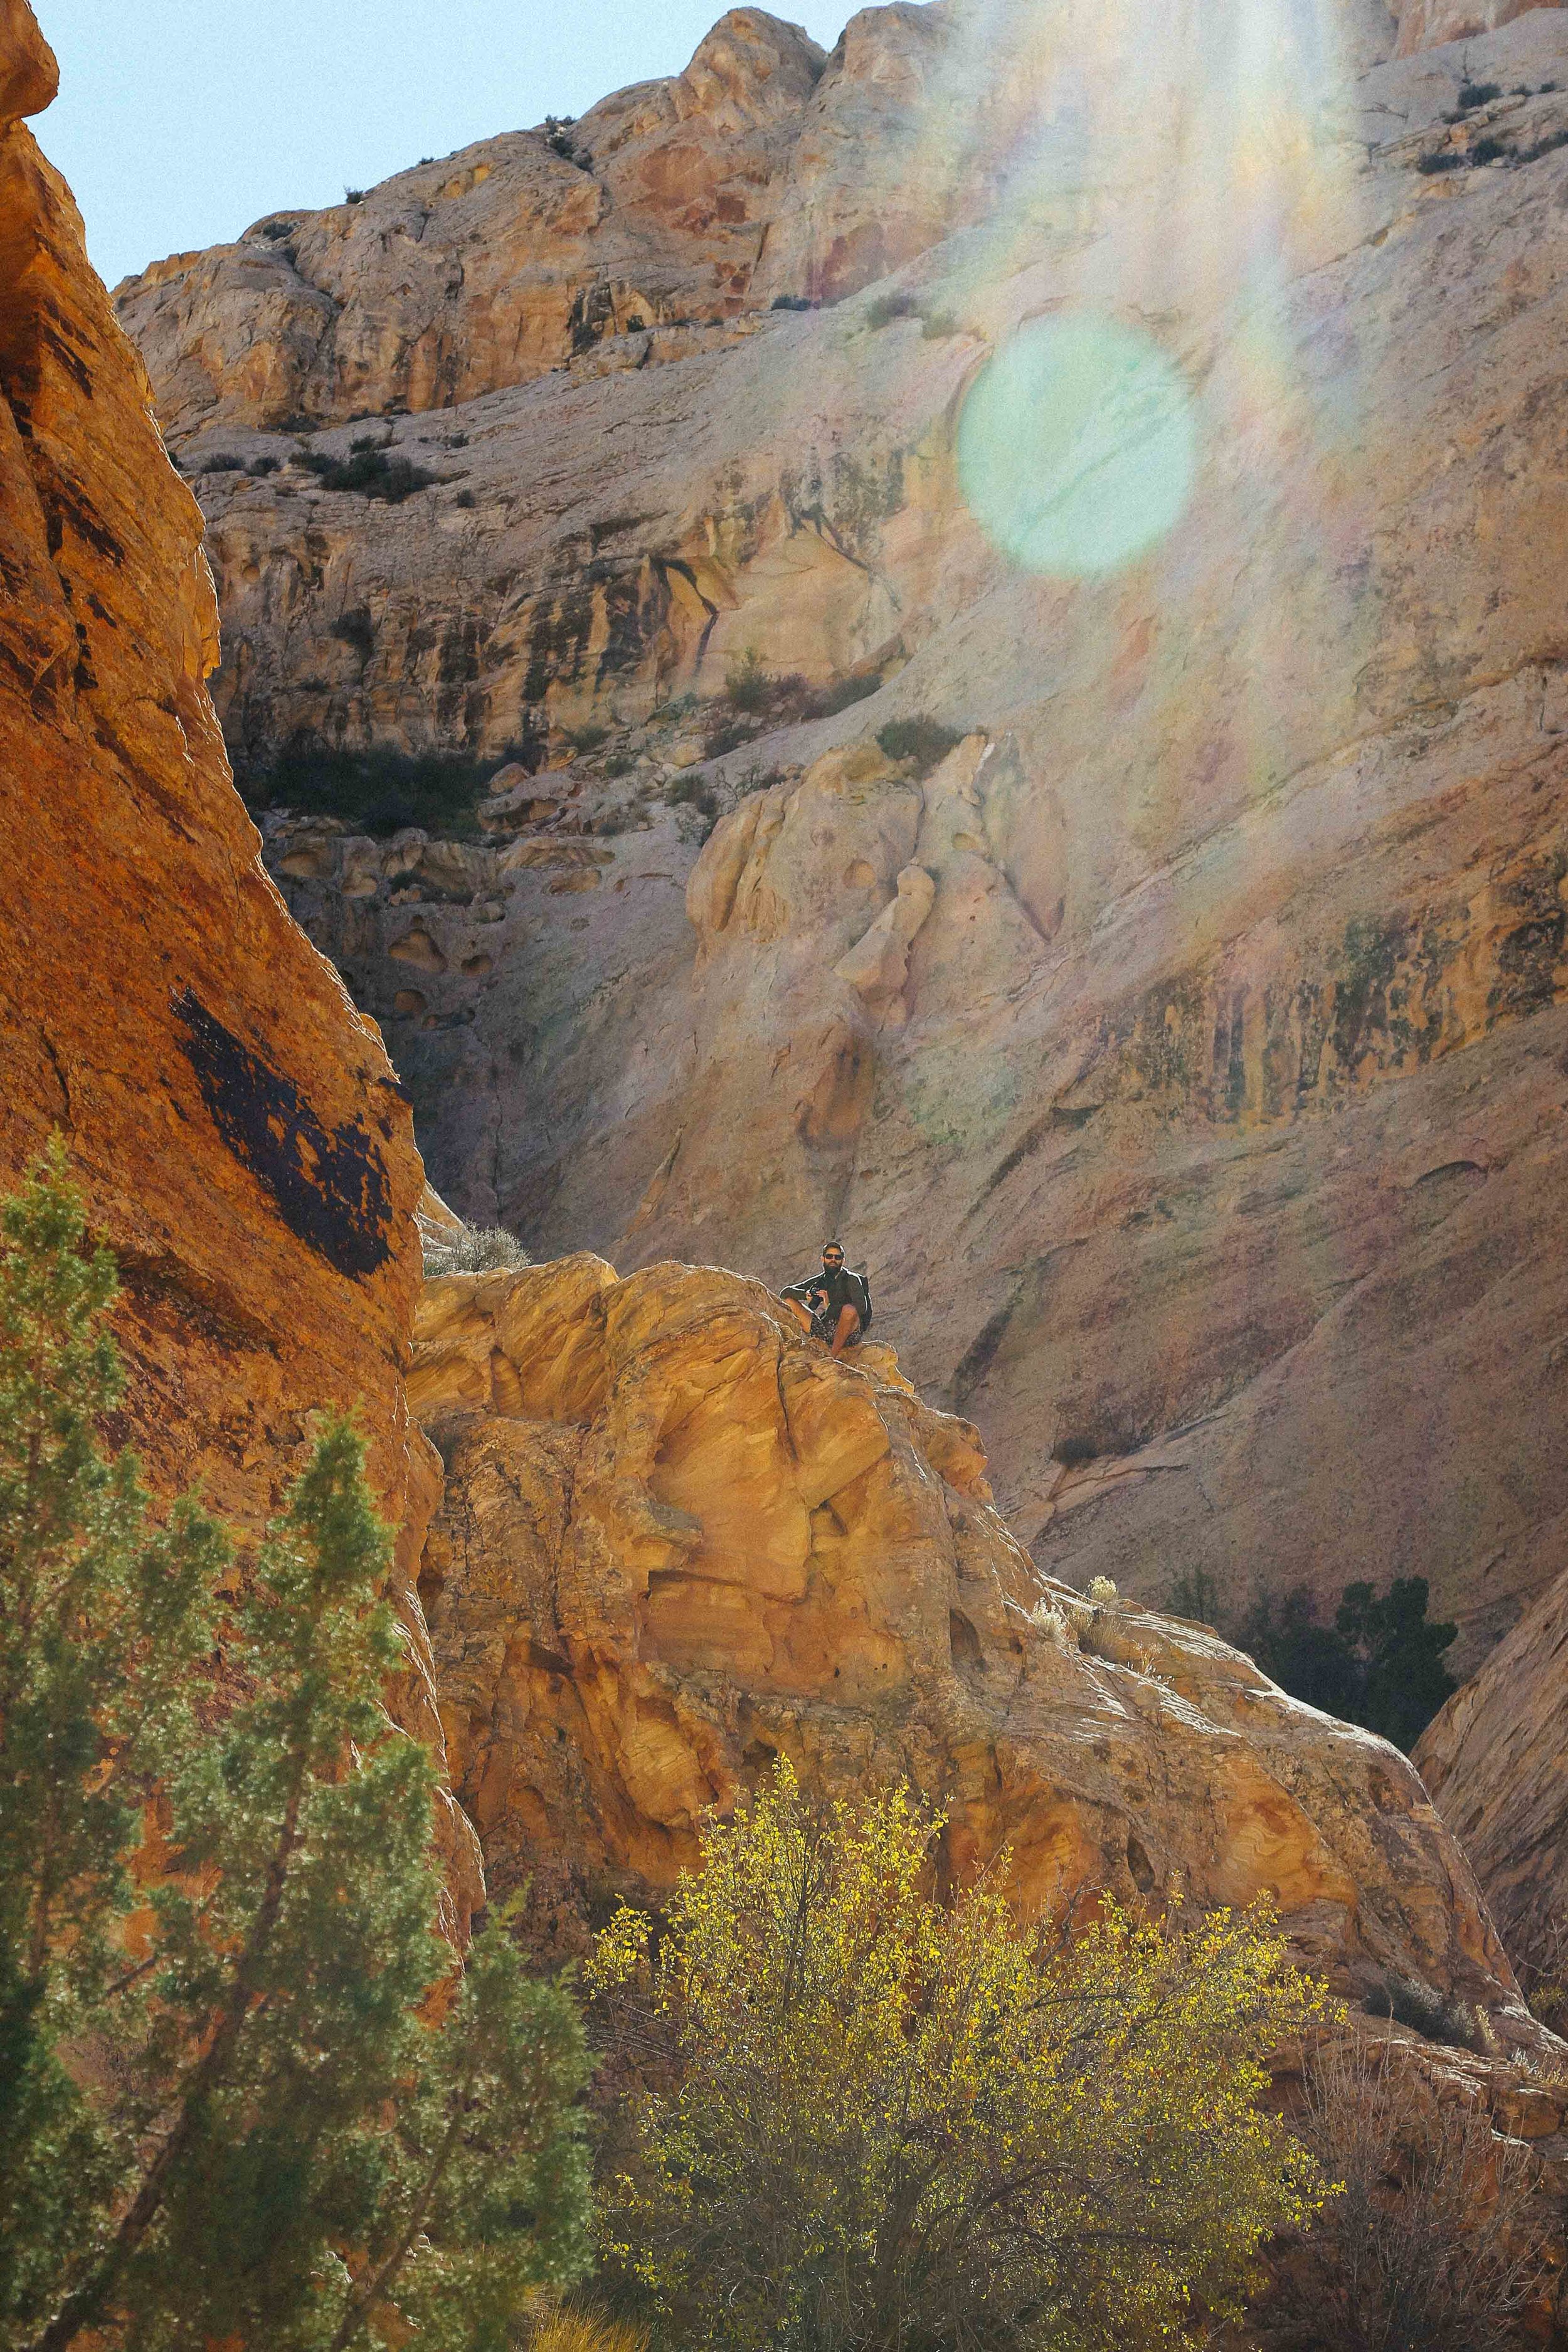
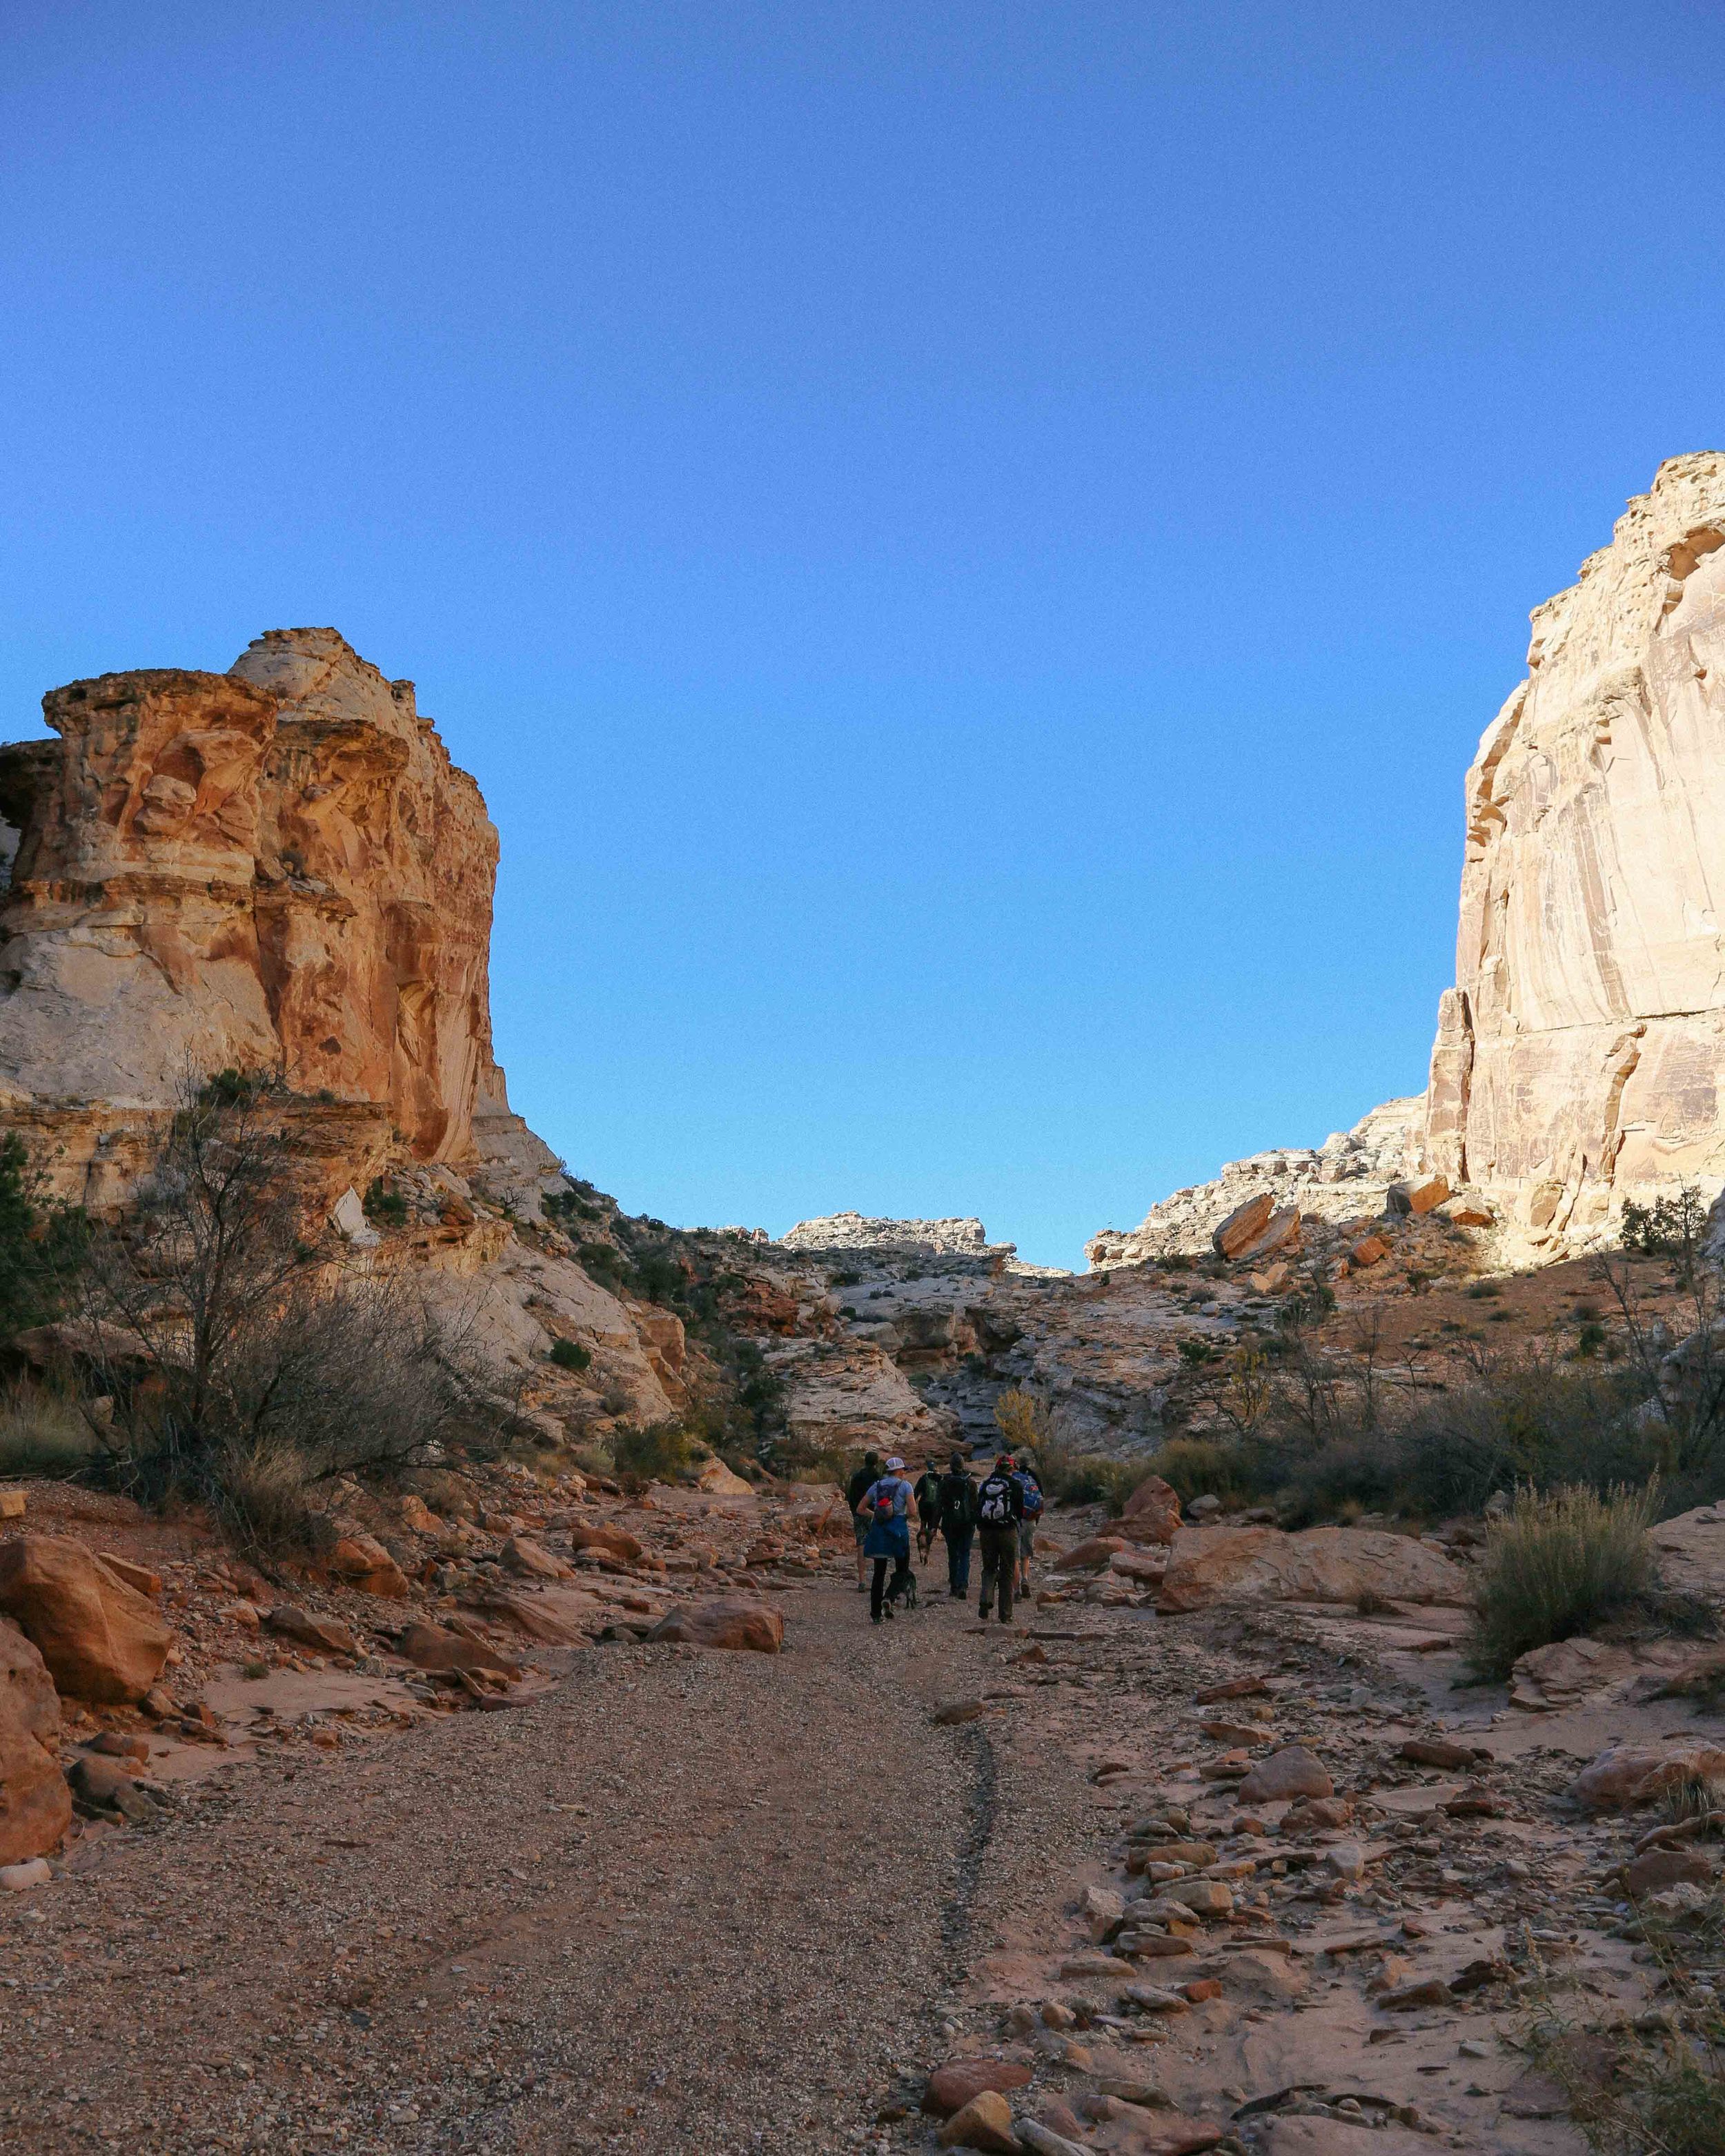
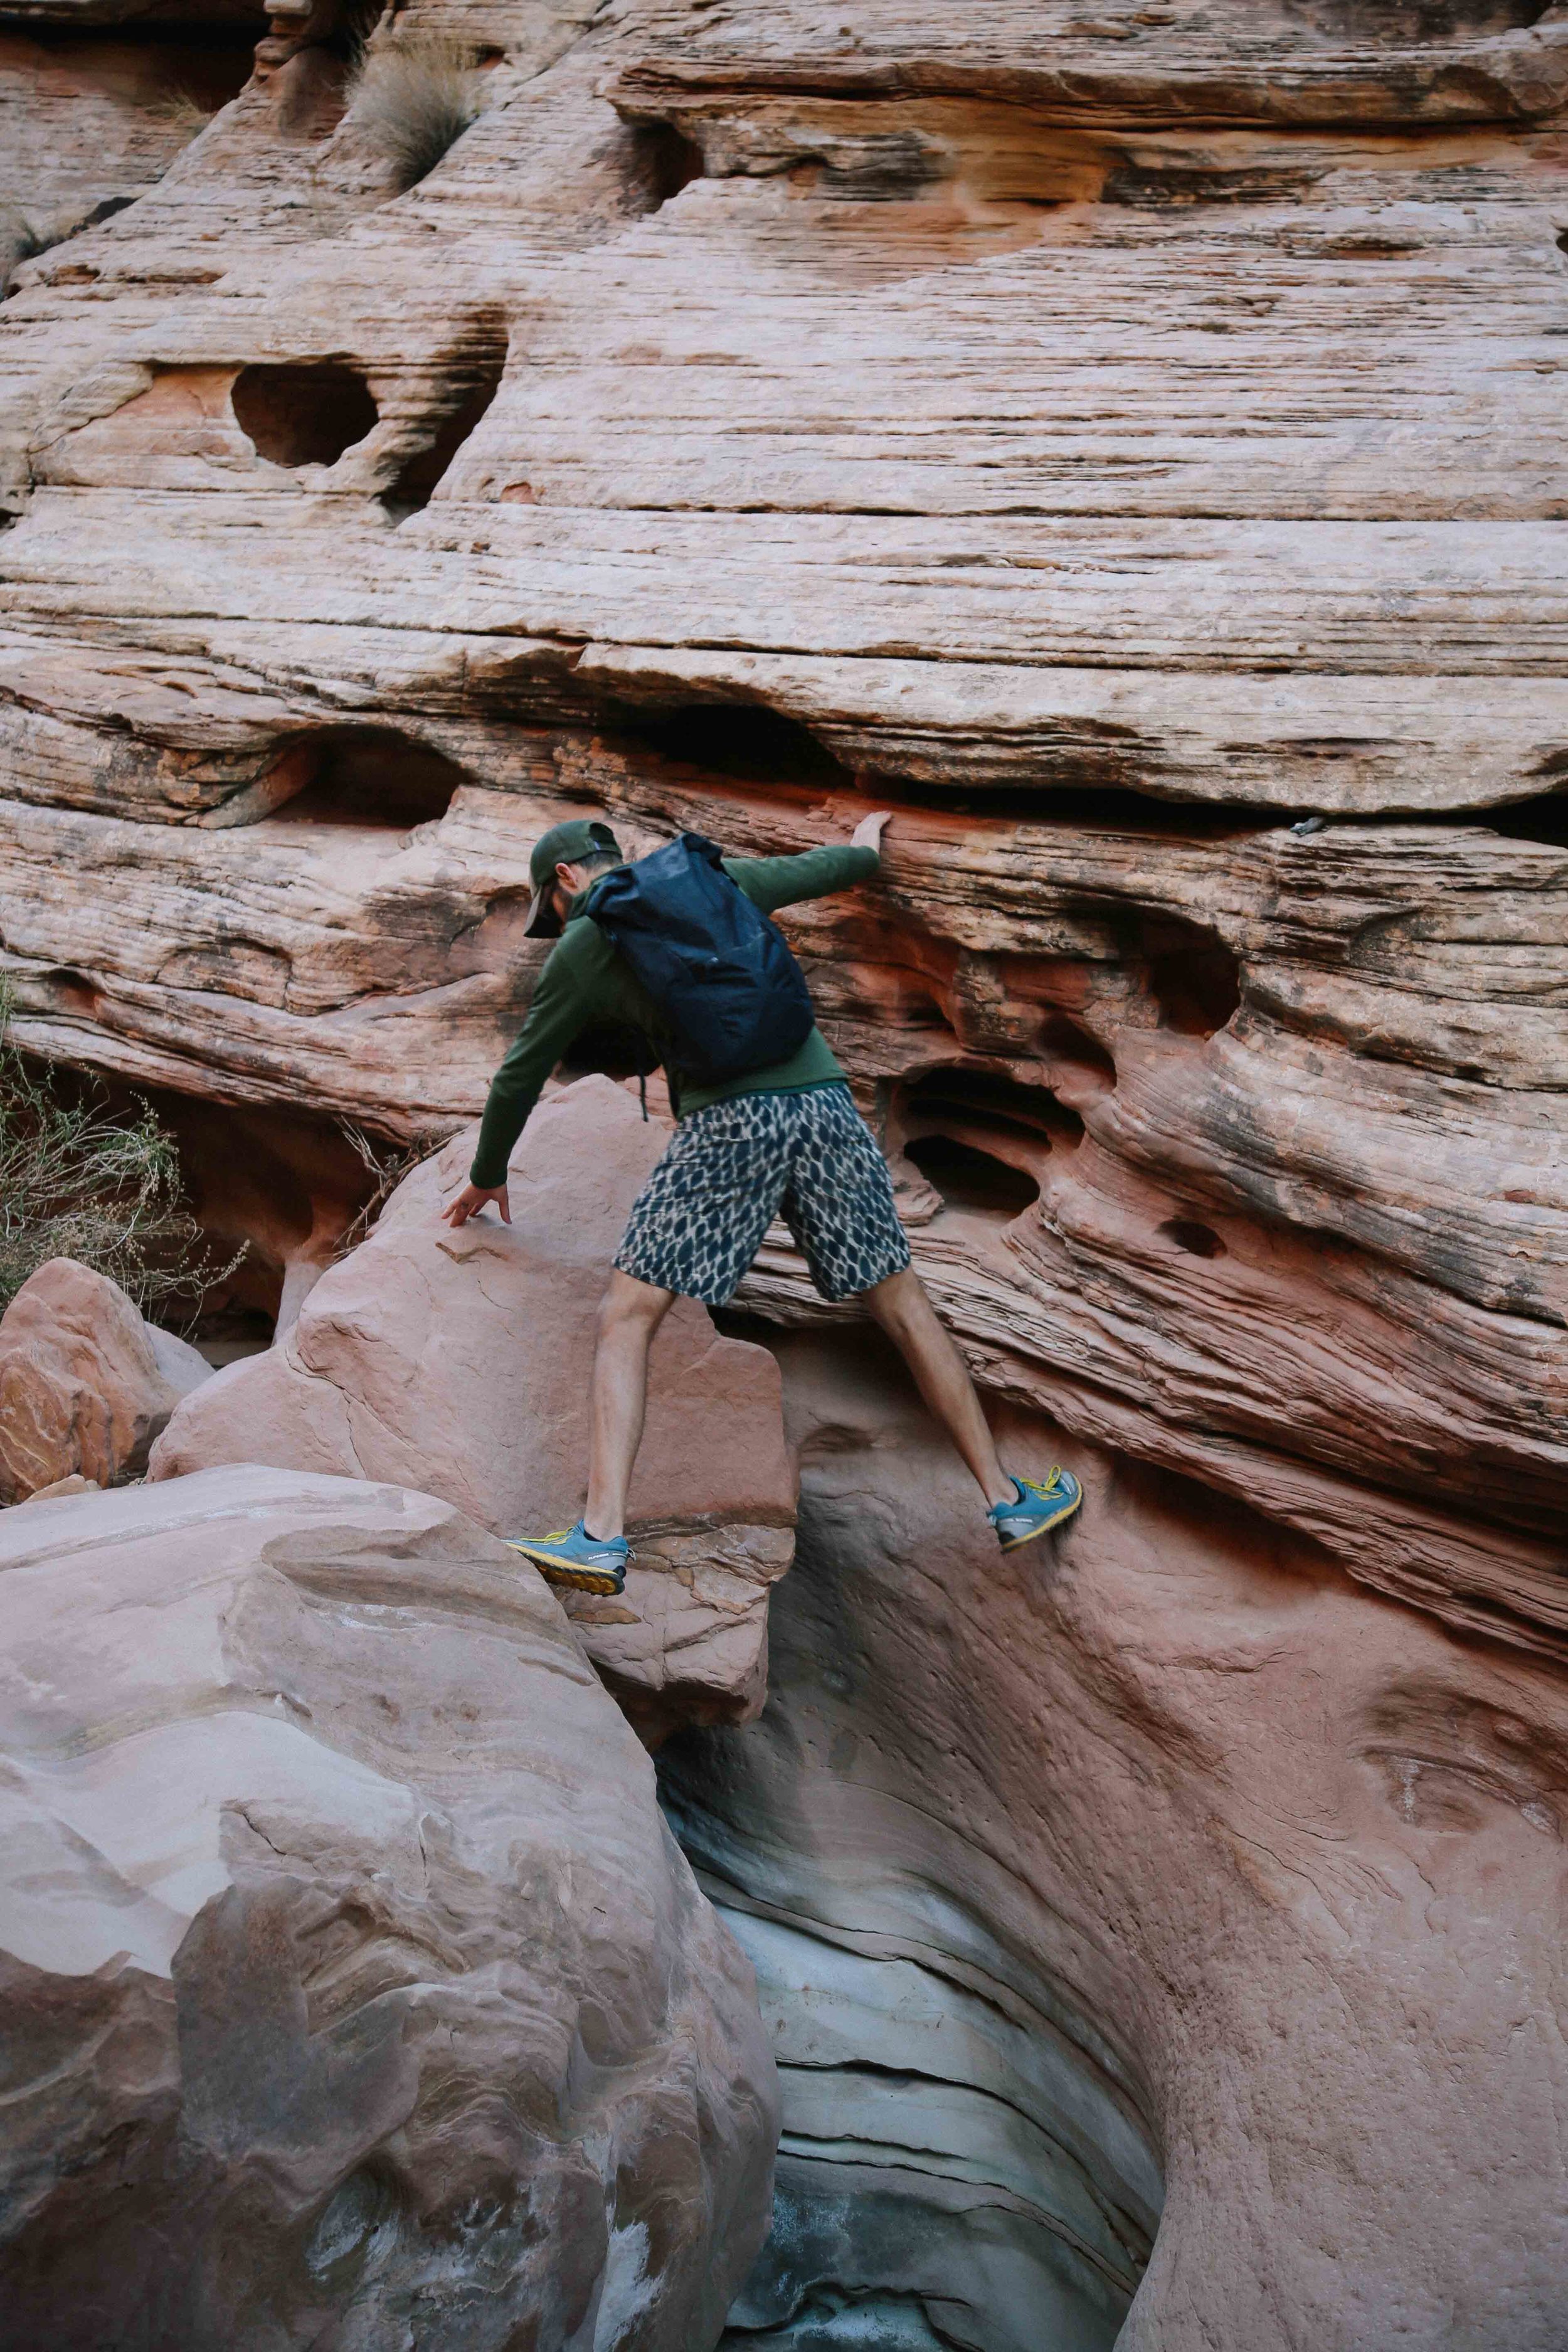
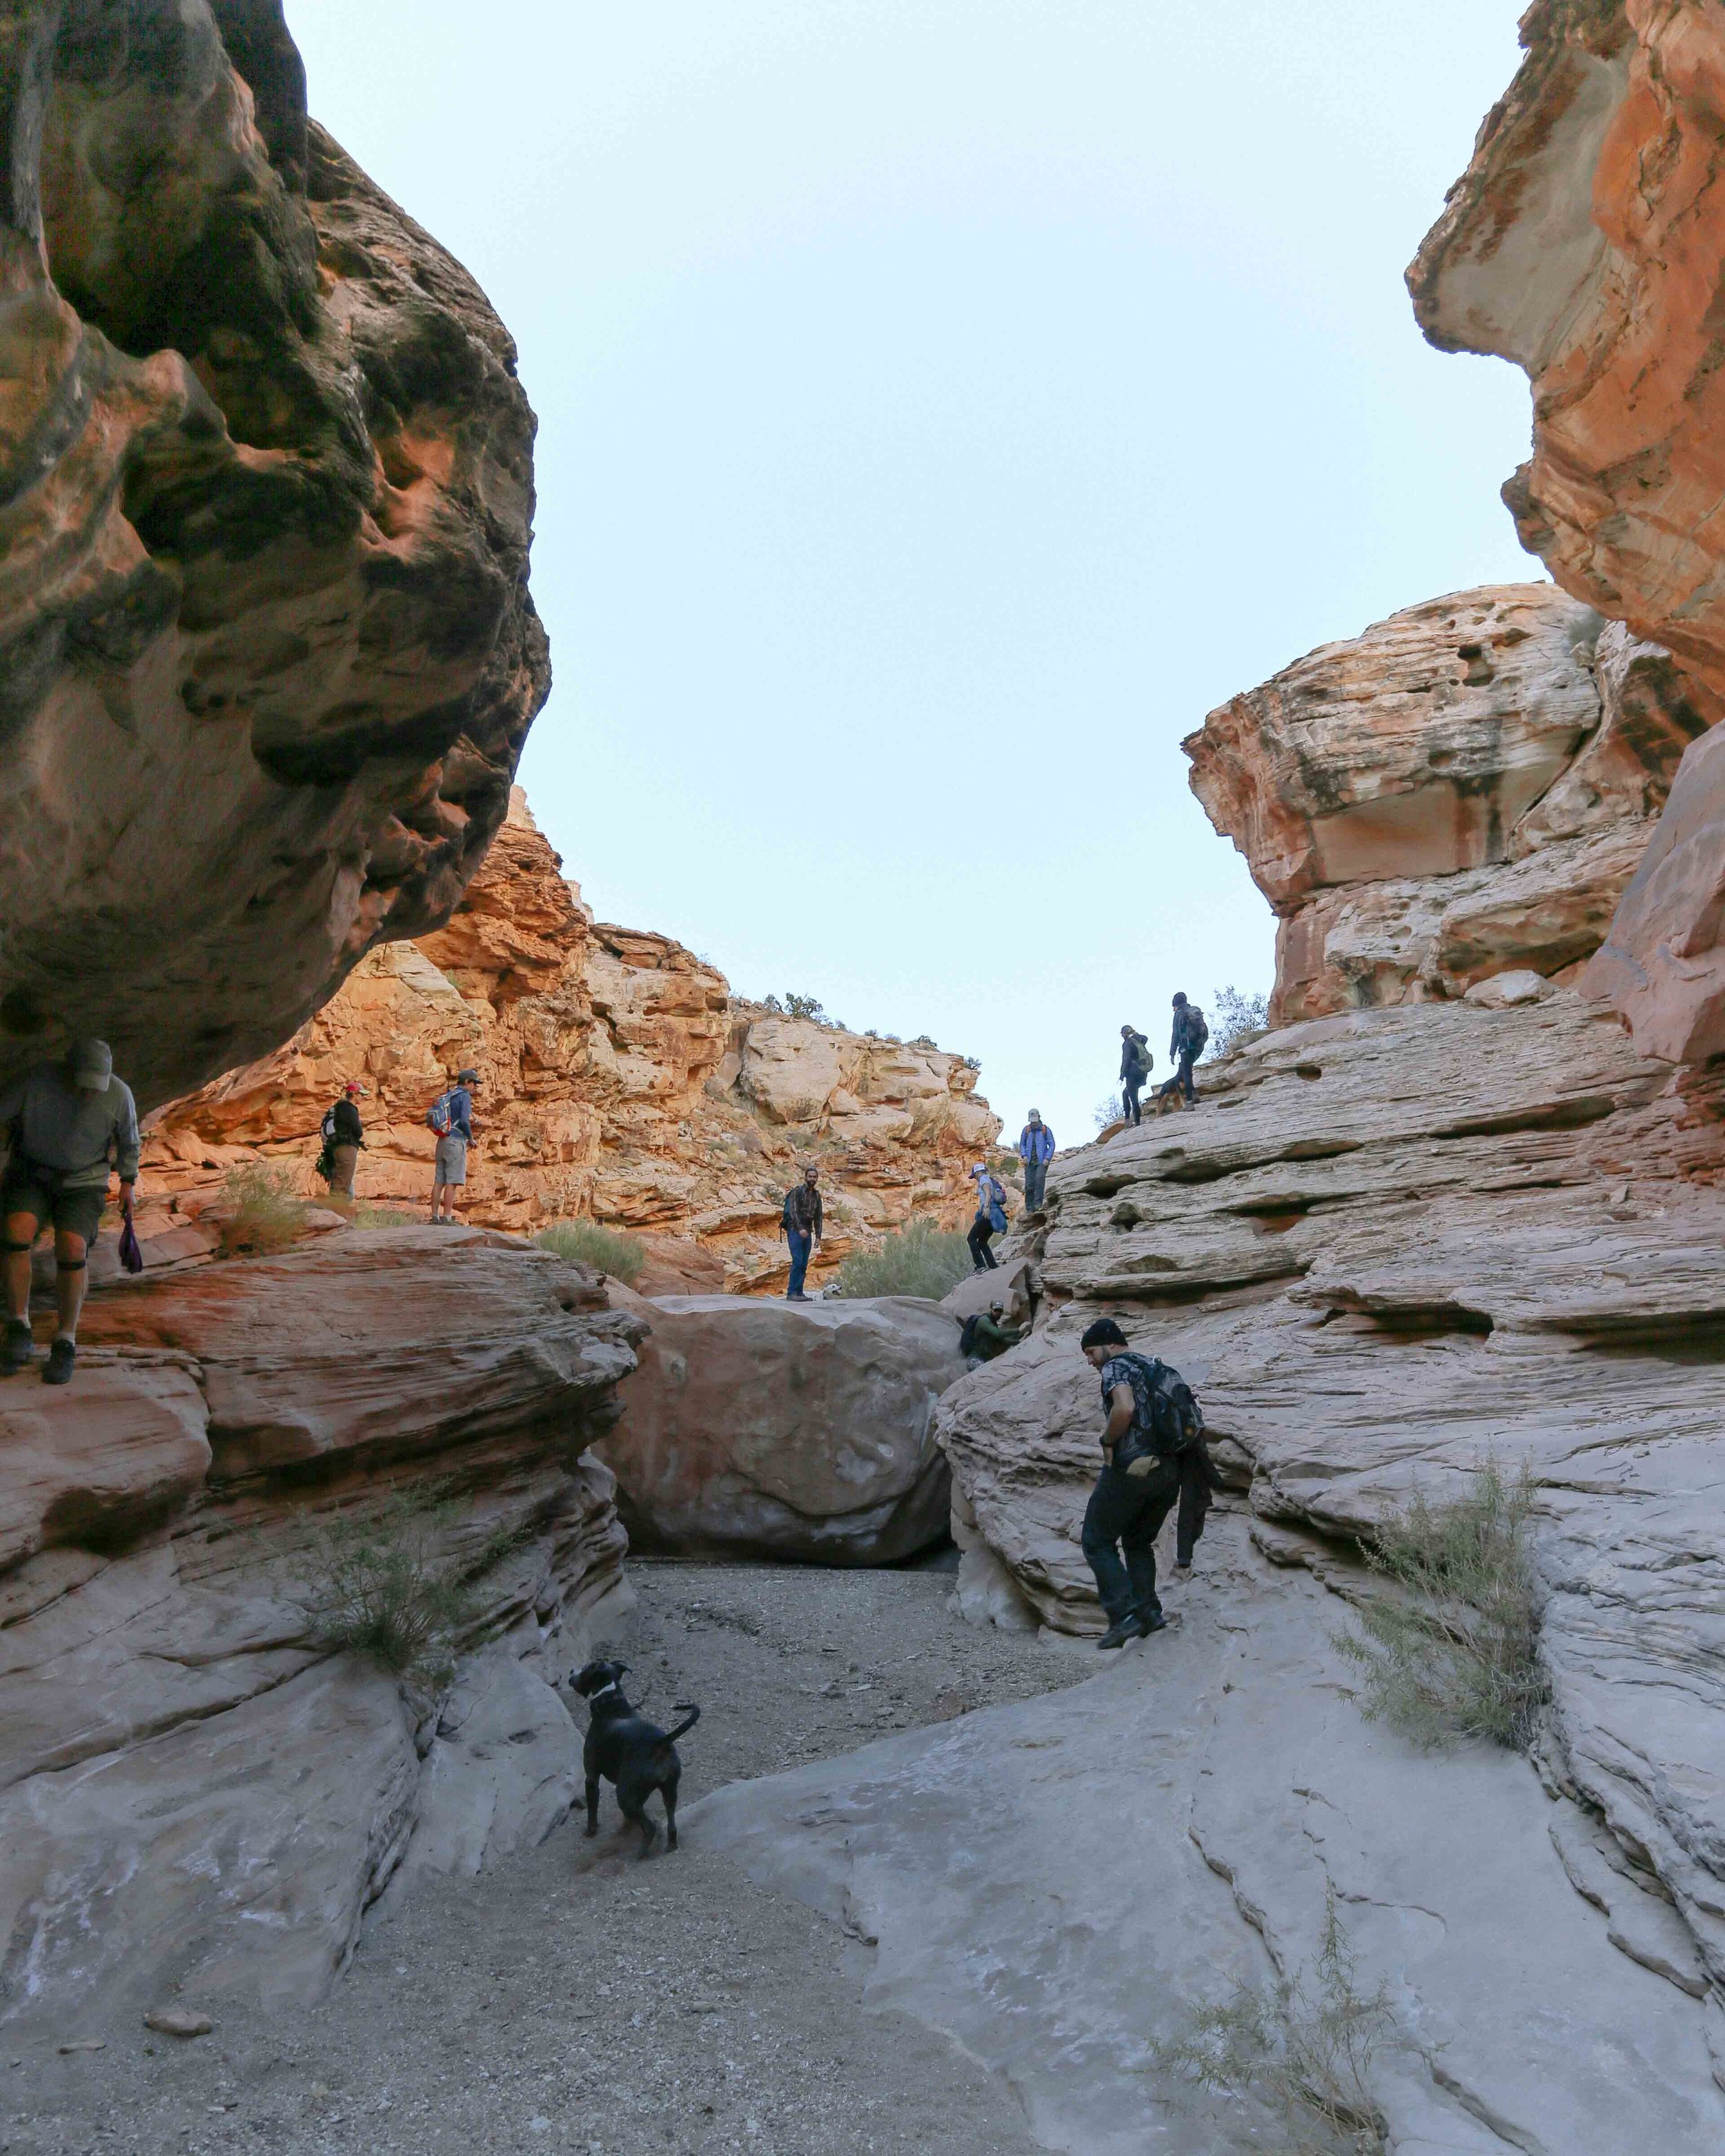
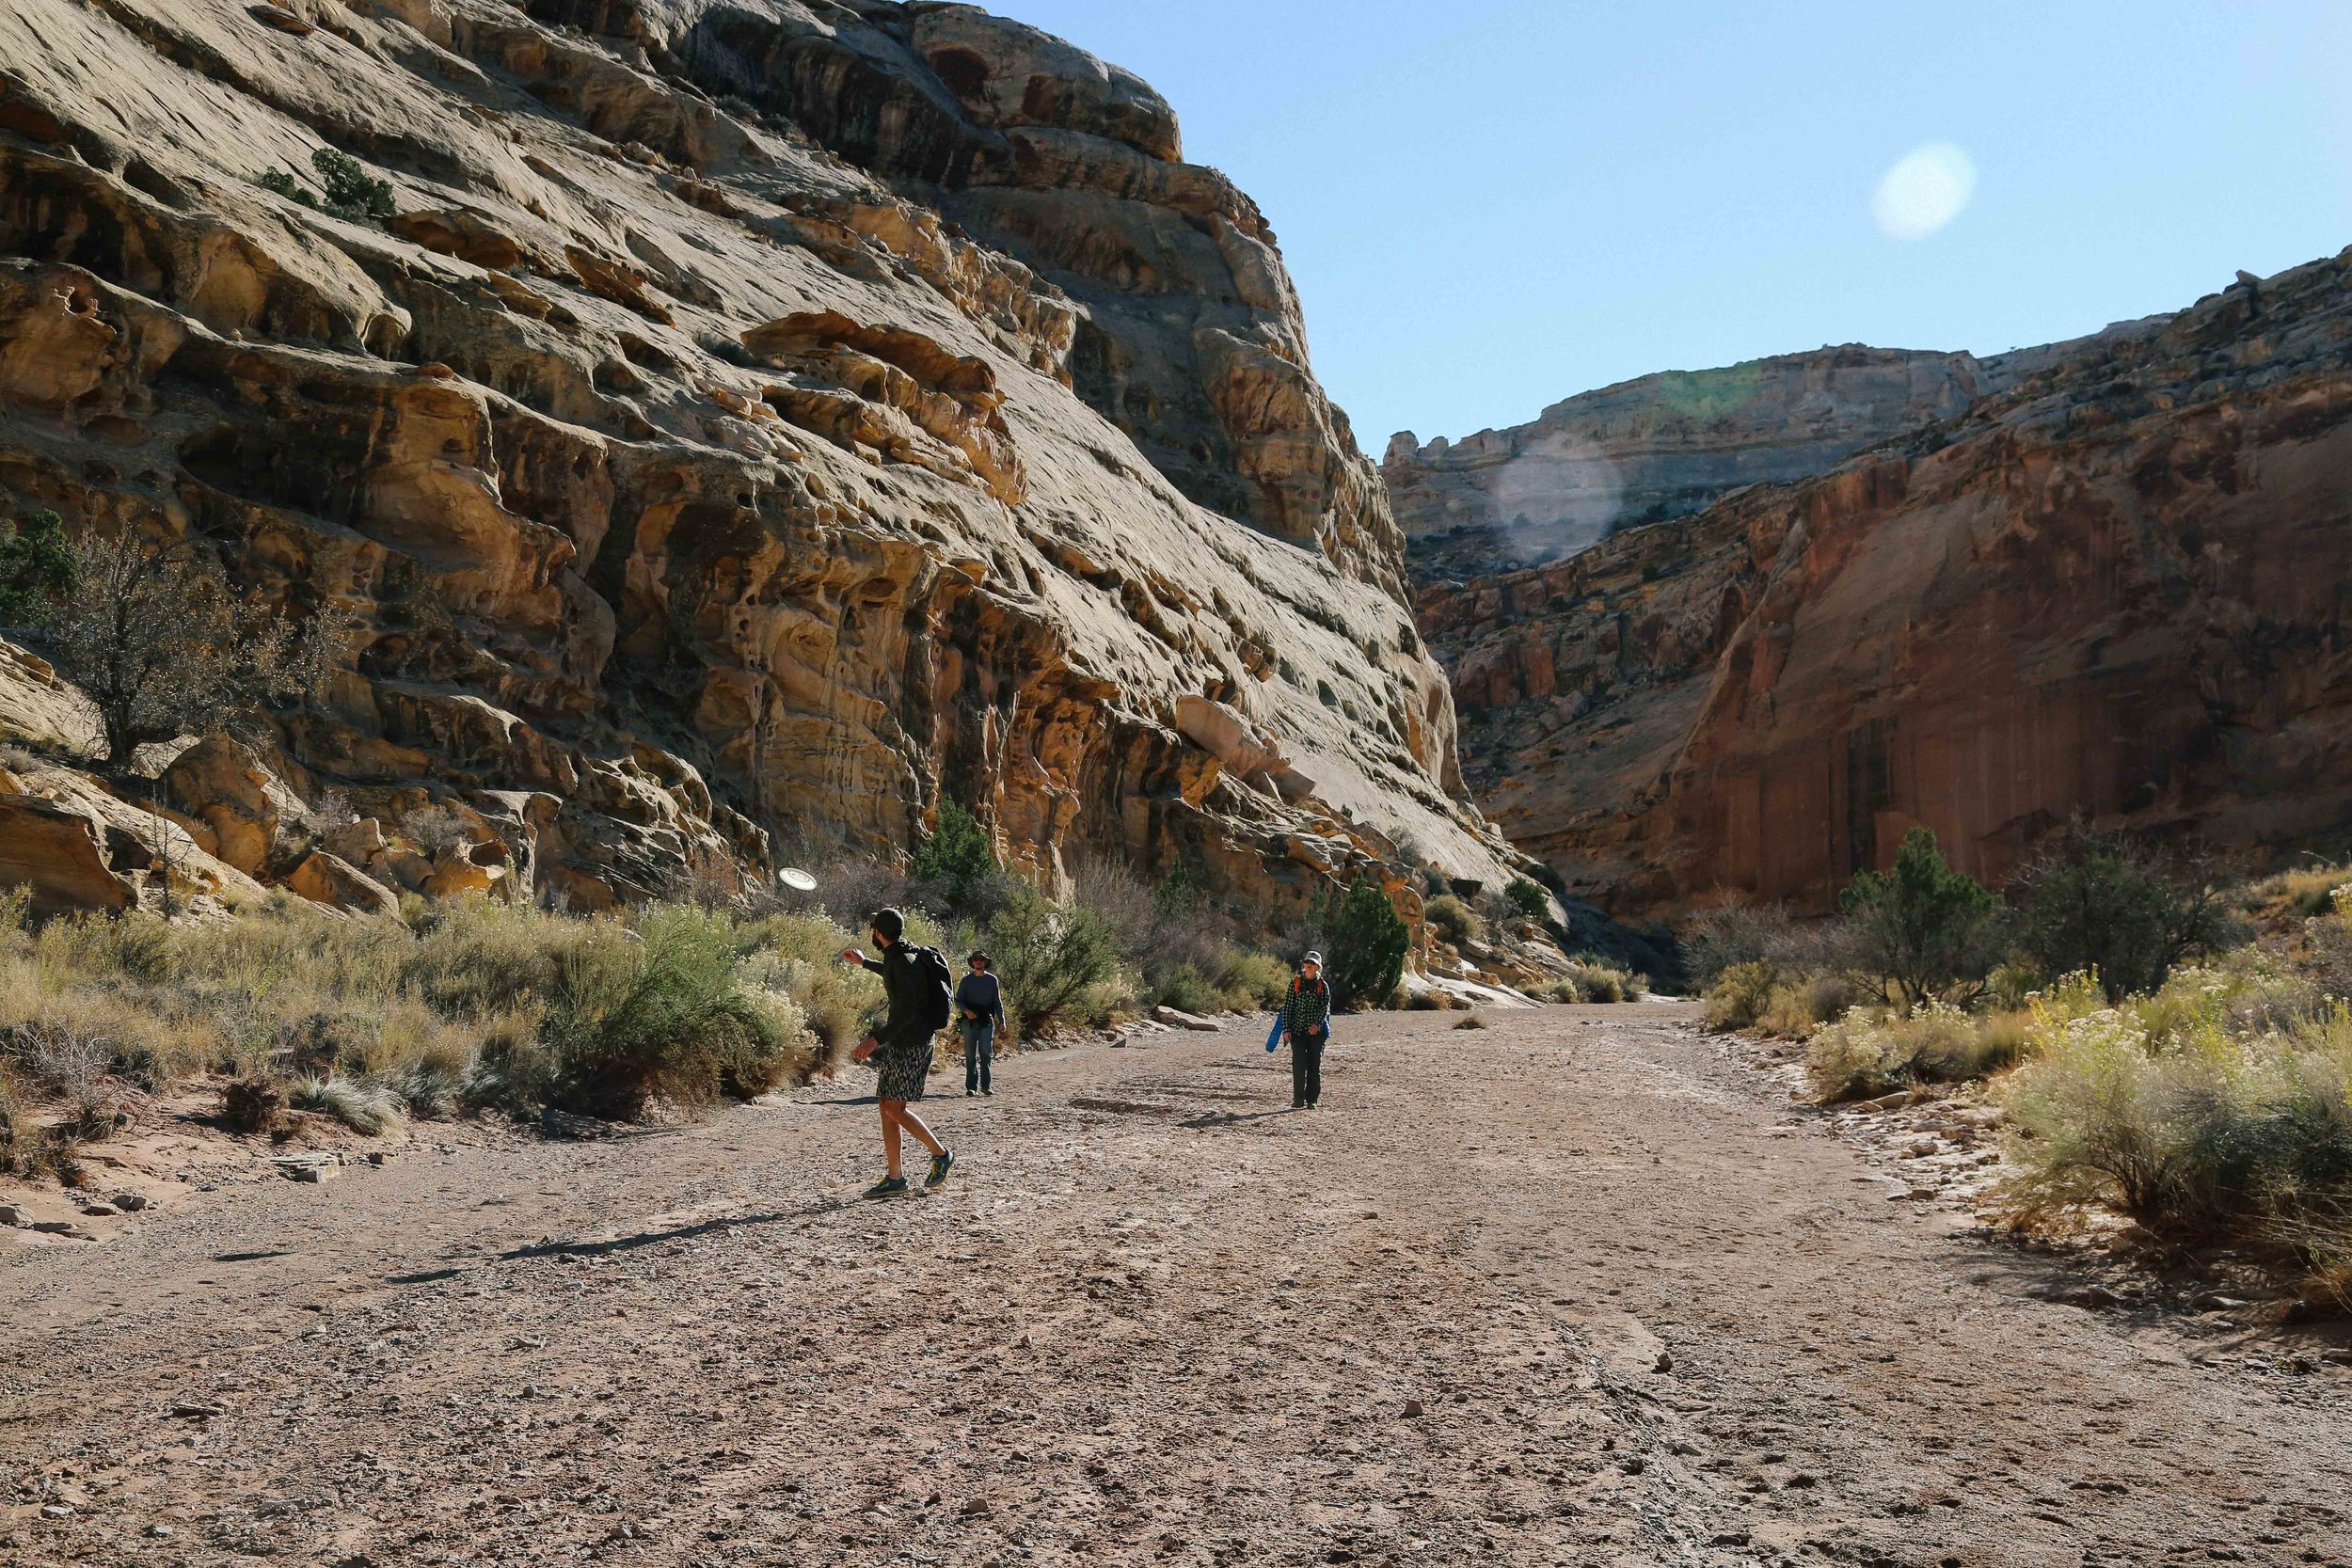
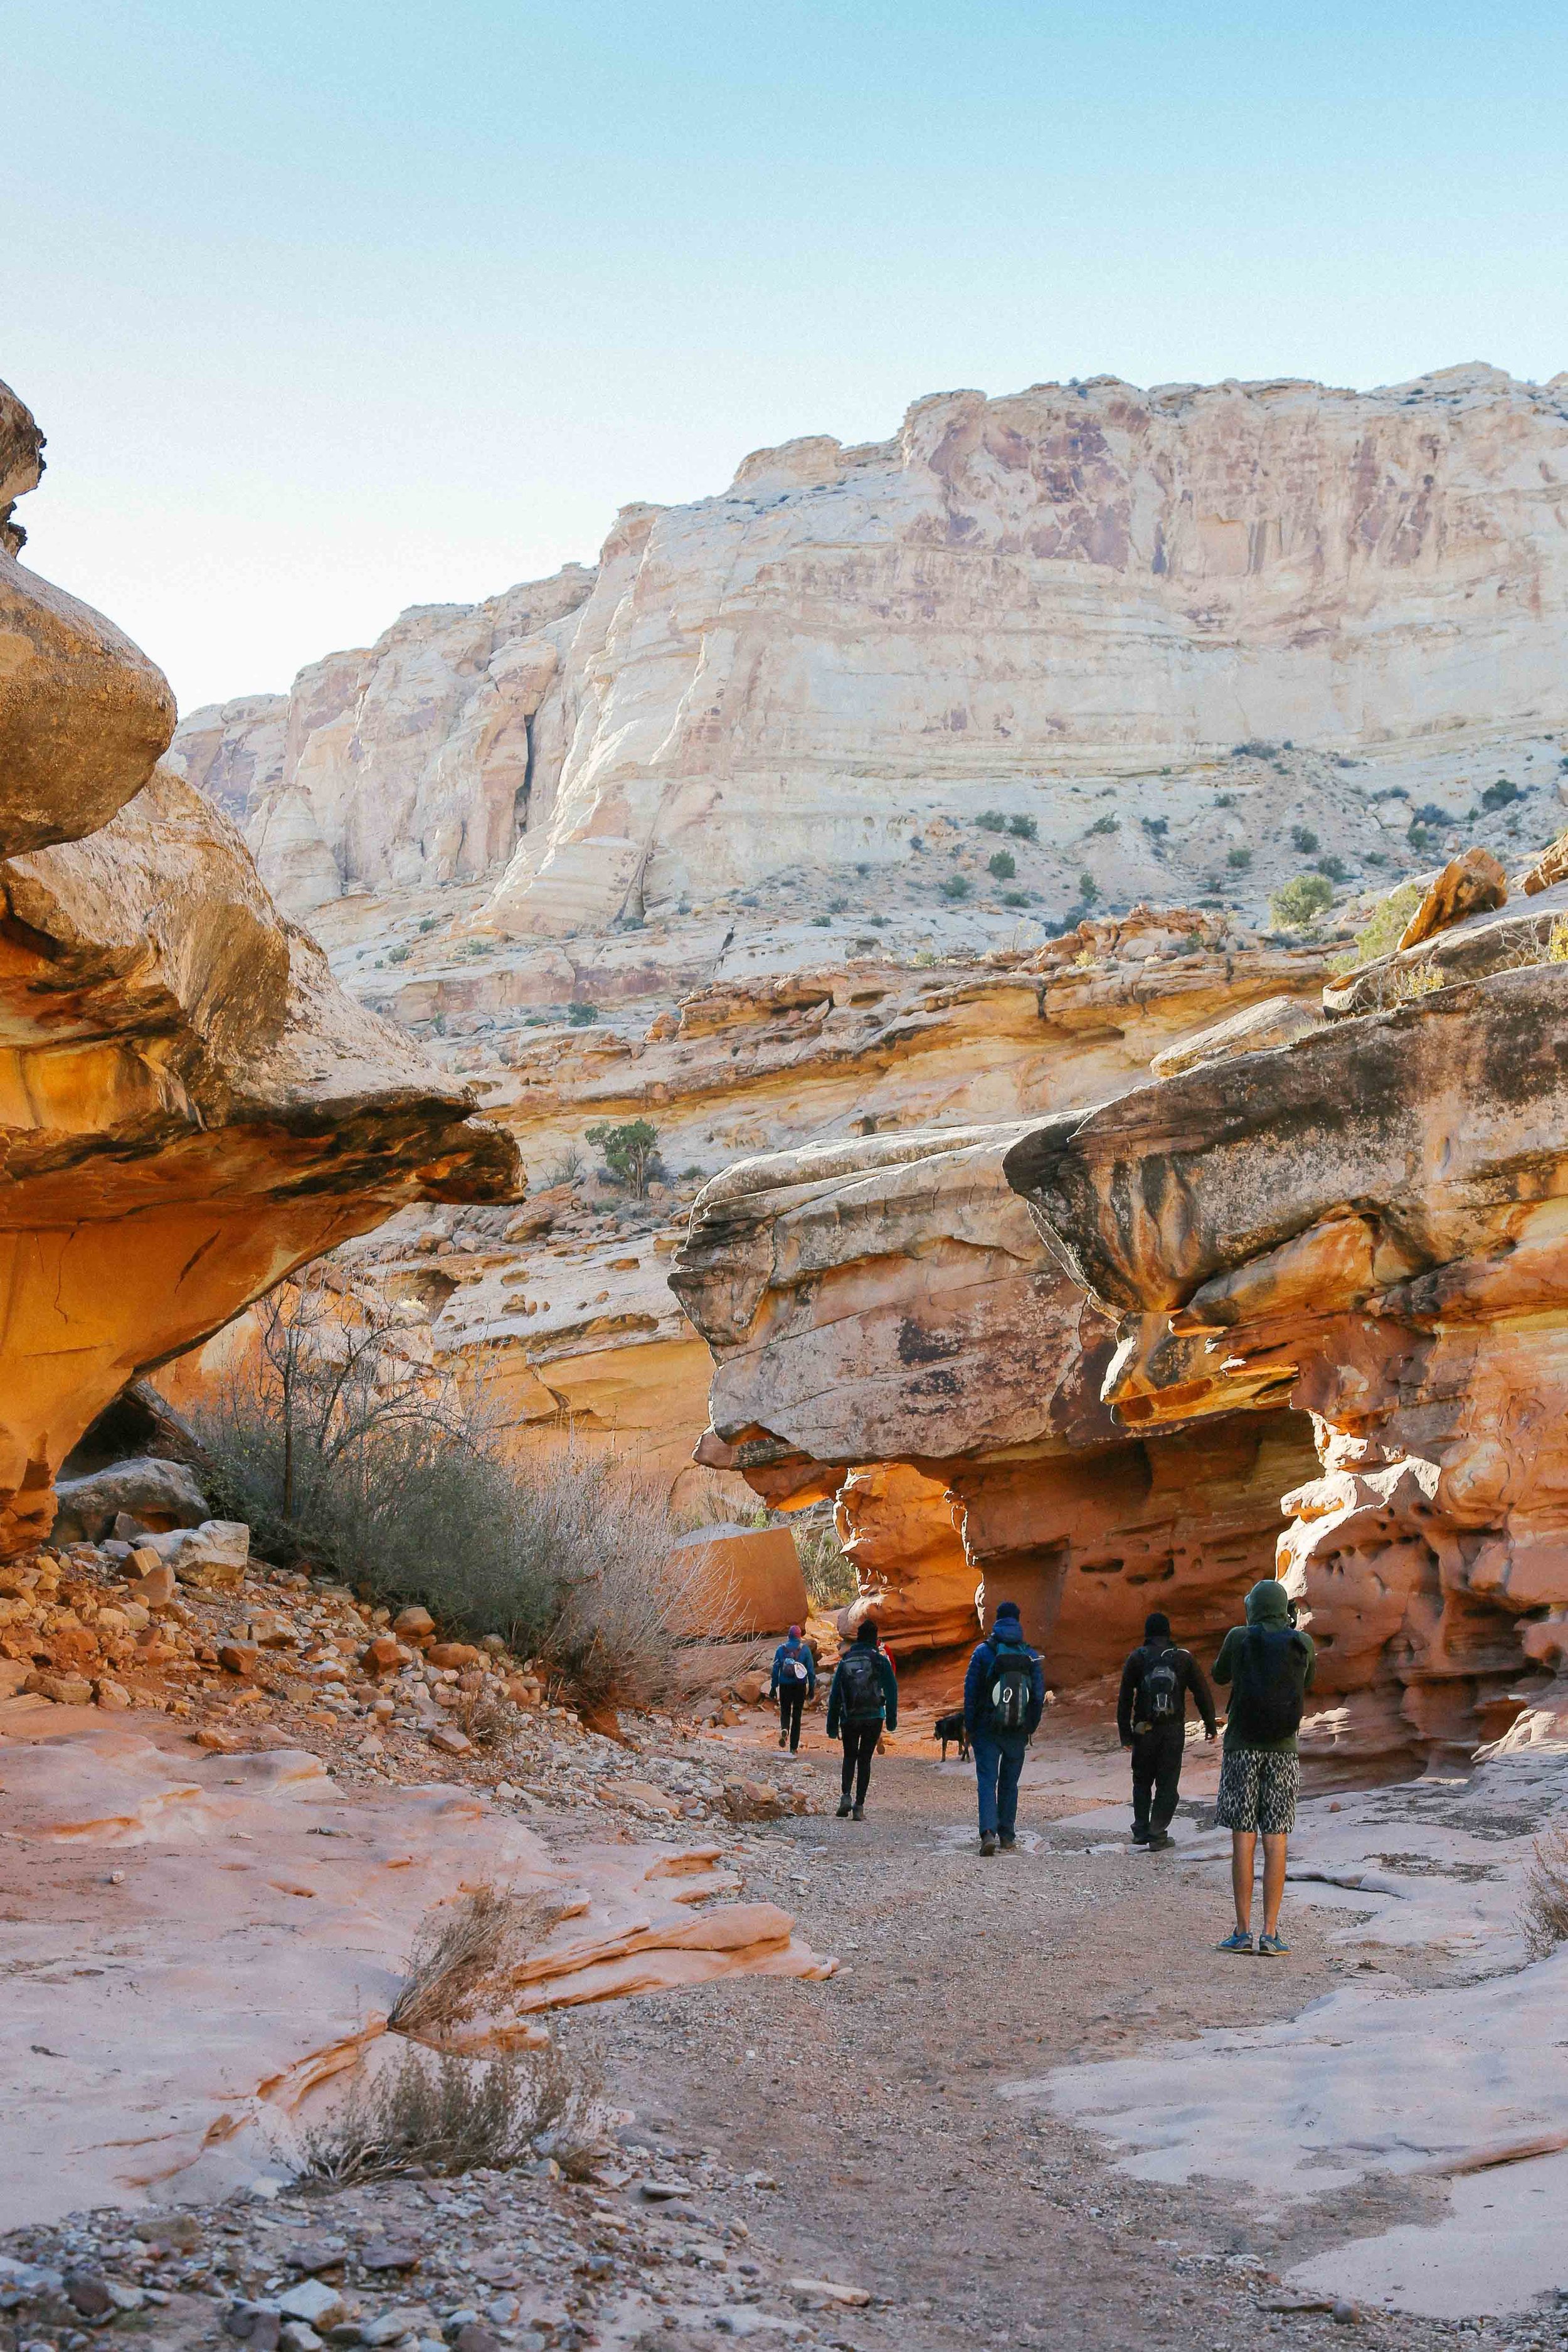
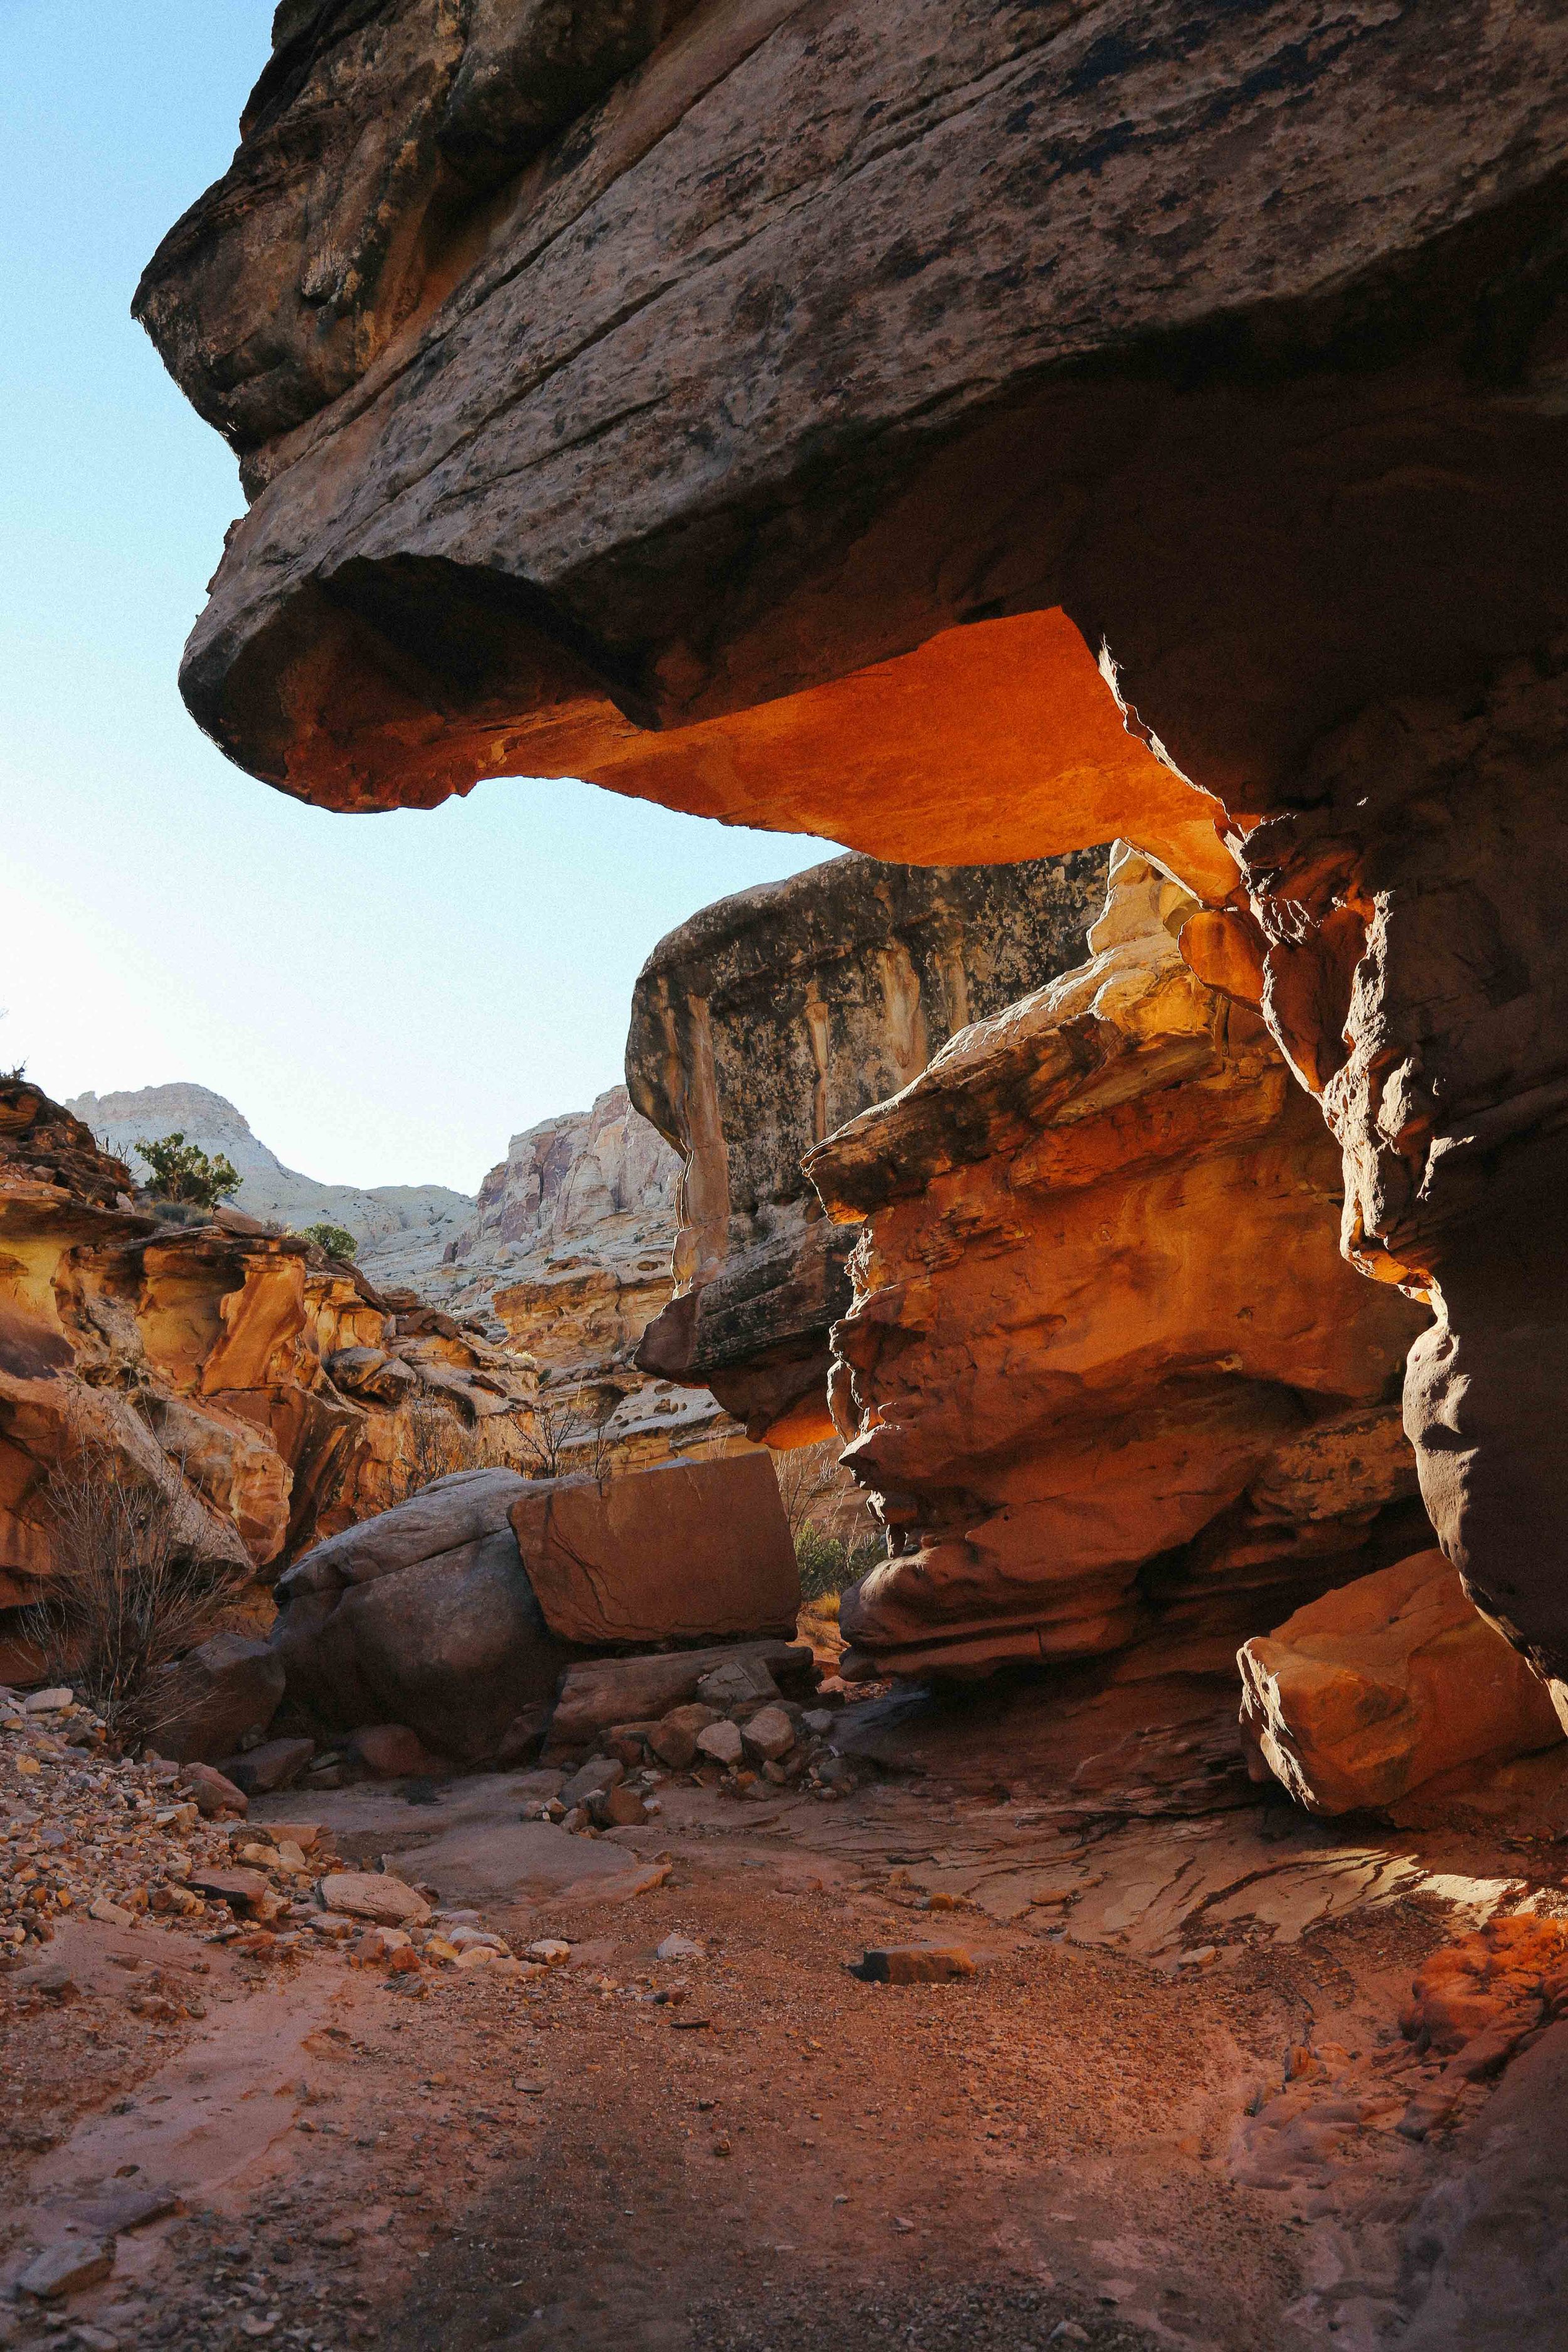
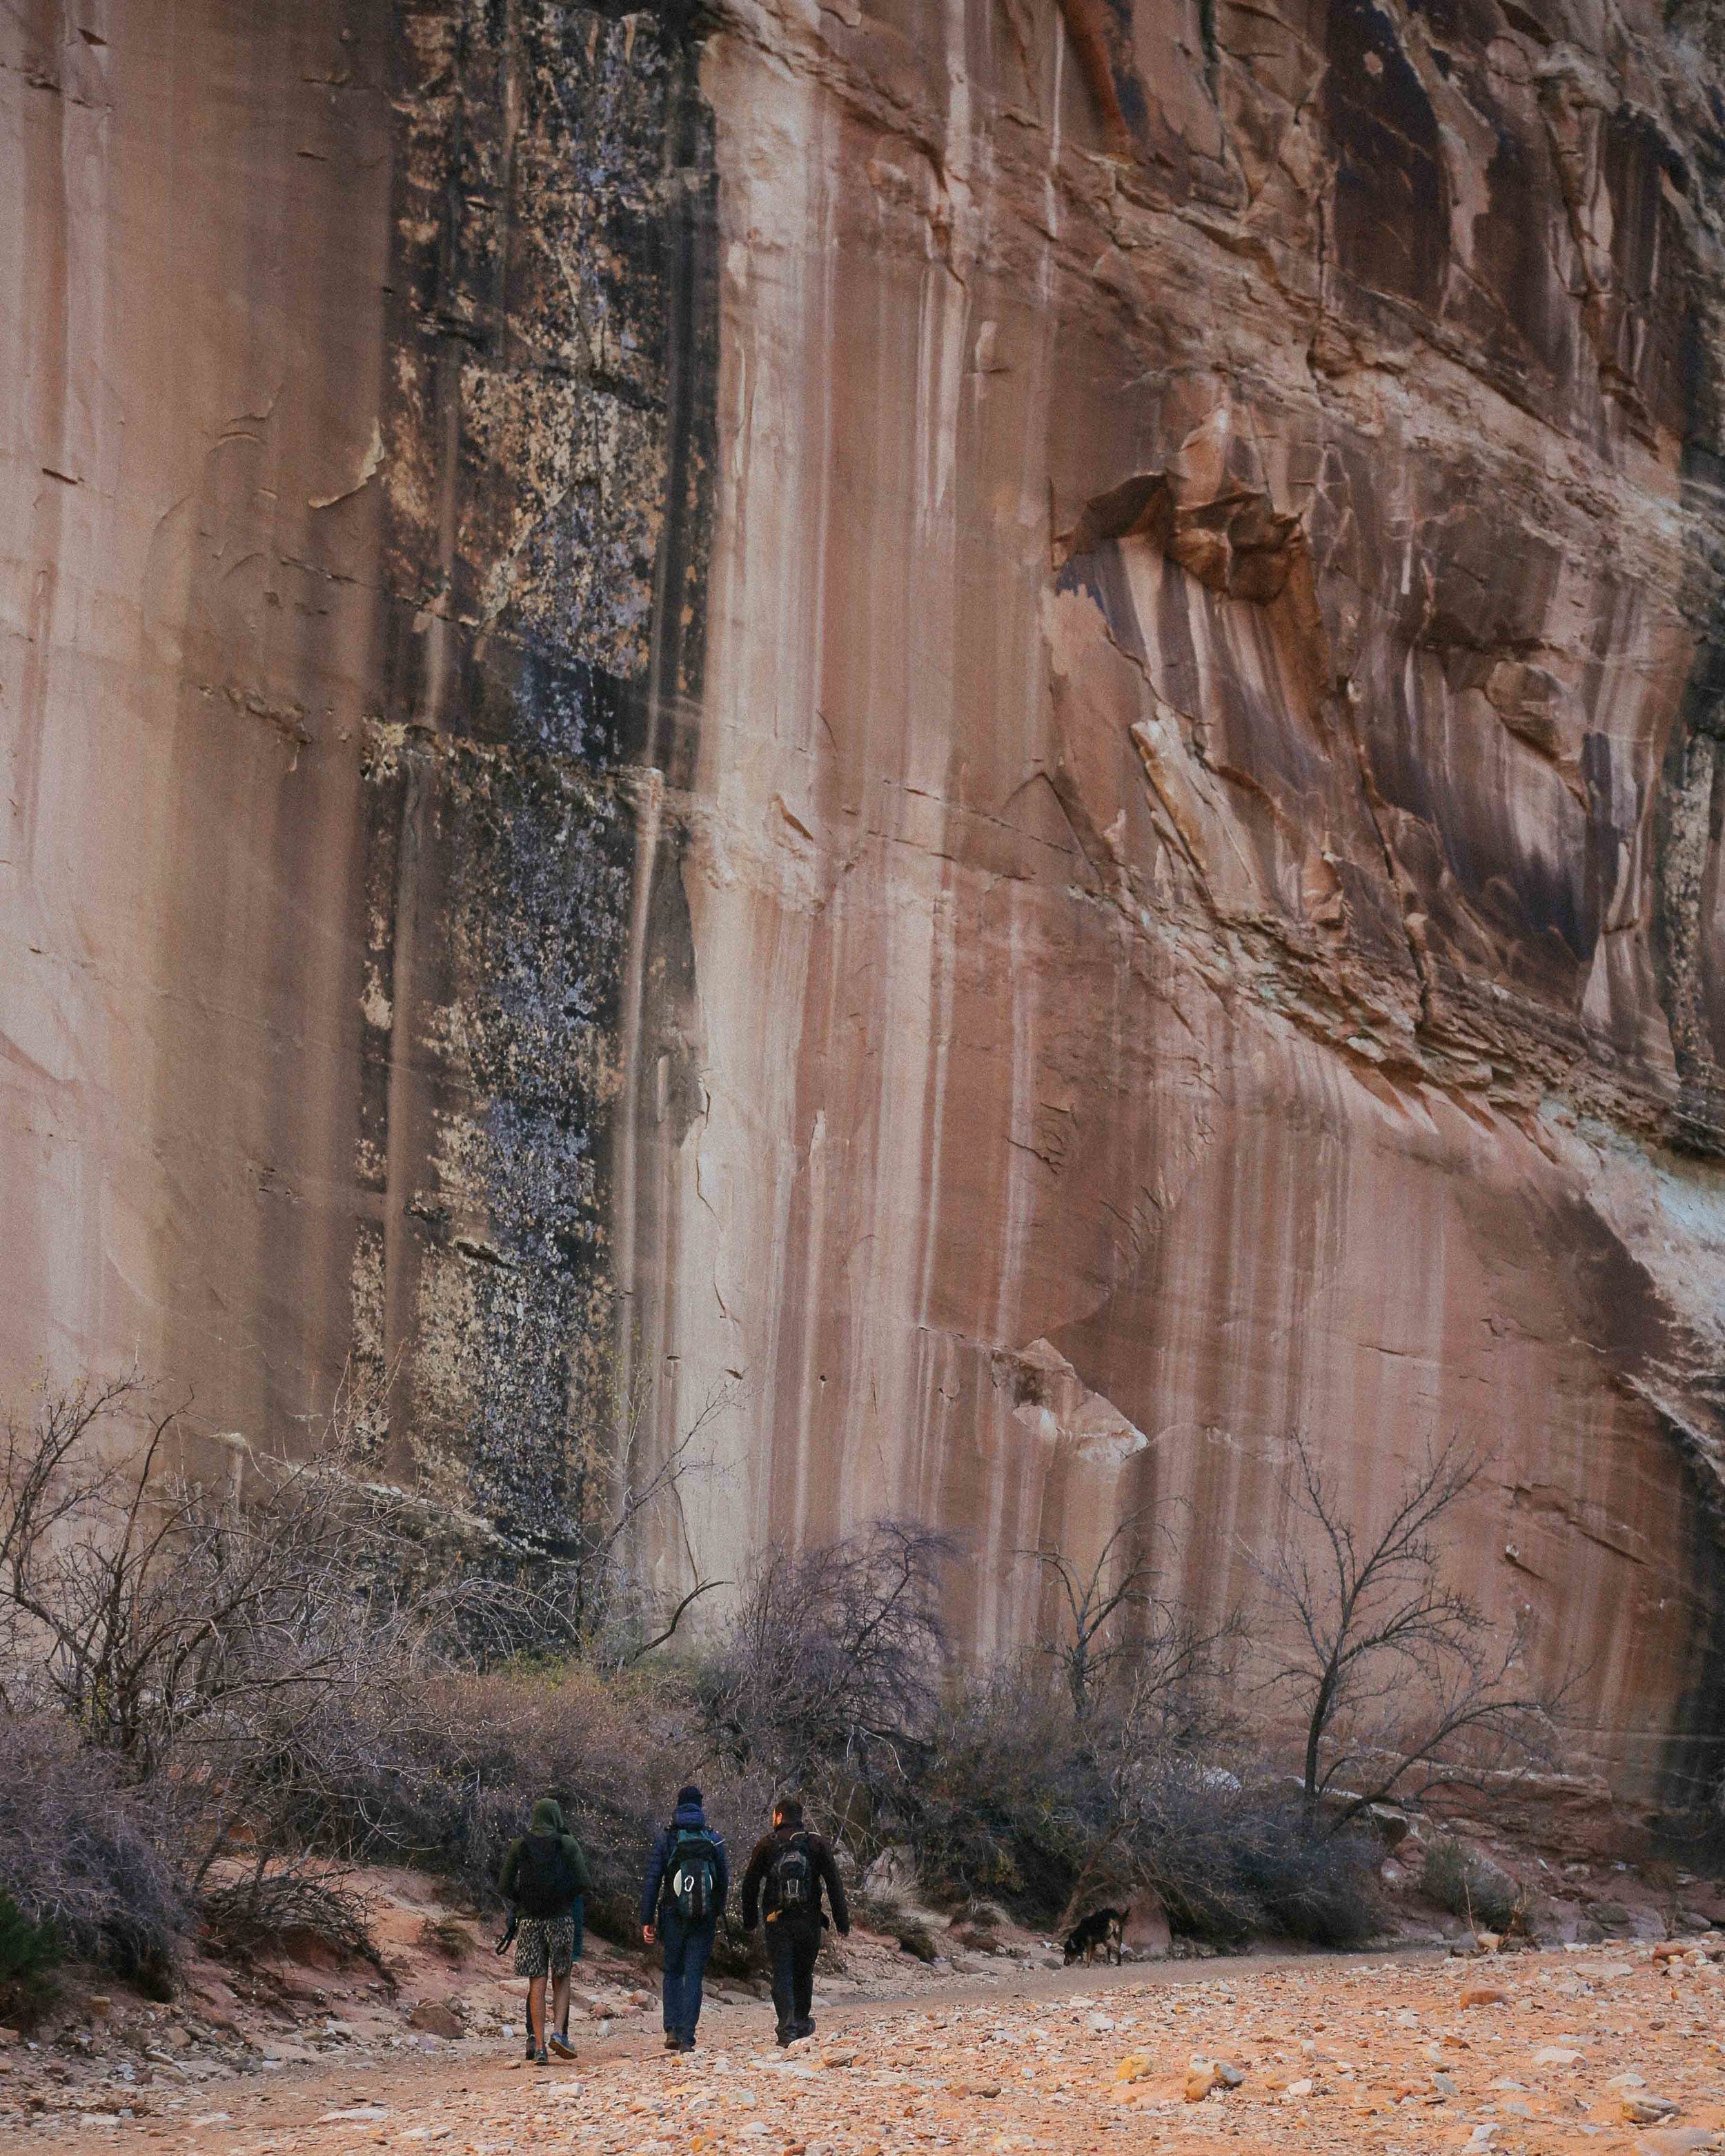
Bell Canyon and Little Wild Horse Canyon are two sets of slot canyons connected by an open, expansive wash, forming a hiking loop that begins and ends at the Little Wild Horse Canyon trailhead. Of the two, Little Wild Horse is considered by many to be "more spectacular," and certainly contains the narrowest of the slots. Little Wild Horse is made up of three distinct slots punctuated by larger openings and atriums, while Bell is a continual, long and winding slot which widens and narrows in different areas.

The trailhead is the same for both canyons, and involves a half-mile hike to the fork for both trails. To start with Bell Canyon, take the left trail in the fork. To start with Little Wild Horse, take the right trail. The trails are quite obvious, given that you follow the path of water cutting through rock, though there are a few cairns in spots where the trail is less clear. The main area where you should pay attention is in the wash; there is an obvious sign with a map when you are heading from Bell Canyon in the direction of Little Wild Horse Canyon, though it is harder to see the sign when coming from Little Wild Horse toward Bell Canyon. If you started the loop in Little Wildhorse Canyon, you will want to favor the left (West) side of the canyon and keep your eye out for the sign for Bell and for the split that begins the canyon.

Entering the wash from Bell Canyon.

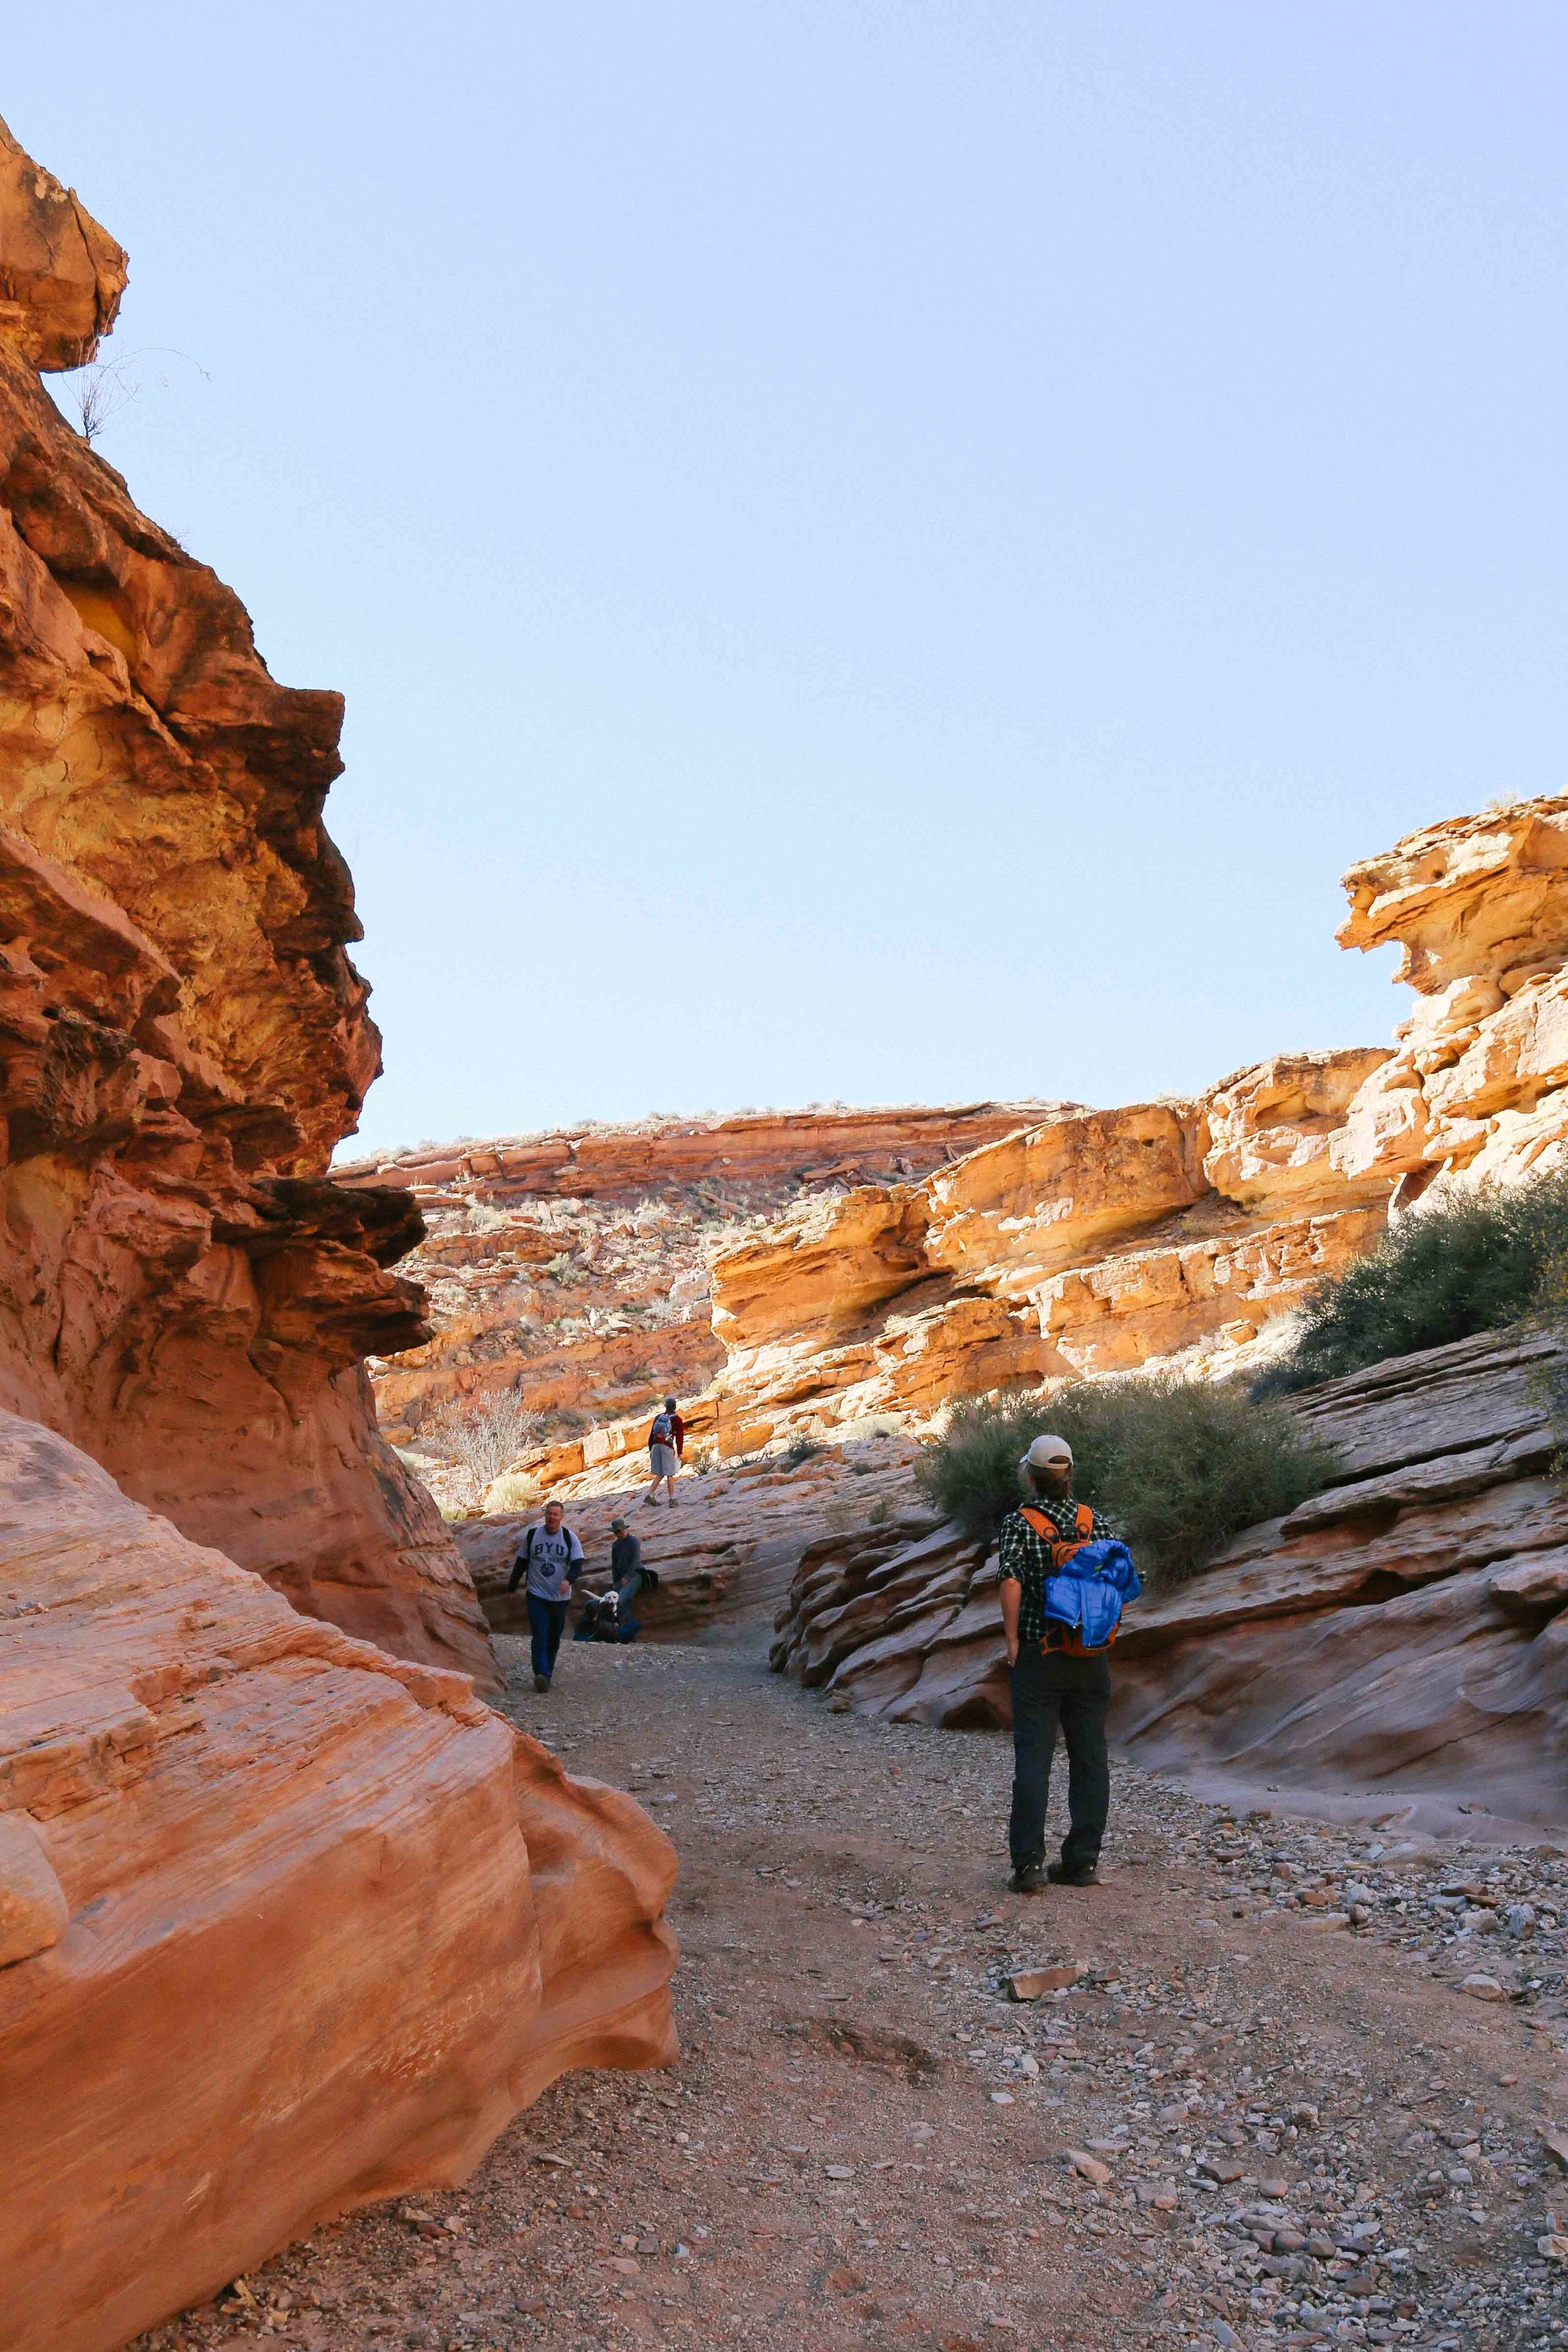
Some people will simply walk down the Little Wild Horse Canyon trail for as long as they feel comfortable, just to get a sense of what it is like to be in a slot canyon. But being that it is possible to drive to the trailhead, the trail is relatively flat, and the hike can be completed well within a day (if not a few hours), it is well worth hiking the full loop. And, given that the Class 2-3 scrambling can be accomplished without aid, it is also a great introduction to canyoneering.


DIRECTIONS TO LITTLE WILD HORSE CANYON/BELL CANYON TRAILHEAD


From I-70 West (Green River):

  1. Take Exit 149 for UT-24 W toward Hanksville
  2. Turn left onto UT-24 West
  3. Turn right onto Temple Mountain Road
  4. Turn left onto Goblin Valley Road
  5. Turn right onto Wild Horse Road (destination will be on the right)

Visit here for full directions from Salt Lake City.

4J5A9564.jpg

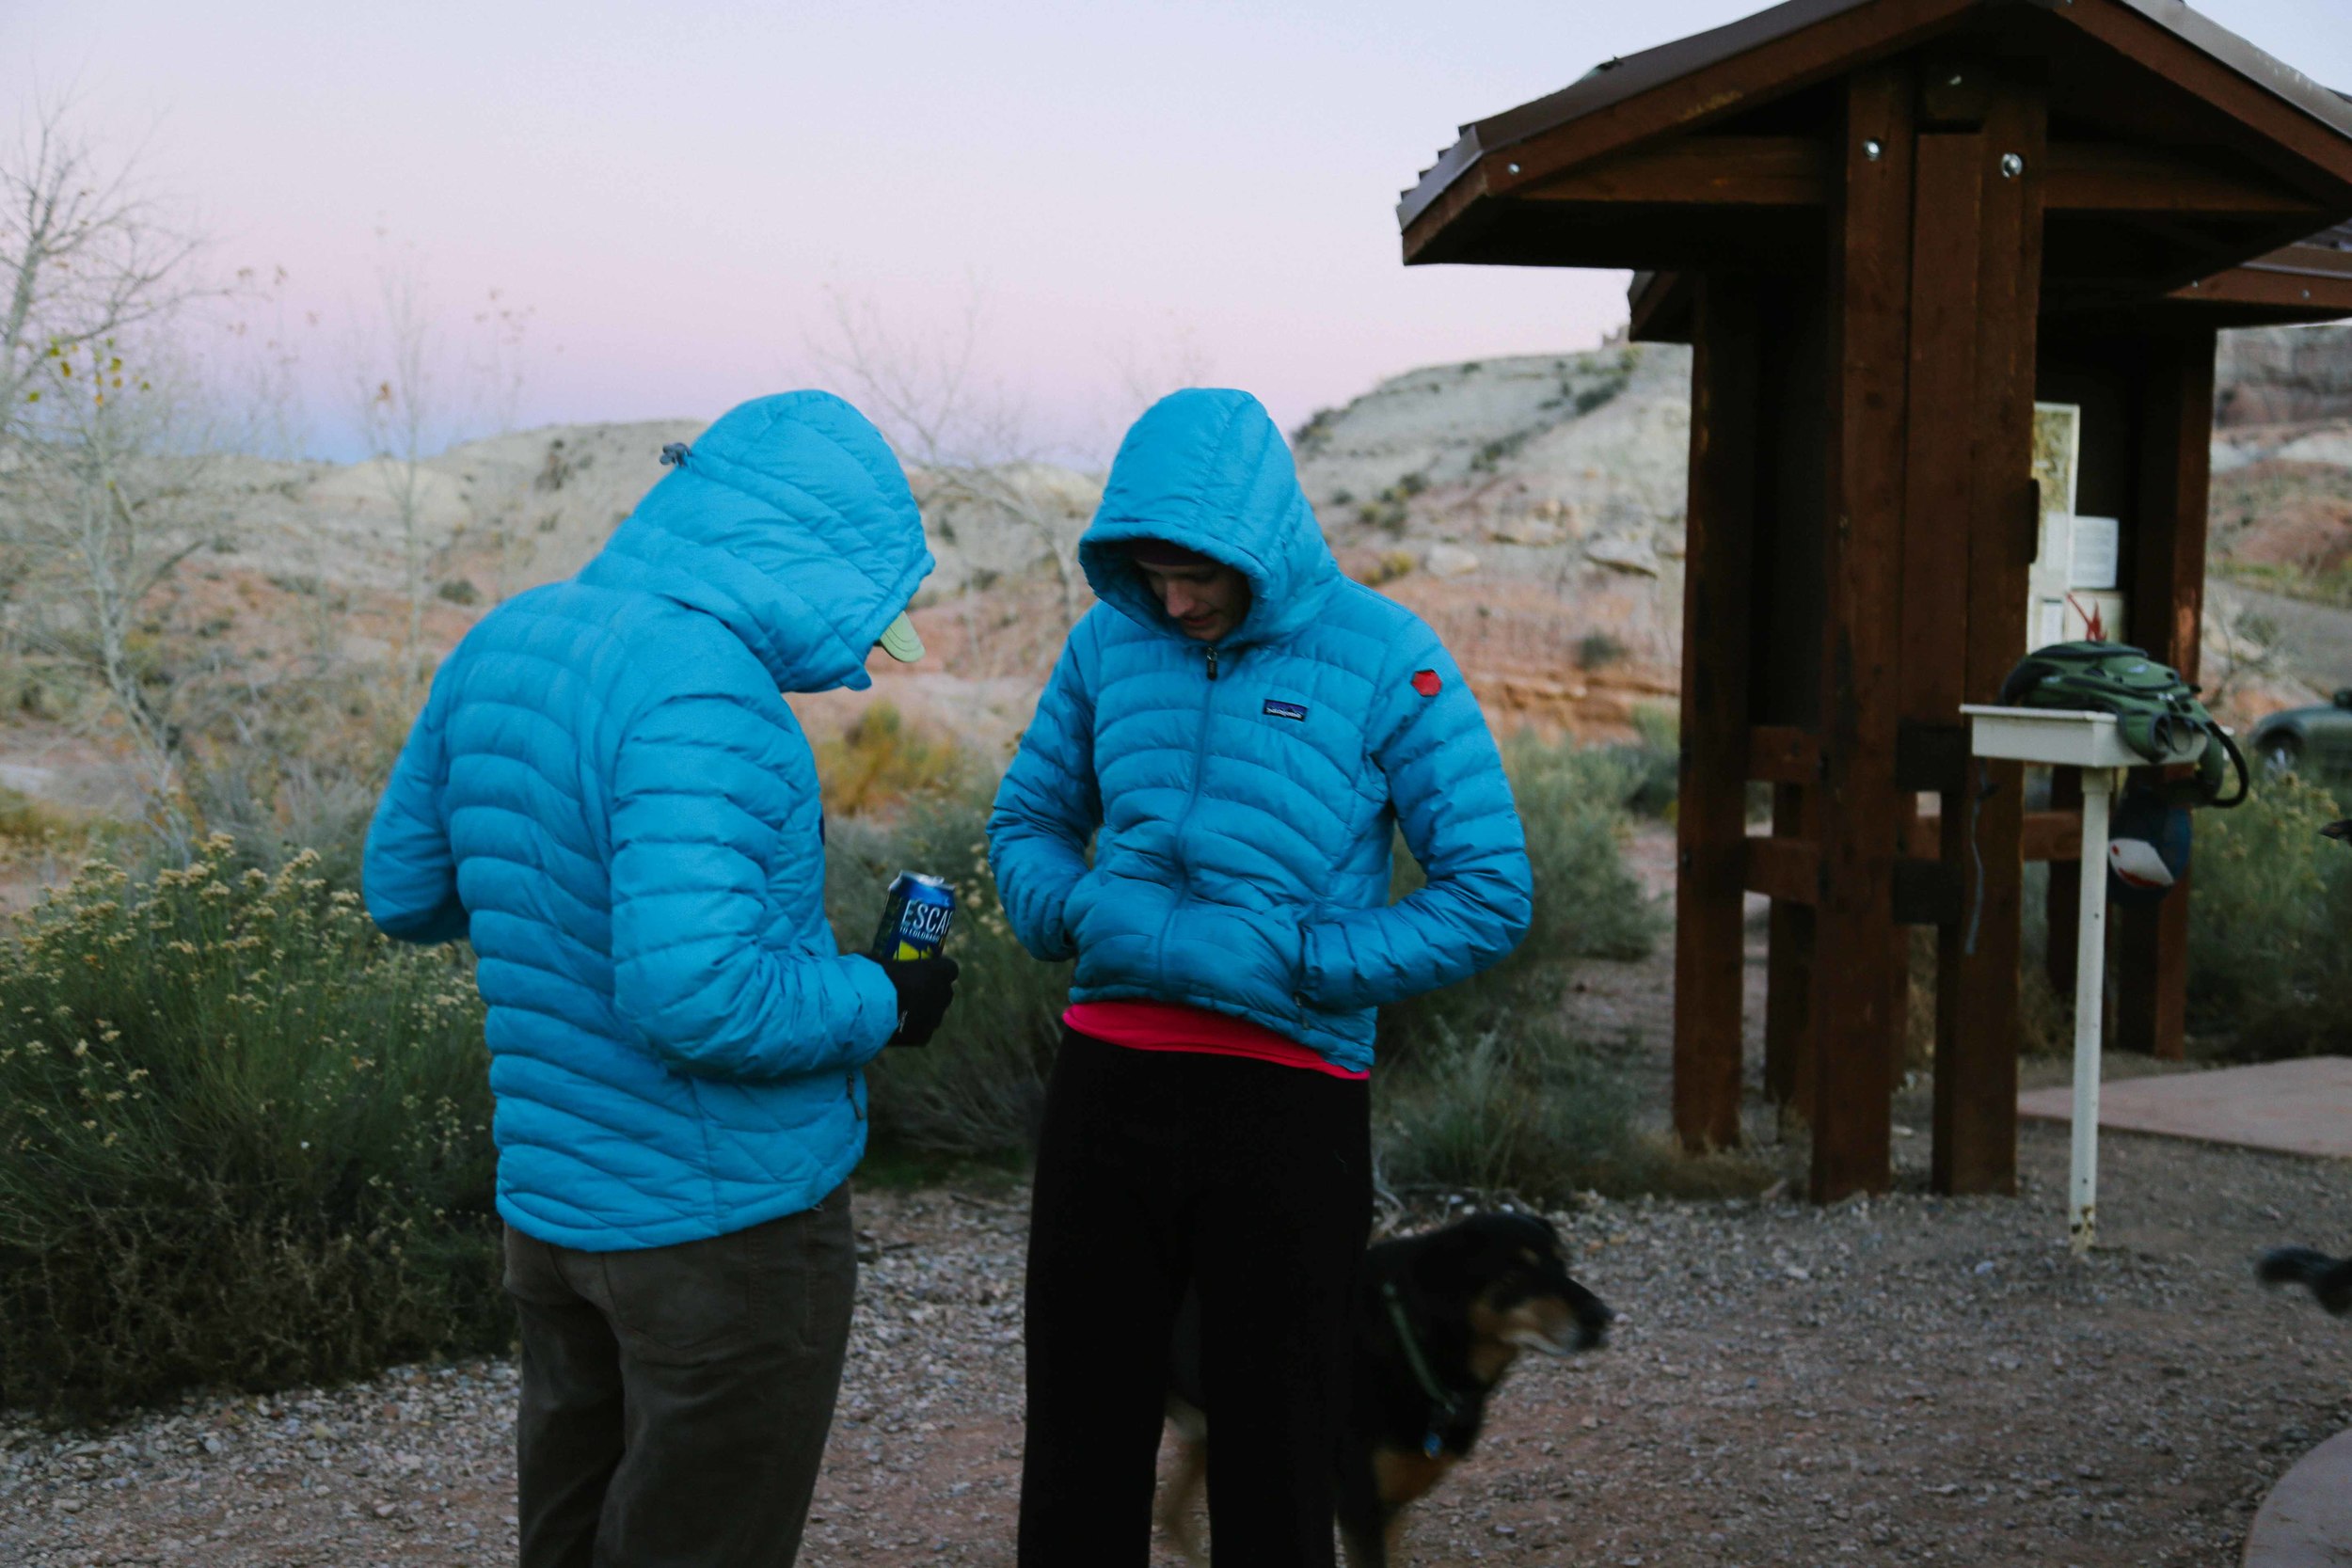
THINGS WE LEARNED ABOUT CAMPING (LATE FALL/EARLY WINTER CONDITIONS):

  • Holy crap, does it get cold at night. I woke up to pee sometime between 2-4am and there were ice crystals on the inside of the tent. Bring the warmest sleeping bag you own. In fact, bring two. I have this bag and my toes were popsicles when I came back from my nighttime pee, and it took them forever to warm up again.
  • One of the best ways to keep warm (with a partner or friend) is to zip two sleeping bags together into one giant bag, slip two individual sleeping bags next to each other in the big bag, and then sleep in the individual sleeping bags like you are some kind of poofy, inedible turducken. Any dogs can go in between the two sleeping bags within the giant bag. Props to Richard for knowing to do this.
  • Speaking of dogs, make sure you bring a jacket or blanket for your furry friend(s), plus a dog bed or pad for him/her to sleep on so s/he isn't lying on the freezing-cold ground. We think of Lucca as an Arctic wonder dog because he voluntarily takes naps in the snow, but I have never in my life seen him so cold. We put him on a dog bed after our hike and wrapped him in a jacket and wool blanket and he stayed there, all frozen-burrito like, until we scooped him up and went to the tent to sleep.
  • If I have just freaked you out about the cold, know that there are other places for you to stay, such as yurts! Two yurts are located about a quarter mile from the the Goblin Valley State Park visitor's center, and look quite cozy. You're going to have to redo that math from earlier, though, as it costs just over $100/night to stay in a yurt (and no pets are allowed).
  • Camping at Goblin Valley State Park is popular, and campsites quickly fill up. There is ample BLM camping off of dirt roads nearby, and many of the BLM spots are actually closer to the Bell/Little Wildhorse trailhead than the Goblin Valley campsites. Everything is quite close together, however (the Goblin Valley Visitor's Center is about 7 minutes from the trailhead), so you'll be in a good spot wherever you camp.

THINGS WE LEARNED ABOUT HIKING (LATE FALL/EARLY WINTER CONDITIONS):

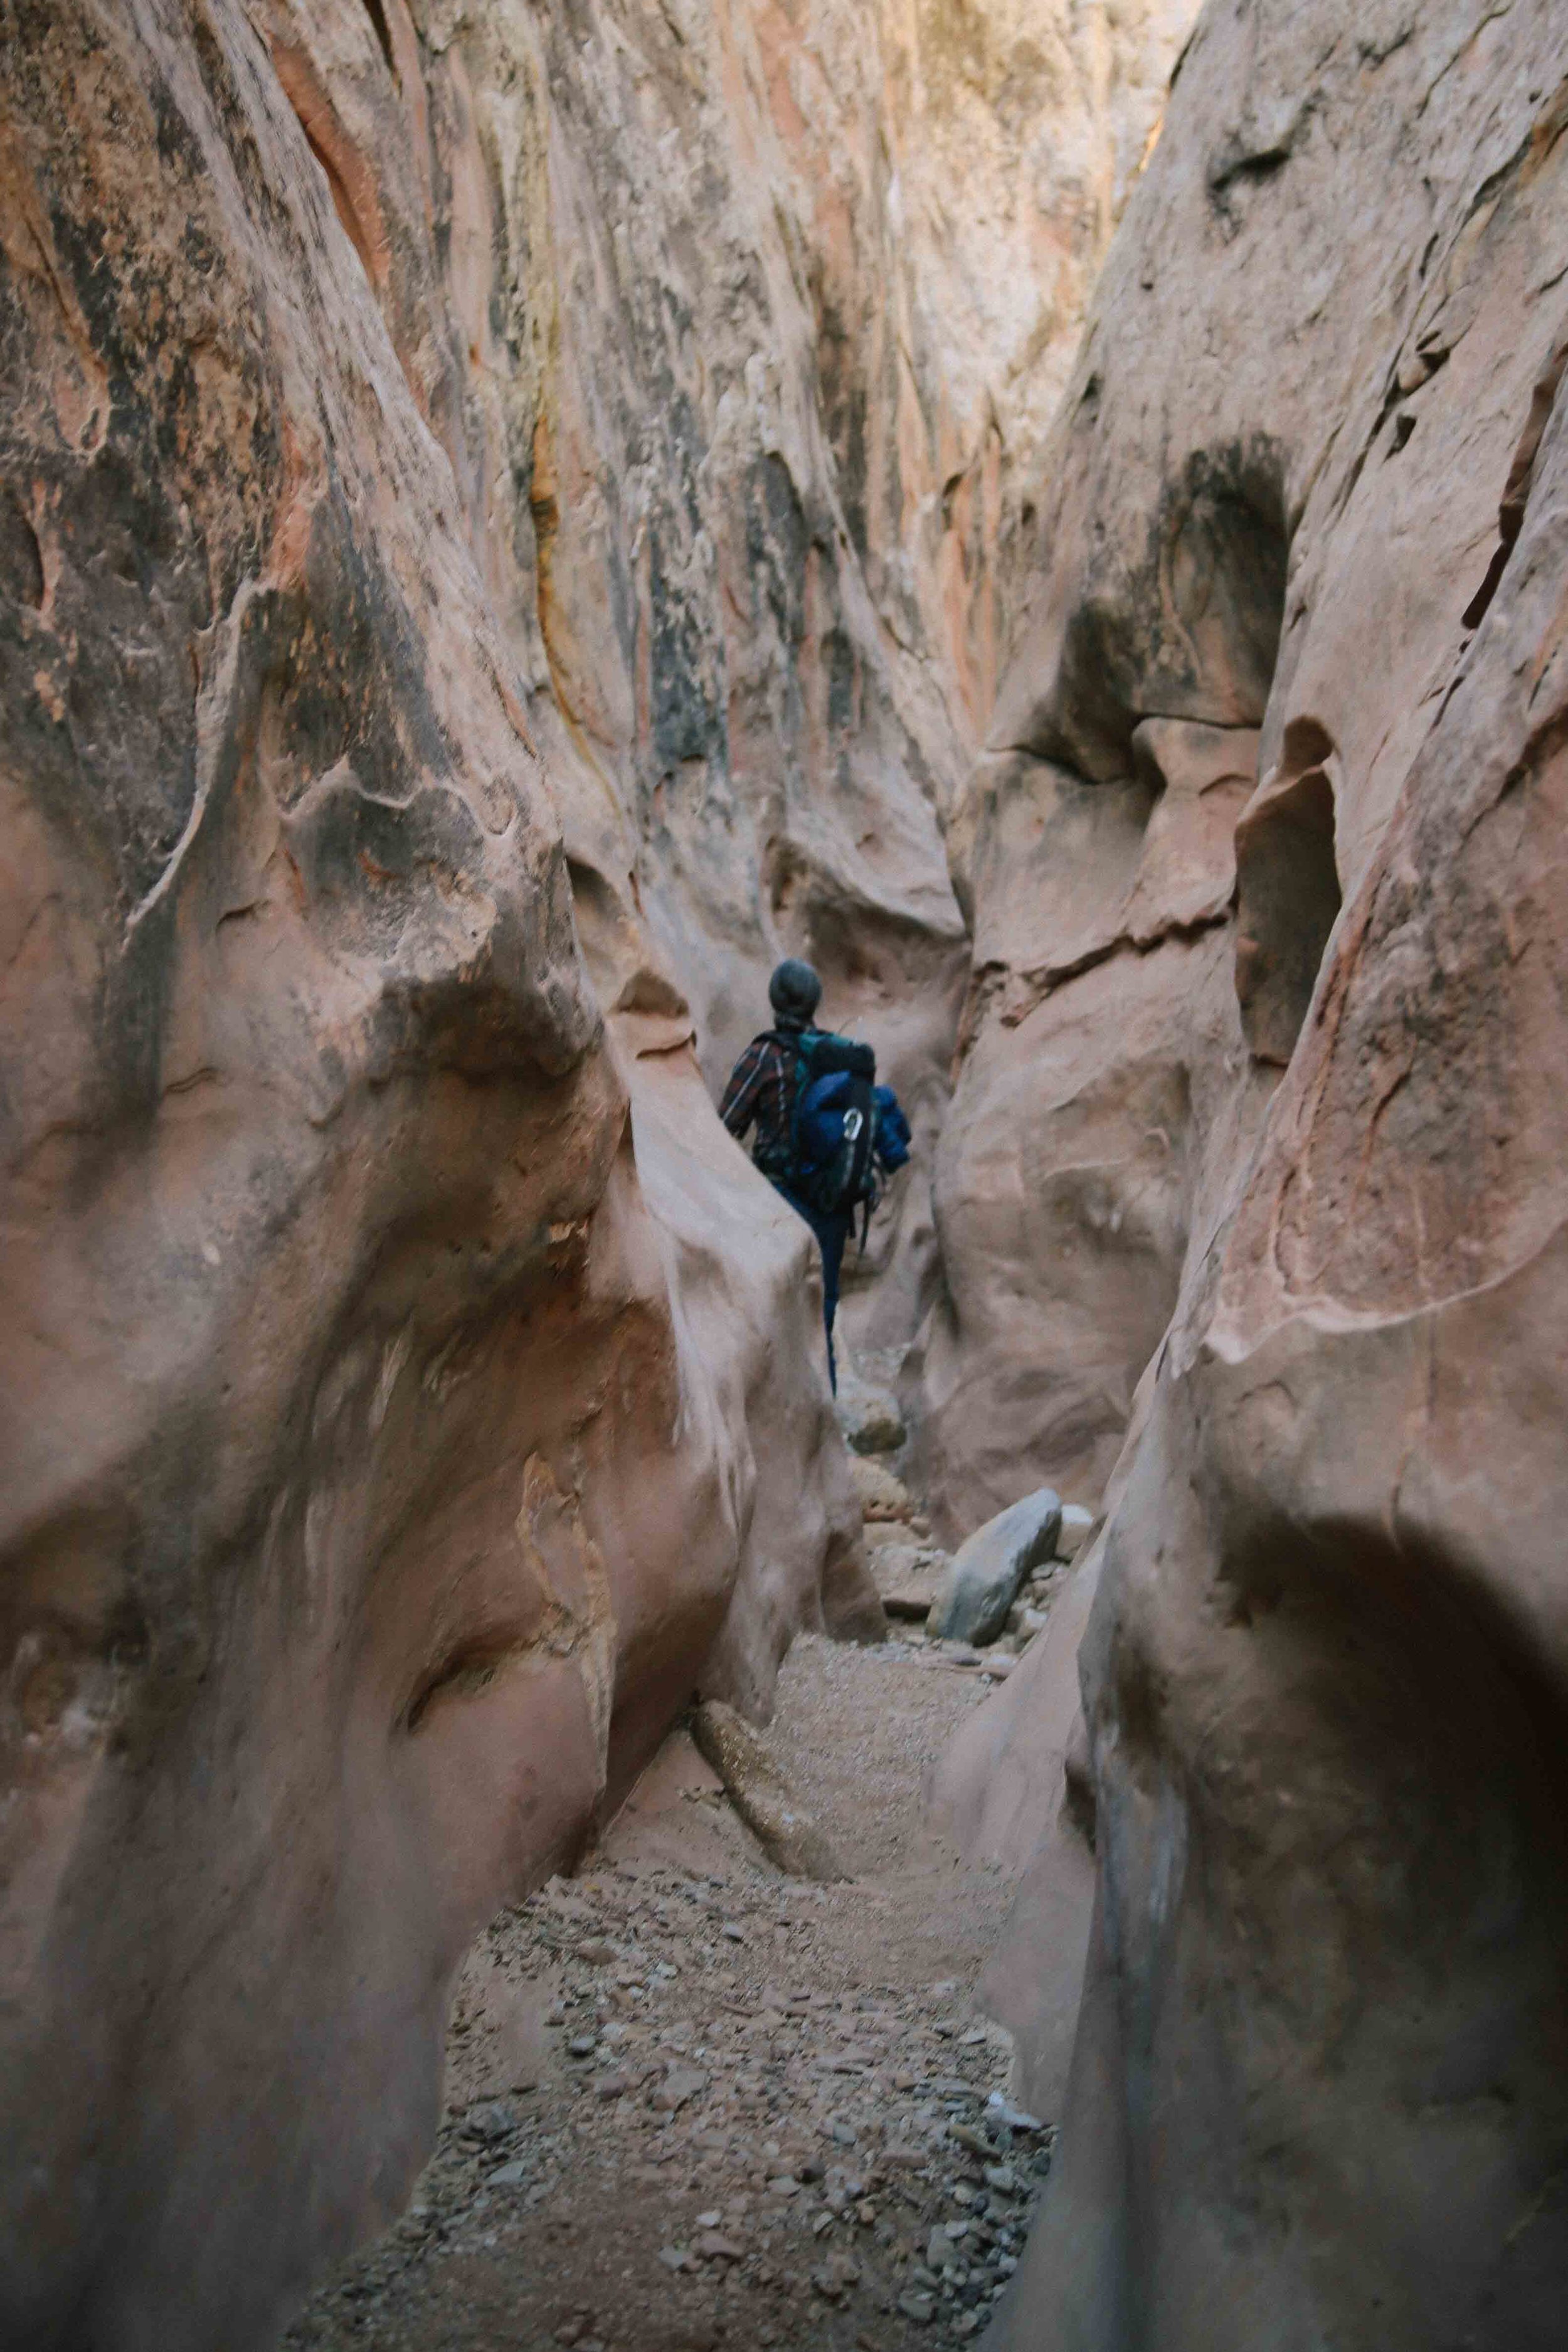
  • If you are doing the full Bells/Little Wild Horse loop (which you should!), we recommend starting at Bells (which is the left trail at the fork just beyond the trailhead, with Little Wild Horse being the right trail). Most people start at Little Wild Horse, so you'll miss most of the crowds by beginning at Bells, and then you'll go through the final slot late in the day when few (if any) people begin to hike, so there is a slim(mer) chance you'll bottleneck in the slot.
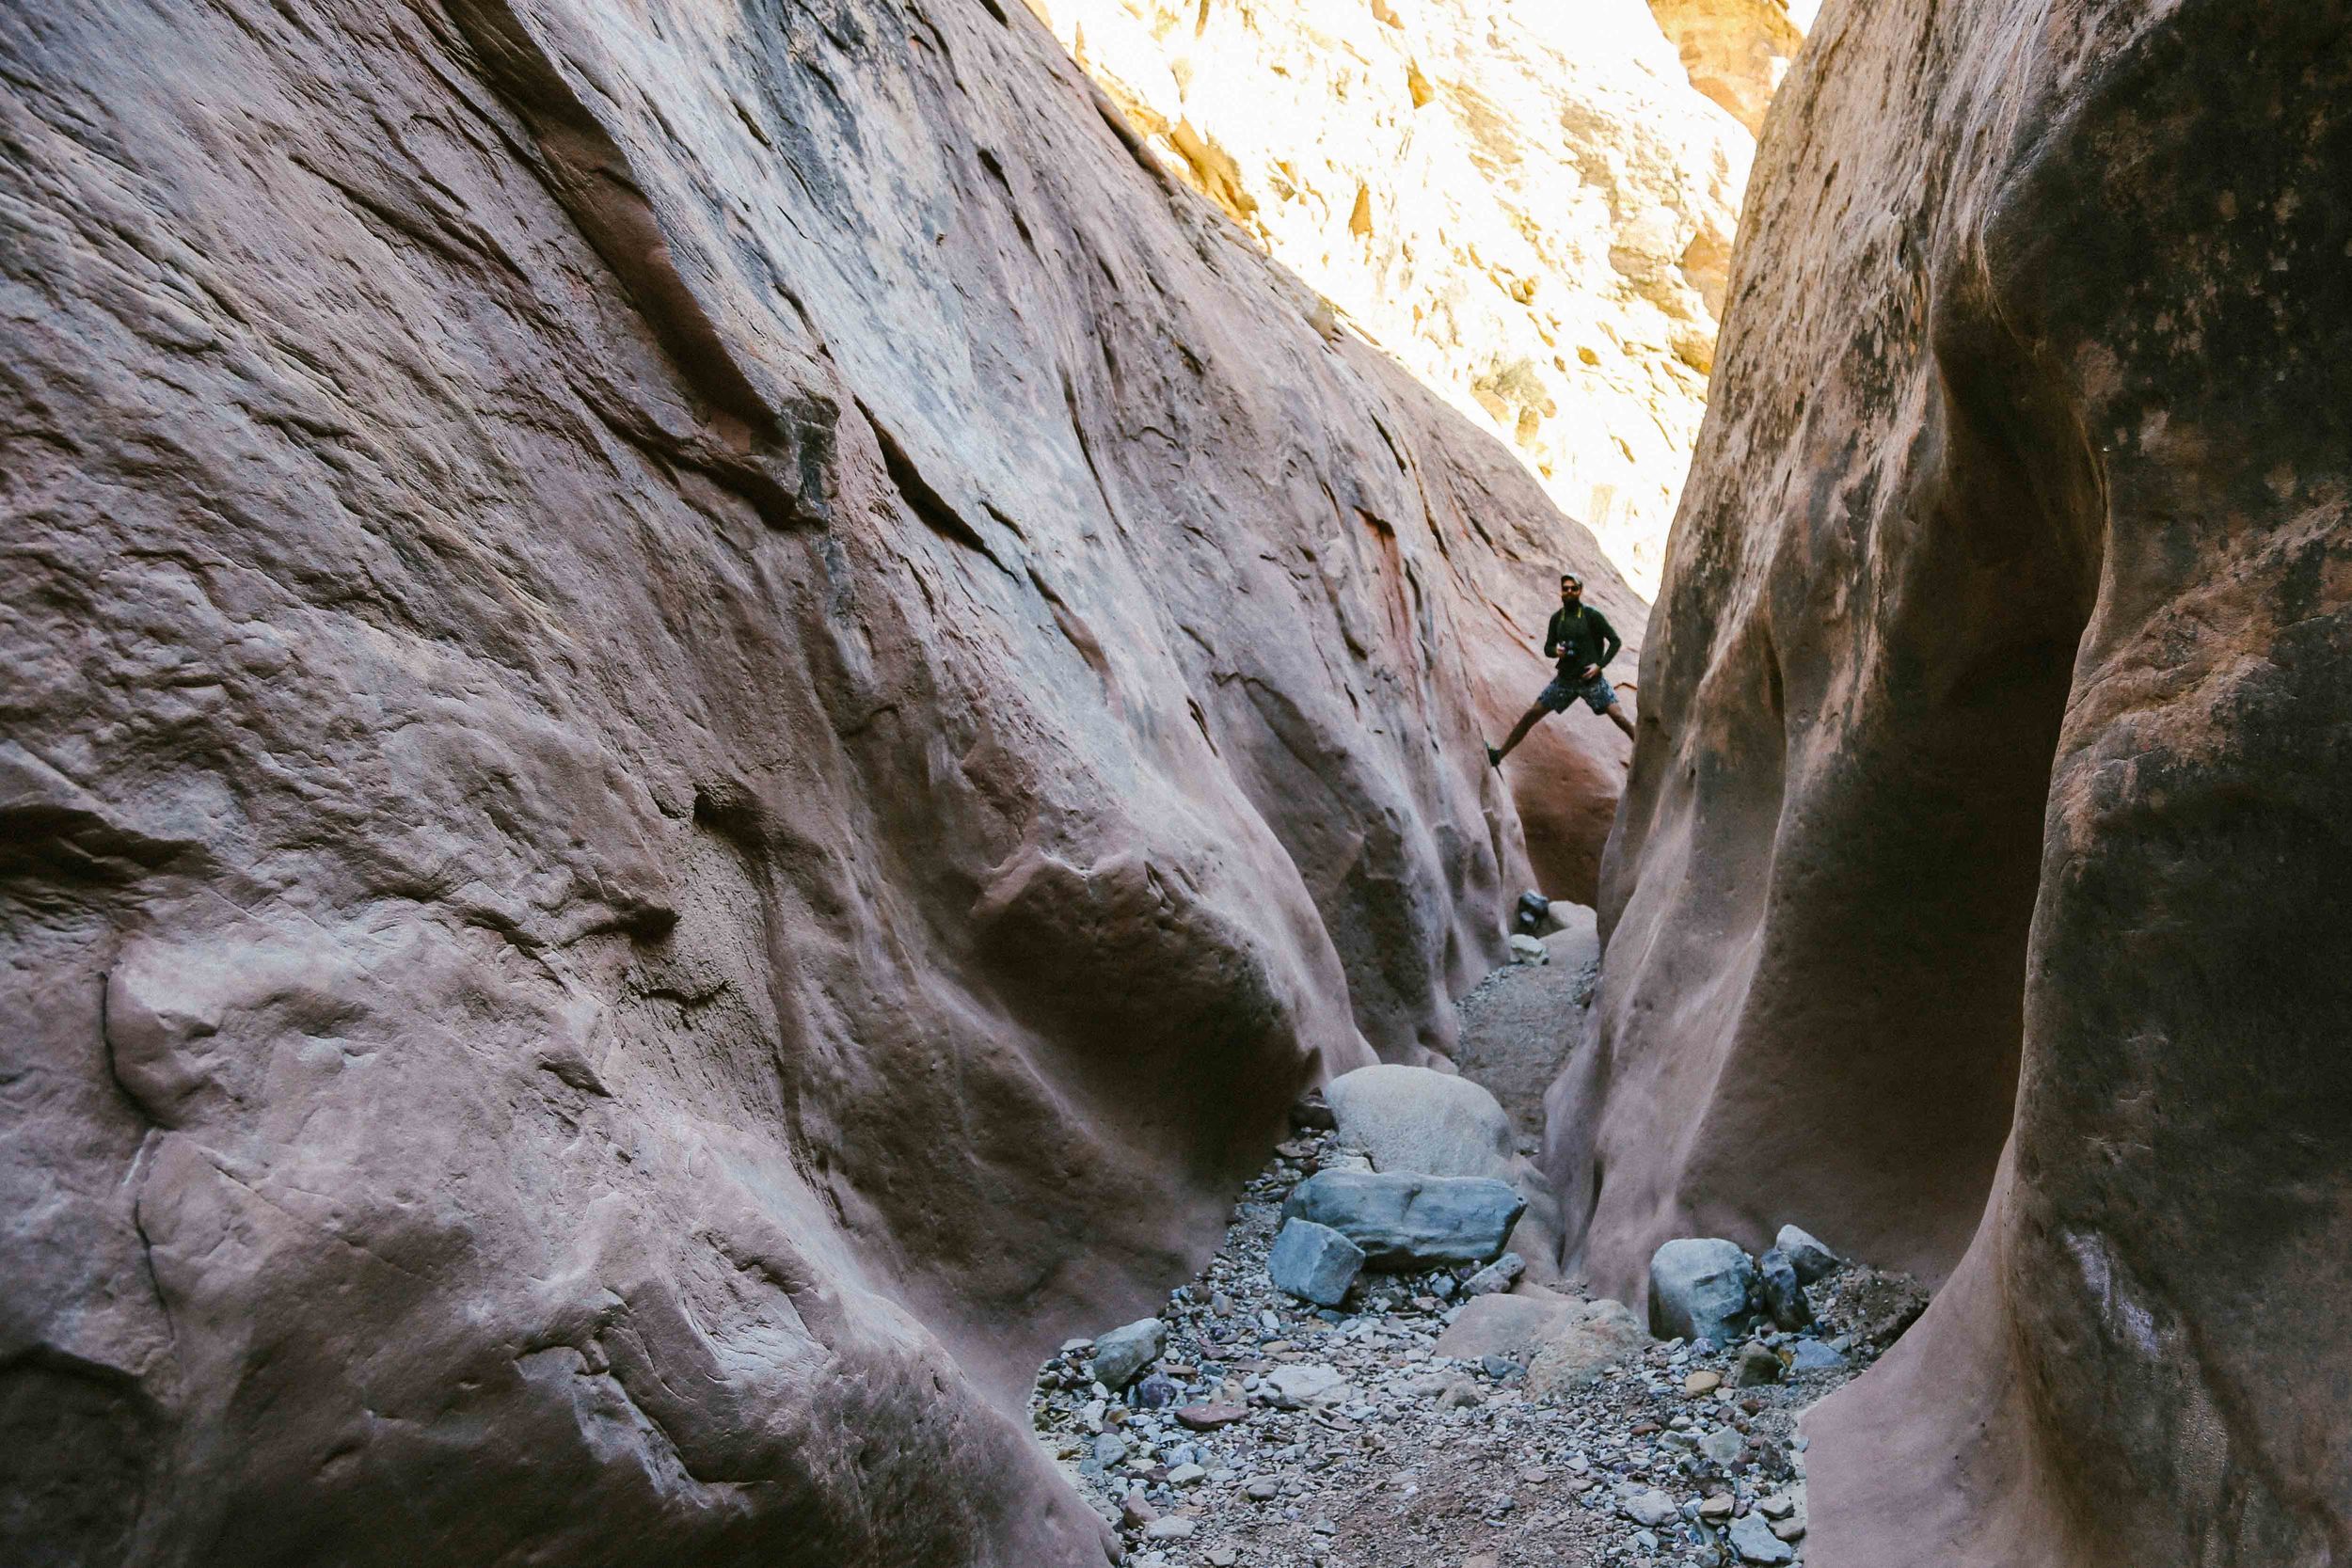
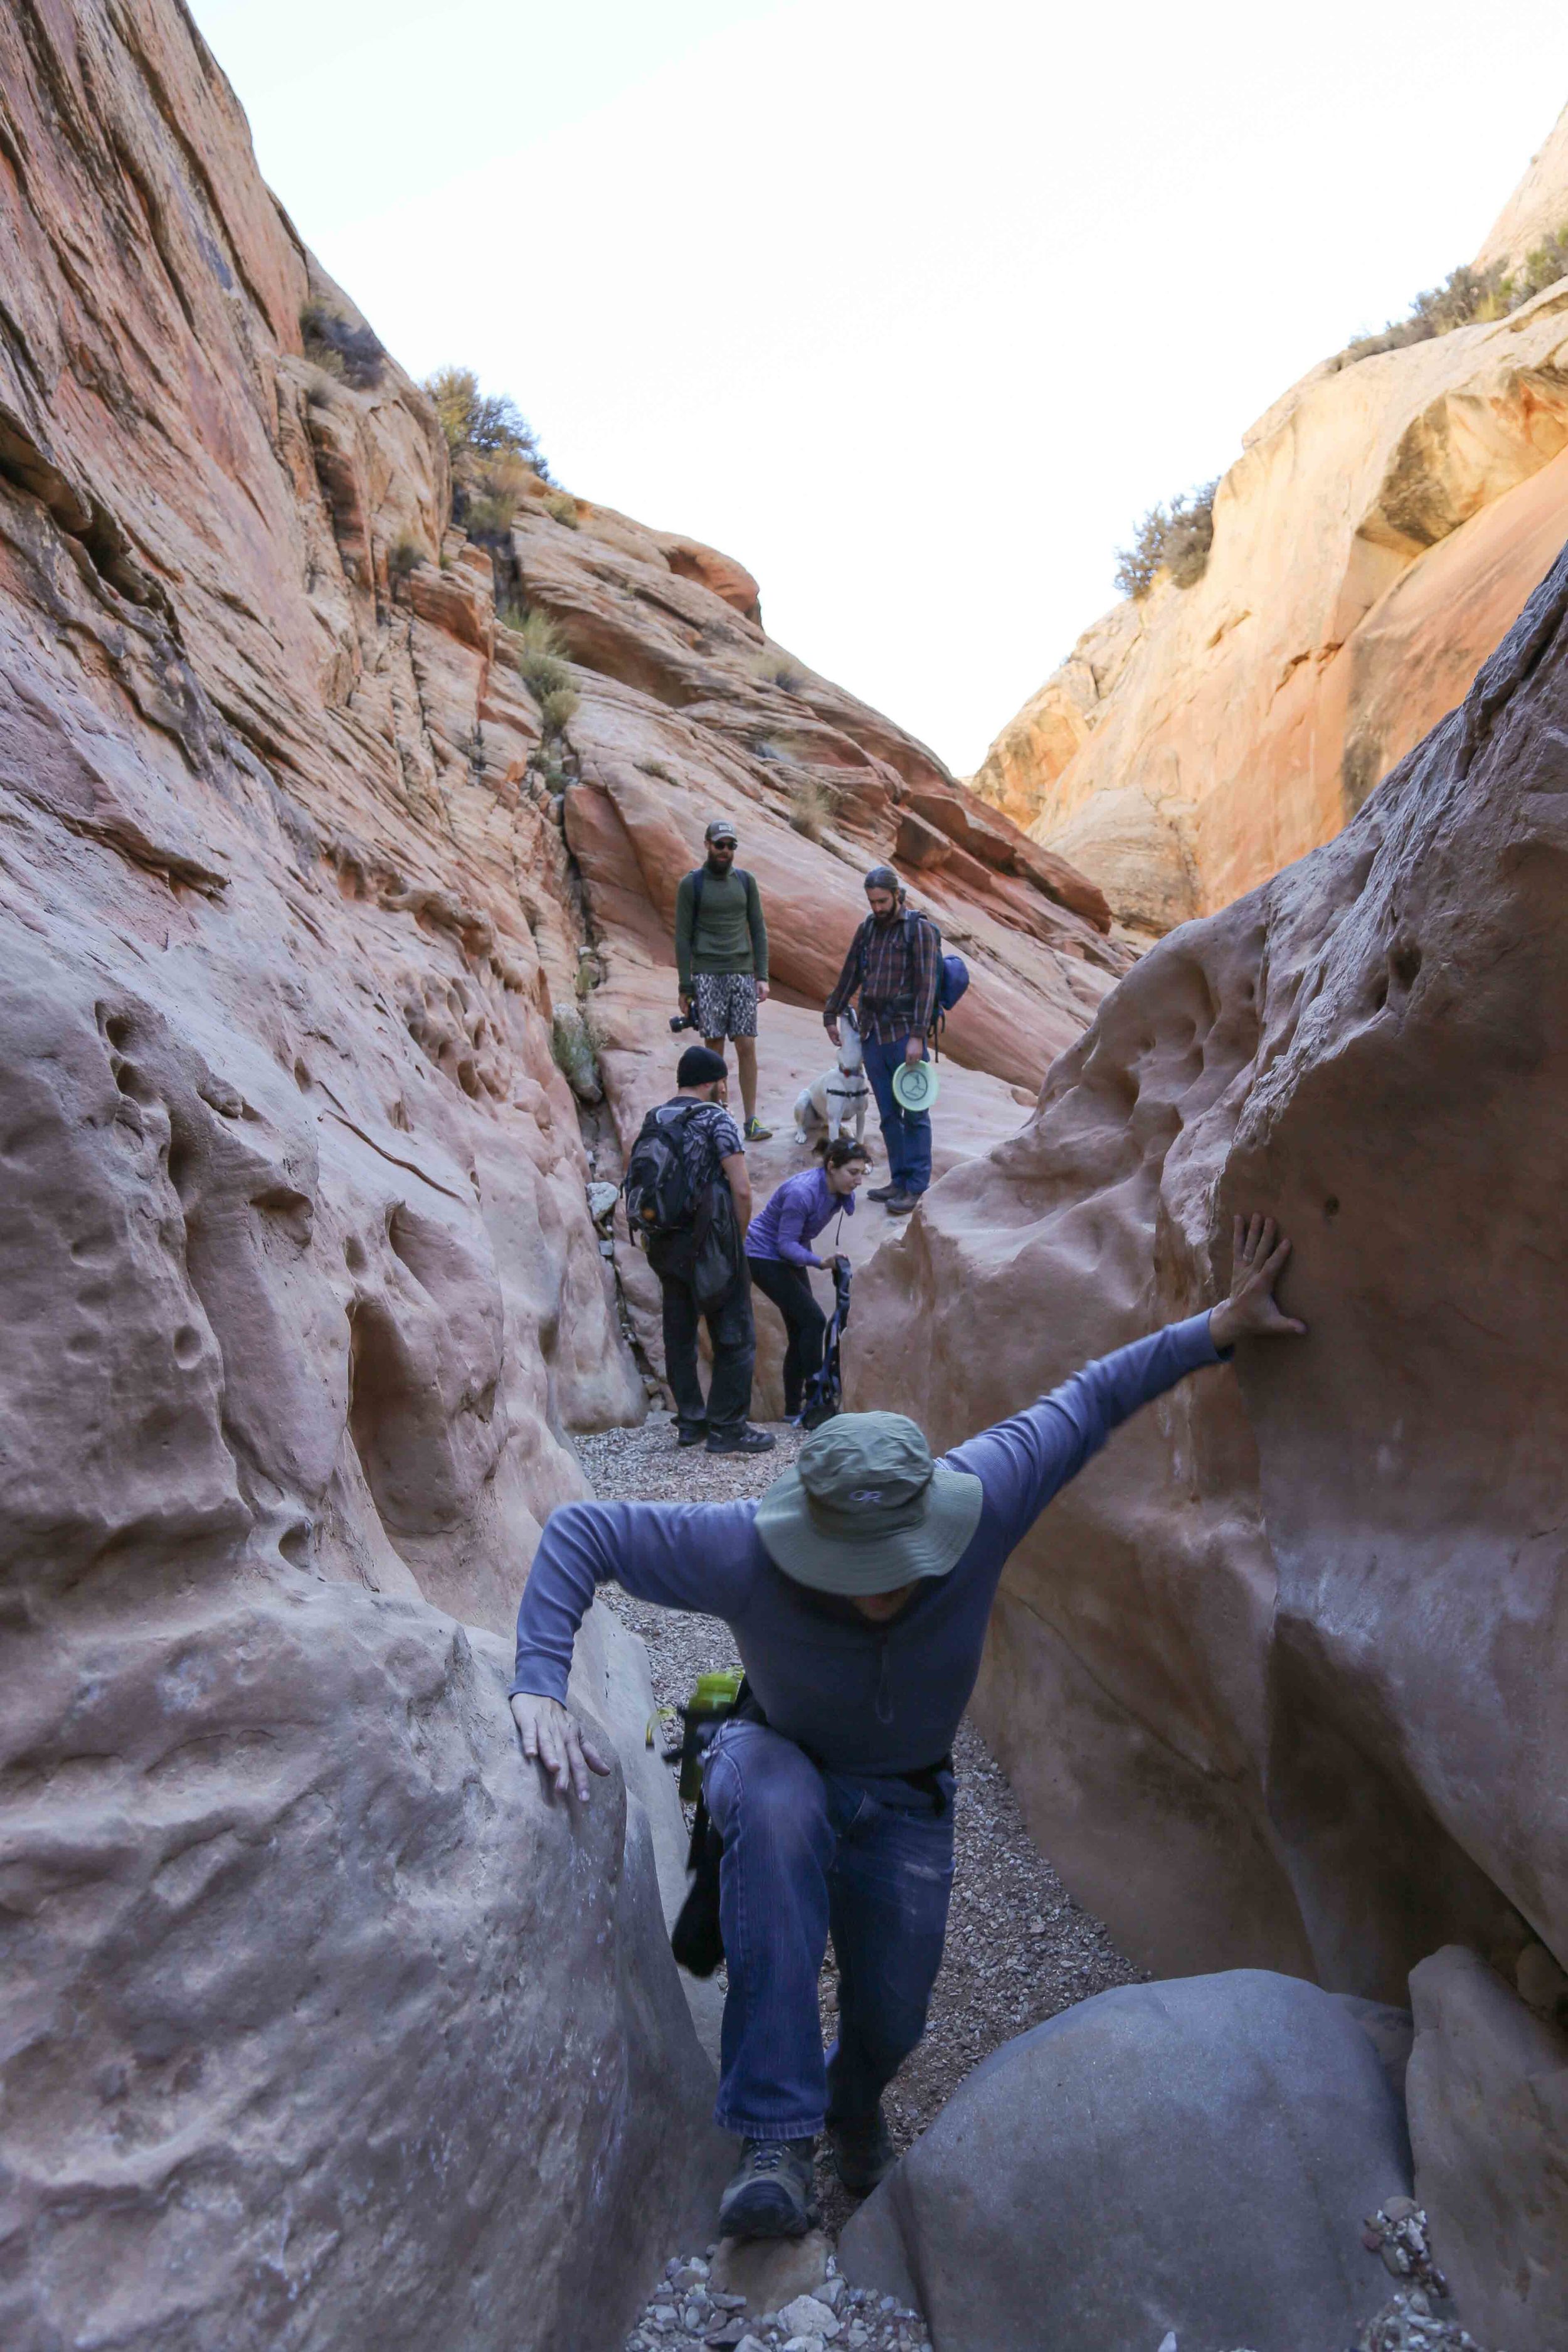
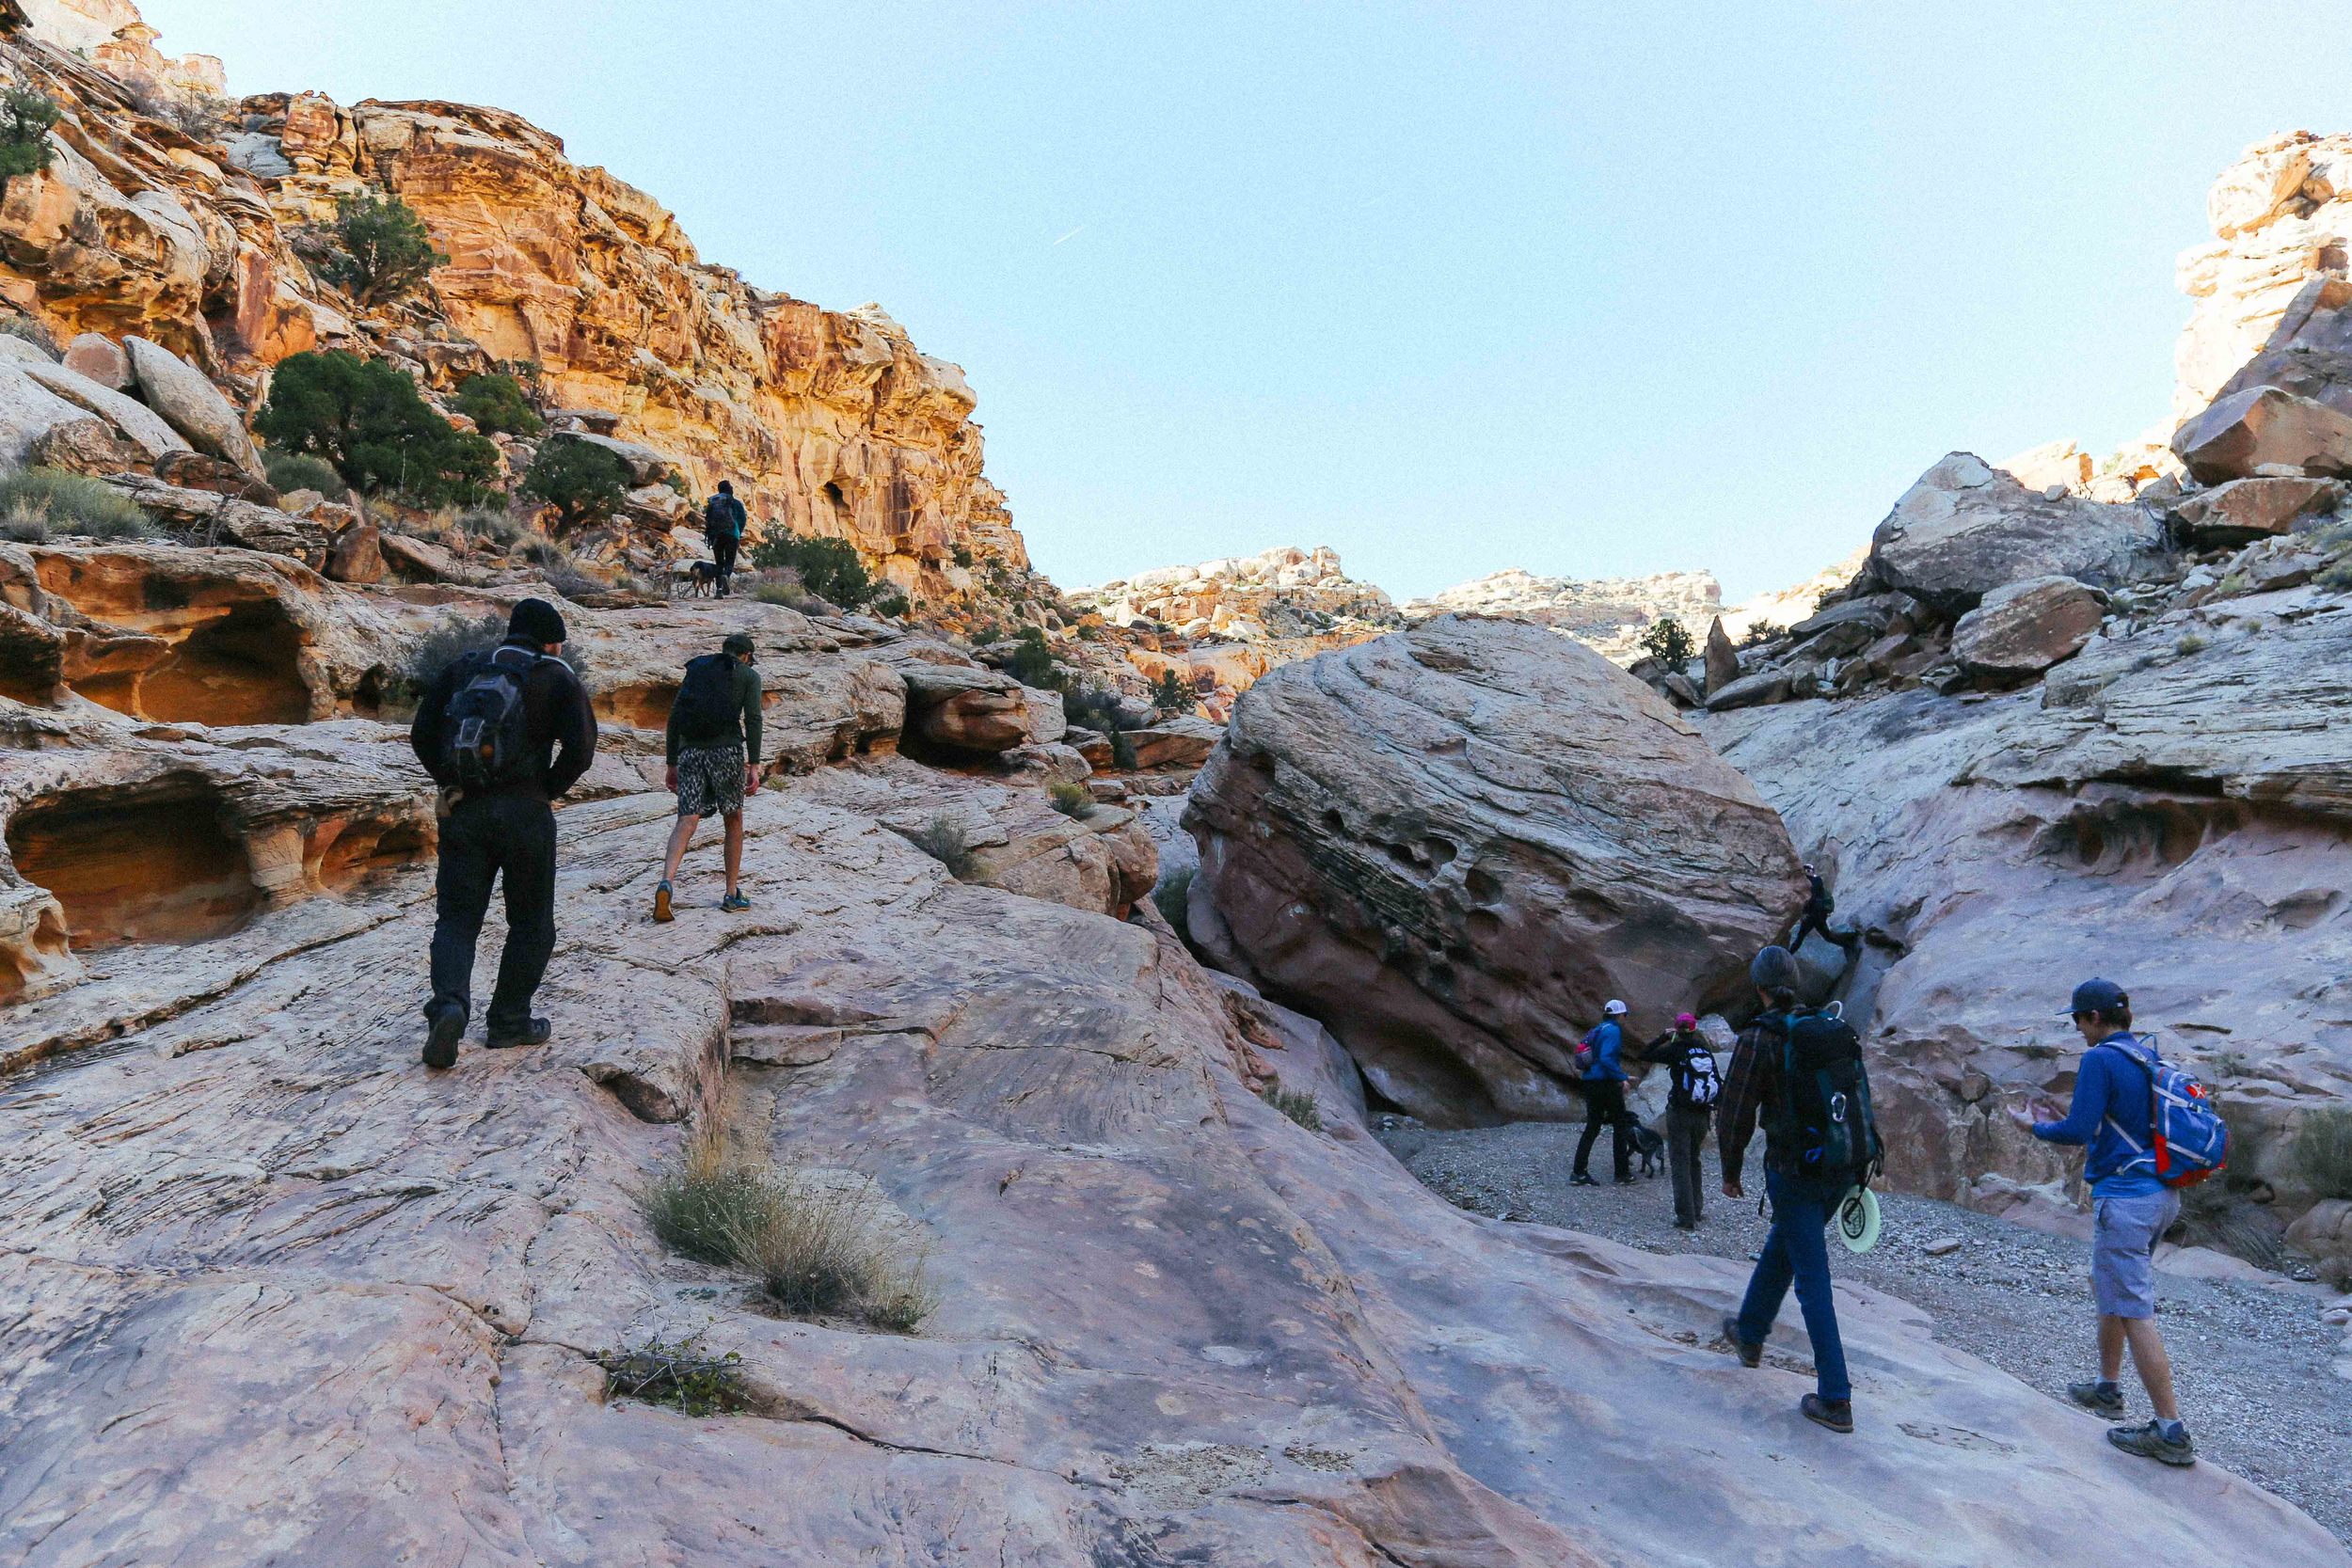
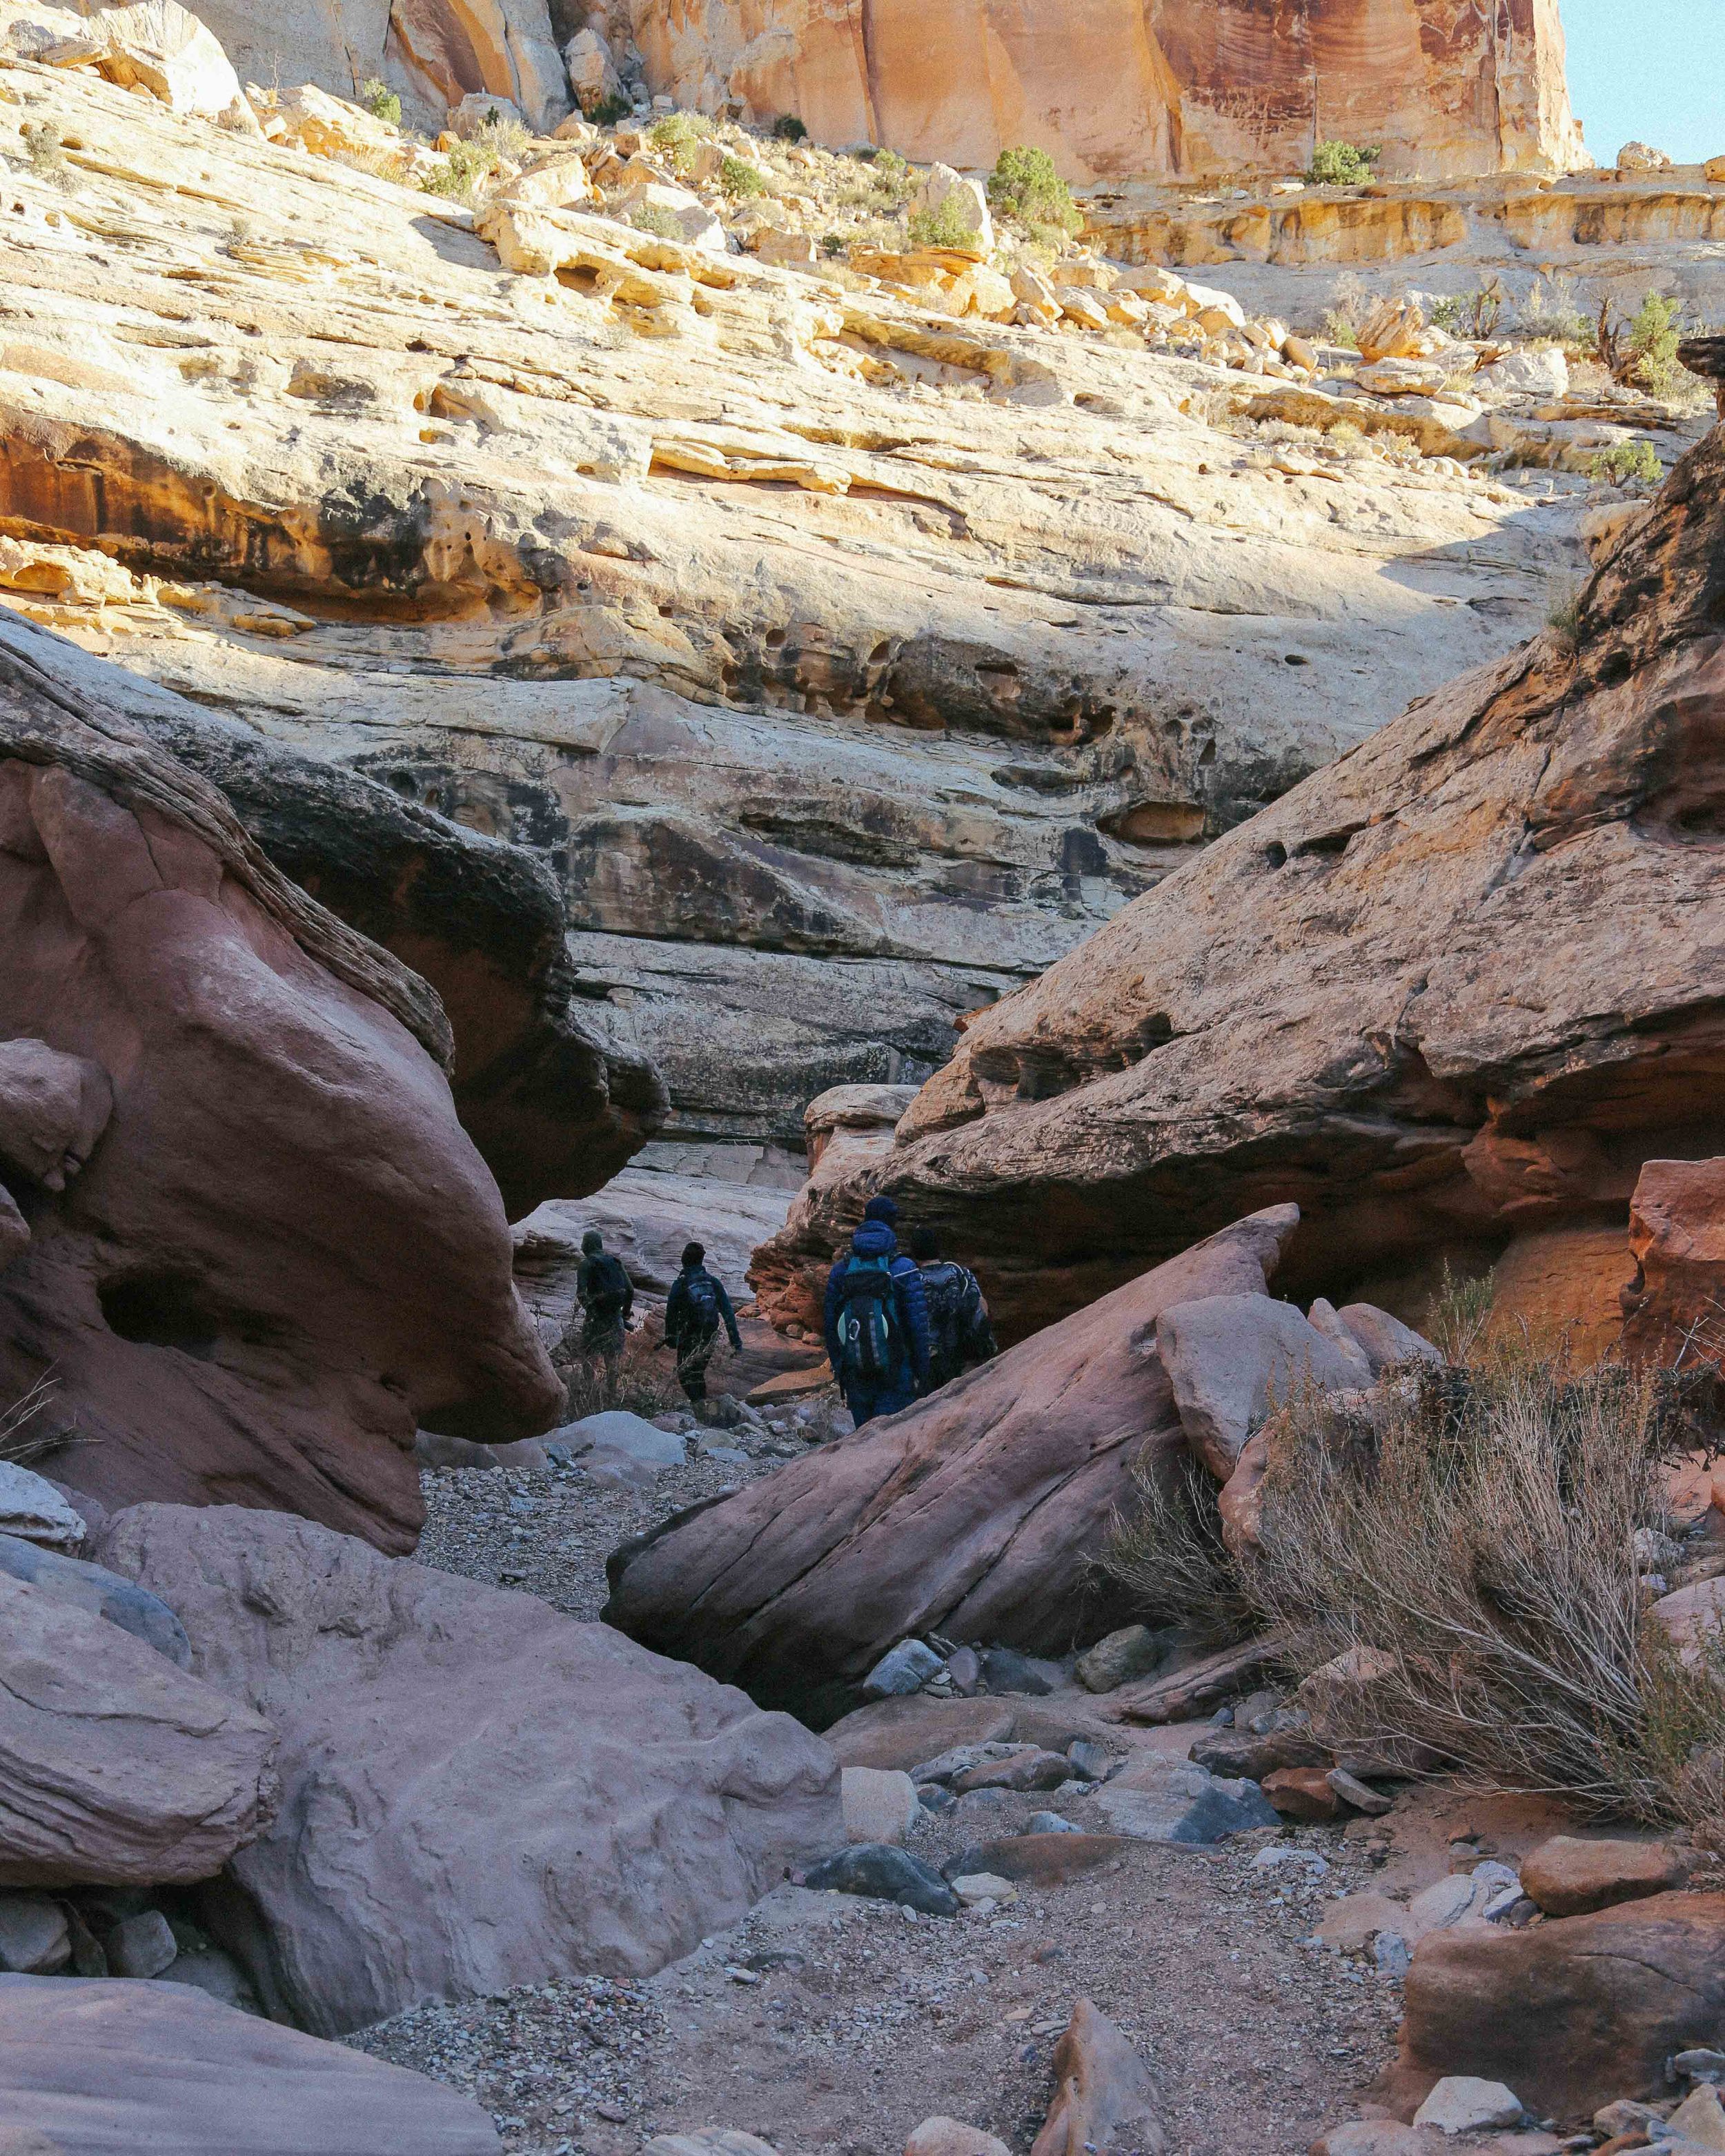
  • Be advised that you will be scrambling over boulders, loose rocks, etc. at various times during the trip. Wear sensible (close-toed) shoes. Tape or wrap any injured ankles/wrists to stabilize them, as you will be using all of your appendages to do stuff. The trail is punctuated with Class 2 and Class 3 climbing (meaning scrambling + more dicey scrambling) due to boulders getting lodged in the slot canyons during floods.
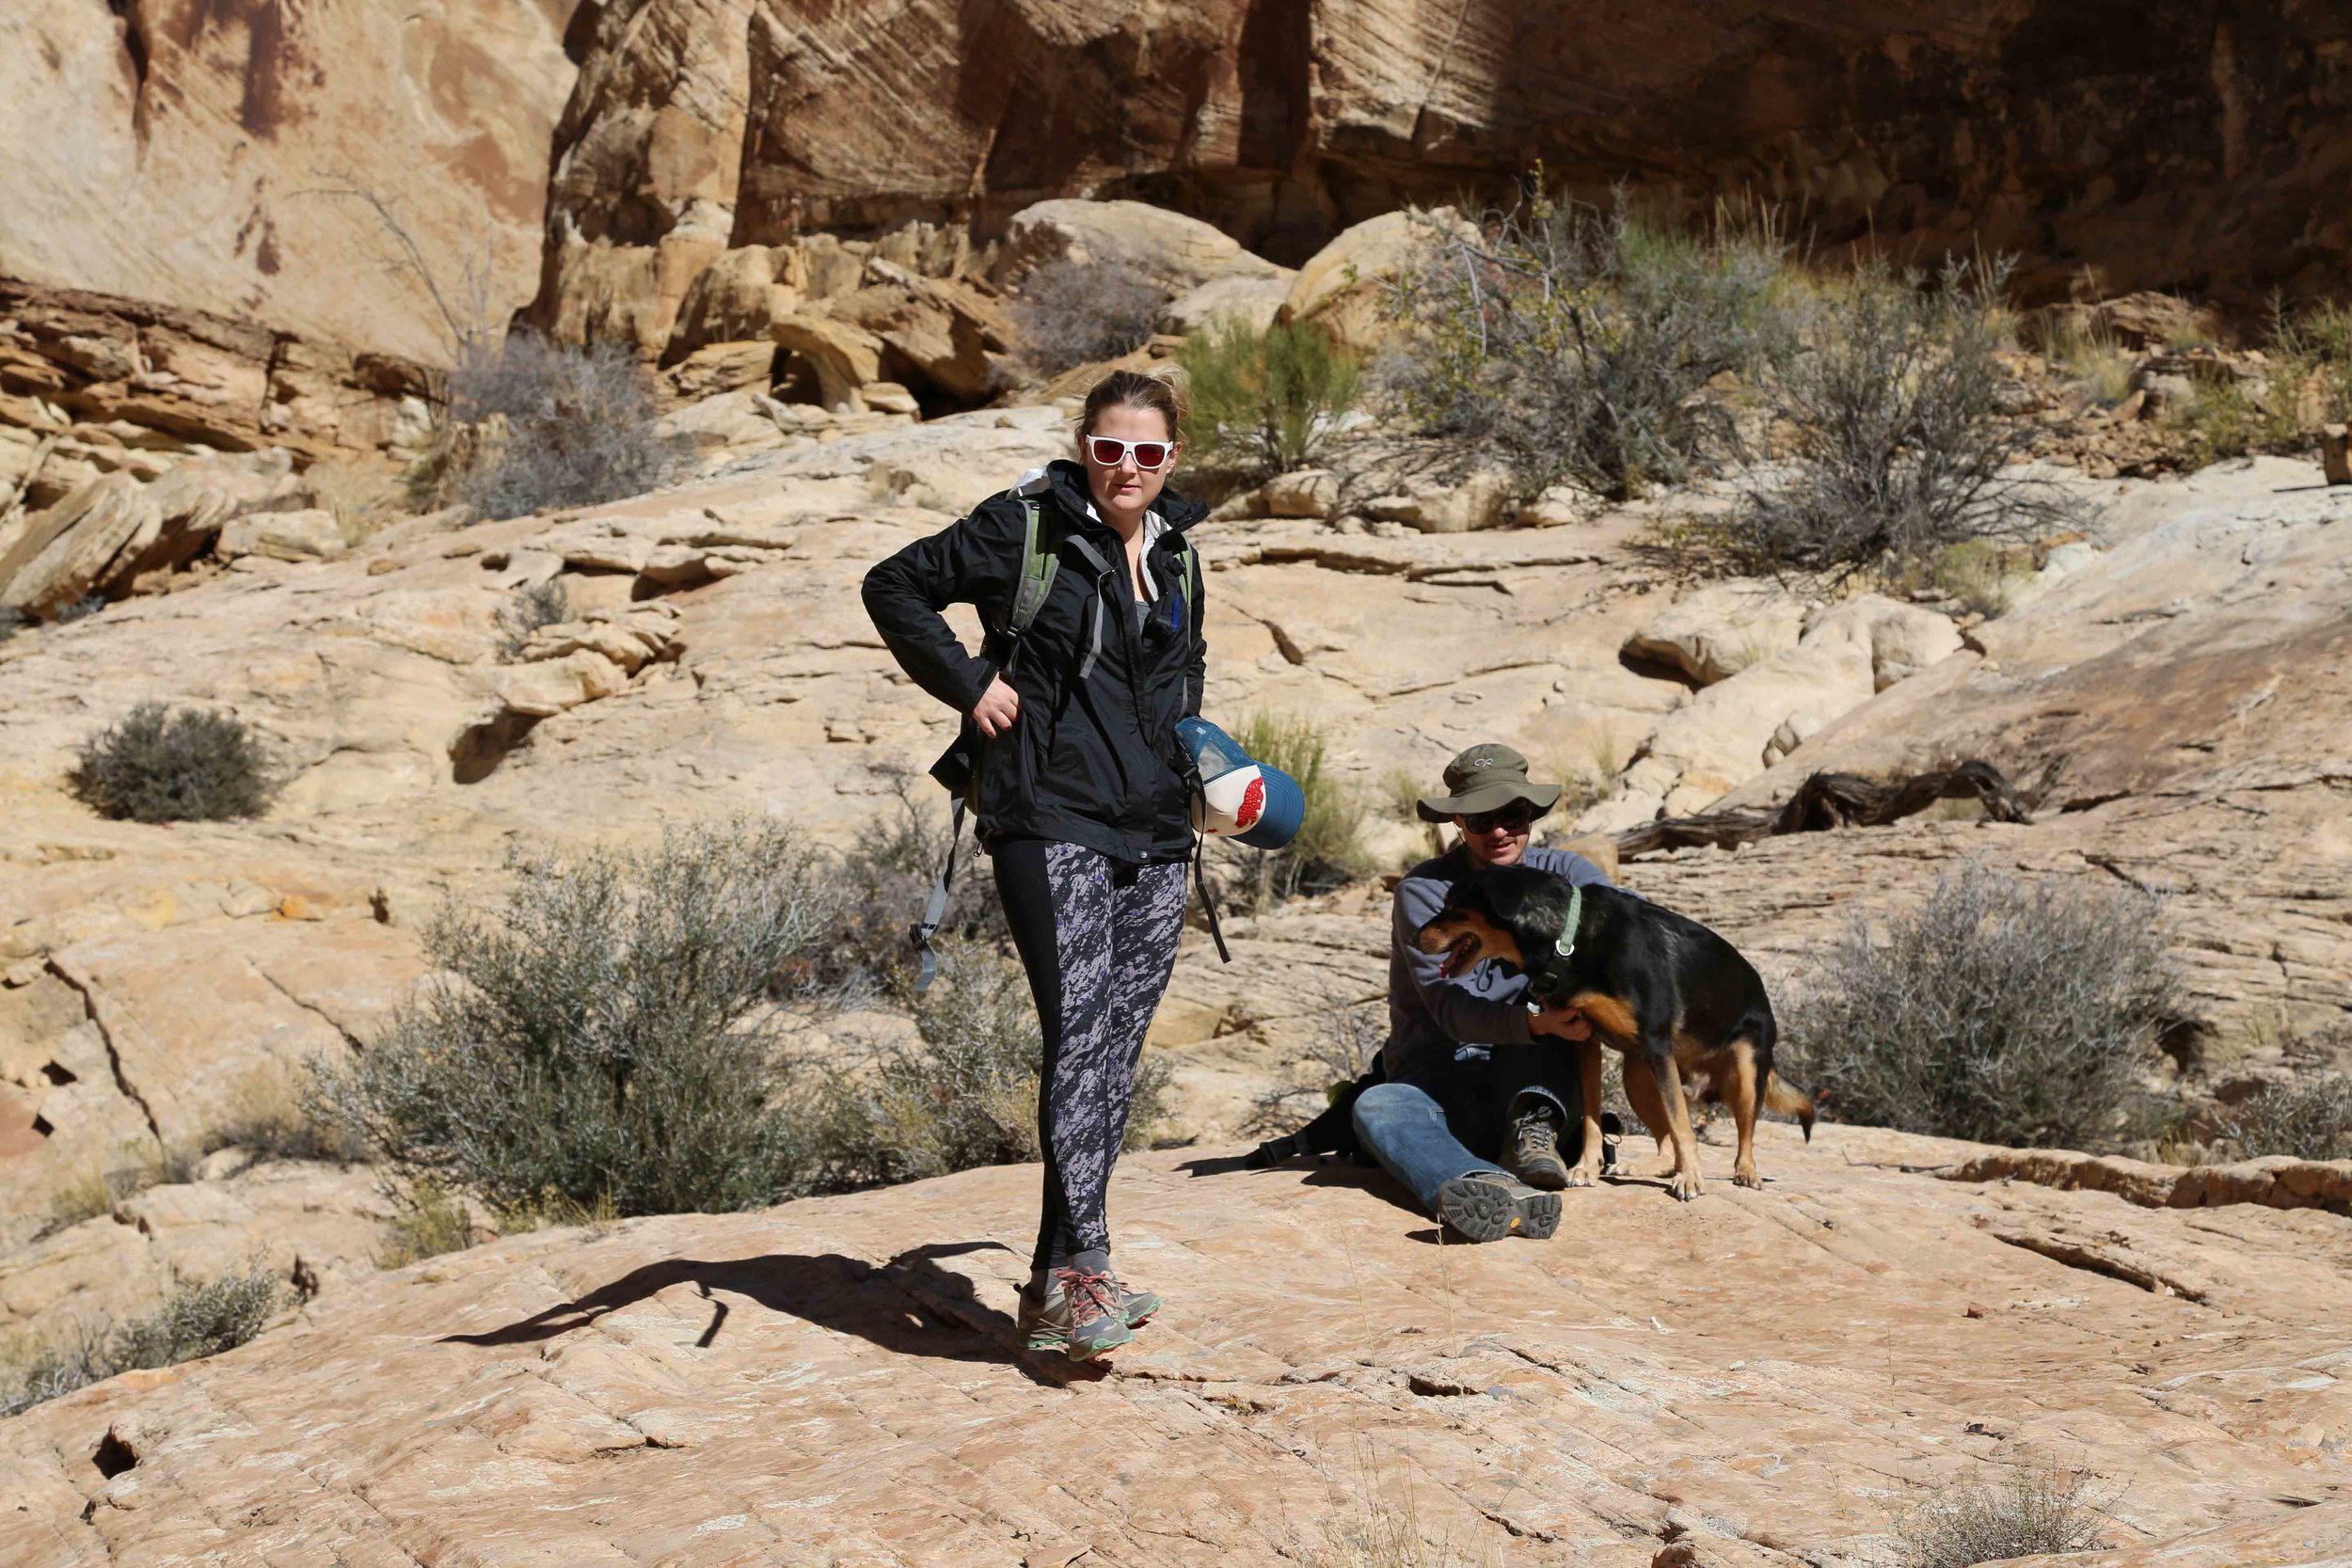
  • If you are bringing a dog, note that some of the areas in the canyons are rather technical, and that the rock is slick. Your dog needs to be confident and physically fit, and you need to prepare yourself to lift your dog over rocks/boulders that your dog can't manage himself. Get your dog a harness with a handle on the back (like this one) to help with maneuvering, and to hopefully catch your dog if he slips. Also make sure that at least two people in your group are physically able to lift the heaviest dog in the group. If you can't do that, leave the dog at home for both human and dog safety. Lucca weighs 60 pounds, for reference.
  • Dogs may get scared while you are lifting them over rocks, and they may pee on you or your friends. Make sure you have really nice friends.

THINGS WE LEARNED IN GENERAL:

  • There are kangaroo rats in the desert, and they like to hide in your suitcase and eat your pants. No, really. Beware that any car doors/tent flaps left open are fair game. Also, kangaroo rats are very cute, in spite of eating pants. Or, possibly because? There's an NSF research grant opportunity here.
  • There is very spotty cell service. Make plans with your group ahead of time, preferably through email so everyone has the same instructions/itinerary.
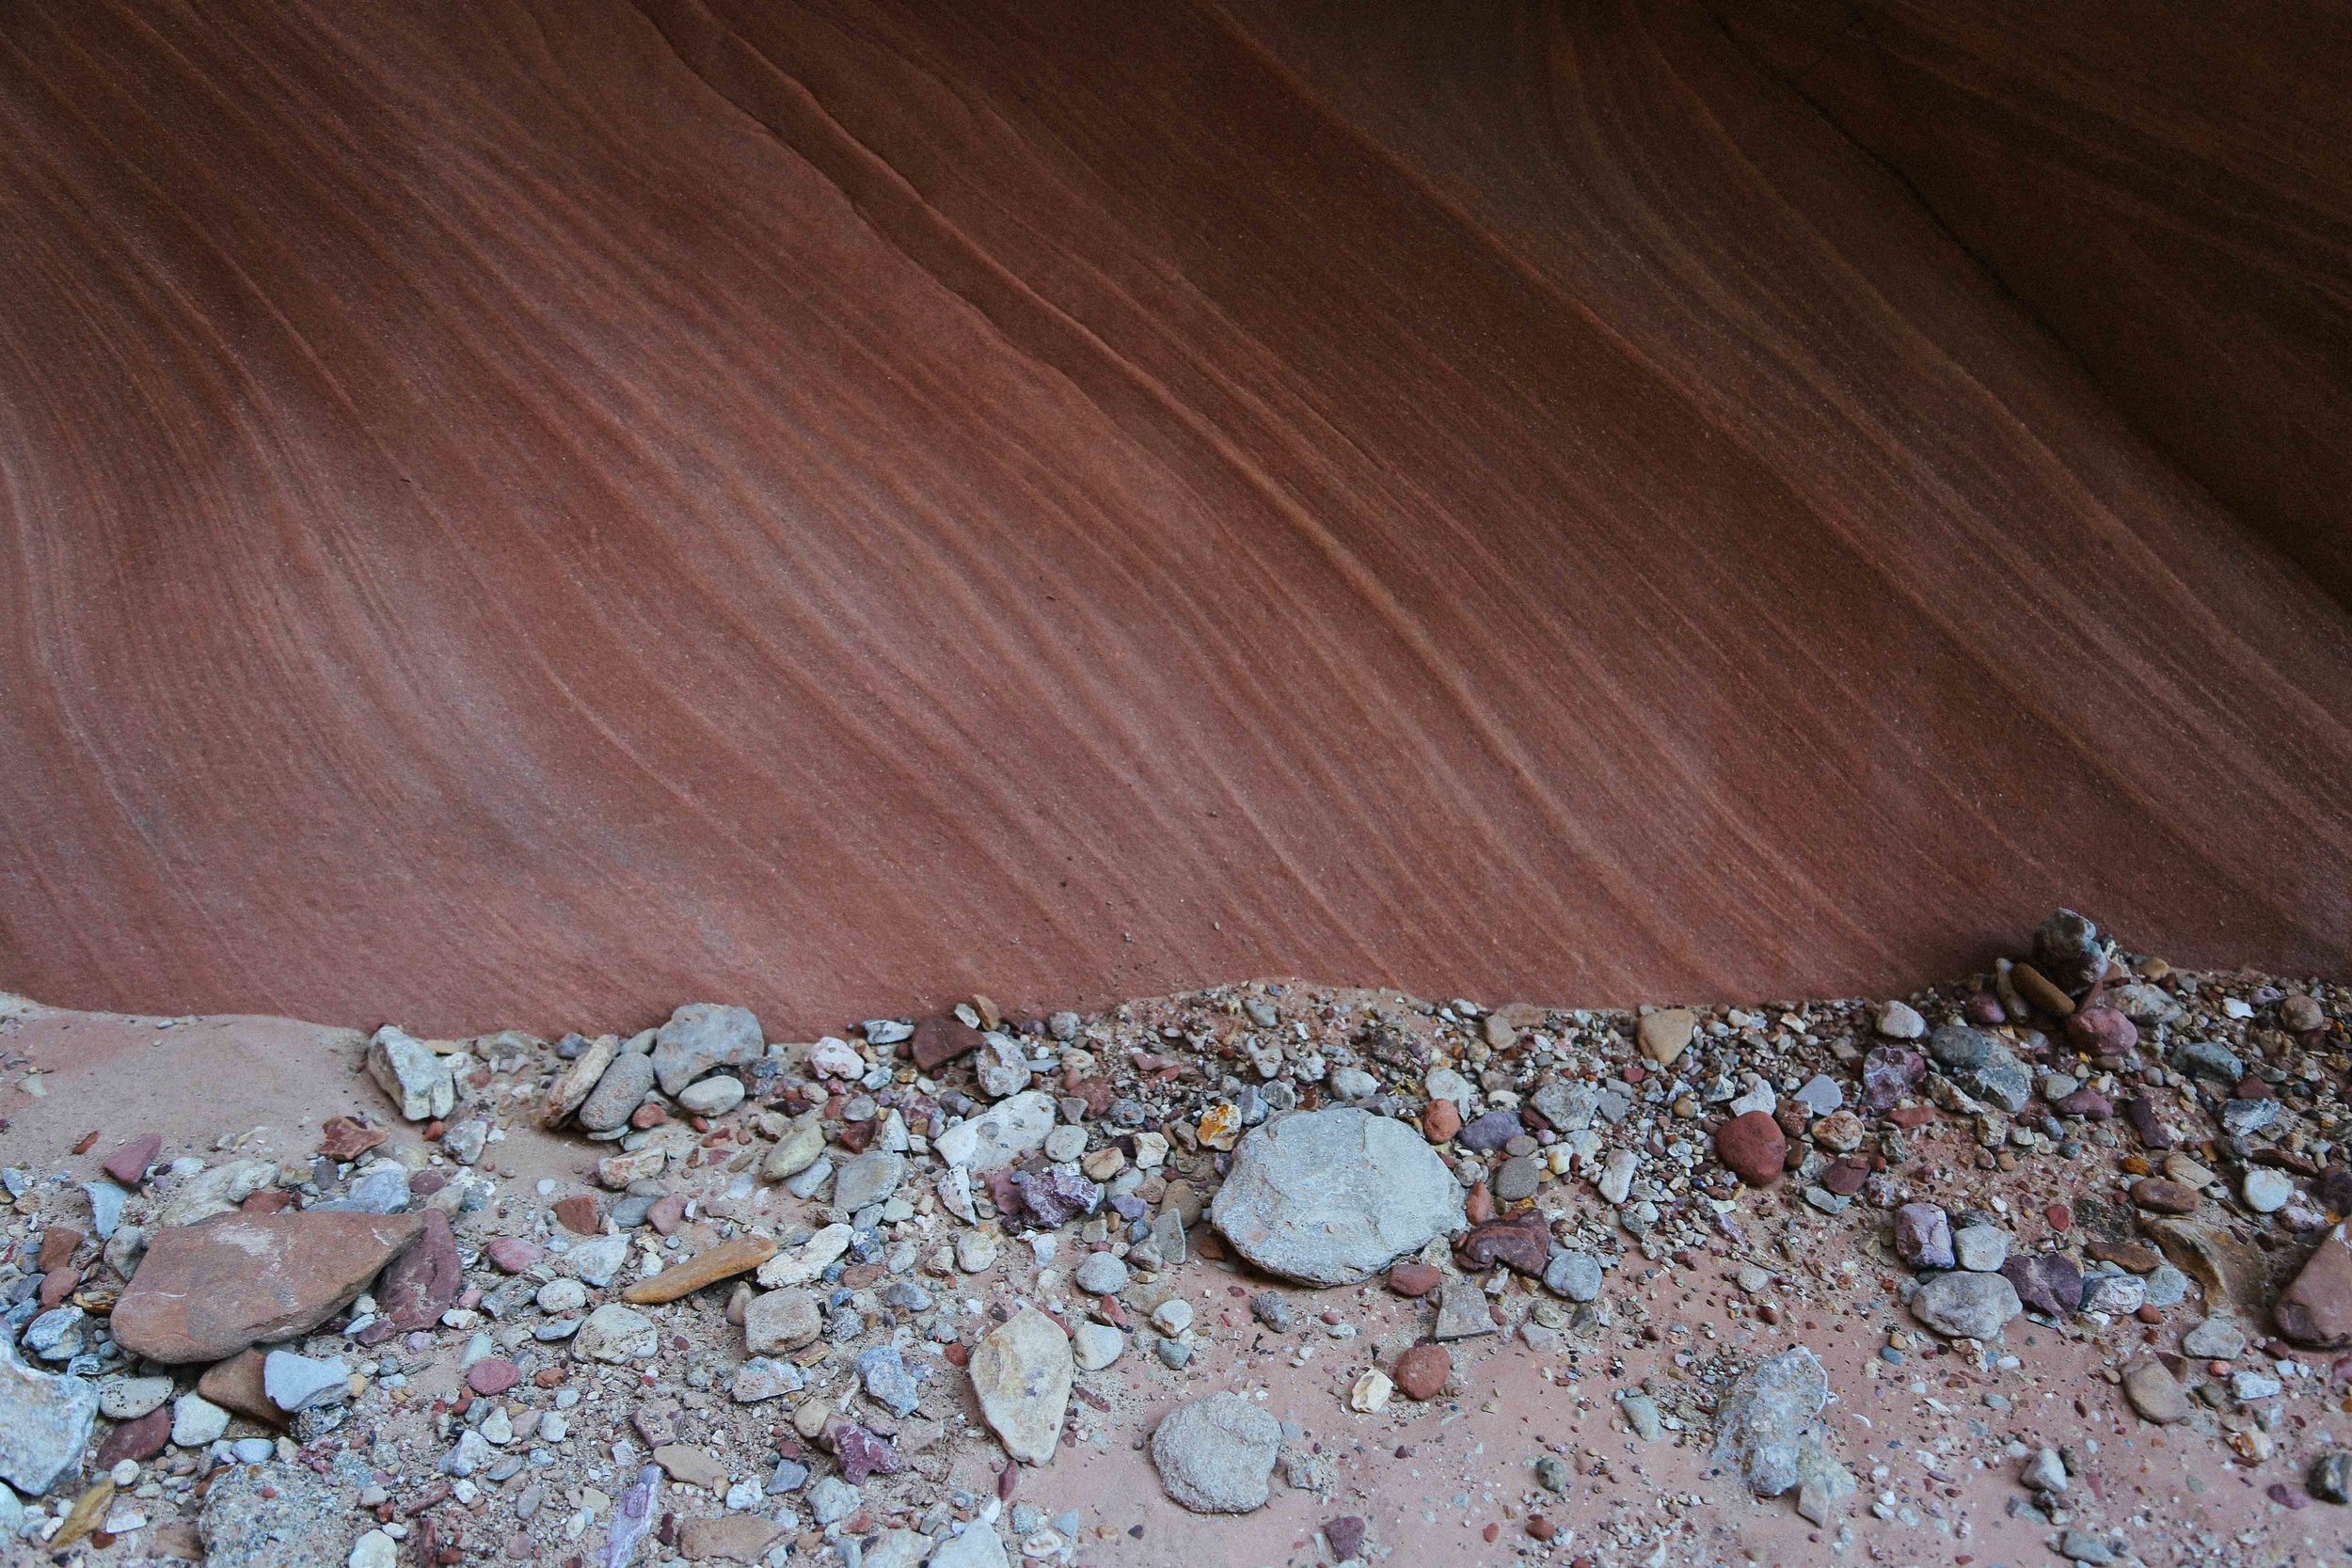
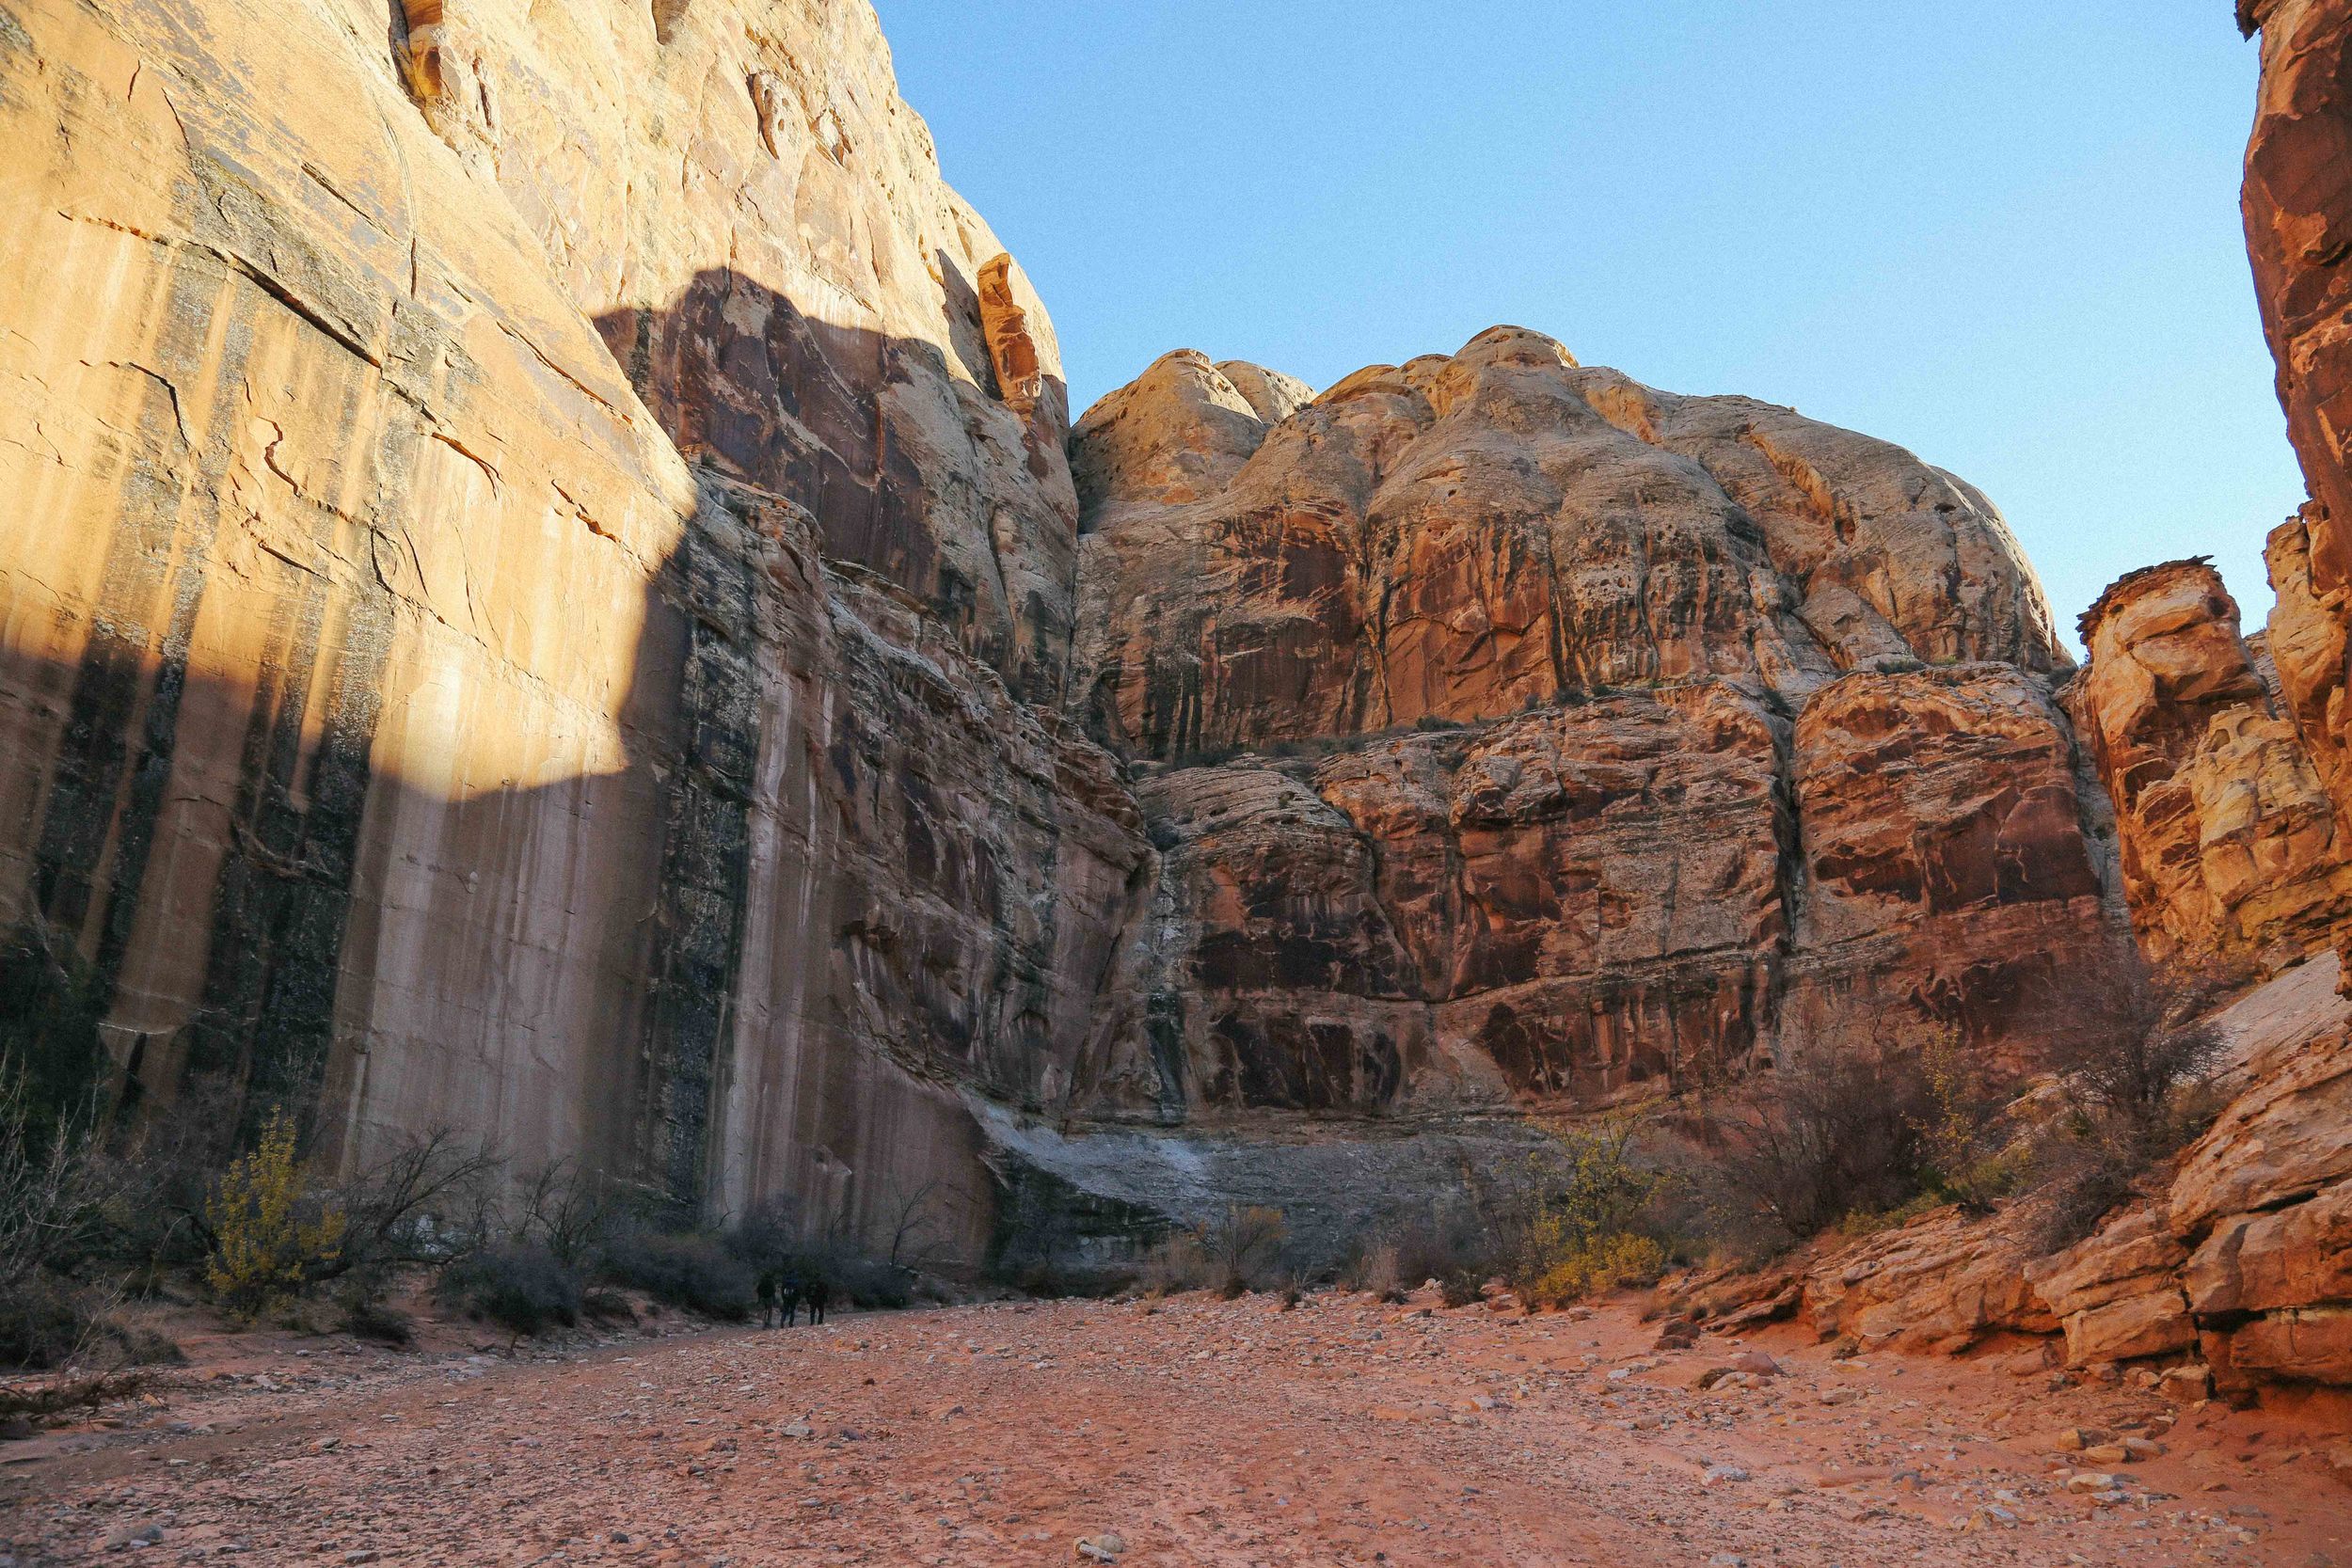
  • Know before you go, and CHECK THE WEATHER. This is IMPORTANT. The flood line in the slot canyon was 15 feet above our heads, which means the water can get that high in a rainstorm. DO NOT ATTEMPT THIS LOOP IF THERE IS A CHANCE OF RAIN. IF YOU SEE STORM CLOUDS, GET OUT OF THE CANYON IMMEDIATELY. Seriously. Don't be the doofus that is all "this is the weekend we chose to do this and we drove all this way to get here and we are going in that canyon!" You will have, best case scenario, a very bad time. Also, nobody likes that guy. See resources (below) for a link to an account of being in and surviving a flash flood.

rosemary biscuits + blood orange shortcakes

breakfast, desserts, sweet, vegetarian, winterRachel SandersComment

So my best laid plan to get these biscuits + shortcakes to you for Valentine's Day was a bust. I had grand visions of breakfast in bed with coffee and artfully plated shortcakes for my own Sunday celebration, but in reality, I nuked a tortilla and wrapped it around some avocado slices and then went skiing with Richard. Ha! Oh well.

I think sometimes there's a little too much pressure to do something grand for Valentine's Day. And it's not really worth it to make everything perfect and photogenic and complicated if it keeps you from being relaxed and having fun and spending quality time with your significant other/best friend/dog/chickens/self. Plus, I like breakfast-in-bed stuff all of the time, not just on Valentine's Day!

So I'm here to say that I hope you had a lovely and wonderful Sunday holiday morning, no matter what you ended up doing, and offer you a fabulous little breakfast idea for the next time you want to express "hey, I like you!" sentiments to someone important in your life. Especially if that someone is yourself.

4J5A0185.jpg

I have made these biscuits so many times that the cookbook containing the recipe falls open to the biscuit page each time I take it out of the bookshelf. They are Heidi Swanson's biscuits, and they are amazing. We mix up the flour proportions and types sometimes, but we're pretty committed to putting yogurt in our biscuits at this point.

Here's the low-down on choosing your yogurt for this recipe: a) tangier is better, in our minds, because it makes a more flavorful biscuit, b) Greek yogurt makes for taller, more layered biscuits, while a more liquid yogurt means flatter, but still very tender biscuits, and c) any (plain) yogurt you have on hand is perfect for this recipe, because it will make for delicious biscuits no matter their height.

I used a fairly liquid, goat's milk yogurt for the biscuits pictured here. You don't have to use goat's milk yogurt (it's just something we keep around most of the time), but I think a thinner biscuit is better for shortcake purposes, since you get a higher ratio of cream and fruit to biscuit.

In case you are wondering, no, I have never tried making these with a non-dairy yogurt. They could be great! They could be awful! Who can say! I'll let you experiment with this.

Makes 10-12 biscuits/shortcakes

You should feel free to experiment with these biscuits to take them further toward sweet or savory. You can brush them with a little cream or milk and sprinkle them with Turbinado sugar to give them a sweet, crunchy top. You can also change the herbs depending on how you plan to serve the biscuits, or omit them altogether.


For the biscuits:

1 1/4 cups whole wheat pastry flour
1 1/4 cups unbleached all-purpose flour, plus more as needed for dusting
3 teaspoons kosher salt (or 1 1/2 teaspoons table salt)
1 tablespoon aluminum-free baking powder
1 1/2 tablespoons chopped fresh rosemary (or more or less, depending on how much you like rosemary
1/2 cup unsalted butter, chilled and cut into tiny cubes
1 1/3 cups yogurt (again, Greek for higher, more layered biscuits; more liquid for shorter, tender biscuits)


Preheat the oven to 450˚F and place a rack in the center of the oven. Line a baking sheet with parchment paper and set aside.

Combine the flours, salt, baking powder, and rosemary in the bowl of a food processor, and pulse 2-3 times to mix. Sprinkle the cubes of butter over the dry ingredients and pulse 15-20 times (or more) until the mixture resembles (in Heidi's words) "tiny pebbles on a sandy beach."

Add the yogurt and pulse a few more times until just incorporated. Avoid over-mixing, as this will toughen the biscuits.

Gather the dough into a ball and turn out onto a lightly floured surface. Gently press the dough together, kneading 2-3 times if necessary, and shape it into an inch-thick square. Cut in half and place one half on top of the other. Flatten with your hands or with a rolling pin into another inch-thick square, cut in half, and stack again. Repeat each step one more time, then press the dough into a 3/4-inch thick rectangle. Cut the dough into 10-12 equally sized biscuits.

Transfer the biscuits to the baking sheet, leaving 1/2-inch of space between each biscuit. Bake for 15-20 minutes, until the bottoms are deeply golden and the biscuits are cooked through.

Scroll down for notes on making/plating the shortcakes.

Serves 2


Split the biscuits and place each bottom on a plate. Spoon the yogurt cream evenly over the two biscuit bottoms. Arrange the blood orange slices over the cream, and drizzle with honey. Pick some rosemary leaves from the springs and tuck in among the orange slices. Angle the biscuit tops over the shortcakes so that much of the fruit and yogurt is visible. Serve immediately and tuck in! 

2 rosemary biscuits
Yogurt cream (enough to serve 2 = 1/4 cup cream whipped with 1/4 cup yogurt and 1/4 teaspoon vanilla)
2-3 blood oranges, peeled, seeded, and sliced
Honey
1-2 rosemary sprigs


marie-hélène's apple cake with cardamom and orange blossom

autumn, breakfast, desserts, sweet, vegetarian, winterRachel SandersComment

Being a grownup is hard. You have to deal with unforeseen and sometimes high-stress life situations, you have to keep a level head when really you feel like exploding all over the place, and you are solely responsible for managing your cake intake. I feel like we're doing okay with the first two things this week, given that we've been experiencing some wily circumstances (long story for a future post), but to say I managed my cake intake would be a gross overstatement.

This is a good cake to keep around in these kinds of times, primarily because it is delicious, but also because it is mostly apples! So eating a bunch is NBD. Which is good, because I'm actually eating another piece as I write this post. #grownupdecisions

(Update: this cake is now gone! We ate it all. Sorry/not sorry, local friends.)

I feel that I must point out that the original recipe for this cake (from Dorie Greenspan) contained rum instead of the cardamom and orange blossom water. Rum and I haven't been friends since an unfortunate incident in college involving a very boozy drink served in a hollowed-out pineapple, hence the change in flavor additions. But if you would like to go Dorie's route, nix the cardamom and orange-blossom water and add in 3 tablespoons of rum. I think I'm going to make this with 3 tablespoons of Applejack (brandy and I are still friends) and a pinch of cinnamon and nutmeg next time, so I'll let you know how that goes when I give it a try.

I would like to say, though, that the cardamom and the orange blossom water made the whole thing smell REALLY good while it was baking. Really, stupid good. Plus, even without the booze, the cake was still incredibly moist and never dried out, even though we left it unwrapped as per the original recipe's instructions. That is impressive for any cake in our bone-dry state.

One more note: there really are a lot of apples in this cake! It won't feel like there's enough batter to hold them all, but there is, trust me. You can move the apples around a bit in the pan to spread out the mixture evenly, but believe that the batter will help to fill in the cracks and empty parts.

makes one 9-inch cake - serves 8 (or maybe just 2)
(adapted from Dorie Greenspan's recipe in Genius Recipes)
 

I didn't peel my apples when I made this cake, and I'm very happy I made that decision. Because I used some Pink Lady Apples, the bright pink peel caused the apple flesh to blush in the oven, and gave this cake really lovely pops of pink. Plus, I feel that there is enough flavor in the peel that I'm more than willing to risk the slight hesitation in texture it gives to each bite. You may peel your apples if you disagree.


3/4 cup all-purpose flour
3/4 teaspoon baking powder
pinch of salt
1 teaspoon cardamom (freshly ground, if possible)
4 large apples (use different kinds, if you can! I used two Pink Lady, one Fuji, and one Opal)
2 large eggs
3/4 cup sugar
2 teaspoons orange blossom water
1/2 teaspoon pure vanilla extract
1/2 cup unsalted butter, melted and cooled


Place a rack in the center of your oven and preheat the oven to 350˚F. Generously butter and flour an 8 or 9-inch springform pan, and place it on a baking sheet.

Whisk the flour, baking powder, salt, and cardamom together in a small bowl. Cut the core from the apples and cut the apples into 1-inch chunks.

Break the eggs into a large bowl and whisk until foamy. Add the sugar and whisk to blend well. Whisk in the orange blossom water and vanilla extract. Add half the flour mixture to the bowl and whisk until just combined. Add half of the butter mixture and whisk until just combined. Repeat with the remaining flour and butter, mixing gently after each addition. You will have a smooth, thick batter.

Using a rubber spatula, fold in the apples, turning the fruit so that it is coated with batter. Scrape the mixture into the prepared springform pan, and move it around a bit so that there aren't any large holes or gaps, and so the mixture evenly reaches the inner walls of the pan.

Slide the baking sheet with the pan into the oven, and bake for 45-60 minutes (begin checking the cake at 45 minutes), until the top of the cake is golden brown and the center of the cake springs back when touched. Transfer to a cooling rack and let rest in the pan for 5 minutes.

Carefully run an icing spatula or a thin knife between the cake and the pan, and remove the sides of the springform pan, making sure there aren't any apples stuck inside the pan. If you want to remove the bottom of the springform pan from the cake, wait until the cake is almost completely cooled and run a long spatula between the pan's bottom and the cake. Cover the top of the cake with a piece of waxed paper or a clean, lint-free dishtowel, and invert onto a rack. Carefully remove the bottom of the pan and re-invert the cake onto your serving plate.


We ate this warm, at room temperature, and after it had sat around for a bit. It is great each and every way! Dorie recommends NOT wrapping this cake, as it is so moist that it will cause the nice, crusty edges of the cake to become a bit soggy. After testing this cake in one of the driest states in the Union, we concur. Simply place a piece of waxed paper against to cut parts of the cake to keep them from drying, or just cut off any dry-ish parts before serving and eat them yourself. :)


beans with garlic, rosemary, and aleppo pepper

dinner, lunch, vegan, vegetarian, winter, autumnRachel SandersComment

Gah, my mouth starts watering whenever I think of these beans. These look innocuous, but they are heady with garlic and deeply savory with rosemary and pepper flakes. I sometimes can't believe how good they are considering that they're made with things that are usually just lying around! Pure magic.

The beans pictured here are Good Mother Stallard beans from Rancho Gordo. I love how these beans plump up when you cook them and how densely creamy they are on the inside, but you can make this with any cooked beans or canned beans you have around. You could simply add them to the oil with the garlic and cook until they're heated through, but I like taking them a little further so that some become golden and a little crispy on the outside. That's when things really start to get good.

After that, you can remove them from the heat and serve them straight from the pan as is, or give them another pinch of flaky salt and a squeeze of lemon for a bit of a lift (which is highly recommended!). If you can't stop eating them, then you know you've achieved perfection.

serves 2-4 as a side

This recipe easily scales up, but I wouldn't bother scaling it down, as the beans make fantastic leftovers when added to pasta or salads, or served with eggs. You can even make a slice of toast, top it with a few slices of avocado, add the beans and a fried egg and have a very respectable breakfast or brunch dish.

How to simply cook dried beans: place your beans in a large bowl and soak them overnight in plenty of cold water. Drain and rinse your beans to remove any grit, and put them in a large pot with plenty of cold water and a single bay leaf. Bring the water and beans to a boil, reduce heat to low, and cover, cooking until the beans are no longer mealy and taste creamy, but not so long that they turn to mush (I start checking my beans 30-45 minutes after they started cooking, but the timing can vary greatly depending on the age of your beans). Once the beans are cooked, remove from heat, uncover, and let cool in their cooking water (this helps to keep them intact). Use immediately or refrigerate until ready to use.


1/2 pound Good Mother Stallard beans (or other beans that hold their shape once cooked), cooked, OR 2 cans cannellini beans
A generous glug (two tablespoons) olive oil
6-8 cloves garlic (or more, no need to limit yourself!), thinly sliced
2 large sprigs fresh rosemary
1 large pinch aleppo pepper flakes OR 1 small pinch standard red pepper flakes
Flaky salt, to taste
Lemon juice, to taste


In a large, heavy-bottomed skillet, heat the olive oil over medium-low heat until it begins to shimmer and can easily be swirled around the pan. Add the garlic and cook, stirring constantly, for about 30 seconds or until it begins to turn translucent and smells really, really good (don't let it brown here). Add the pepper flakes and rosemary, cook (stirring) for a few more seconds, and then add the beans. Stir everything together, raise heat to medium, and then let cook, stirring occasionally, until the beans are heated through, the garlic is turning golden, and a few of the beans are beginning to turn crispy.

Remove from the heat, strip the leaves from the rosemary, and stir the leaves back into the beans. Finish with a generous pinch of flaky salt and a good squeeze of lemon, and serve immediately.


Note that if you use canned beans, you may have to stir them more gently while cooking, as canned beans have a greater tendency to fall apart when cooked in this way. But beans that have fallen apart make excellent bean mash, which is a lovely thing on its own, so it's not any tragedy should this happen to you.