FIELD & FOREST

fruit desserts

berry (and cherry!) vanilla yogurt muffins

breakfast, desserts, summer, sweet, vegetarianRachel SandersComment

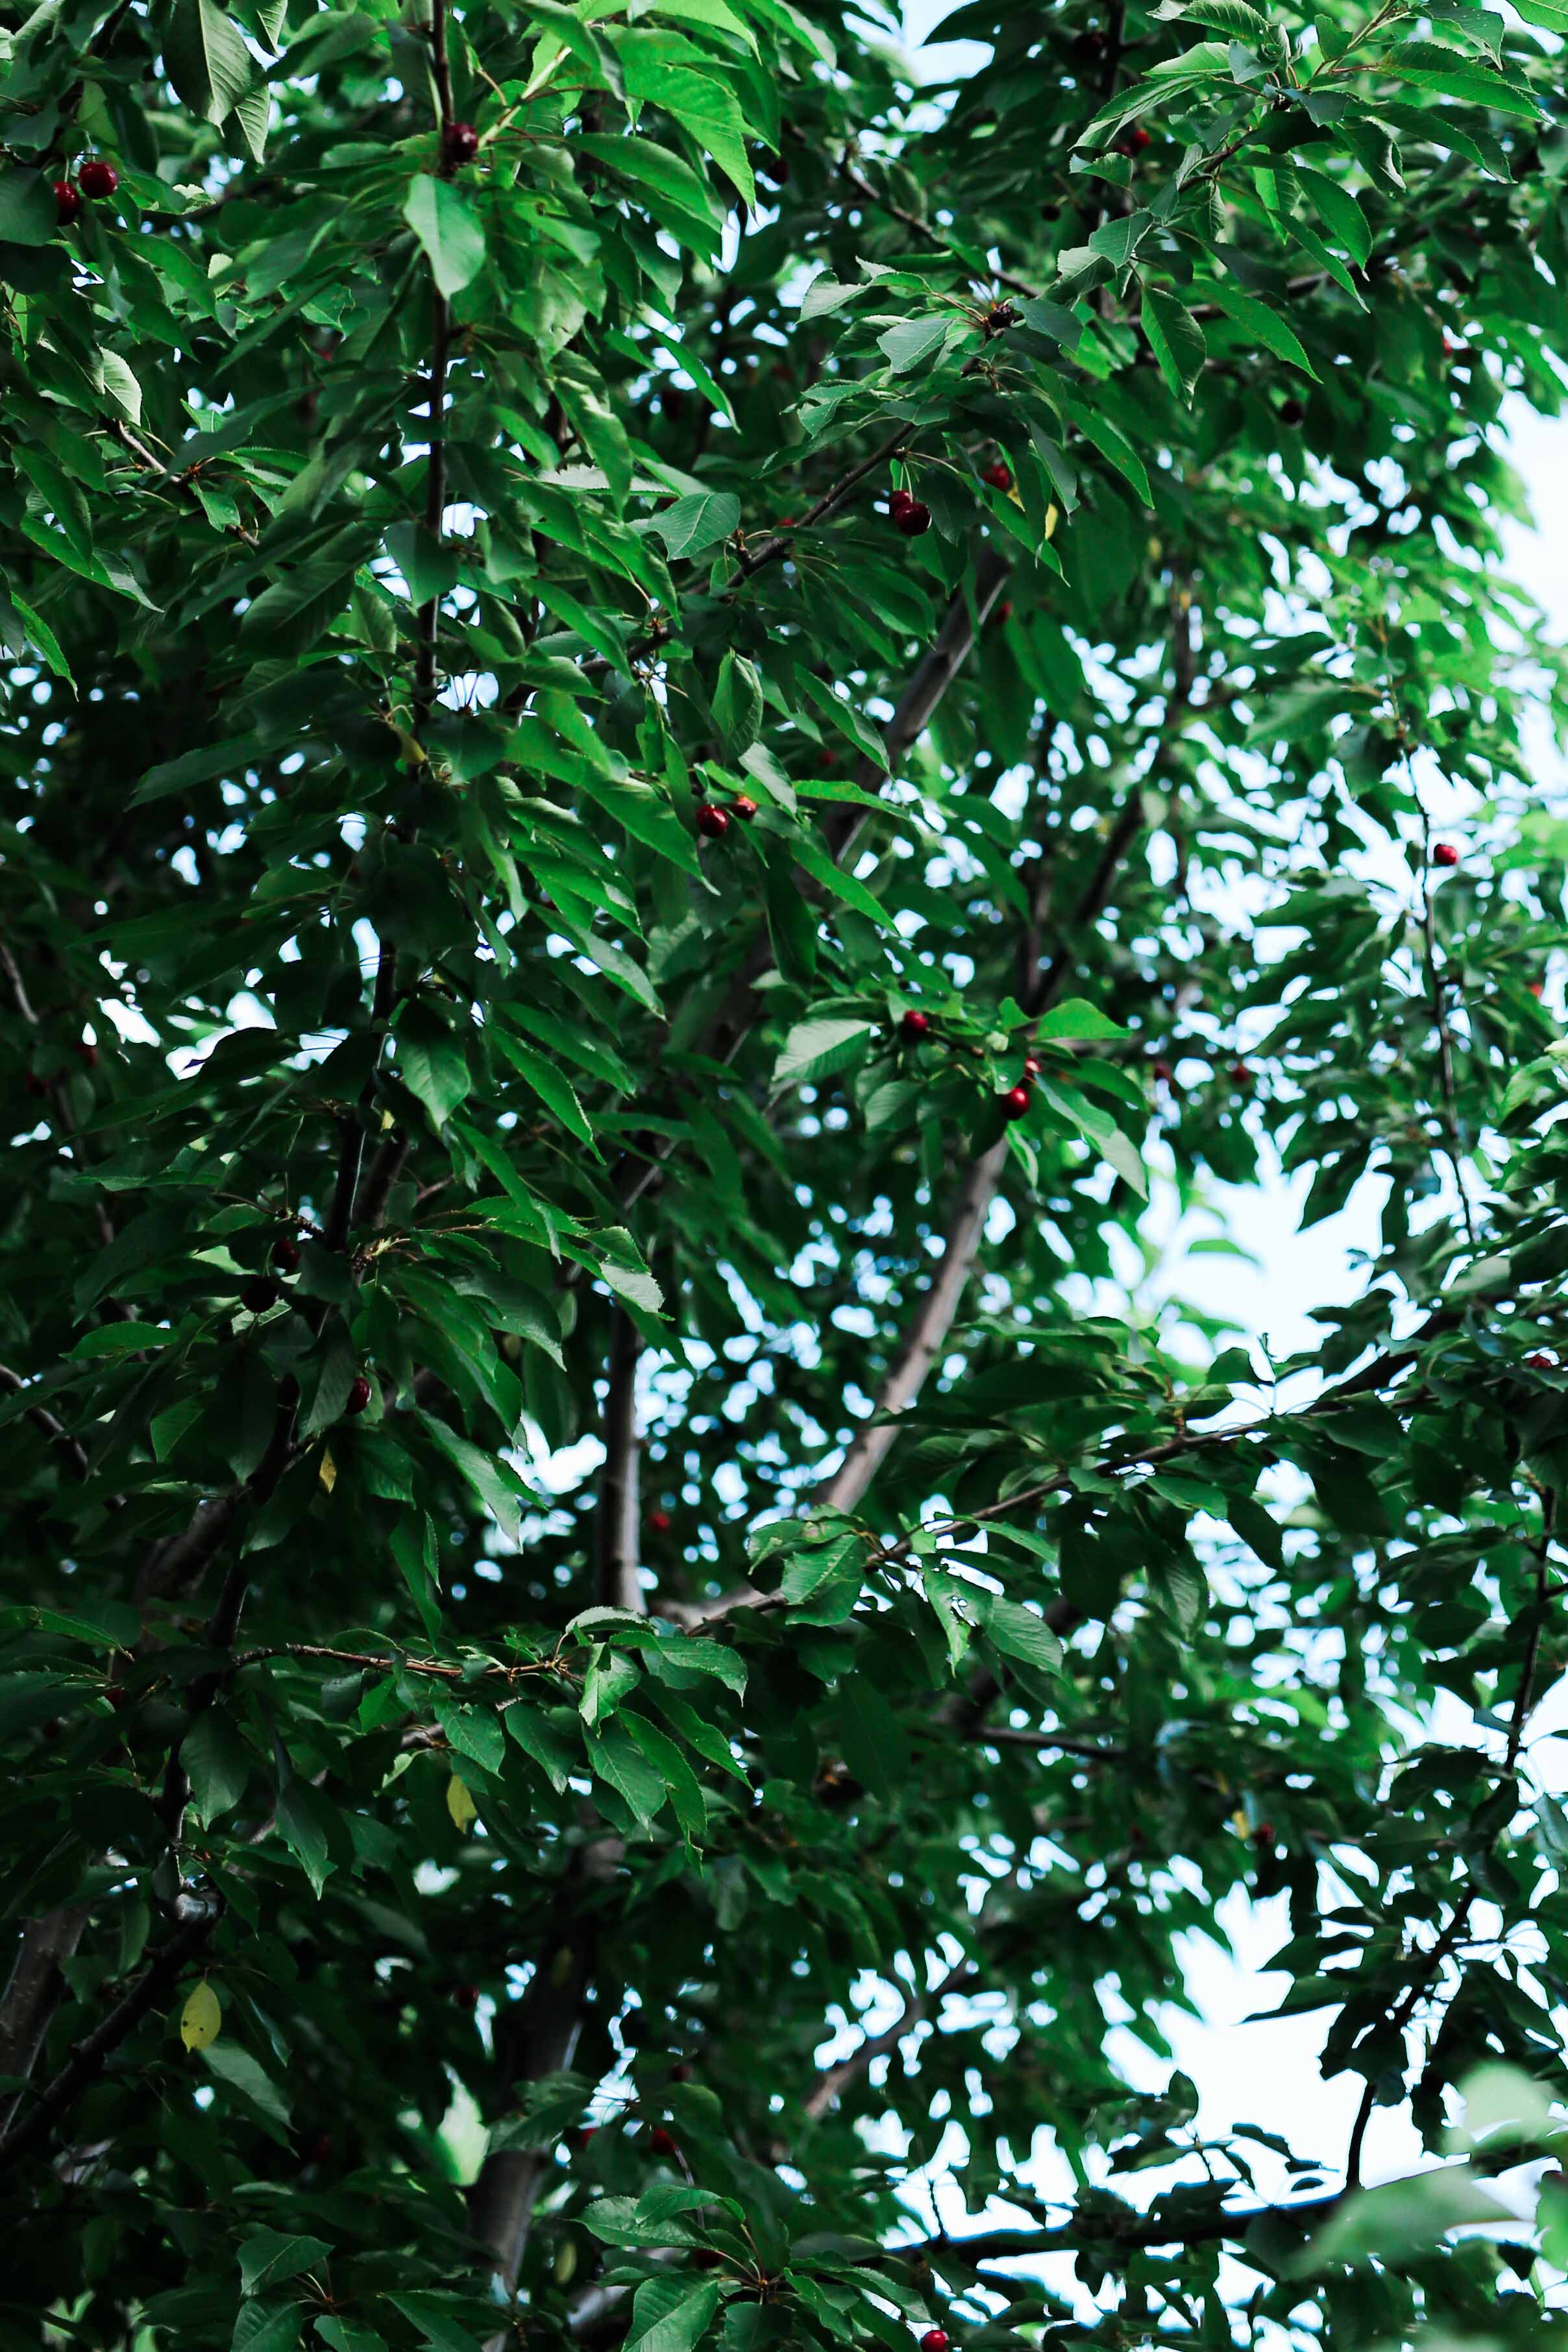
We bought a cherry tree! I mean, a house!

Either way, woohoo!!!

Hopefully that helps to clarify my wee vacation from posting (sorry, sorry). It has been a wild ride. And because home-buying normally entails moving, we've also been in a mess of boxes and bins and DI (the Utah equivalent of the Salvation Army) donation piles for the past couple of months. I tried to relocate the kitchen to the new house before moving other rooms so that I would be able to keep things relatively organized and track items that we use on a regular basis. Also so that we could eat stuff other than frozen tamales every day. But in spite of my best efforts, there are certain things I haven't been able to find since we moved in, like our bread pans and our ground cinnamon. And my eyebrow tweezers, which has nothing to do with kitchen stuff, but I looked in the mirror this morning and let's just say time is a factor in pinning these down.

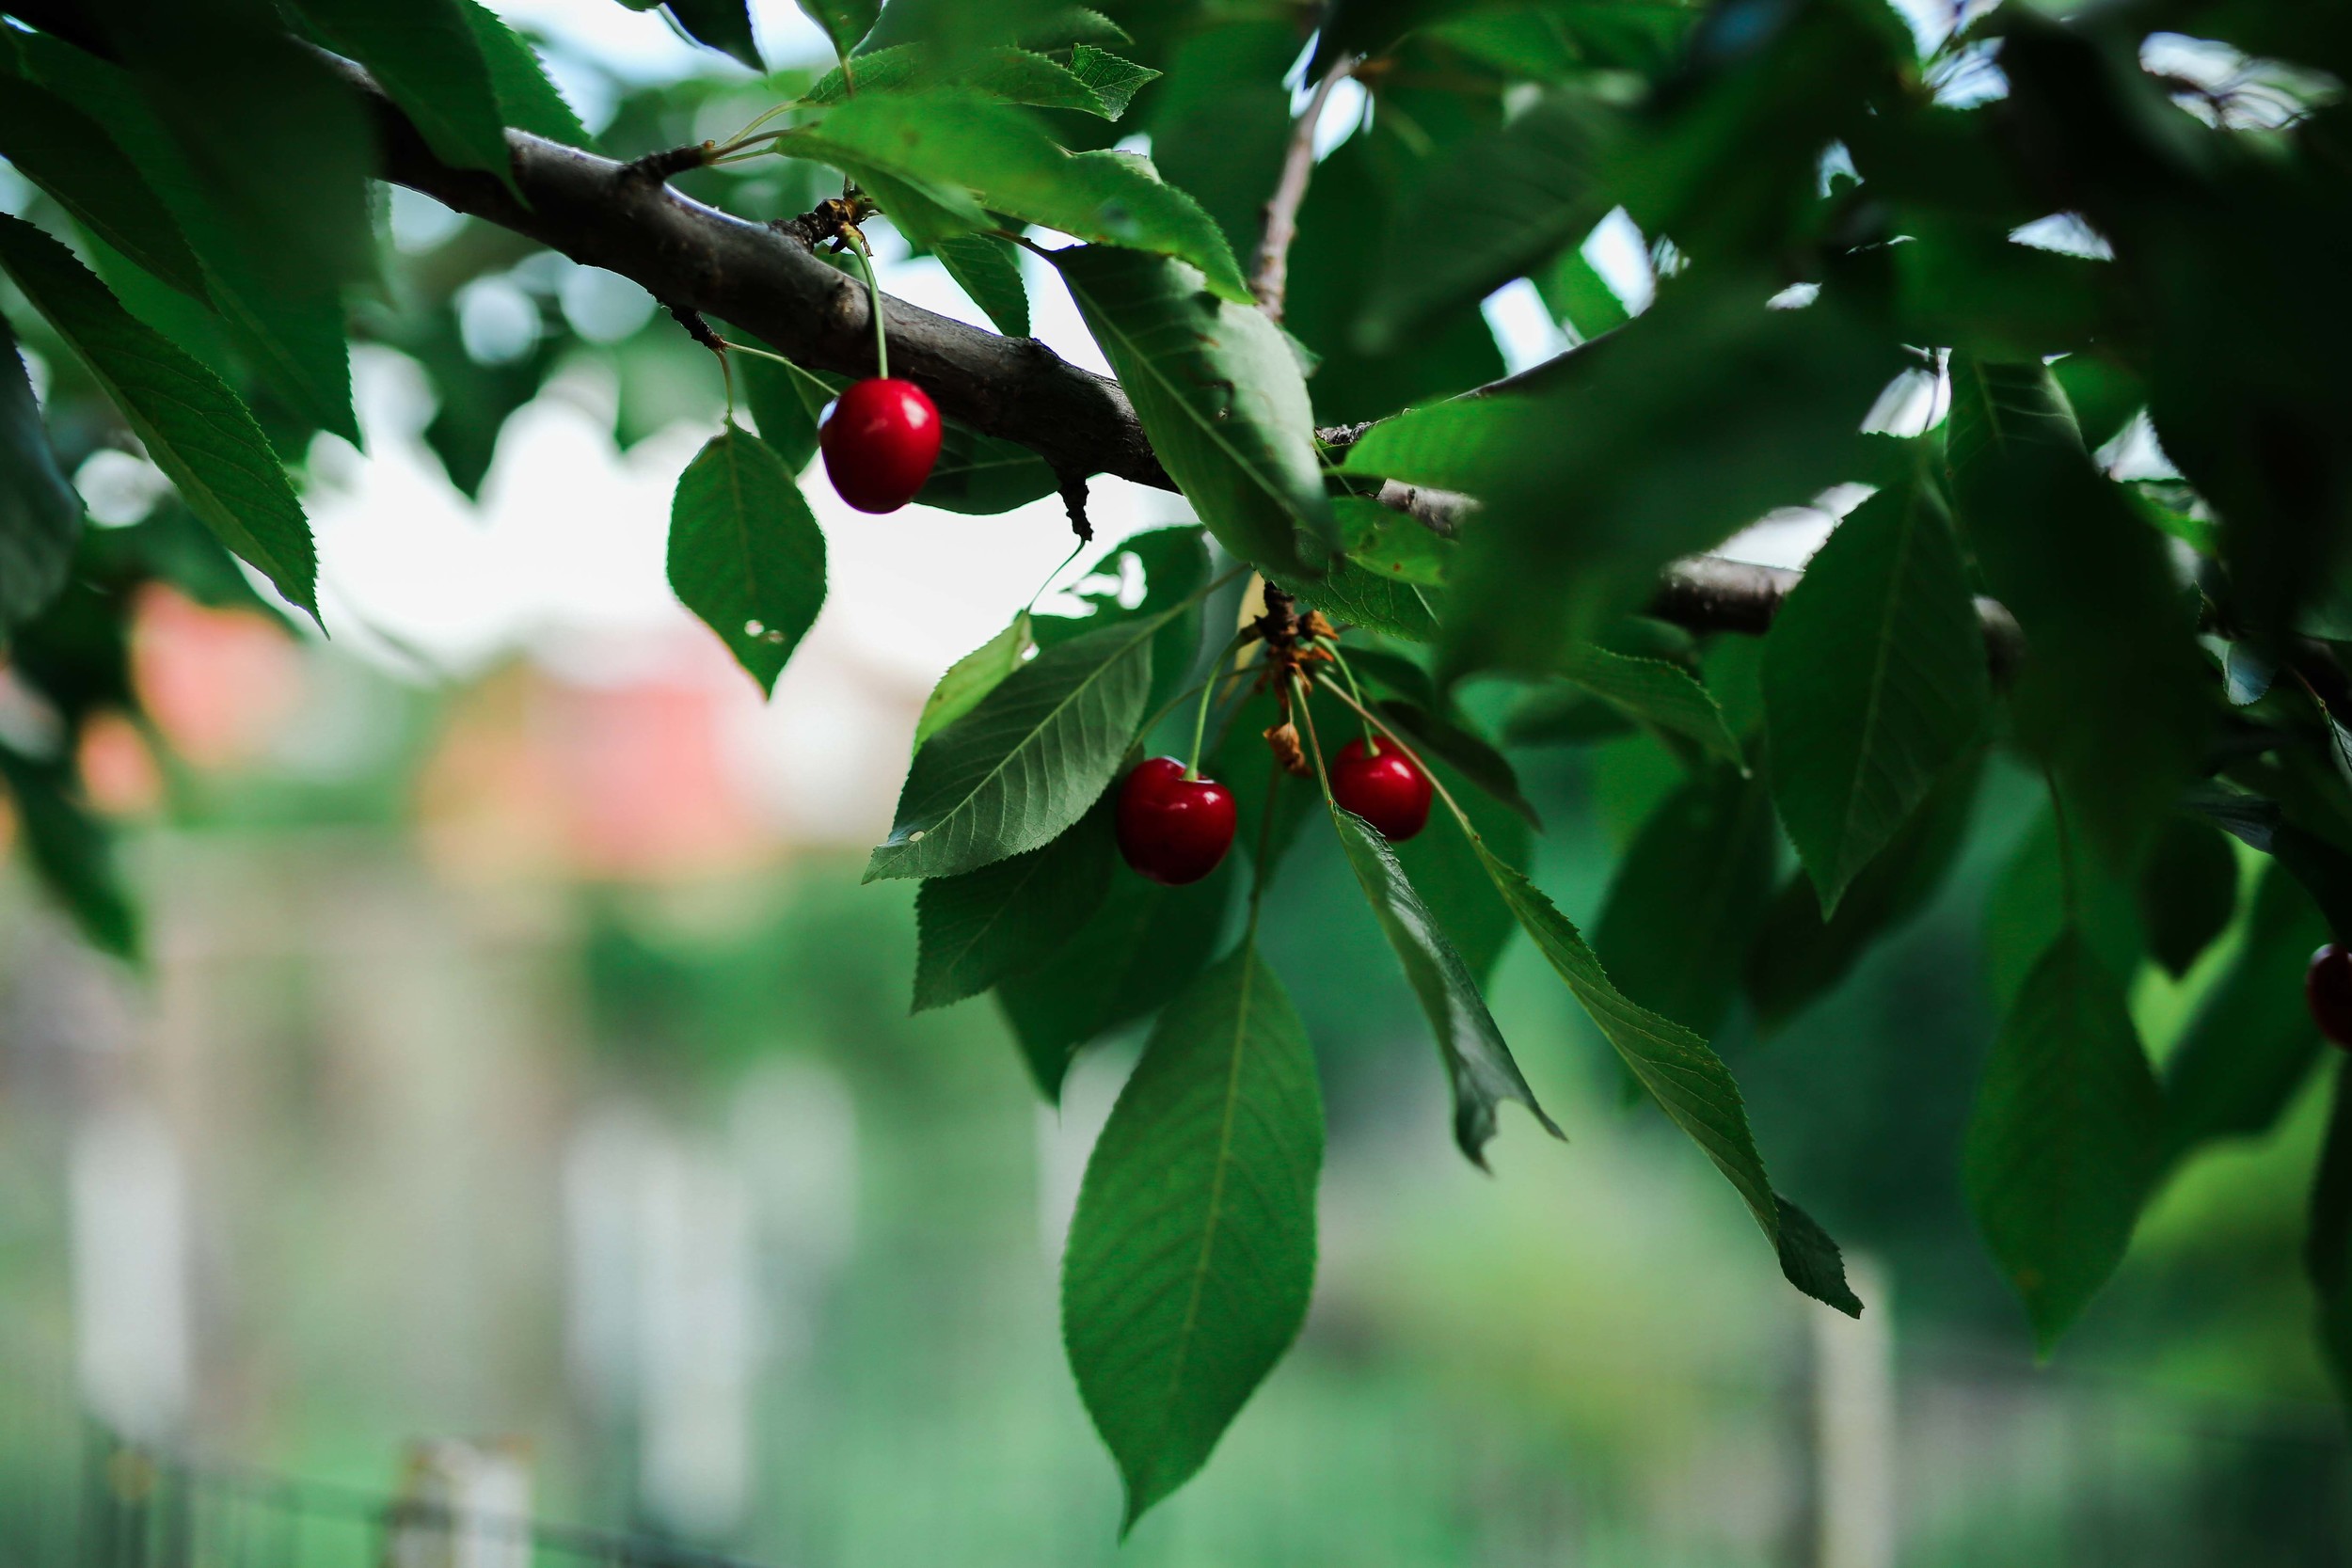
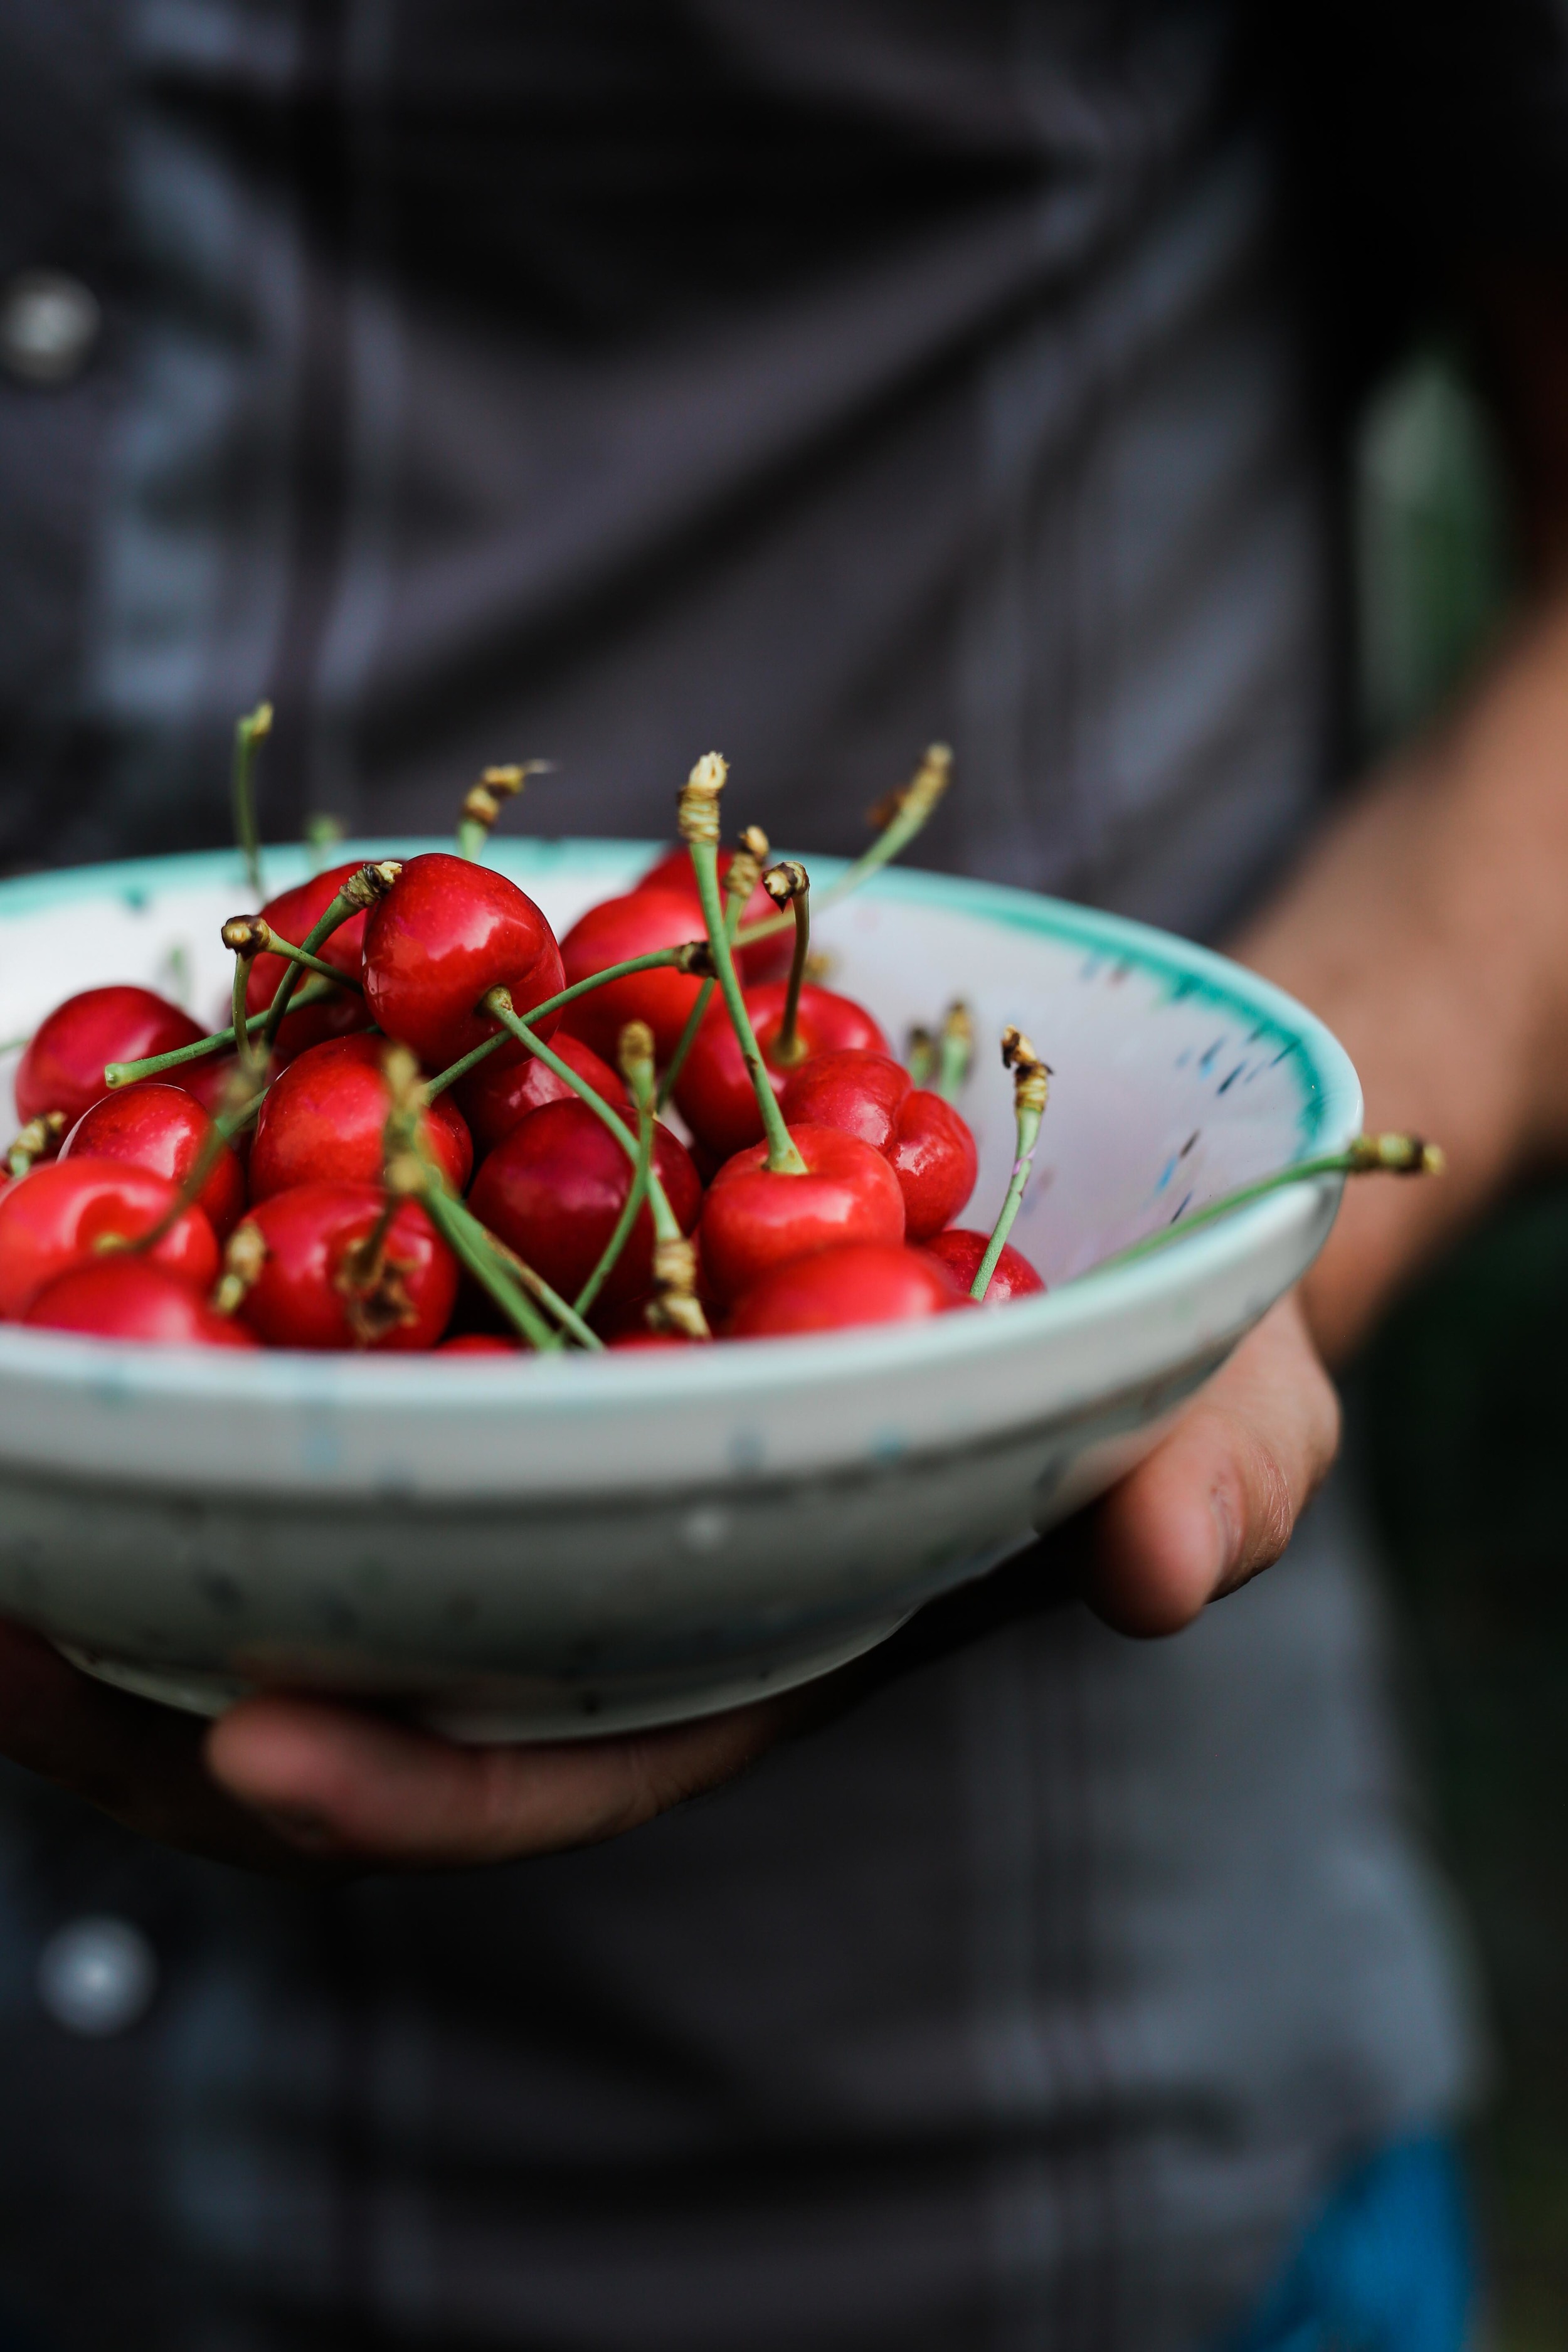
Ironically, around the same time that our cherry tree started fruiting, we found the cherry pitter, which felt like I big high-five from the universe in the midst of a sea of moving chaos. I may have unruly eyebrows, but I am eating lots of baked cherry things! Highly recommend.

Full disclosure: these muffins were made not just because we had cherries, but because I accidentally bought vanilla yogurt at the store while picking up ingredients for tzatziki. D'oh. Thank goodness we've all figured out that yogurt is a fabulous thing to stick in a baked good. Or a fried good.

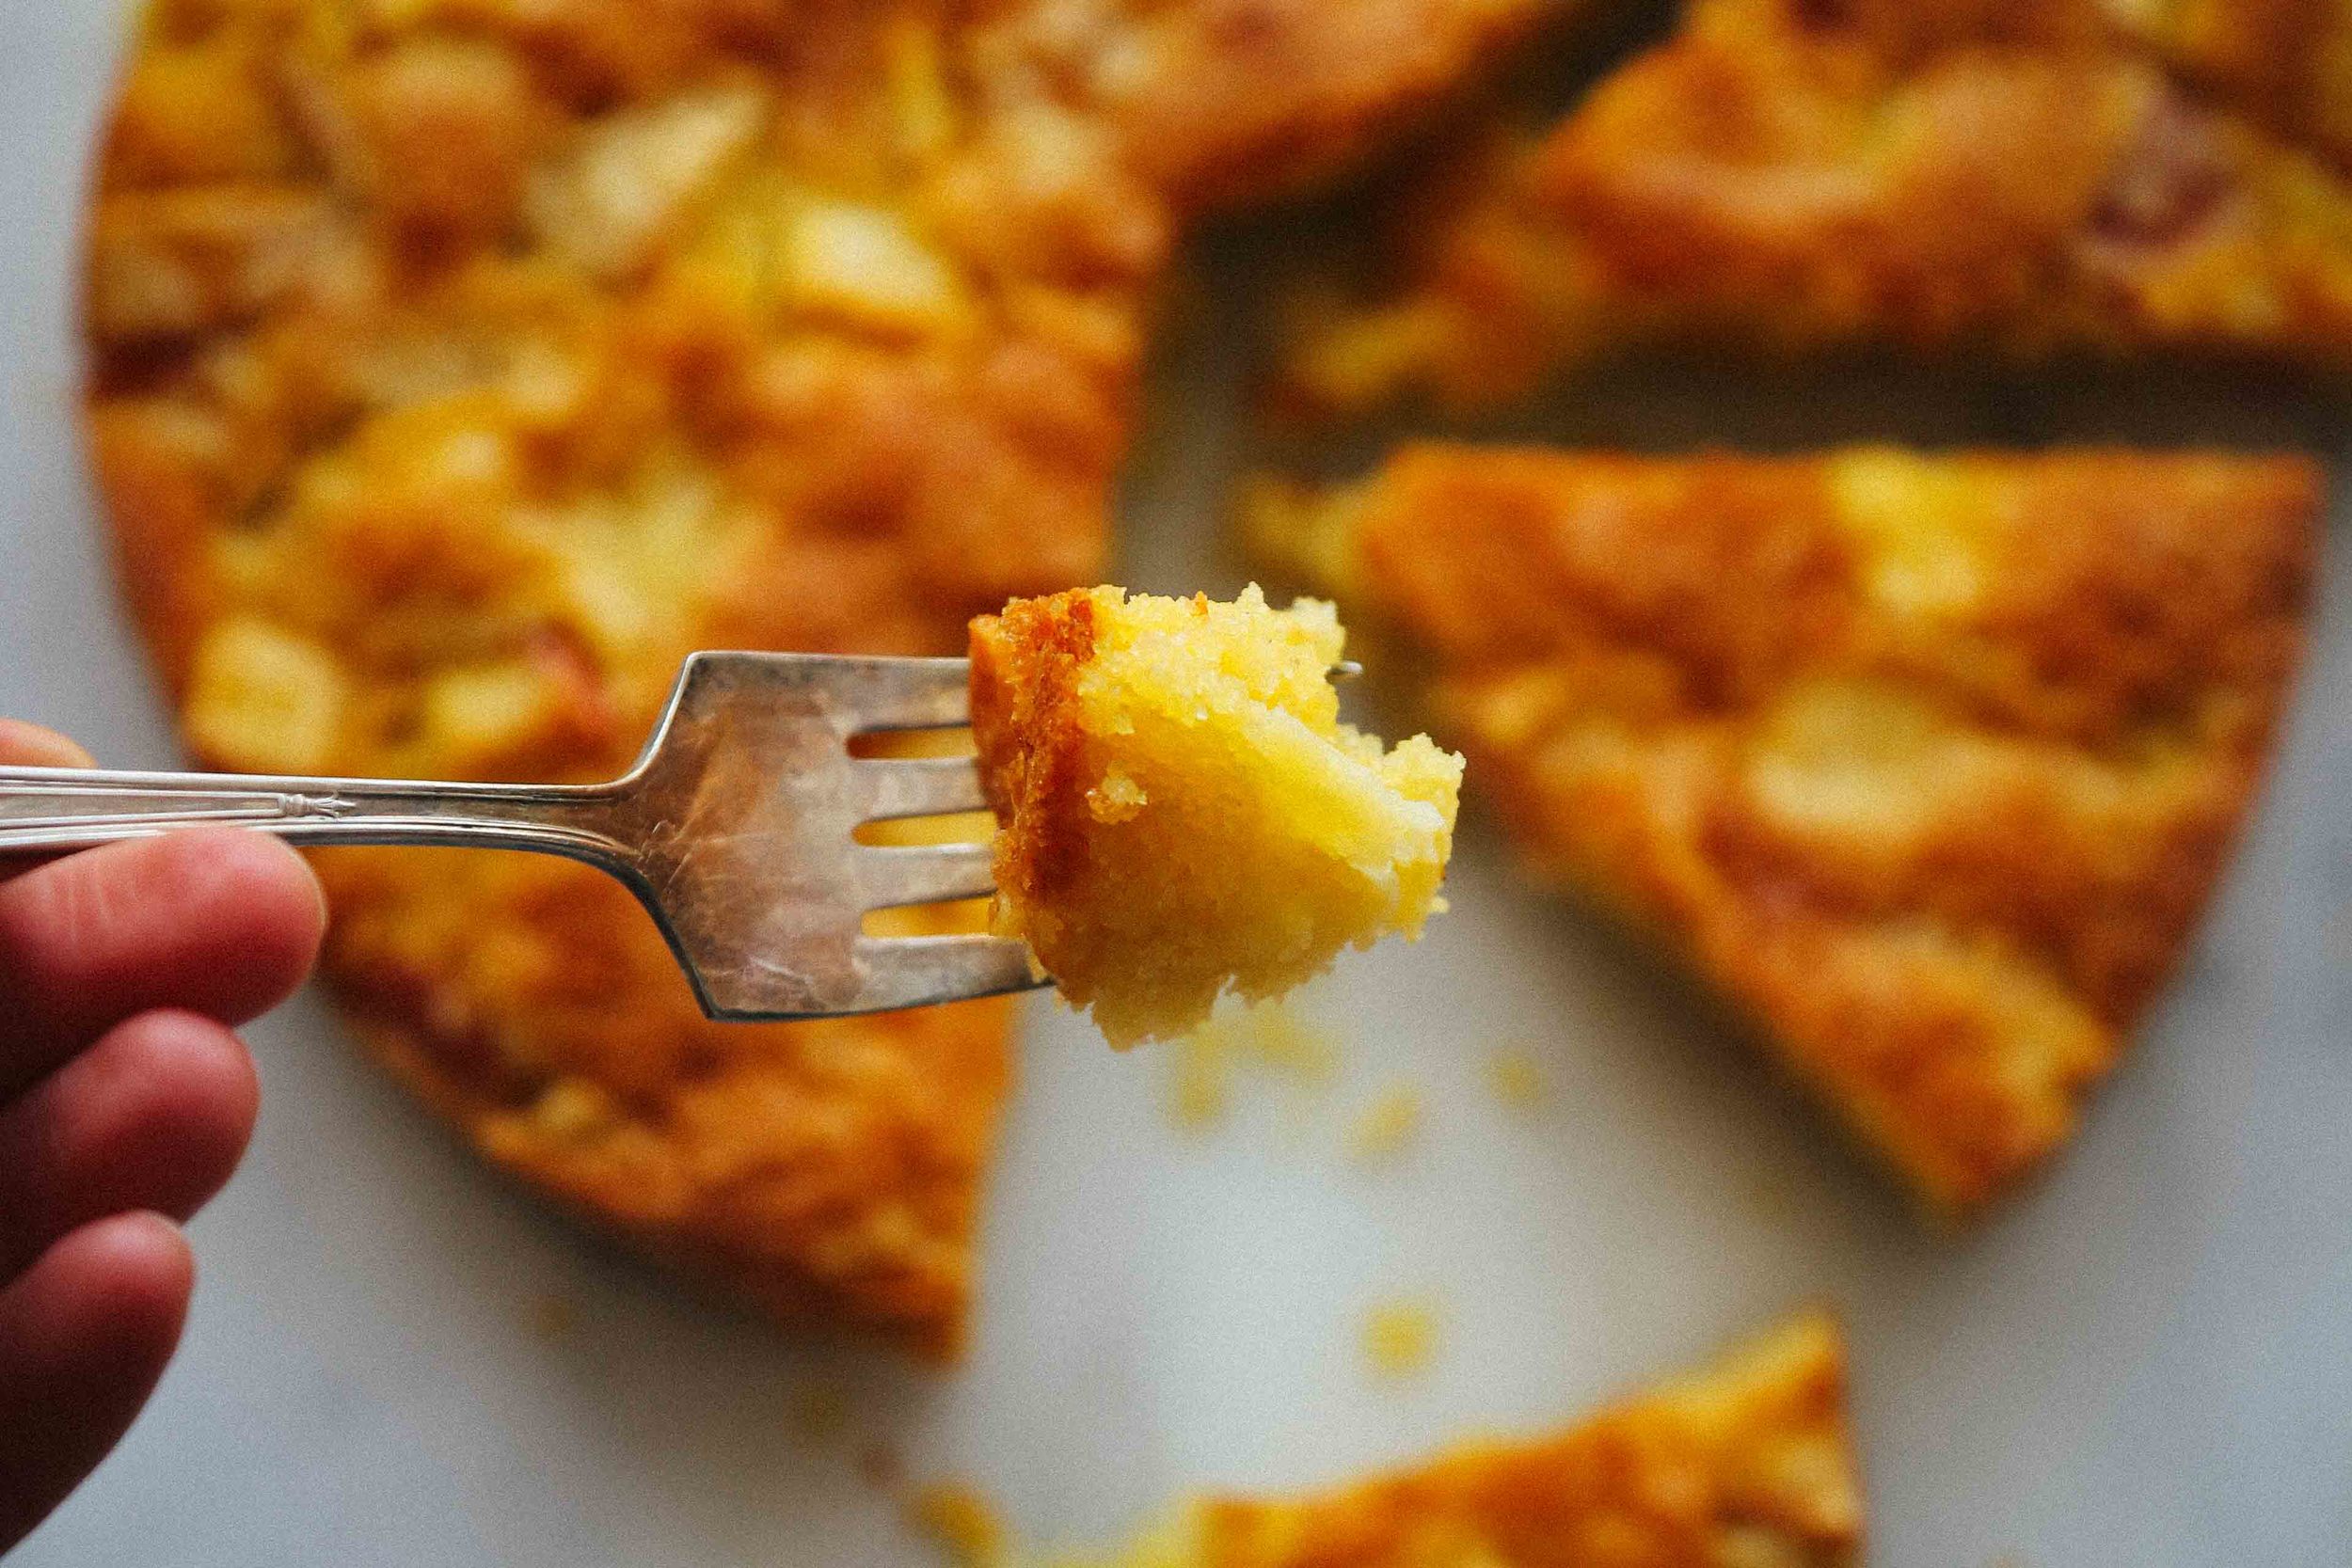
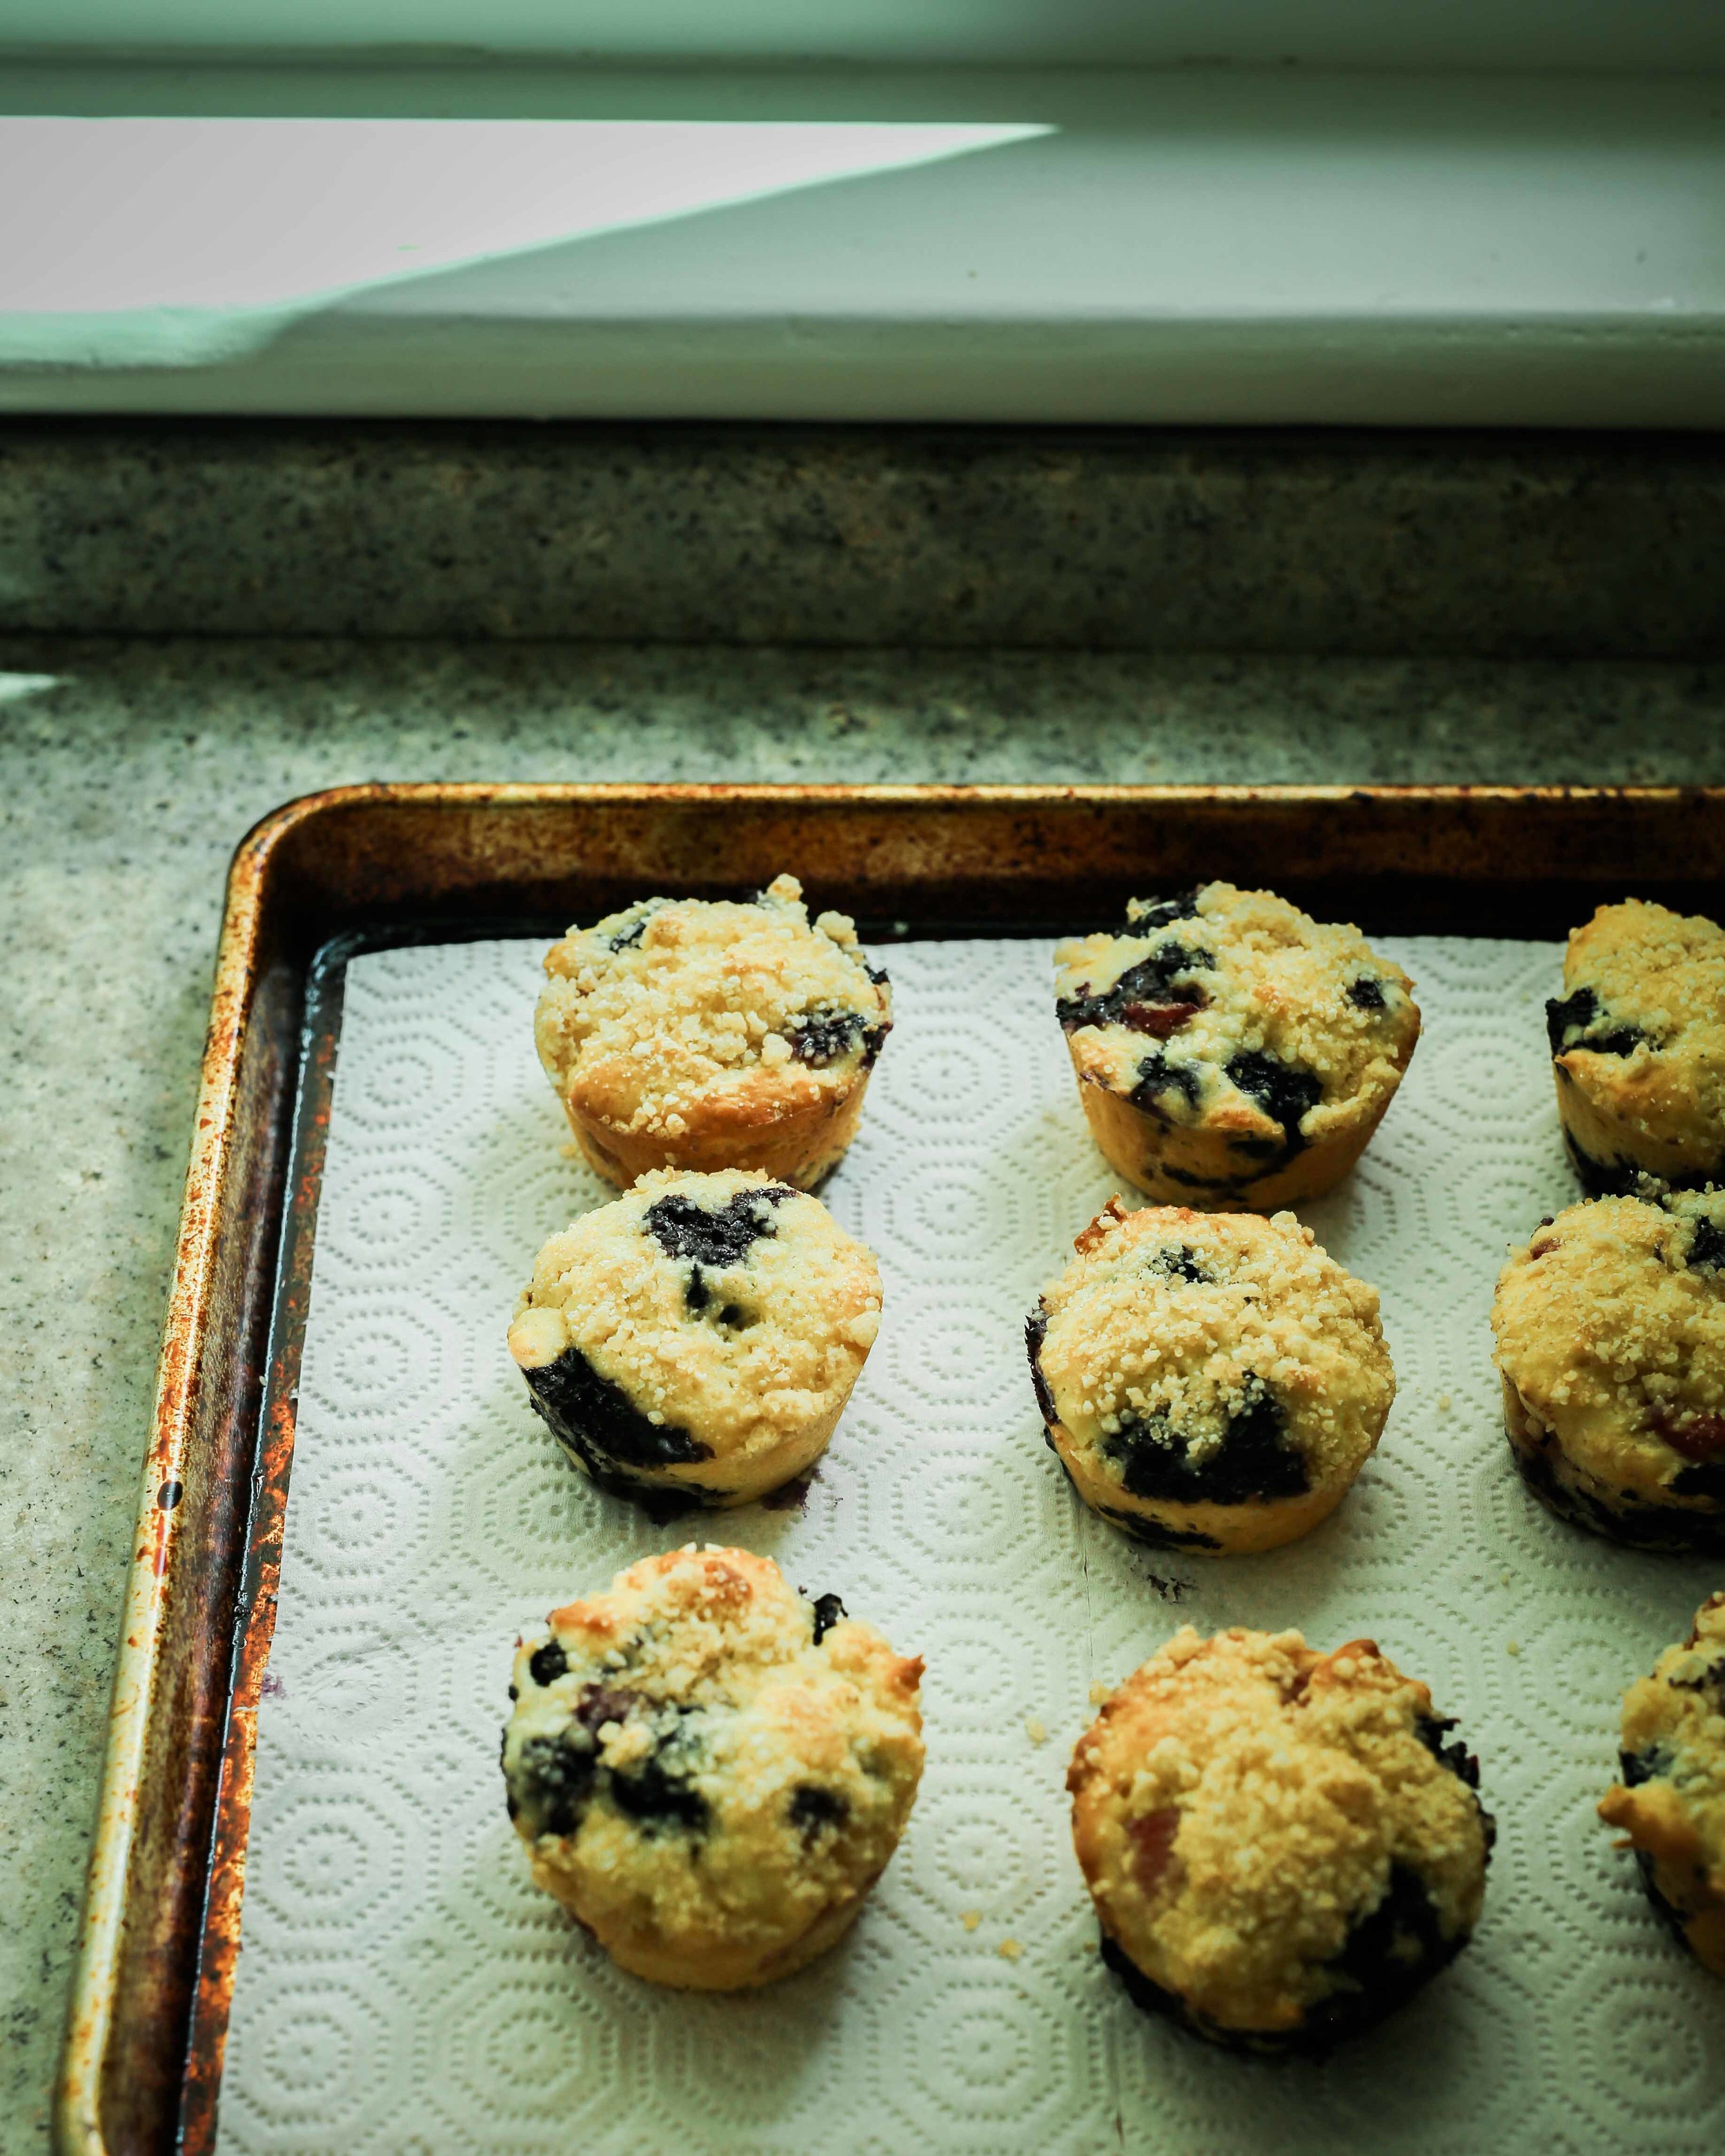
These are adapted from a yogurt muffin recipe in Yvette Van Boven's whimsical and lovely Home Baked, which was a welcome distraction during stressful parts of the move. The original recipe didn't come with a photo, I think because (as we discovered) the muffins are slightly homely looking (though still cute, because I think all of my oven children are cute). Also, for the life of me, I cannot figure out a great way to photograph muffins! Maybe Oof felt the same way while photographing Yvette's book. It's like when artists have a really hard time drawing hands.

We'll work on this.

In the meantime, I'm sending you all great big virtual hugs along with these muffins. Let's face it, moving (even when it's exciting) kind of blows, and it feels wonderful to be back here in a familiar happy place. I have missed you all.

Let's hang out more, yes? 😄


makes 12-16 muffins (depending on how much fruit you use)


In a small bowl, combine all of the ingredients for the topping. Mix into a coarse crumble with your fingers. Place in the fridge until ready to use.

Preheat the oven to 350˚F, and grease a standard 12-cup muffin tin.

In a medium bowl, whisk together the 2 2/3 cups flour, baking soda, and salt.

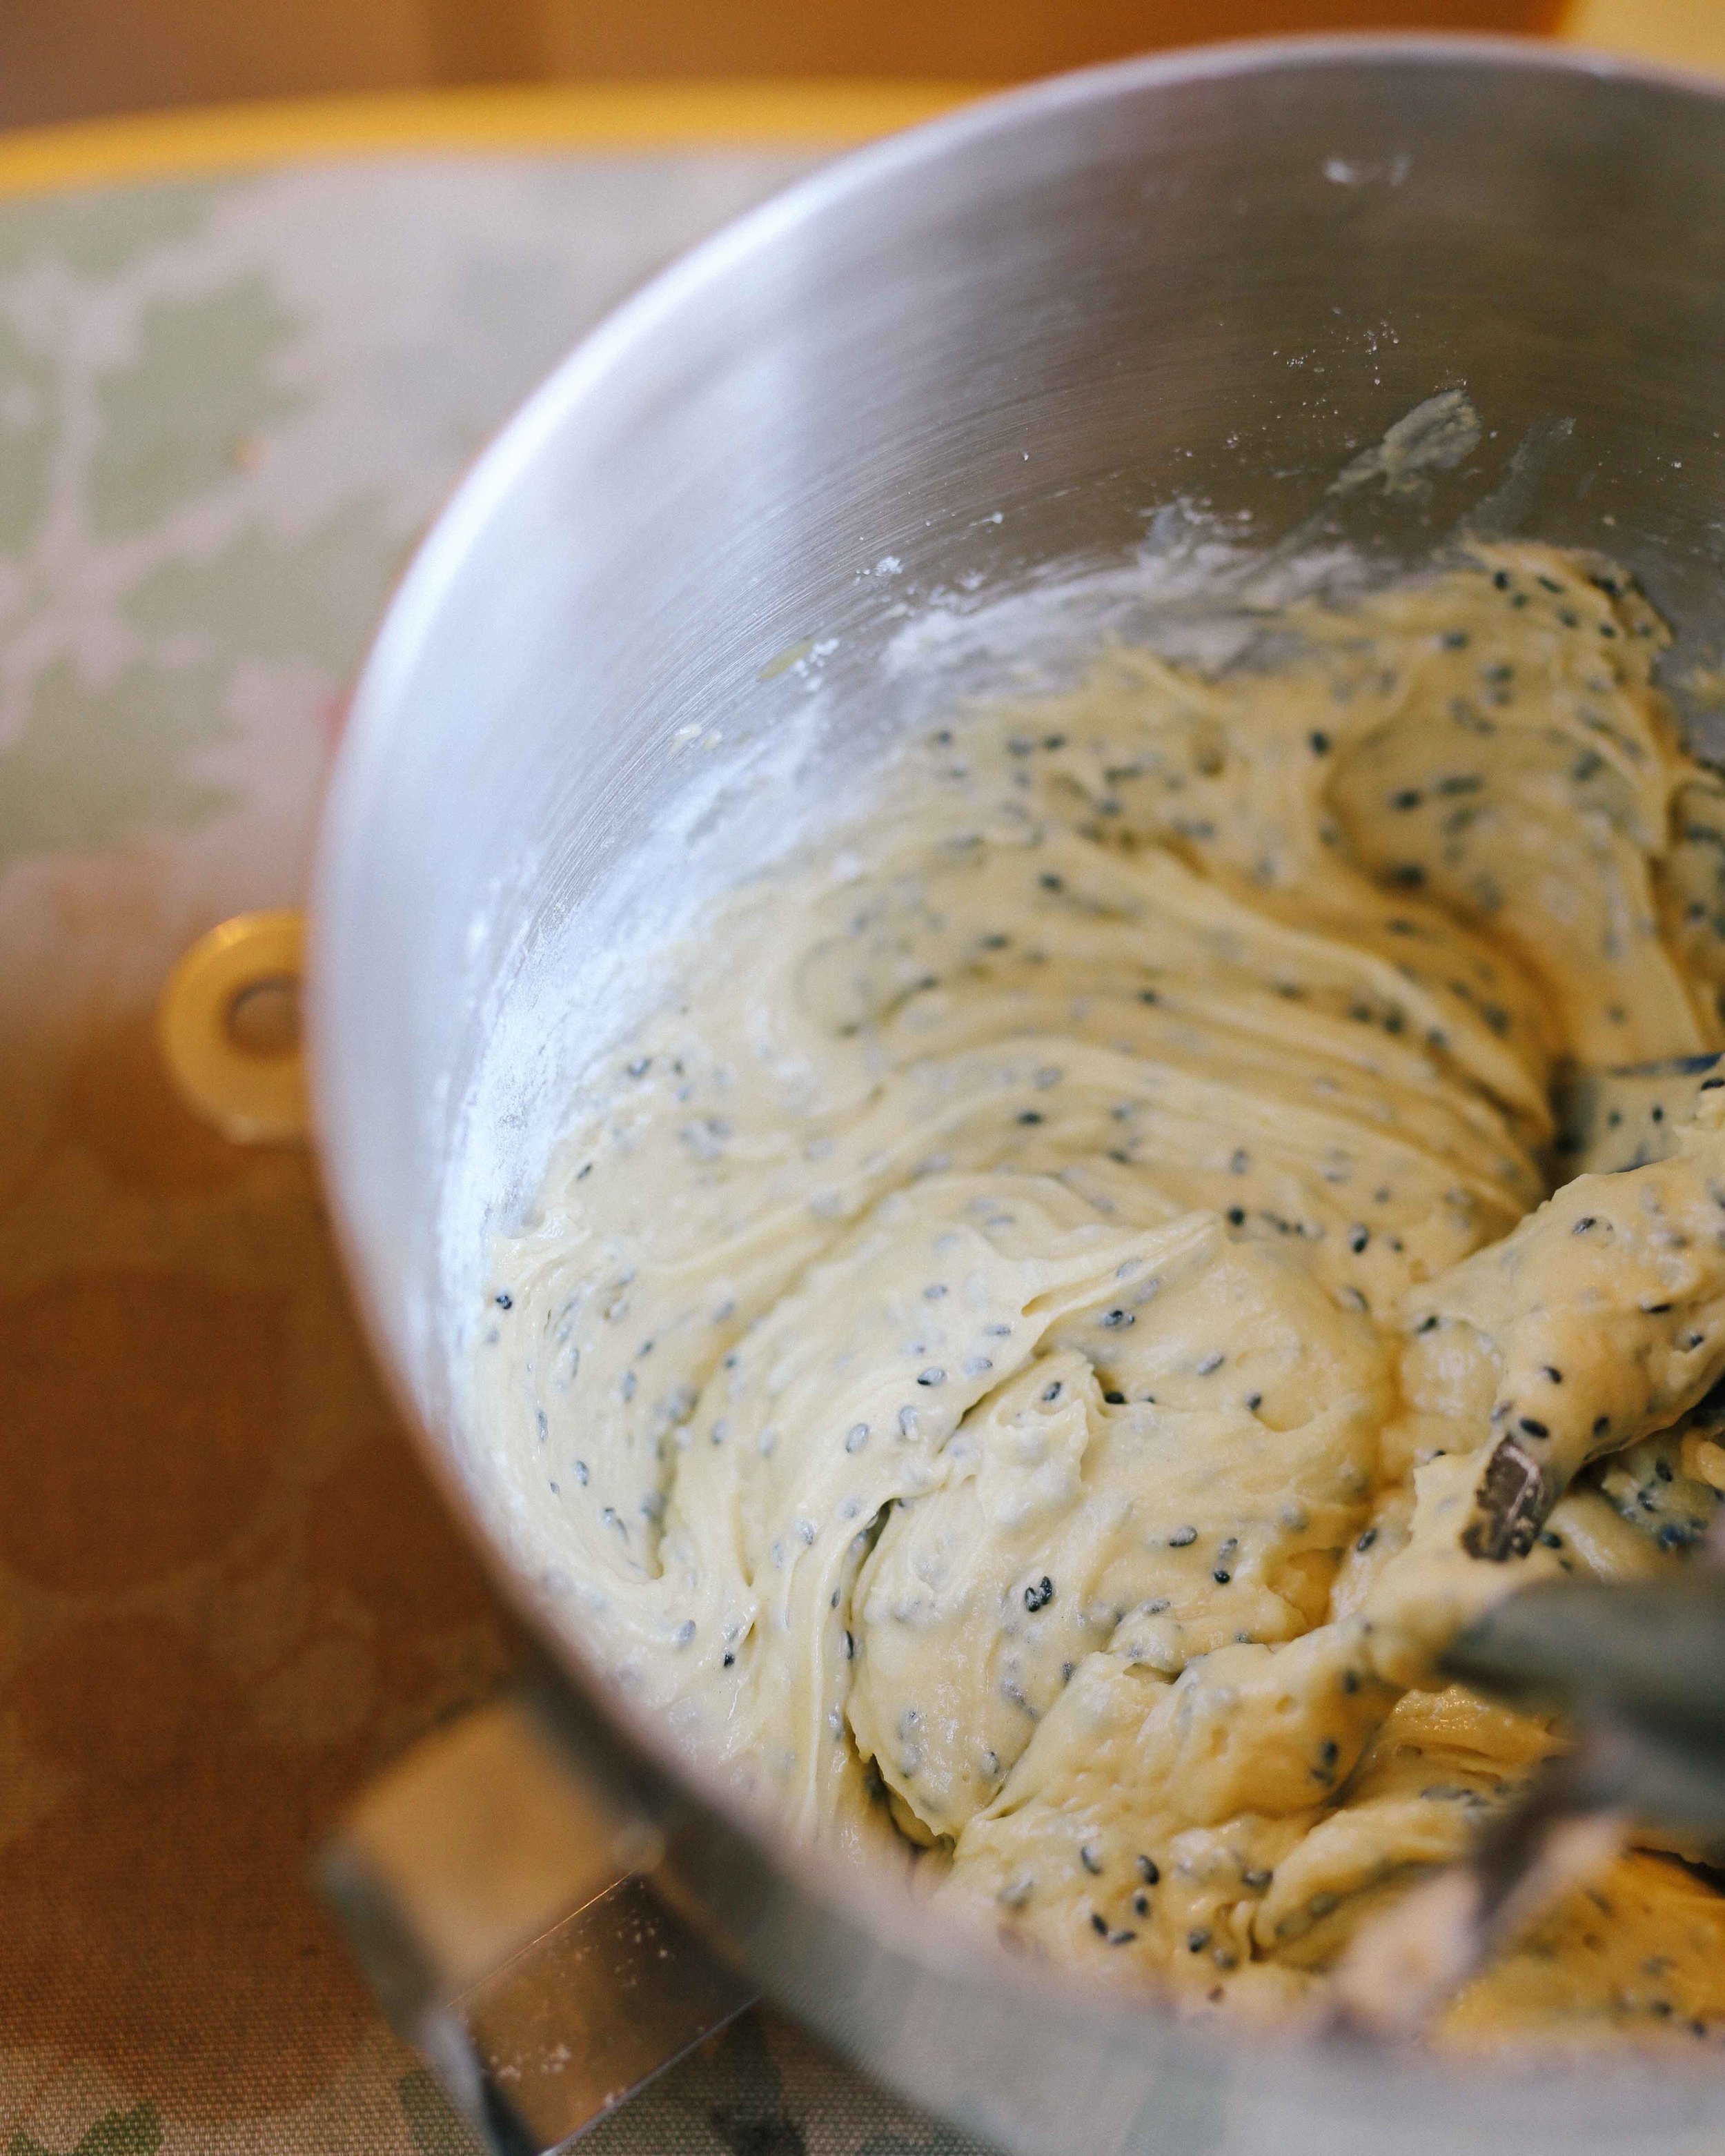
Break the eggs into a large bowl and beat with a whisk until foamy (alternately, use a hand mixer). Add the sugar and melted butter and beat it until the mixture has become light and airy. Add the yogurt and lemon zest and mix well to combine. Add the flour all at once and stir gently until just combined, being careful not to over-mix the batter. It's okay if the batter is slightly lumpy; the lumps will bake out in the oven.

Quickly toss the fruit with the remaining tablespoon of flour, then add to the batter bowl. Using a spatula, fold the fruit into the batter. Spoon the batter into the prepared muffin cups, filling each cup 3/4 of the way full. Sprinkle the crumb topping over the top. (If you have more batter than will fit in 12 muffin cups, put the batter in the fridge while the first batch bakes, then remove it at the same time you remove the finished muffins from the oven. Re-grease the muffin tins before refilling.)

Bake for 25 minutes, or until the tops of the muffins spring back when touched (it is hard to use the toothpick method since the muffins have so much wet fruit!). Let them cool on a rack for 5 minutes, then remove them from the cups. Enjoy warm from the oven, or store in an airtight container in the fridge for up to three days.


FOR THE TOPPING:

1/4 cup unrefined cane sugar
3 tablespoons spelt, wheat, or all-purpose flour
1.5 tablespoons butter, at room temperature
pinch of salt
1/2 teaspoon cinnamon (optional)

FOR THE MUFFINS:

2 2/3 cups + 1 tablespoon spelt, wheat, or all-purpose flour
2 teaspoons baking powder
pinch of salt
2 large eggs, at room temperature
2/3-3/4 cup unrefined cane sugar (use 2/3 if using vanilla yogurt, 3/4 if using plain yogurt)
2 tablespoons butter or coconut oil, melted, plus extra for greasing the pan
1 1/2 cups vanilla-flavored whole-milk greek yogurt or other whole milk yogurt
finely grated zest of 1 lemon
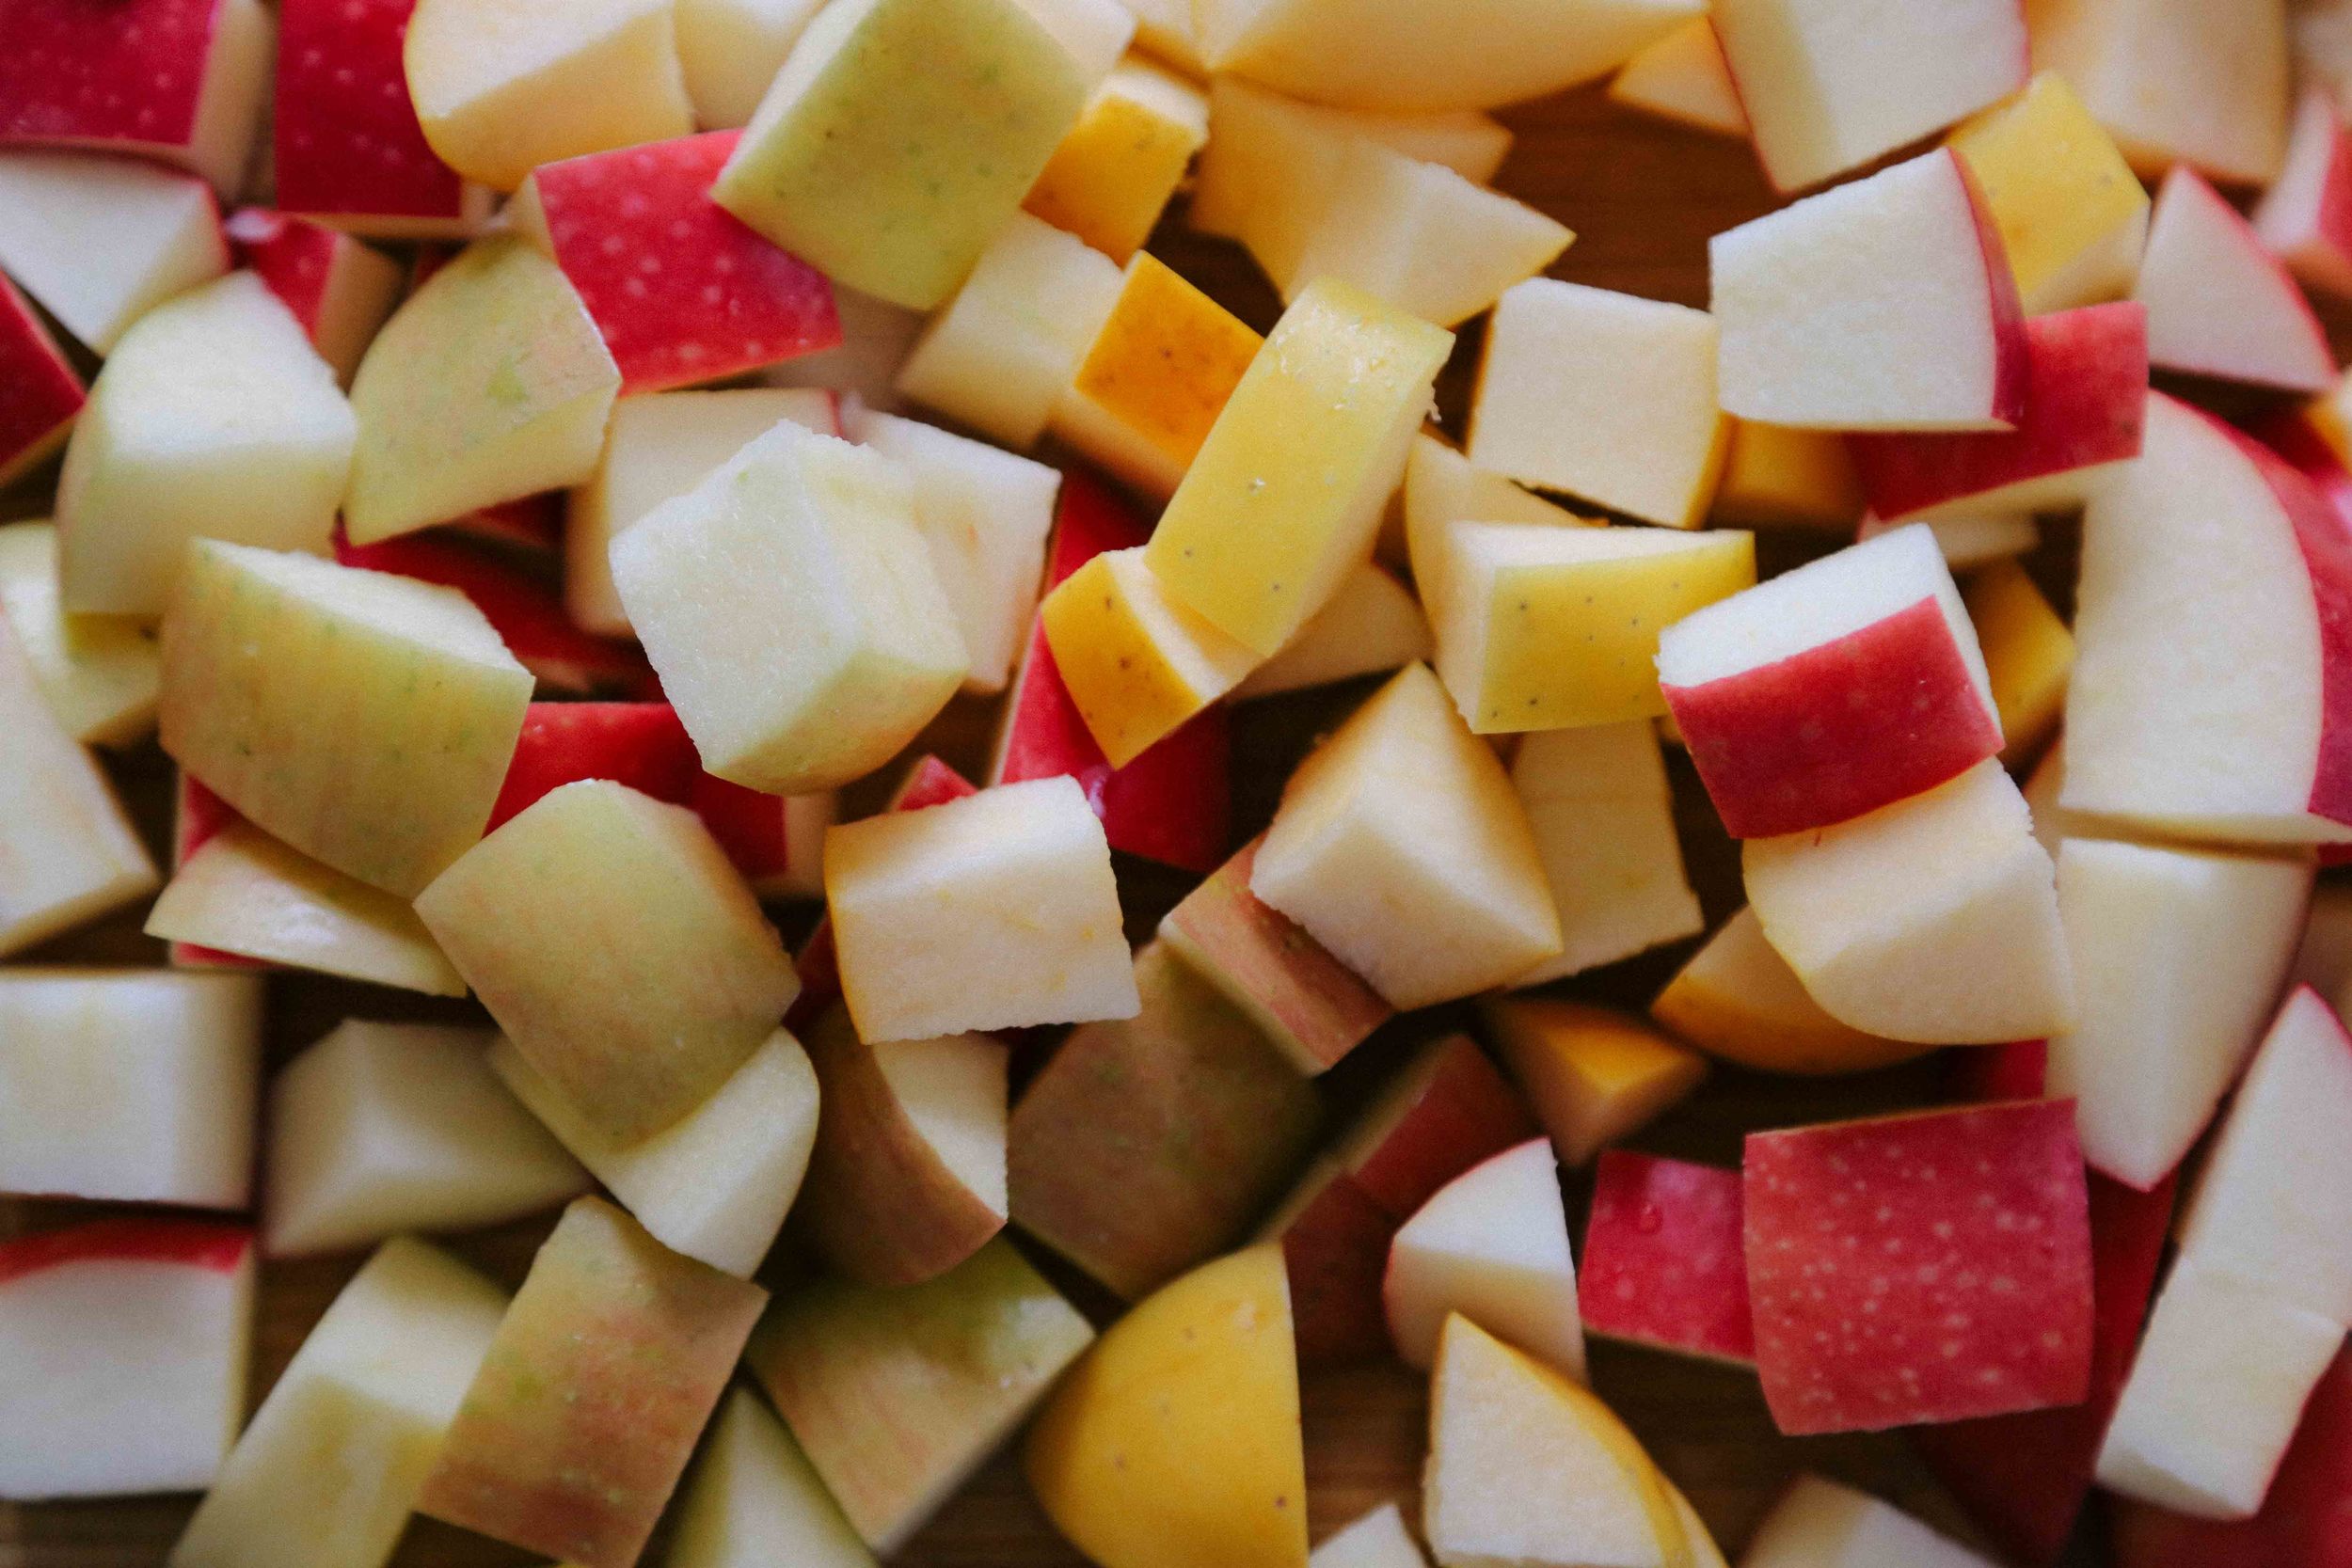
2 1/4 cups mixed berries, pitted cherries, and/or chopped stone fruit


rosemary biscuits + blood orange shortcakes

breakfast, desserts, sweet, vegetarian, winterRachel SandersComment

So my best laid plan to get these biscuits + shortcakes to you for Valentine's Day was a bust. I had grand visions of breakfast in bed with coffee and artfully plated shortcakes for my own Sunday celebration, but in reality, I nuked a tortilla and wrapped it around some avocado slices and then went skiing with Richard. Ha! Oh well.

I think sometimes there's a little too much pressure to do something grand for Valentine's Day. And it's not really worth it to make everything perfect and photogenic and complicated if it keeps you from being relaxed and having fun and spending quality time with your significant other/best friend/dog/chickens/self. Plus, I like breakfast-in-bed stuff all of the time, not just on Valentine's Day!

So I'm here to say that I hope you had a lovely and wonderful Sunday holiday morning, no matter what you ended up doing, and offer you a fabulous little breakfast idea for the next time you want to express "hey, I like you!" sentiments to someone important in your life. Especially if that someone is yourself.

4J5A0185.jpg

I have made these biscuits so many times that the cookbook containing the recipe falls open to the biscuit page each time I take it out of the bookshelf. They are Heidi Swanson's biscuits, and they are amazing. We mix up the flour proportions and types sometimes, but we're pretty committed to putting yogurt in our biscuits at this point.

Here's the low-down on choosing your yogurt for this recipe: a) tangier is better, in our minds, because it makes a more flavorful biscuit, b) Greek yogurt makes for taller, more layered biscuits, while a more liquid yogurt means flatter, but still very tender biscuits, and c) any (plain) yogurt you have on hand is perfect for this recipe, because it will make for delicious biscuits no matter their height.

I used a fairly liquid, goat's milk yogurt for the biscuits pictured here. You don't have to use goat's milk yogurt (it's just something we keep around most of the time), but I think a thinner biscuit is better for shortcake purposes, since you get a higher ratio of cream and fruit to biscuit.

In case you are wondering, no, I have never tried making these with a non-dairy yogurt. They could be great! They could be awful! Who can say! I'll let you experiment with this.

Makes 10-12 biscuits/shortcakes

You should feel free to experiment with these biscuits to take them further toward sweet or savory. You can brush them with a little cream or milk and sprinkle them with Turbinado sugar to give them a sweet, crunchy top. You can also change the herbs depending on how you plan to serve the biscuits, or omit them altogether.


For the biscuits:

1 1/4 cups whole wheat pastry flour
1 1/4 cups unbleached all-purpose flour, plus more as needed for dusting
3 teaspoons kosher salt (or 1 1/2 teaspoons table salt)
1 tablespoon aluminum-free baking powder
1 1/2 tablespoons chopped fresh rosemary (or more or less, depending on how much you like rosemary
1/2 cup unsalted butter, chilled and cut into tiny cubes
1 1/3 cups yogurt (again, Greek for higher, more layered biscuits; more liquid for shorter, tender biscuits)


Preheat the oven to 450˚F and place a rack in the center of the oven. Line a baking sheet with parchment paper and set aside.

Combine the flours, salt, baking powder, and rosemary in the bowl of a food processor, and pulse 2-3 times to mix. Sprinkle the cubes of butter over the dry ingredients and pulse 15-20 times (or more) until the mixture resembles (in Heidi's words) "tiny pebbles on a sandy beach."

Add the yogurt and pulse a few more times until just incorporated. Avoid over-mixing, as this will toughen the biscuits.

Gather the dough into a ball and turn out onto a lightly floured surface. Gently press the dough together, kneading 2-3 times if necessary, and shape it into an inch-thick square. Cut in half and place one half on top of the other. Flatten with your hands or with a rolling pin into another inch-thick square, cut in half, and stack again. Repeat each step one more time, then press the dough into a 3/4-inch thick rectangle. Cut the dough into 10-12 equally sized biscuits.

Transfer the biscuits to the baking sheet, leaving 1/2-inch of space between each biscuit. Bake for 15-20 minutes, until the bottoms are deeply golden and the biscuits are cooked through.

Scroll down for notes on making/plating the shortcakes.

Serves 2


Split the biscuits and place each bottom on a plate. Spoon the yogurt cream evenly over the two biscuit bottoms. Arrange the blood orange slices over the cream, and drizzle with honey. Pick some rosemary leaves from the springs and tuck in among the orange slices. Angle the biscuit tops over the shortcakes so that much of the fruit and yogurt is visible. Serve immediately and tuck in! 

2 rosemary biscuits
Yogurt cream (enough to serve 2 = 1/4 cup cream whipped with 1/4 cup yogurt and 1/4 teaspoon vanilla)
2-3 blood oranges, peeled, seeded, and sliced
Honey
1-2 rosemary sprigs


marie-hélène's apple cake with cardamom and orange blossom

autumn, breakfast, desserts, sweet, vegetarian, winterRachel SandersComment

Being a grownup is hard. You have to deal with unforeseen and sometimes high-stress life situations, you have to keep a level head when really you feel like exploding all over the place, and you are solely responsible for managing your cake intake. I feel like we're doing okay with the first two things this week, given that we've been experiencing some wily circumstances (long story for a future post), but to say I managed my cake intake would be a gross overstatement.

This is a good cake to keep around in these kinds of times, primarily because it is delicious, but also because it is mostly apples! So eating a bunch is NBD. Which is good, because I'm actually eating another piece as I write this post. #grownupdecisions

(Update: this cake is now gone! We ate it all. Sorry/not sorry, local friends.)

I feel that I must point out that the original recipe for this cake (from Dorie Greenspan) contained rum instead of the cardamom and orange blossom water. Rum and I haven't been friends since an unfortunate incident in college involving a very boozy drink served in a hollowed-out pineapple, hence the change in flavor additions. But if you would like to go Dorie's route, nix the cardamom and orange-blossom water and add in 3 tablespoons of rum. I think I'm going to make this with 3 tablespoons of Applejack (brandy and I are still friends) and a pinch of cinnamon and nutmeg next time, so I'll let you know how that goes when I give it a try.

I would like to say, though, that the cardamom and the orange blossom water made the whole thing smell REALLY good while it was baking. Really, stupid good. Plus, even without the booze, the cake was still incredibly moist and never dried out, even though we left it unwrapped as per the original recipe's instructions. That is impressive for any cake in our bone-dry state.

One more note: there really are a lot of apples in this cake! It won't feel like there's enough batter to hold them all, but there is, trust me. You can move the apples around a bit in the pan to spread out the mixture evenly, but believe that the batter will help to fill in the cracks and empty parts.

makes one 9-inch cake - serves 8 (or maybe just 2)
(adapted from Dorie Greenspan's recipe in Genius Recipes)
 

I didn't peel my apples when I made this cake, and I'm very happy I made that decision. Because I used some Pink Lady Apples, the bright pink peel caused the apple flesh to blush in the oven, and gave this cake really lovely pops of pink. Plus, I feel that there is enough flavor in the peel that I'm more than willing to risk the slight hesitation in texture it gives to each bite. You may peel your apples if you disagree.


3/4 cup all-purpose flour
3/4 teaspoon baking powder
pinch of salt
1 teaspoon cardamom (freshly ground, if possible)
4 large apples (use different kinds, if you can! I used two Pink Lady, one Fuji, and one Opal)
2 large eggs
3/4 cup sugar
2 teaspoons orange blossom water
1/2 teaspoon pure vanilla extract
1/2 cup unsalted butter, melted and cooled


Place a rack in the center of your oven and preheat the oven to 350˚F. Generously butter and flour an 8 or 9-inch springform pan, and place it on a baking sheet.

Whisk the flour, baking powder, salt, and cardamom together in a small bowl. Cut the core from the apples and cut the apples into 1-inch chunks.

Break the eggs into a large bowl and whisk until foamy. Add the sugar and whisk to blend well. Whisk in the orange blossom water and vanilla extract. Add half the flour mixture to the bowl and whisk until just combined. Add half of the butter mixture and whisk until just combined. Repeat with the remaining flour and butter, mixing gently after each addition. You will have a smooth, thick batter.

Using a rubber spatula, fold in the apples, turning the fruit so that it is coated with batter. Scrape the mixture into the prepared springform pan, and move it around a bit so that there aren't any large holes or gaps, and so the mixture evenly reaches the inner walls of the pan.

Slide the baking sheet with the pan into the oven, and bake for 45-60 minutes (begin checking the cake at 45 minutes), until the top of the cake is golden brown and the center of the cake springs back when touched. Transfer to a cooling rack and let rest in the pan for 5 minutes.

Carefully run an icing spatula or a thin knife between the cake and the pan, and remove the sides of the springform pan, making sure there aren't any apples stuck inside the pan. If you want to remove the bottom of the springform pan from the cake, wait until the cake is almost completely cooled and run a long spatula between the pan's bottom and the cake. Cover the top of the cake with a piece of waxed paper or a clean, lint-free dishtowel, and invert onto a rack. Carefully remove the bottom of the pan and re-invert the cake onto your serving plate.


We ate this warm, at room temperature, and after it had sat around for a bit. It is great each and every way! Dorie recommends NOT wrapping this cake, as it is so moist that it will cause the nice, crusty edges of the cake to become a bit soggy. After testing this cake in one of the driest states in the Union, we concur. Simply place a piece of waxed paper against to cut parts of the cake to keep them from drying, or just cut off any dry-ish parts before serving and eat them yourself. :)


ruined cake parfaits

breakfast, desserts, sweet, vegetarian, winterRachel SandersComment

Good grief, did this holiday season kick anyone else in the pants? I realize we're more than halfway into January (how did that even happen?!) and have gotten back into the swing of reality, but all I really want to do is have a solid lie-down and binge watch The Great British Baking Show in my pajamas.

I suppose our holiday break got off to a bad start when our car broke down (at 1:30am, on a dirt/mountain road, in a storm), and was punctuated by various unforeseen events (including more car trouble) through the New Year. I mean, really, everything was okay in the grand scheme of things (and the car trouble meant we were able to have more time with family), but it felt like each day something made us say, "WHOA, okay... guess we're dealing with this, now." We're both still reeling a bit.

And then last week, on a day when I really needed things to go right, I baked a cake.

And it SUCKED.

It stuck to the pan, the top came out strangely tough while the inside was quite delicate and almost under-baked, it didn't rise the way I expected... blah. It has been a while since I've adapted a cake recipe, and I had forgotten how devastating it can feel to put a lot of time and effort and care into making a cake and have it not turn out the way you want. Granted, I did mess around with the recipe quite a bit, but in a way that I honestly thought would turn out okay, if not extremely well. That probably sounds arrogant, but CLEARLY I WAS WRONG ANYWAY.

Phoo.

So, when we bake a cake and it turns out wrong, what do we do? Do we cry (maybe), do we eat a lot of the part that was stuck to the pan (probably), or do we find a way to remedy the situation (um, sure?)?

Some ways have already been devised to rescue weird cakes (remember cakepops?), but usually when I am making a cake, it is because it is a celebration or special event of some kind, and I want to make something a little more special or fancy. It also usually means that I am cooking other things, and I don't have the time or wherewithal or emotional capacity to deal with stuff like tempering chocolate and finding skewers or popsicle sticks.

No time like the present to break out a good old parfait.

A parfait is, in its most elemental form, layers of cake or cookies, whipped cream, and fruit. Sometimes the cream has other things going on with it, like mascarpone or creme fraîche whipped in (or maybe a wee bit of booze). I personally like my whipped cream tempered with yogurt in a 1:1 ratio. It is just rich enough for dessert, but still feels quite light and has a pleasantly subtle tang; you could serve it for breakfast and nobody would say boo.

So next time you plan to make a cake, on the off-chance it decides to be temperamental, grab a pint of cream, a container of yogurt, and some fruit just in case you need to perform some parfait magic, and no one will EVER know that your cake was a near-disaster. Unless, of course, you write a blog post about it later.

(Also, Richard and I agree that we like this so much that we'd make it again with a not-ugly cake, too! Though I may save at least the next good cake for something else, if only for my ego's sake.)

ruined cake parfaits

serves 6

You can scale this recipe up or down quite easily, depending on the number of people you want to serve; just keep the 1:1 cream to yogurt ratio.

I was testing out a recipe for a sesame cake when I made these parfaits, and decided to use cara-cara oranges and lime zest to go with the sesame flavor. The combination was out-of-this-world good, and I'll be sure to share the recipe for the sesame cake once I get it dialed. Serve this cream with any cake you like, and with any fruit you like, but here's a quick thought regarding chocolate cake - I'd actually replace the yogurt in the cream with mascarpone, as I think it would taste better to have something slightly richer and less tangy to go with the chocolate.


1 cup full or low fat plain yogurt
1 cup heavy whipping cream
2-3 tablespoons sugar (optional)
1 teaspoon vanilla (optional)

1 cake, sliced or broken into bite-sized pieces
fresh fruit, cut into slices or chunks (reserve a few pieces for garnish)
lime/citrus zest (optional)


Whisk together the yogurt and cream in a large bowl. If the yogurt and cream are not straight-out-of-the-fridge cold, place the bowl into the fridge for 15-20 minutes to chill (it won't whip properly if it is not cold). In the bowl of a stand mixer fitted with a whisk attachment or with a hand whisk, beat the yogurt/cream until soft peaks form. Continue beating for a few more seconds to stiffen the mixture, but keep it somewhat billowy and soft (it will look prettier and be easier to layer).

Layer the cake, cream, and fruit in individual glass jars or wine glasses, beginning with the cake and ending with the cream. Garnish each parfait with a piece of fruit and some fresh citrus zest, if desired. Refrigerate until ready to serve

campfire blueberry cobbler

breakfast, desserts, summer, sweet, vegetarianFieldandForest4 Comments

I wish I could tell you that this camping trip was all sunshine and climbing and cobbler, and it was, but it was also mosquitos (in a BIG way) and now I am a human-shaped pile of itch. Our lovely, perfect, secluded BLM camping site, with its flat, soft ground, makeshift fire pit, and expansive field and mountain views, was also the site for mosquito Bonnaroo Summer 2015, and we were Mumford and Sons caught without our chicken suit and wedding dress. Not a moment had passed since we opened the car doors before we were enveloped in a wispy, humming cloud of bloodsuckers, more at a single time than I have ever before seen in my life.

Ohhh, I wish I were kidding.

Lucca, of course, couldn't have cared less about the mosquitos, and Richard is a particular breed of hardcore, so the two of them went about doing their various camp arrival activities (rolling in deer poop/setting up the tent, respectively), while I ran around the campsite in my ski jacket waving my arms and yelling and trying desperately to avoid being bitten. I was unsuccessful. But eventually a slight breeze picked up and the temperatures dropped and the majority of the mosquitos hurried away to wherever it is mosquitos go when it gets windy and cold, and we had a very lovely time eating burritos and drinking beer/wine and enjoying one of the best campfire desserts we've ever made.

So, here's the thing: I honestly don't know whether to call this a crumble or a cobbler, as there is no liquid in the topping (which I think is supposed to make it ineligible to be a true cobbler), but there was a definite cakey layer under the crispy, pebbled top which seemed out of place for a crumble. And the recipe I adapted was originally from a topping for fruit crisp, but I'm pretty sure that a crisp isn't supposed to be cakey at all. So, even though I'm categorizing this as a cobbler, I don't know what to call this Franken-fruit dessert! But it was delicious, whatever it was. And if you are someone who oscillates between a preference for cakey things and crumbly/streusel-y things, then this is definitely the happy medium you've been waiting to find.

As we were unable to finish the cobbler between the two of us that evening, we just stuck the lid on the Dutch oven when we were finished and ate the leftovers over yogurt for breakfast the next morning. I HIGHLY recommend you do this as well, should you find yourself with leftovers of your own.

A few things you might be wondering/thinking:

Where are you in these photos? We were in the Uintas, a northern Utah mountain range, and the largest mountain range running east-to-west in the contiguous United States. It includes King's Peak, the highest mountain in Utah at 13,528 feet, plus over 1,000 lakes (really, really). It is a great place to hike, camp, ski, paddleboard, kayak, play with dogs, and escape the oppressive summer heat of the Salt Lake valley. It is also barely two hours away from downtown SLC! Even though we camped on BLM land, there are a number of (very popular) campsites in the area. You can check out campsites, permit/pass information, weather forecasts, and more here.

Where did you get that nifty Dutch oven? Richard got this Dutch oven from his parents for a past birthday. It is aluminum, and is light enough to take backpacking. If you're more into cast iron, Lodge makes a number of great Dutch ovens in a variety of sizes and styles that would be perfect for car camping. Make sure you get one with a handle that can swing up and over the lid of the Dutch oven for easy lifting and moving, or you are going to have a pretty interesting time maneuvering your lava-hot pot of cobbler out of the campfire.

How did you keep Lucca from running away from your campsite? Oh, there was definitely a moment when Lucca went on a mission to befriend a lone landscape photographer, and Richard had to hunt him down in the semi-darkness. And Lucca took himself on a short adventure to somewhere (I still don't know where) when I got up for an early morning pee, and I hollered for him for a good couple of minutes before he popped out of some bushes on the other side of the field next to our campsite. So, I suppose the answer is: we don't. He kind of likes to explore on his own when we're outside, and he almost always returns without our intervention. I guess I don't really have good advice, other than that we give him a few top-shelf treats and some cheese every once in a while (usually when he returns from adventuring), and I think he intuits that he'd be hard-pressed to find aged cheddar elsewhere in the wilderness.

(And don't you worry, Internet trolls, we wouldn't let him off the leash if he was a menace to other dogs/small children, and we leash him when we're in areas with a high-density of wild animals/cars/other people/watersheds.)

You left some stems on your blueberries when you made the cobbler!! Let's be clear that when you are getting attacked by hordes of mosquitos, de-stemming blueberries falls pretty low on your list of priorities. I just wanted to get the cobbler show on the road as quickly as possible. But to be honest, I didn't even notice any stems in the cobbler after it was finished! True story.

I want to know what's happening with that burrito-looking thing. Yeah! So we had a leftover chicken breast from the Gringo Chicken Tacos (I made a double batch the other day), so I shredded it and added it to some black beans which we heated on the camp stove. We put the chicken-bean mixture on whole-wheat tortillas, added some leftover chopped onions and cilantro, store-bought pico de gallo, and avocado slices, plus a squeeze of lime, and rolled everything up into burritos. They rocked.

Campfire Blueberry Cobbler serves 4-6 (or 2 with leftovers for breakfast)

For the topping:
1 cup all-purpose flour
1/3 cup packed brown sugar
1 tablespoon white sugar
1/4-1/2 teaspoon cinnamon (depending on how cinnamon-y you like your topping)
1 large pinch kosher salt (1/8 teaspoon)

Before you leave on your camping trip, combine all of the dry ingredients in a lidded container (preferably one that is large enough to also cut the butter into) and mix thoroughly. Pack with the rest of your food for the trip.

To complete your cobbler:
6 tablespoons butter, divided
4-6 cups blueberries (depending on how your preferred fruit-to-topping ratio... we used about 4 cups of berries)
1-2 tablespoons brown sugar juice of 1 lemon

Equipment: one 10-inch Dutch oven, a knife, a campfire with hot coals, tongs

Grease the inside of a 10-inch Dutch oven with 1 tablespoon of the butter. Add the blueberries, brown sugar, and lemon juice to the Dutch oven and mix with your hands to combine.

Cut the remaining 5 tablespoons butter into the container with the dry topping mixture. Use your fingers to pinch the butter into the flour mixture until the mixture looks like a blend of sand and small pebbles. Spread this mixture evenly over the blueberries, and place the lid on the Dutch oven.

Spread a single layer of hot coals on one side of your campfire, and place the Dutch oven over the coals. Use the tongs to carefully place about 10 additional coals (12, if your coals are on the small side) on the top of the Dutch oven. Cook for 30-40 minutes, rotating the Dutch oven 90-180 degrees every 5-10 minutes so the cobbler cooks evenly.

Remove the Dutch oven to a bare patch of dirt, and carefully use the tongs to place the coals from the lid back into the fire. Remove the lid from the Dutch oven to make sure that the cobbler is cooked, and let cool with the lid off (or ajar, if it is buggy) for about 5 minutes before serving.