FIELD & FOREST

lunch

fridge clean-out minestrone

autumn, dinner, lunch, main dishes, soups, spring, vegan, vegetarian, winterRachel SandersComment

One of my New Year's resolutions from like, 2012, was to get better at using up all of the odds and ends that accumulate in our fridge. For the most part, we've failed. We still fill up a little compost container with past-their-prime veggies/fruits/cheese ends/what have you every month or so. 

But, had I known the recipe for building this skill was one part Richard saying "I want soup" and two parts us being too lazy to travel 2.5 blocks to the store, we might have cracked this fridge clean-out thing a loooong time ago.

I feel funny sometimes when I share these kinds of recipes with you because they aren't flashy or profound or beautifully styled. This is base-level practicality at its core. But geez, there is so much gorgeous food inspiration among the cookbooks and the Instagram and the Pinterest that I sometimes really need someone to slap me across the face and say "put down the pea shoots and make some goddamn food with what you goddamn have."

(I picture this someone as one (or both) of my economical depression-era grandmas, which makes me feel happy in spite of the slapping.)

I'm guessing your fridge looks different than my fridge, and since this is about making the most of what's available to you in the moment, you shouldn't feel constrained by amounts of things or by particular ingredients. An onion, some olive oil, an acid, and maybe a little meat will be enough to carry any veggies pretty far along, and you can even get away with using water if you don't have veggie/chicken/beef broth hanging out somewhere. This soup will not be French Laundry soup by any means but it will be inexpensive and healthy and nourishing and soul-satisfying and delicious.

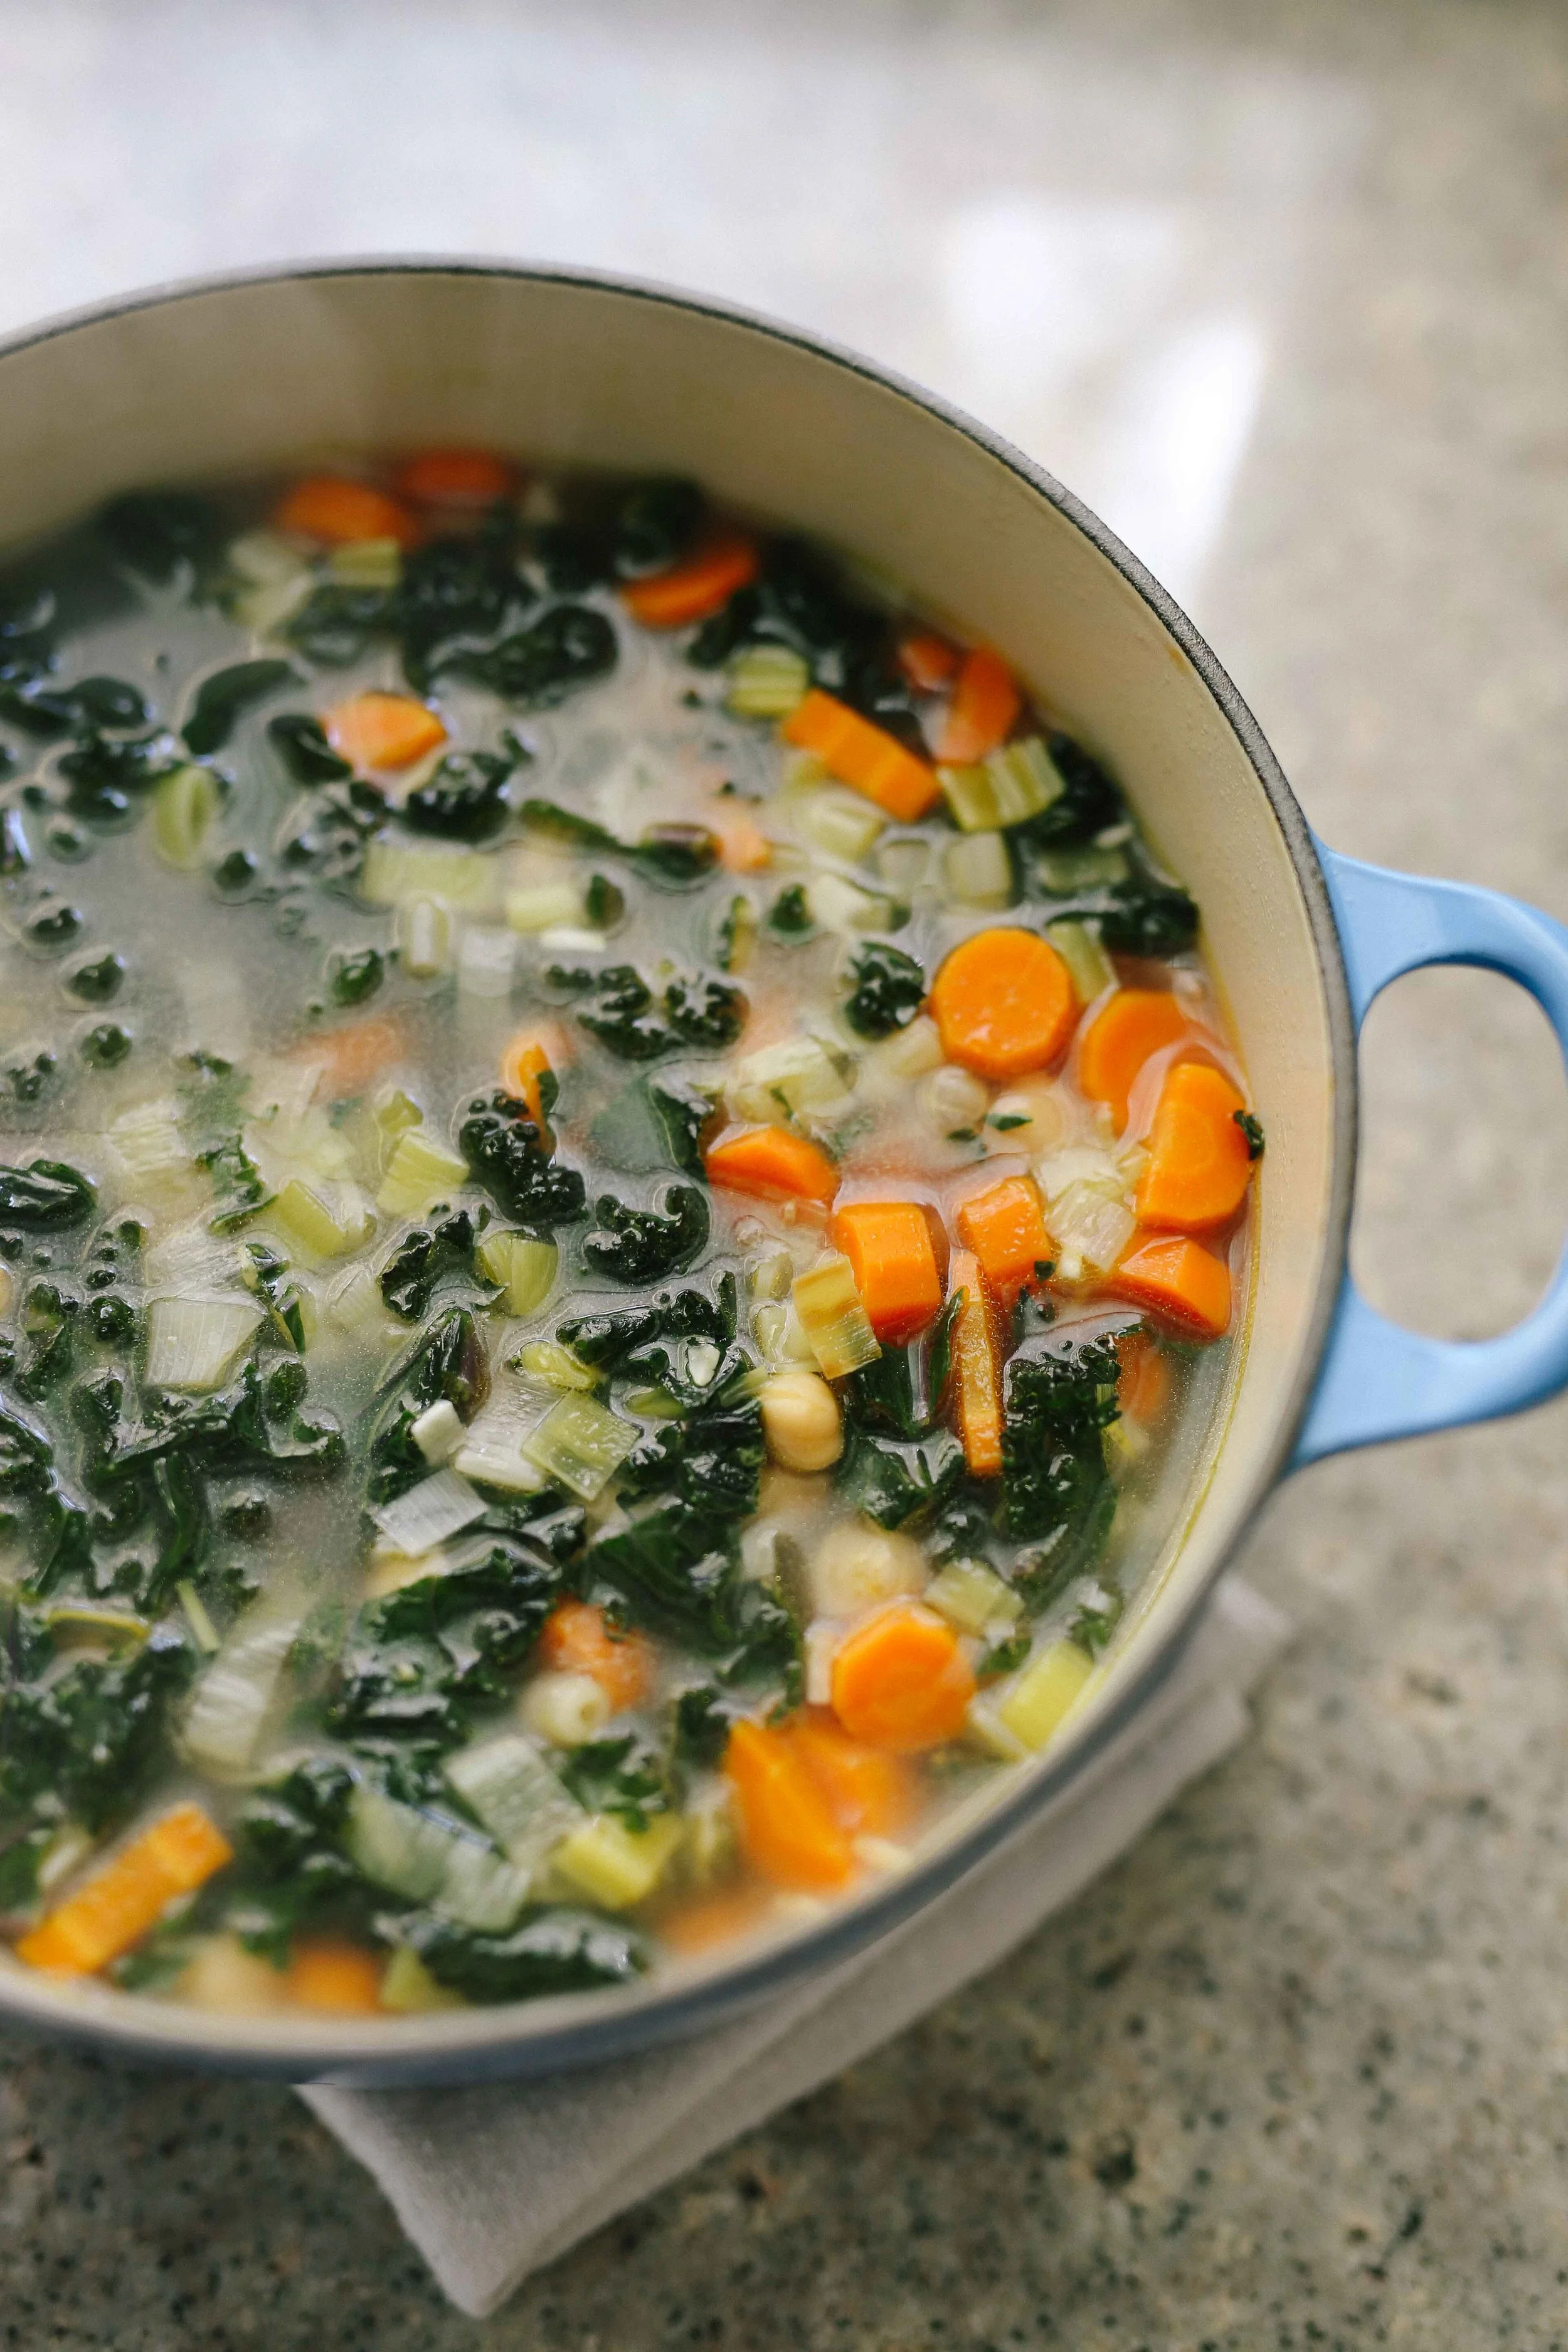
Pretty much everything we need.

butter
olive oil
2 leeks, halved lengthwise, cut into 1/4-inch slices, and rinsed (white and light green parts only), OR 1 large onion, chopped
salt
1 bunch carrots (~5 carrots) (alternately, use parsnips/sweet potatoes/what have you), peeled and cut into 1/4-inch slices
3 cloves garlic, chopped
a few sprigs of thyme or 1 of rosemary
1/2 cup dry white wine
6 cups broth, water, or a mixture of broth and water
1 can chickpeas (alternately, use cannellini beans or other canned/cooked beans), drained and rinsed
1 cup ditalini (or other small) pasta (alternately, break up long pasta into small pieces)
1/2 bunch red Russian kale, chopped (alternately, other robust greens, chopped, or whole leaf baby spinach)
black pepper
zest and juice of 1/2 a lemon
(optional: cooked sausage, bacon, or shredded cooked chicken)

To serve: shaved parmesan, red pepper flakes, olive oil

In a pot set over medium-low heat, melt a small knob of butter (a tablespoon or so) and add a quick swig of olive oil. Add the leeks (or chopped onion) along with a pinch of salt and sauté, stirring frequently, until they become soft and translucent. Add the carrots and garlic and cook for 5  (adding more oil or butter if the vegetables are sticking to the pot) until the carrots are just beginning to soften.

Turn the heat up to medium and add the wine. Let the wine cook down until the pan is almost dry again, then add the water or broth. Bring the pot to a boil, add the chickpeas and pasta, and cook for 5 minutes. Lower the heat to maintain a brisk simmer, add the kale, and continue to cook until the greens have softened and the pasta is al dente. (If you are including leftover cooked meat in your soup, add it along with the kale.)

Taste the soup and season with more salt, a little pepper, and the lemon zest and juice. Serve immediately, with shaved parmesan, red pepper flakes, and olive oil on the side.

roasted veggie tacos + a video!

autumn, dinner, lunch, main dishes, vegan, vegetarian, winterRachel SandersComment

So remember a little (er, long) while ago when I said you'd be getting a taco recipe soon? Well, rejoice! Soon is now.

This is one of my favorite recipes. And, it's vegan! You'd never know! I actually forgot it was vegan the last time we made it until halfway through my second taco.

That's actually the kind of vegan cooking I prefer. We're not vegan, but we really don't eat meat more than once or twice a week, if that. We save the meat for dishes that really need it, like sausage bolognese and meat lasagna and roasted chicken (not quite sure how one would make this without the chicken), and focus on the vegetables the rest of the time. I will probably always eat this way, mainly because I have never met a vegan lasagna that can hold a candle to normal lasagna (mainly because I have never met a vegan cheese that can hold a candle to cheese).

My friend Andrew and I made this video back in January (note my pre-spring skiing alabaster complexion), and then I promptly sat on it for a number of months while moving/working/traveling/being a bum. So now that squash is back in season, it's high time I made good on my taco promises and gave you this recipe already, especially since it's ideal camping season in most parts of Utah. Even though I roast the veggies in the oven and cook the kale on the stovetop, the ingredients for these tacos are robust enough that you can make them ahead of time, pack them in your cooler, and reheat them in the backcountry with no discernable changes in quality or texture. They've been a featured item on more than one trip, and since getting fresh veggies in our tummies while camping is sometimes an issue for us, I'm always super happy when these are part of the rotation.

(Some of you are going to balk at the homemade tortillas thing, since that is admittedly a more time-consuming element of these tacos. I mean, I like these tortillas a lot, but you don't have to make them if you don't want to. I'll still be your friend. And even I don't bother with making the tortillas when we take this camping, mainly because we'll eat more than I can practically make. But seriously, do make the orange sauce, because it is like liquid crack and you can use it on your eggs/chips/burgers/veggies/significant other, so you'll definitely use up the full batch.)

Huge thanks and the biggest of bear hugs to Andrew for shooting this video with me and for helping me to eat all of the tacos afterward! Do yourselves a favor and check out his other work at andrewjamesfilm.com.


a few good squash (I used 1 large butternut and two delicata, but feel free to use whatever densely-fleshed squash is your favorite)
1 pound carrots
olive oil
1 bunch lacinato (dino) kale or Red Russian kale
kosher salt

TACO ACCESSORIES - tortillas, orange sauce, chopped cilantro + white onion, sliced avocado, toasted pepitas

Peel the squash (delicata squash can be unpeeled), remove any seeds, and cut into 1/2-inch cubes. Peel the carrots and cut into 1/2-inch thick rounds or half-moons. Place the veggies in a single layer on two baking sheets, drizzle with olive oil, and toss lightly with your hands to evenly coat. Place both baking sheets on separate racks in your oven, and turn the oven temperature to 400˚F. Roast for 20-30 minutes, rotating the sheet pans once, until the edges of the veggies are becoming crispy and the insides are custardy.

While the veggies are roasting, stem, chop, and rinse your kale (do not dry it). Heat a cast-iron pan over a medium flame. Drizzle a tablespoon of olive oil into the pan and let heat for a few seconds before adding the kale. Sauté the kale until it begins to wilt (the water from rinsing will help the kale to steam and break down). Add a pinch of kosher salt, and continue to cook for another 5-10 minutes, until the kale is soft and easy to bite through.

Remove the vegetables from the oven, sprinkle with kosher salt, and add to the pan with the kale. Set aside while you heat the tortillas, and gently reheat if necessary before serving.


ORANGE SAUCE (makes 2 cups)

Note: this recipe is inspired by both a salsa from Tacolicious and one from the beloved Q'ero in Encinitas, CA.

Turn your broiler to high. Lay the onion slices in a single layer on a baking sheet, and place under the broiler until they begin to blacken on one side, about 5-10 minutes.

While the onions broil, heat a heavy bottomed skillet over a medium flame and add a couple of teaspoons of canola oil. Add the chiles de arbol and the garlic cloves to the pan, and cook until the chiles are beginning to turn dark, the garlic is beginning to turn golden, and the whole thing smells smokey and delicious (this only takes a few minutes if that, so keep your eye on the pan).

Remove the chiles and garlic from the heat, and pour into the cup of an immersion blender or the carafe of a stand blender. Add the broiled onion slices, and pour about 1/4-1/3 of a cup of boiling hot water over the vegetables and let sit for 5 minutes (this will help them soften for blending).

Add the aji amarillo purée or tomatoes, the vinegar, and a large pinch of salt to the carafe and blend until puréed (it's okay if there is still a little bit of texture). Add the agave nectar and oil, and blend again until thoroughly mixed. Taste the sauce and add more vinegar/salt/agave/oil as necessary to get your desired balance of flavors.

The sauce will keep, refrigerated, for up to two weeks.

1 red onion, peeled, halved, and cut into 1/2-inch thick slices
canola oil or other neutral oil
1/2 cup dried chiles de arbol
6 large cloves garlic
boiling hot water
1/3 cup aji amarillo purée or two medium tomatoes
1/3 cup apple cider vinegar
kosher salt
1 tablespoon agave nectar (syrup) or 1 tablespoon sugar
1/3 cup canola oil


BLUE CORN TORTILLA (makes 8-12)
adapted from King Arthur Flour

Combine the flour and cornmeal in a medium bowl, and add the oil, mixing to combine. Dissolve the salt in the water and add to the bowl, mixing to combine with your hands or a wooden spoon.

Turn the mixture out onto a lightly floured surface, and knead briefly until the dough is smooth and no longer sticky, adding a little more flour to the board if necessary. Divide the dough into 8-12 equal pieces (depending on how large you would like your tortillas) and roll each piece into a ball. Set on a plate or baking sheet, cover with a damp dishtowel, and leave to rest for 30 minutes.

Working with one piece of dough at a time, leaving the rest covered, press the dough ball using a tortilla press (if you don't have a press, which I don't, place the dough ball on a large piece of plastic wrap, fold the wrap loosely over the ball, and press using the bottom of a dish or a pan). Place pressed tortillas on a plate and cover with a damp dishtowel while you work with the rest of the dough.

Once the tortillas have all been pressed, heat an ungreased skillet or griddle over medium heat and line a dish with a dishtowel or large piece of foil. Cook the tortillas for 1-2 minutes on each side, until the color is light with some golden spots. Remove cooked tortillas to the lined dish, and keep covered with the towel or wrapped in foil while the others cook.

Serve immediately.

1 1/3 cups all-purpose flour
2/3 cup blue cornmeal
4 tablespoons canola oil
1/2 teaspoon kosher salt
1/2 cup + one tablespoon water

beans with garlic, rosemary, and aleppo pepper

dinner, lunch, vegan, vegetarian, winter, autumnRachel SandersComment

Gah, my mouth starts watering whenever I think of these beans. These look innocuous, but they are heady with garlic and deeply savory with rosemary and pepper flakes. I sometimes can't believe how good they are considering that they're made with things that are usually just lying around! Pure magic.

The beans pictured here are Good Mother Stallard beans from Rancho Gordo. I love how these beans plump up when you cook them and how densely creamy they are on the inside, but you can make this with any cooked beans or canned beans you have around. You could simply add them to the oil with the garlic and cook until they're heated through, but I like taking them a little further so that some become golden and a little crispy on the outside. That's when things really start to get good.

After that, you can remove them from the heat and serve them straight from the pan as is, or give them another pinch of flaky salt and a squeeze of lemon for a bit of a lift (which is highly recommended!). If you can't stop eating them, then you know you've achieved perfection.

serves 2-4 as a side

This recipe easily scales up, but I wouldn't bother scaling it down, as the beans make fantastic leftovers when added to pasta or salads, or served with eggs. You can even make a slice of toast, top it with a few slices of avocado, add the beans and a fried egg and have a very respectable breakfast or brunch dish.

How to simply cook dried beans: place your beans in a large bowl and soak them overnight in plenty of cold water. Drain and rinse your beans to remove any grit, and put them in a large pot with plenty of cold water and a single bay leaf. Bring the water and beans to a boil, reduce heat to low, and cover, cooking until the beans are no longer mealy and taste creamy, but not so long that they turn to mush (I start checking my beans 30-45 minutes after they started cooking, but the timing can vary greatly depending on the age of your beans). Once the beans are cooked, remove from heat, uncover, and let cool in their cooking water (this helps to keep them intact). Use immediately or refrigerate until ready to use.


1/2 pound Good Mother Stallard beans (or other beans that hold their shape once cooked), cooked, OR 2 cans cannellini beans
A generous glug (two tablespoons) olive oil
6-8 cloves garlic (or more, no need to limit yourself!), thinly sliced
2 large sprigs fresh rosemary
1 large pinch aleppo pepper flakes OR 1 small pinch standard red pepper flakes
Flaky salt, to taste
Lemon juice, to taste


In a large, heavy-bottomed skillet, heat the olive oil over medium-low heat until it begins to shimmer and can easily be swirled around the pan. Add the garlic and cook, stirring constantly, for about 30 seconds or until it begins to turn translucent and smells really, really good (don't let it brown here). Add the pepper flakes and rosemary, cook (stirring) for a few more seconds, and then add the beans. Stir everything together, raise heat to medium, and then let cook, stirring occasionally, until the beans are heated through, the garlic is turning golden, and a few of the beans are beginning to turn crispy.

Remove from the heat, strip the leaves from the rosemary, and stir the leaves back into the beans. Finish with a generous pinch of flaky salt and a good squeeze of lemon, and serve immediately.


Note that if you use canned beans, you may have to stir them more gently while cooking, as canned beans have a greater tendency to fall apart when cooked in this way. But beans that have fallen apart make excellent bean mash, which is a lovely thing on its own, so it's not any tragedy should this happen to you.

pantry flatbread with arugula and aleppo pepper

autumn, breads, breakfast, dinner, lunch, main dishes, snacks, spring, winterRachel SandersComment

In the beginning of many cookbooks, there is a chapter with no pictures where the chef/author talks about the foods they like to keep on hand at any given time, how to stock a pantry properly, etc. Sometimes they'll go over unique ingredients - what they are, where to find them, why you should use them - or pieces of equipment that they can't live without that they've added to their finely curated list of kitchen gadgetry. Or maybe they'll talk a bit about their process - how they clean as they cook, or how they write out recipes on post-its that they stick on the counter while they work. The abundance of care and work that go into creating this pantry/equipment/process chapter is obvious. You know? Don't you usually read this section?

Yeah, me neither. I want to look at the pretty pictures already.

But when I went to see family for Thanksgiving, I ended up going to a spice shop I've been wanting to check out for a while and subsequently dropped a fair amount of cash on some spices I've been having trouble finding (and some that I have never seen before but am so excited to use). And then I came home to our hap-hazard pantry with its crazy amount of beans and nearly empty boxes of pasta, and thought "This is no place for my spices!" So I cleaned out the shelves, reorganized everything, and took note of stuff that was about to run out, and I now have a well-oiled pantry machine. I didn't expect that it would have a profound effect on my efficiency and enjoyment of cooking, but it did! It is crazy! I have joined the Clean Pantry Cult and I am going to prosthelytize to anyone who will listen!!

One of these days I'll write a post on the things that are in my pantry (there will be pictures, promise), but let's talk about this flatbread for a moment. I get most excited by foods with flavor contrasts (salty/sweet, rich/bright, etc.), and I wanted to bring that kind of excitement to this recipe so that it didn't feel like an "I don't know what to make for dinner" kind of a meal (which it most definitely was). It worked sort of like this:

If I ever publish a cookbook, there will be a lot of Venn diagrams (which will probably break up the text a bit in my pantry section, which y'all had better read).

There are so many ingredients that fall into each of these categories (I even listed a few more than I put on the flatbread), so don't feel like you have to limit yourself to what I did, especially because the whole point of this thing is to utilize stuff you have on hand! Just grab a prepared crust or some pizza dough and something bright and fresh on your way home from work, and you'll have a tasty, simple, and homemade meal in the time it takes to order a pizza.

(A quick pantry tip: buy things that you use frequently every time you go to the store, whether you need them immediately or not! I do this with onions, sweet potatoes, and lemons, because I use them multiple times throughout the week, if not every day. And I'll usually also buy some arugula or spinach every week because a pop of green easily takes something from blah to beautiful.)

pantry flatbread

Makes 1 flatbread; serves 4 as a light main, or 6-8 as an appetizer/snack

Aleppo pepper flakes are different from the standard red pepper flakes you can find in the spice aisle, and they are certainly different from the packets that come when you order a pizza to go. Instead of punching the inside of your mouth with heat, these flakes are bright, tart, and pleasantly warming. I don't know if this reflects a level of quality, but the flakes I purchased are also just pepper flakes, with no included seeds. You can find them at specialty stores or online, and a little jar will last you for quite some time.

Also, keep in mind that this is not a pizza, so there is no ooey-gooey-cheesy base holding all of the ingredients on board. Some things will bake together, and some things will be looser. If you want a more cohesive flatbread, omit the olive oil that you drizzle over the dough and replace it with a generous smear of creme fraîche.


1 pound pizza or flatbread dough (I grabbed a container of prepared dough at Whole Foods)
olive oil
1 red onion, thinly sliced from top to tail
1/4 cup white wine (optional) or water
kosher salt
4 oz bacon, sliced into lardons
1/3 cup pitted kalamata olives, torn in half with your fingers
4 oz feta cheese (I used goat's milk feta)
flaky sea salt (I used Maldon)
a couple of handfuls of arugula
Aleppo pepper or other red pepper flakes


About an hour before you want to bake the flatbread, remove the dough from the refrigerator to proof and come to room temperature (it will bake more evenly and be much, much easier to work with).

Preheat your oven to 425˚F. Line a baking sheet with parchment paper.

Place a heavy-bottomed skillet over medium low heat, and add a generous swig of olive oil (enough to coat the bottom of the pan). Add the onions to the oil and sauté, stirring frequently, until they soften and begin to become translucent. Add the white wine and a pinch of kosher salt to the pan and cook for another 2-5 minutes, until the wine has evaporated and the onions are quite limp, but not falling apart. (Note: you do not need to caramelize them to a darker color unless that is what you want; I happen to like some of the brighter purple on the flatbread, and they'll get a little charred anyway during baking.) Remove the onions to a small bowl and set aside.

Place the pan back over the heat and add the bacon lardons. Cook, watching closely (and occasionally stirring), until the lardons are just barely cooked and beginning to get crispy edges. Remove the lardons to a paper towel-lined plate and drain.

Remove the pizza dough from its container and stretch with your hands, pizza parlor style. Don't worry about it being perfect or crazy-thin! Rustic looks best here, so just stretch it as much as you can without tearing the dough.

Place the dough on the parchment-lined baking sheet, and drizzle the dough with a little olive oil. Spread the onions over the dough, and scatter with the bacon and olives. Crumble the feta cheese over the bacon and olives. Gently press the toppings into the dough, just enough to help them stick to the surface while baking (not so much that the dough envelops them and they cannot be seen).

Bake at 425˚F until the dough is fully cooked and the onions at the edge of the dough are crisp and a little charred, about 20-25 minutes (check after 20 minutes). Remove from the oven and let cool for 5-10 minutes, then top with a couple of handfuls of arugula, and some generous pinches of flaky salt and Aleppo pepper flakes.