FIELD & FOREST

dinner

sausage "bolognese" with tagliatele and pecorino-romano

dinner, autumn, main dishes, winterRachel SandersComment

Okay, I'm going to toot my own horn for a little bit, but you're going to get a kick-ass pasta sauce recipe at the end, so I promise it will all be worth it.

I'm going to start by saying that I've been delaying giving you this recipe, because it is one of the best things I know how to make, and what exactly is my claim to fame going to be when all of you know how to make it, too? That I can salsa dance at a relatively-okay level? That I know all of the words to "Rollercoaster of Love" and can also make my voice sound like a kazoo? That one of our chickens likes to ride around on my shoulder while I'm in the garden and I will sometimes pretend that I'm a landlocked pirate?

You guys are nice and great and I'm happy you're here and everything, but really. You're not leaving me with much to work with.

Here's the story behind this pasta sauce, along with my reasons for sharing it with you:

I first made this pasta for Richard in our junior year of college, and I am immensely proud of my college self for coming up with something so rad. That being said, I screwed up just after I made this for the first time, and I LOST the little scrap of paper on which I had scribbled ingredients and proportions on the off-chance that the sauce turned out well (which it did) and I wanted to make it again (which I most definitely did). I found the paper scrap in my senior year of college, and then wrote the recipe down in a notebook of Richard's. Which we then lost AGAIN when Richard moved to his first post-college apartment, and then FOUND when we moved Richard out of his place and into our first shared apartment. And then LOST again when we moved to Utah.

This post is a gigantic spoiler alert that the notebook has since been found, but in short, we have a terrible track record of hanging on to this recipe. And thus, I no longer have the right to keep this recipe to myself, because I'll just lose it again at some point in the future. Your track record, however, is perfect, and you will never lose this because now it will be on the internet, where everything exists forever.

I also hereby give you leave to make this recipe your own. Vary the ratios of spicy to mild sausage, or use all one or all the other. Add freshly chopped herbs, such as oregano or basil, at the end for more color. And don't feel obligated to call it bolognese, but that is how Richard refers to this sauce, and it truly does have all of the great qualities of a classic, slow-cooked Italian meat sauce. And when someone you love asks you to make "your bolognese sauce," that is when you forget semantics and appreciate what a wonderful request that is.

I hope you love it.


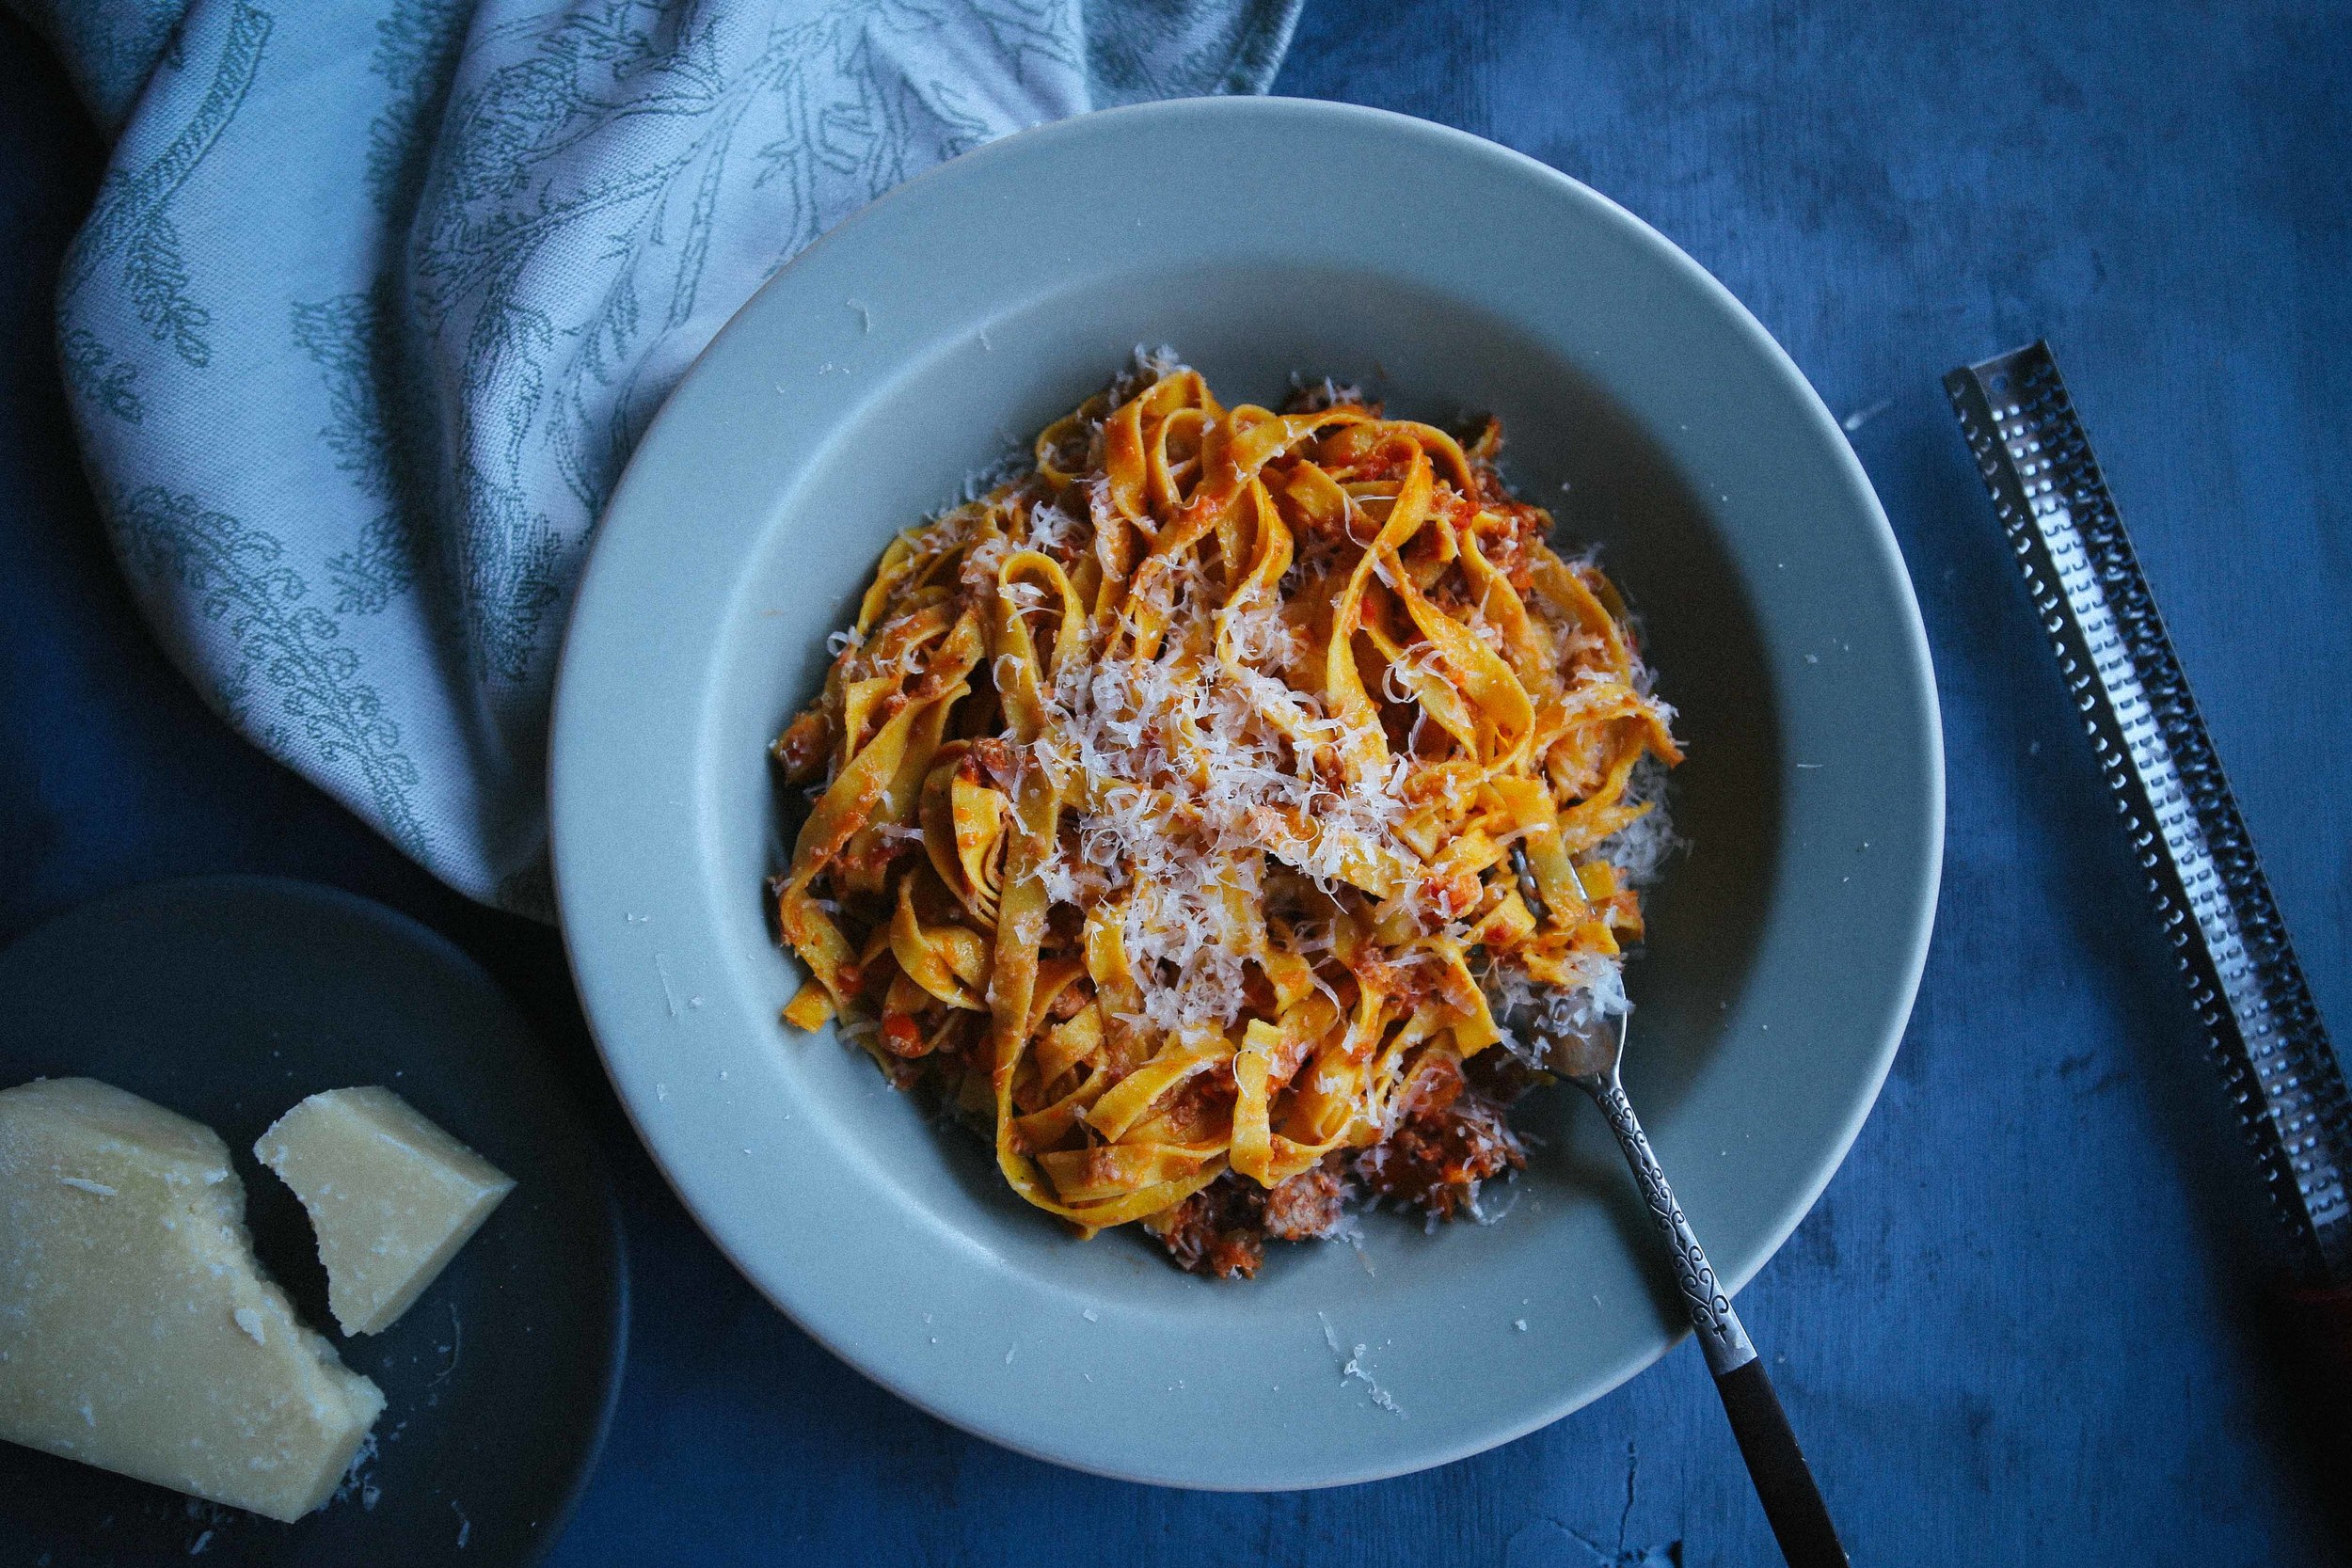
SAUSAGE "BOLOGNESE" WITH TAGLIATELE AND PECORINO-ROMANO
makes sauce for 1.5-2 pounds of pasta - serves 4-8

I will make this sauce a day or two ahead of when I plan to serve it, if I'm thinking ahead. Just like most braised and stewed dishes, it seems to taste better when the flavors have time to hang out together. And even better, dinner comes together in the amount of time it takes to cook pasta, which is not very long at all!

2 tsp + 2 Tbs olive oil, divided
1 pound bulk Italian sausage (mild, spicy, or 1/2 pound of each, depending on preference)
1 onion, diced
2 carrots, finely chopped
2 celery branches, chopped
3-5 cloves garlic, minced
1-2 chiles de arbol, finely crushed with your fingers
1 tablespoon tomato paste
2 sprigs fresh oregano
2 sprigs fresh basil
1 bay leaf
1/2 cup dry red wine
1 28-oz can diced tomatoes (I used San Marzano)
black pepper
salt
2-4 tablespoons heavy cream
fresh lemon juice, to taste (optional)

1.5-2 pounds Tagliatele, or other pasta
Pecorino-romano


Heat the olive oil in a heavy-bottomed pot over a medium flame. Add the sausage and let it brown a little, using a spatula to break it up into smaller pieces as it cooks. Once nearly all of the sausage is no longer pink, remove it from the pot and set aside (don't worry about any remaining pinkness; the sausage will go back in the pot later to cook again for an extended time).

Add 1 tablespoon of olive oil to the pan, along with the onion, carrots, and celery, and cook, stirring occasionally, until the vegetables soften and begin to brown. Make a well in the center of the vegetables, add the remaining tablespoon olive oil to the well, and add the garlic and chiles to the oil. Cook, stirring in the well constantly, for 15 seconds, before mixing the garlic and chiles into the rest of the vegetables.

Mix in the tomato paste, oregano, basil, and bay leaf. Add the red wine, and let reduce for a minute. Add the tomatoes, along with a pinch of kosher salt and a grind of black pepper, and then add the sausage back to the pot. Wait until the sauce reaches a simmer, then reduce the heat to low and cover with the lid slightly ajar. Cook for 45 minutes, stirring occasionally, and adding a little water if the sauce seems to be reducing too quickly.

Once the tomatoes are fully cooked and the sausage has softened, remove the pot from the heat. Remove the oregano, basil, and bay leaf from the sauce and discard. Using an immersion blender, blend the sauce as much or as little as you'd like. (I like mine to be blended to the point that there aren't large chunks of sausage, but I can still see pieces of carrot and tomato... I guess you would call that chunky? I don't know.) Stir in the cream, and taste. Season with additional salt, pepper, and/or lemon juice, to taste.

Notes on making the pasta and finishing the dish - when I'm ready to cook my pasta, I put my sauce back on the stove and heat it just to a simmer (turning the heat to low once it reaches a simmer).

I cook my pasta until it is almost, but not quite done (still has more of a bite than I'd like), and then I transfer it with tongs or a slotted spoon directly to the (hot) sauce to finish cooking. This helps your pasta and sauce become a more cohesive dish, and also adds more flavor to the pasta as it finishes cooking in the sauce.

Once the pasta is completely coated in the sauce, I remove the pot from the heat and serve it straightaway with a plenty of Pecorino-romano on the side.

tomato and avocado salad with sweet corn and herb vinaigrette

dinner, lunch, salads, summer, vegetarianRachel Sanders2 Comments

I would wager a guess that 95% of you are really excited about this tomato and avocado salad, while 5% of you were immediately distracted by the denim tuxedo lurking behind that bowl of tomatoes. Lest ye judge me too harshly, note that it was laundry day. However, after wearing this outfit for a full afternoon, I can confidently say that this is a pretty rad shirt-pants combo. It is comfy, weather-appropriate for fall, and denim hides dirt well enough that you can't even tell that I was jumped by a chicken shortly before I took these photos.

But is this a fashion blog? Clearly not! Back to salad.

Richard and I went to the farmers' market this past weekend for the first time in two months, which is quite infrequent and very unlike us in general, but very like us when we are in camping mode. And the most gorgeous tomatoes are in season right now, all shapes, sizes, hues, varieties. Just color coming out of your ying yang. And we haven't been buying any for WEEKS, so we seriously need to make up for lost time.

This is a nifty little salad to keep in your back pocket for summer. You chop up some stuff, pile it on a plate, and drizzle a bit of vinaigrette over the whole thing. The point, I think, is to highlight all of those beautiful summer veggies when they are at their very best and most flavorful, so there's no drowning of anything in dressing. You could add other things if you like... grilled summer squash, lentils, fresh cheese, you name it. As is, this salad can double as a great topping (or relish, if chopped more finely) for grilled meat, or a nice brunch side for polenta or potatoes and eggs.

Ooo, just thinking about that is making me excited to go to bed already so I can wake up and make breakfast. BYE.

tomato and avocado salad with sweet corn and herb vinaigrette
serves 2 as a light main, or up to 4 as a side salad

1 small fresh shallot
1 tablespoon white balsamic vinegar, white wine vinegar, or lemon juice
kosher salt
black pepper
2 pounds assorted heirloom and cherry tomatoes
1 ear sweet corn
1 just-ripe (not mushy) avocado
1 teaspoon dijon or whole grain mustard (optional - omit if using cilantro (see next ingredient))
1 tablespoon mixed chopped herbs, such as parsley, basil, cilantro, or chives
1-2 tablespoons olive oil
flaky salt, such as Maldon, to finish (optional, but delicious)

Thinly slice the shallot and place it in a small bowl with the white balsamic vinegar, a pinch of kosher salt, and a grind or two of black pepper. Set aside.

Slice the heirloom tomatoes into thick slices or wedges. Slice the cherry tomatoes in half. Cut the avocado in half, remove the pit, quarter each half, and cut each quarter into 4 wedges or slices (wedges are easiest to cut if you remove the avocado skin first). Husk the sweet corn and slice the kernels away from the cob.

Alternate piling tomatoes and avocado slices on a serving plate, and scatter with the sweet corn. Pick the shallot slices out of the vinegar (reserving the vinegar), and scatter the shallot over the tomatoes, avocado, and corn.

Add the mustard (if using) and finely chopped herbs to the vinegar mixture and whisk to combine. Whisk in the olive oil until the vinaigrette emulsifies and thickens slightly. Taste the vinaigrette, adjust seasoning if needed, and spoon about half of it over the salad. Finish with a light sprinkle of flaky salt, and serve with the remaining vinaigrette and more flaky salt on the side.

yellow tomato and beet gazpacho

dinner, lunch, soups, summer, vegan, vegetarianFieldandForestComment
4j5a78951.jpg

I still remember my first gazpacho, the way a person remembers her first crush or her first pair of really good jeans. I ate my inaugural bowl during the summer after my 15th birthday, during a brief foray into Ashland, Oregon, while en route to Canada. That was a trip of firsts. It was my first time reading a book written outside of the country in the exact edition in which it had been published (so that I learned about things like "ice lollies" and "servos" and "kelpies"), which I read while listening to the first cool CD I had ever purchased for myself, while eating what would be my first of many bowls of fresh blueberries with softly whipped cream (I don't believe I had ever before eaten a blueberry outside of a pancake). We were at a café in Ashland having an early dinner after a many-hour drive from California, when I ordered gazpacho. I don't know why I ordered it - maybe I was trying to seem worldly and fancy while serving my role as the token teenager on a family vacation - but I did. It came in a large, glass bowl set on a plate, with a sprig of parsley in the center, looking very much like tomato-based vegetable soup. I took a bite, and was shocked to find that it was COLD.

Cold soup held the same mystifying power over my 15 year-old self that molecular gastronomy holds over the modern day foodie, where you pay an exorbitant amount of money to eat something that might look like a gumdrop, but tastes like a cheeseburger. The visual didn't match the experience. It was weird and borderline uncomfortable. I somewhat suspected that I had ordered soup and had instead been brought a large bowl of salsa, minus the chips. But the strange cold soup was somehow also incredibly flavorful and delicious and refreshing, and the combination of my waning discontent and reluctant, but growing delight made it nearly impossible to stop eating. No bowl of soup had ever been so INTERESTING.

Please now understand that I have been trying desperately to create a gazpacho without ascribing all of the buildup and feelings that first bowl impressed in my brain. And suffice it to say that many recipes simply haven't cut it. But I have been thinking about a yellow gazpacho for weeks this summer, one different enough from my first that there couldn't be a direct comparison, and this recipe was the end result. It is fantastic, and stands up to the pressures of my first bowl quite gracefully, while earning itself its own new, fond memories. I think that it owes much of its greatness to the quality of the ingredients and its simplicity. Each ingredient sings, and each is heard.

Is it the kind of fantastic that one accredits to a crush or great pair of jeans?

I'll leave that decision up to you, but for me? I think it might be exactly that.

Yellow Tomato and Beet Gazpacho
Yield: approximately 7-8 cups, serves 4-6

Part of the goal here is to preserve the brilliantly yellow color of the beets and the tomatoes. Using aji amarillo (yellow pepper) paste or a yellow chile will add heat without compromising color. The white balsamic, too, will preserve the color while still adding the acidity necessary in making a good gazpacho. While changing these ingredients for a green chile or darker vinegar will slightly desaturate the yellow soup, the flavor will nonetheless remain extraordinarily bright and complex.

2 pounds yellow beets, roasted until quite tender, cooled, and peeled (I roast the beets wrapped in foil at 425˚F for 30-60 mins)
2 pounds yellow tomatoes
1 medium-large cucumber, peeled, seeded, and chopped (about 1 pound)
2 cloves garlic
1-2 tablespoons aji amarillo paste, OR 1 medium-hot yellow chile, OR 1 jalapeño pepper
salt, to taste
white balsamic vinegar, to taste
2-3 cups water, divided

To garnish (optional): Cherry tomatoes, olive oil, Piment d'Espelette, microgreens

Equipment: A stand-up blender A sieve or fine-mesh strainer set over a bowl

Cut the beets into 1-inch chunks, and place in the carafe of a stand-up blender. Cut the tomatoes in half, and squeeze out the seeds and liquid ("tomato water") into the sieve or strainer over the bowl. Add the tomato halves to the blender with the beets. Sharply rap the edge of the sieve to help any remaining liquid from the tomato seeds drain into the bowl, then add the liquid in the bowl to the blender. Discard the tomato seeds (or give them to someone you know with chickens!).

Add the cucumber to the blender, along with the garlic, aji amarillo purée, and a large pinch of salt. Add a splash (about 2 teaspoons) of white balsamic vinegar. Pour in 1 cup of water, and blend on low speed until roughly puréed (add 1/2 cup additional water if needed to help the mixture blend). Increase the speed to high, and blend for about 5 minutes to further purée the soup (if you have a Vitamix, blend at between 6-8 on variable speed, keeping a close eye on the soup to make sure it doesn't begin to heat up and cook itself). How much your soup is puréed is up to you; as you can see, mine still has a little bit of texture, which I like, but feel free to blitz the hell out of your soup if that's your preference.

Once the mixture is puréed, add additional water if necessary until your desired soup consistency is reached (I like my soup not too thick and not too thin - if I brush the surface of the soup with a spoon, I can barely see the path the spoon made, and the path fades after a few seconds). Chill the soup for at least two hours, and up to overnight.

Before serving the soup, taste and add additional salt and white balsamic vinegar if necessary. Serve garnished with cherry tomatoes, olive oil, piment d'espelette, and microgreens.

Other ideas for garnishes: chopped, roasted yellow or chiogga beets; diced avocado; finely chopped herbs such as parsley and basil.

mujaddara, summer edition (with roasted tomatoes, goat cheese, basil, and lemon)

breakfast, dinner, lunch, main dishes, salads, summer, vegetarianFieldandForest1 Comment

What can I say about mujaddara...

If Mujaddara were a person, and I took him as my +1 to a party, he would not necessarily be the most attractive person there, or the tallest, or the most athletic, but he would be the snappiest dresser and get along with everyone and he would be an amazing dancer and he would tell the funniest jokes and everyone would be like, "oh, Mujaddara, you're so funny," and Mujaddara would be all "I know, right?" but not in a narcissistic way, because that's just not the kind of person Mujaddara is.

And, if this was your party, Mujaddara would also stay late to help you wash the dishes, and maybe drive the random dude that passed out on your carpet back to wherever he came from (which is likely across town because it is a law of the universe that a random dude will always pass out an inconveniently far distance from his house) and give him a box of saltines and a ginger ale from the stash that Mujaddara keeps in his car for just such occasions, because Mujaddara doesn't care who you are, he just wants you to feel great.

Mujaddara is pretty much the perfect addition to any party, and you would be happy to have met him. He would have helped you to have a great time, and you would invite him back in the future. And I would probably be in your good graces for bringing Mujaddara along in the first place.

Mujaddara
Serves 4-6 as a vegetarian main course, or 8-12 as a side dish

I like bringing things like Mujaddara to potlucks and collaborative dinner parties, because you just never know what's going to be at a potluck. I have been to a dinner potluck where every person (including me!) brought cheese and crackers. Let's not do that again! This dish will quickly serve as either a hearty side or vegetarian main dish, seamlessly filling any gap in your dinner party. Not to mention that it tastes fantastic at room temperature, making it the perfect dish for picnics or events where the official meal time is unclear. It's just the best!

Cooking notes: you can make this with any kind of rice or leftover rice, but jasmine has a really nice flavor for this dish. Cooking the jasmine rice with a glug of olive oil will help the grains remain separate, which means they can be more easily mixed with the lentils and onions.

2 cups cooked beluga lentils (about 1 cup uncooked)
2 cups cooked jasmine rice (about 1 cup uncooked)
2 medium yellow onions, caramelized (instructions below)
1 cup cooked greens (I sautéed some finely sliced kale leaves in olive oil and garlic), optional
salt, to taste
Lemon juice, to taste
1 pint mixed cherry, grape, and/or pear tomatoes, roasted (instructions below), and divided
1/3 cup chopped pistachios, divided
2 ounces soft goat cheese (I used chevre)
1/4 cup loosely packed basil leaves
Piment d'espelette or hot paprika, to taste (optional)

In a large bowl, combine the lentils, rice, caramelized onions, and greens. Add salt and lemon juice to taste, and mix gently using your hands (so you don't break the rice grains). This lentil/rice/onion combo is what is known as Mujaddara.

Add half of the roasted cherry tomatoes and half of the pistachios to the bowl, again mixing gently with your hands to combine. Transfer to a serving dish. At this point, you can cover and refrigerate the dish for up to 3 days. (The pistachios will soften a bit during this time, but the dish will still be very tasty.)

Just before serving, scatter the remaining roasted tomatoes and pistachios over the Mujaddara, then crumble the goat cheese over the tomatoes and pistachios. Finely chiffonade the basil leaves, and scatter them over the Mujaddara. Finish with a sprinkle of piment d'espelette or hot paprika for color and heat.

For basic caramelized onions: peel and halve the onions, and thinly slice from top to tail. Heat 1 tablespoon butter and 2 tablespoons olive oil in a cast iron or heavy-bottomed skillet over medium low heat, and add the onions, tossing to evenly coat them in the fat. Cook over medium low heat until their texture is meltingly soft, about 15-20 minutes. Once soft, sprinkle with a good pinch of kosher salt and crank up the heat to medium-high. Keep an eye on the onions and stir frequently, allowing them to brown and color. Once the onions are a deep amber in color, deglaze the pan with a little water (or white wine) to scrape up any tasty caramelized bits on the bottom of the pan. Let the water cook most of the way off (the onions may still look slightly wet), and transfer to a bowl to cool. The onions may be made up to a day in advance of making the Mujaddara.

For the roasted tomatoes: preheat the oven to 400˚F. Halve the tomatoes, and place in a single layer on a silpat or parchment paper lined baking sheet. Drizzle with a tablespoon of olive oil and gently toss with your hands to evenly coat. Roast for 15-20 minutes, or until the tomatoes are slightly wrinkled and reduced in size. Remove from the oven, and set aside to cool. The tomatoes are best roasted on the day that you plan to make the Mujaddara.

Other serving ideas: - top with chicken or steak kabobs for a heartier dinner - top with a fried egg, avocado, and hot sauce for breakfast or brunch (I do this with Mujaddara leftovers) - add roasted or grilled squash or replace the cooked greens with arugula (added just before serving).

(On an unrelated note, can we all agree that my friend Vanessa has the most amazing wine stopper you have ever seen?)

chiogga beet tart with ricotta, walnuts, and lemon thyme

autumn, breakfast, dinner, lunch, main dishes, spring, summer, vegetarianFieldandForest1 Comment
4j5a7882.jpg

I've rewritten this post a number of times. Each time has been a bit too verbose, a bit too flowery in waxing about the farmers' market, a bit too enthusiastic without really giving you the meat of the recipe. I mean, really. This is a tart. It's nothing we haven't seen before.

That said, this particular tart is a combination of one of Richard's favorite things, which is pie, and one of my favorite things, which is salad. I'm thinking "salad pie" sounds quite oxymoronic, not to mention sort of gross, so we'll keep calling this a vegetable tart. But really, the only reason why this tart is cooked at all once it is assembled is so that you can eat it hot. By all means, if your ingredients are still warm from cooking (or if you've cooked everything far in advance and are cool with eating your tart cold, salad style), you can feel free to fill up the tart shell with all of your goodies and immediately go to town.

Voila, veggie tart!

Chiogga Beet Tart with Ricotta, Walnuts, Caramelized Onions, and Lemon Thyme Makes 1 9-inch tart - Serves 6

Notes: A minimum 1-inch tall tart, quiche, or springform cake pan is recommended for this recipe to make sure your tart shell can hold all of the ingredients. Blind baking the shell is necessary as the ricotta is rather wet and the shell will not properly crisp in the oven if filled while unbaked. Be sure to read the instructions in full, as I gave them to you all mashed up together in the order in which I cook the various elements for the tart (I've emboldened the points at which various things are cooked, Joy of Cooking style, to try and clarify my process)! You can also always roast your beets, sauté your greens, and caramelize your onions ahead of time and then blind-bake your tart shell on the day you plan to bake your fully assembled tart.

3 pounds baby chiogga or yellow baby beets, with greens attached
olive oil
1 package all-butter puff pastry, such as Dufour, defrosted according to the package instructions (I'll often leave mine in the fridge overnight)
2 medium yellow onions, thinly sliced from top to tail
2 tablespoons butter
2 cloves garlic, minced
1/2 pound whole-milk ricotta cheese (basket ricotta is a good option, as it will be partially drained and less wet than normal ricotta)
1/2 cup coarsely chopped walnuts
2 sprigs lemon thyme or regular thyme, leaves removed from stems
kosher salt, to taste
flaky sea salt, such as Maldon, to taste

Preheat your oven to 400˚F.

Cut the greens away from the beets. Thoroughly wash both the beets and the beet greens, and set the greens aside. To roast the beets, place the beets on a large square of aluminum foil and drizzle with olive oil and sprinkle with a large pinch of kosher salt. Tightly wrap the foil around the beets, and place on a baking sheet to catch any juices that may leak. Roast in the oven for 30-40 minutes, until tender (I test this by piercing a beet with a paring knife).

While the beets are roasting, roughly chop the beet greens, and sauté them in a drizzle of olive oil in a heavy-bottomed pan or skillet over medium heat until they are wilted, but still quite bright green. Season with a pinch of salt, and remove from the heat, and set aside.

Wipe out the beet green pan, and place over medium-low heat to caramelize your onions. Melt the butter in the pan, and add the onions, stirring to coat them all in the fat. Cook, stirring occasionally, until the onions have softened and are translucent, about 15 minutes. Make a well in the center of your onions, add a drizzle of olive oil if the pan is dry, and add your minced garlic to the well. Let the garlic cook for 20-30 seconds, before mixing it into the onions. Add a large pinch of salt to the pan, increase the heat to medium-high, and cook, stirring occasionally, until the onions' color has reached a deep amber. Deglaze the pan with a little water to stir up any lovely caramelized bits on the bottom of your pan, cook for another 30 seconds or so, and remove the onions from the heat.

While the onions are cooking, check your beets. Once they are tender, remove the whole packet from the oven, and let them cool while still wrapped in the foil. Decrease the oven temperature to 375˚F for blind-baking your tart shell.

Flour a baking surface and roll out the puff pastry so that it can easily line a 9-inch x 1-inch tart or quiche pan. Drape the pastry over the pan, and press it into the bottom and sides of the pan. Use scissors or a bench scraper to cut the puff pastry just above the edge of the pan, so the pastry is slightly taller than the pan (it will shrink a little during blind baking, and this will help ensure that it doesn't end up too low in the pan). Place the lined pan on top of a baking sheet for easy maneuvering in and out of the oven.

Prick the bottom of the pastry all over with the tines of a fork. Line the inside of the pastry shell with a piece of parchment paper, and fill with pie weights or dried beans (this, plus the pricking, helps keep the puff pastry from puffing up during blind baking). Bake in your preheated oven for 25-30 minutes, or until the pastry is golden and crisp (start checking it at 20 minutes). Set aside.

Peel your cooked beets, and cut them into wedges. Lightly toss them in a little (1-2 teaspoons) of olive oil along with the lemon thyme.

To assemble your tart, spread the caramelized onions evenly over the bottom of the pastry shell. Spread the ricotta evenly over the onions, and top with the beet greens. Place the beets on top of the greens. Bake at 375˚F for 15-20 minutes, until the tart is hot. Remove from the oven and drizzle with a little more olive oil before sprinkling with a few good pinches of flaky salt. Let the tart sit for a couple of minutes before removing it from the pan and cutting into wedges. Serve hot, warm, or at room temperature.