Zomg. You guys. YOU GUYS. Mrrgkjslkjglskfs.
I can't even write real words right now, I am so excited.
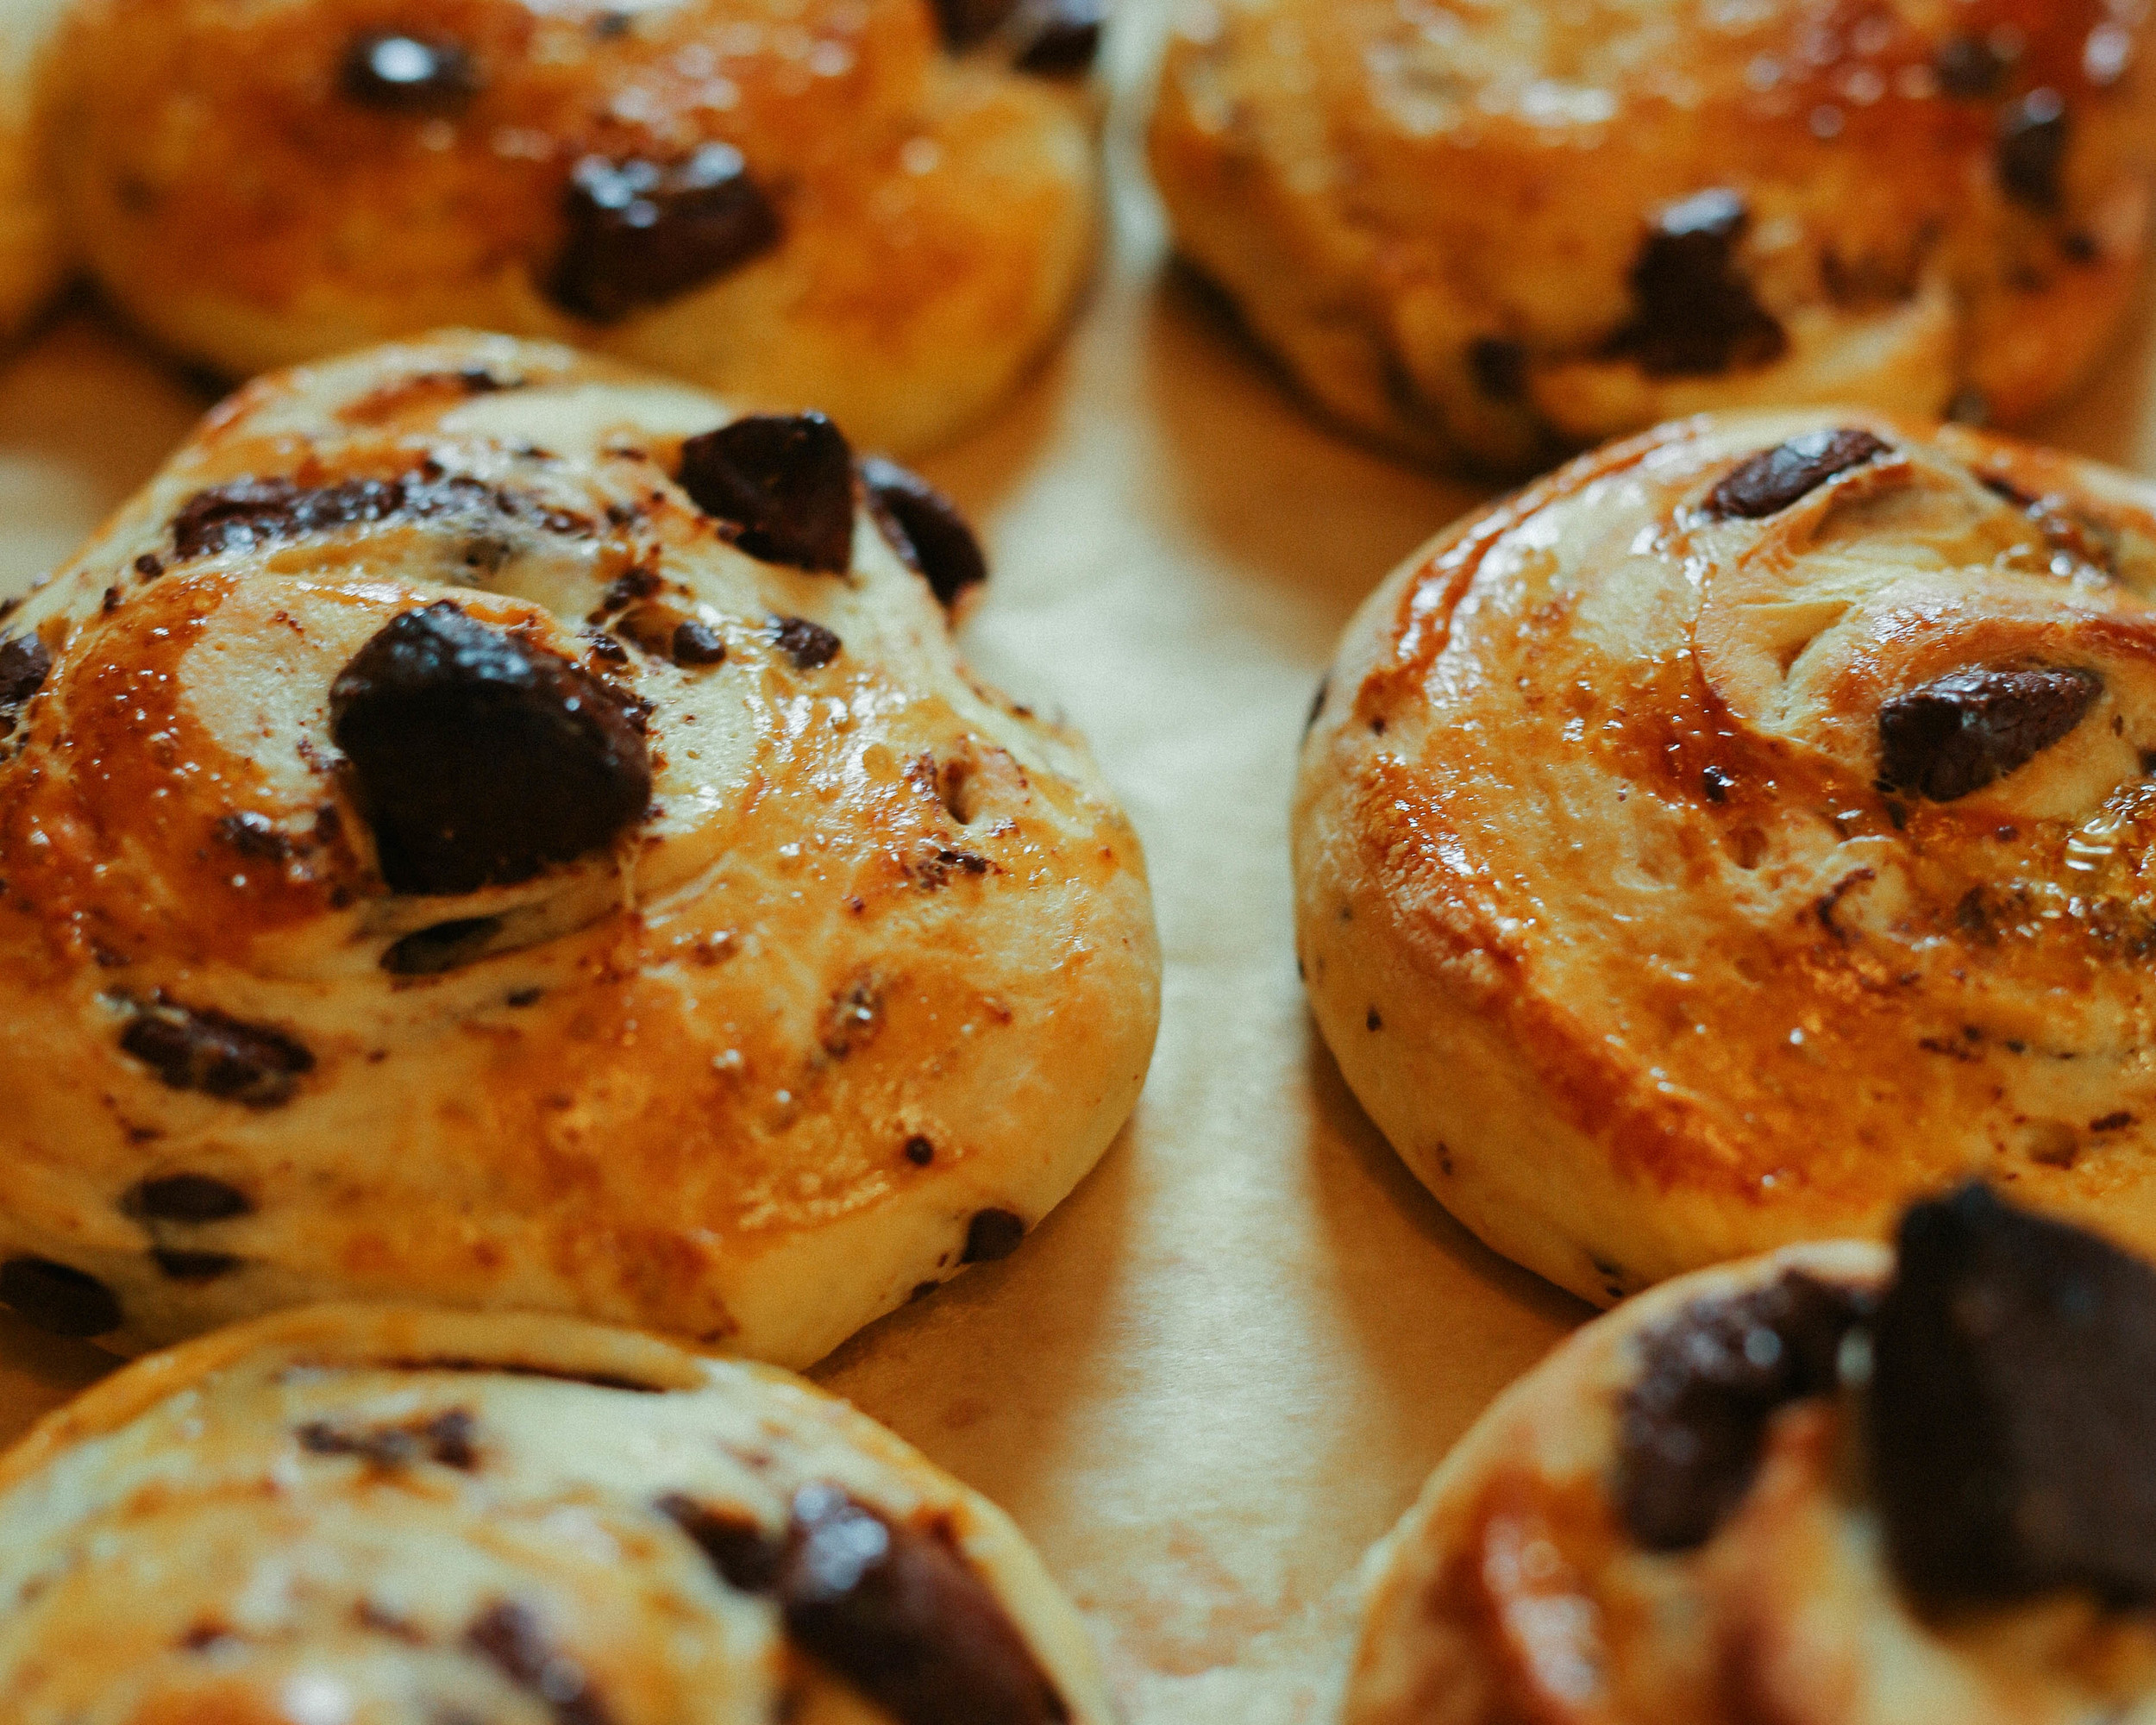
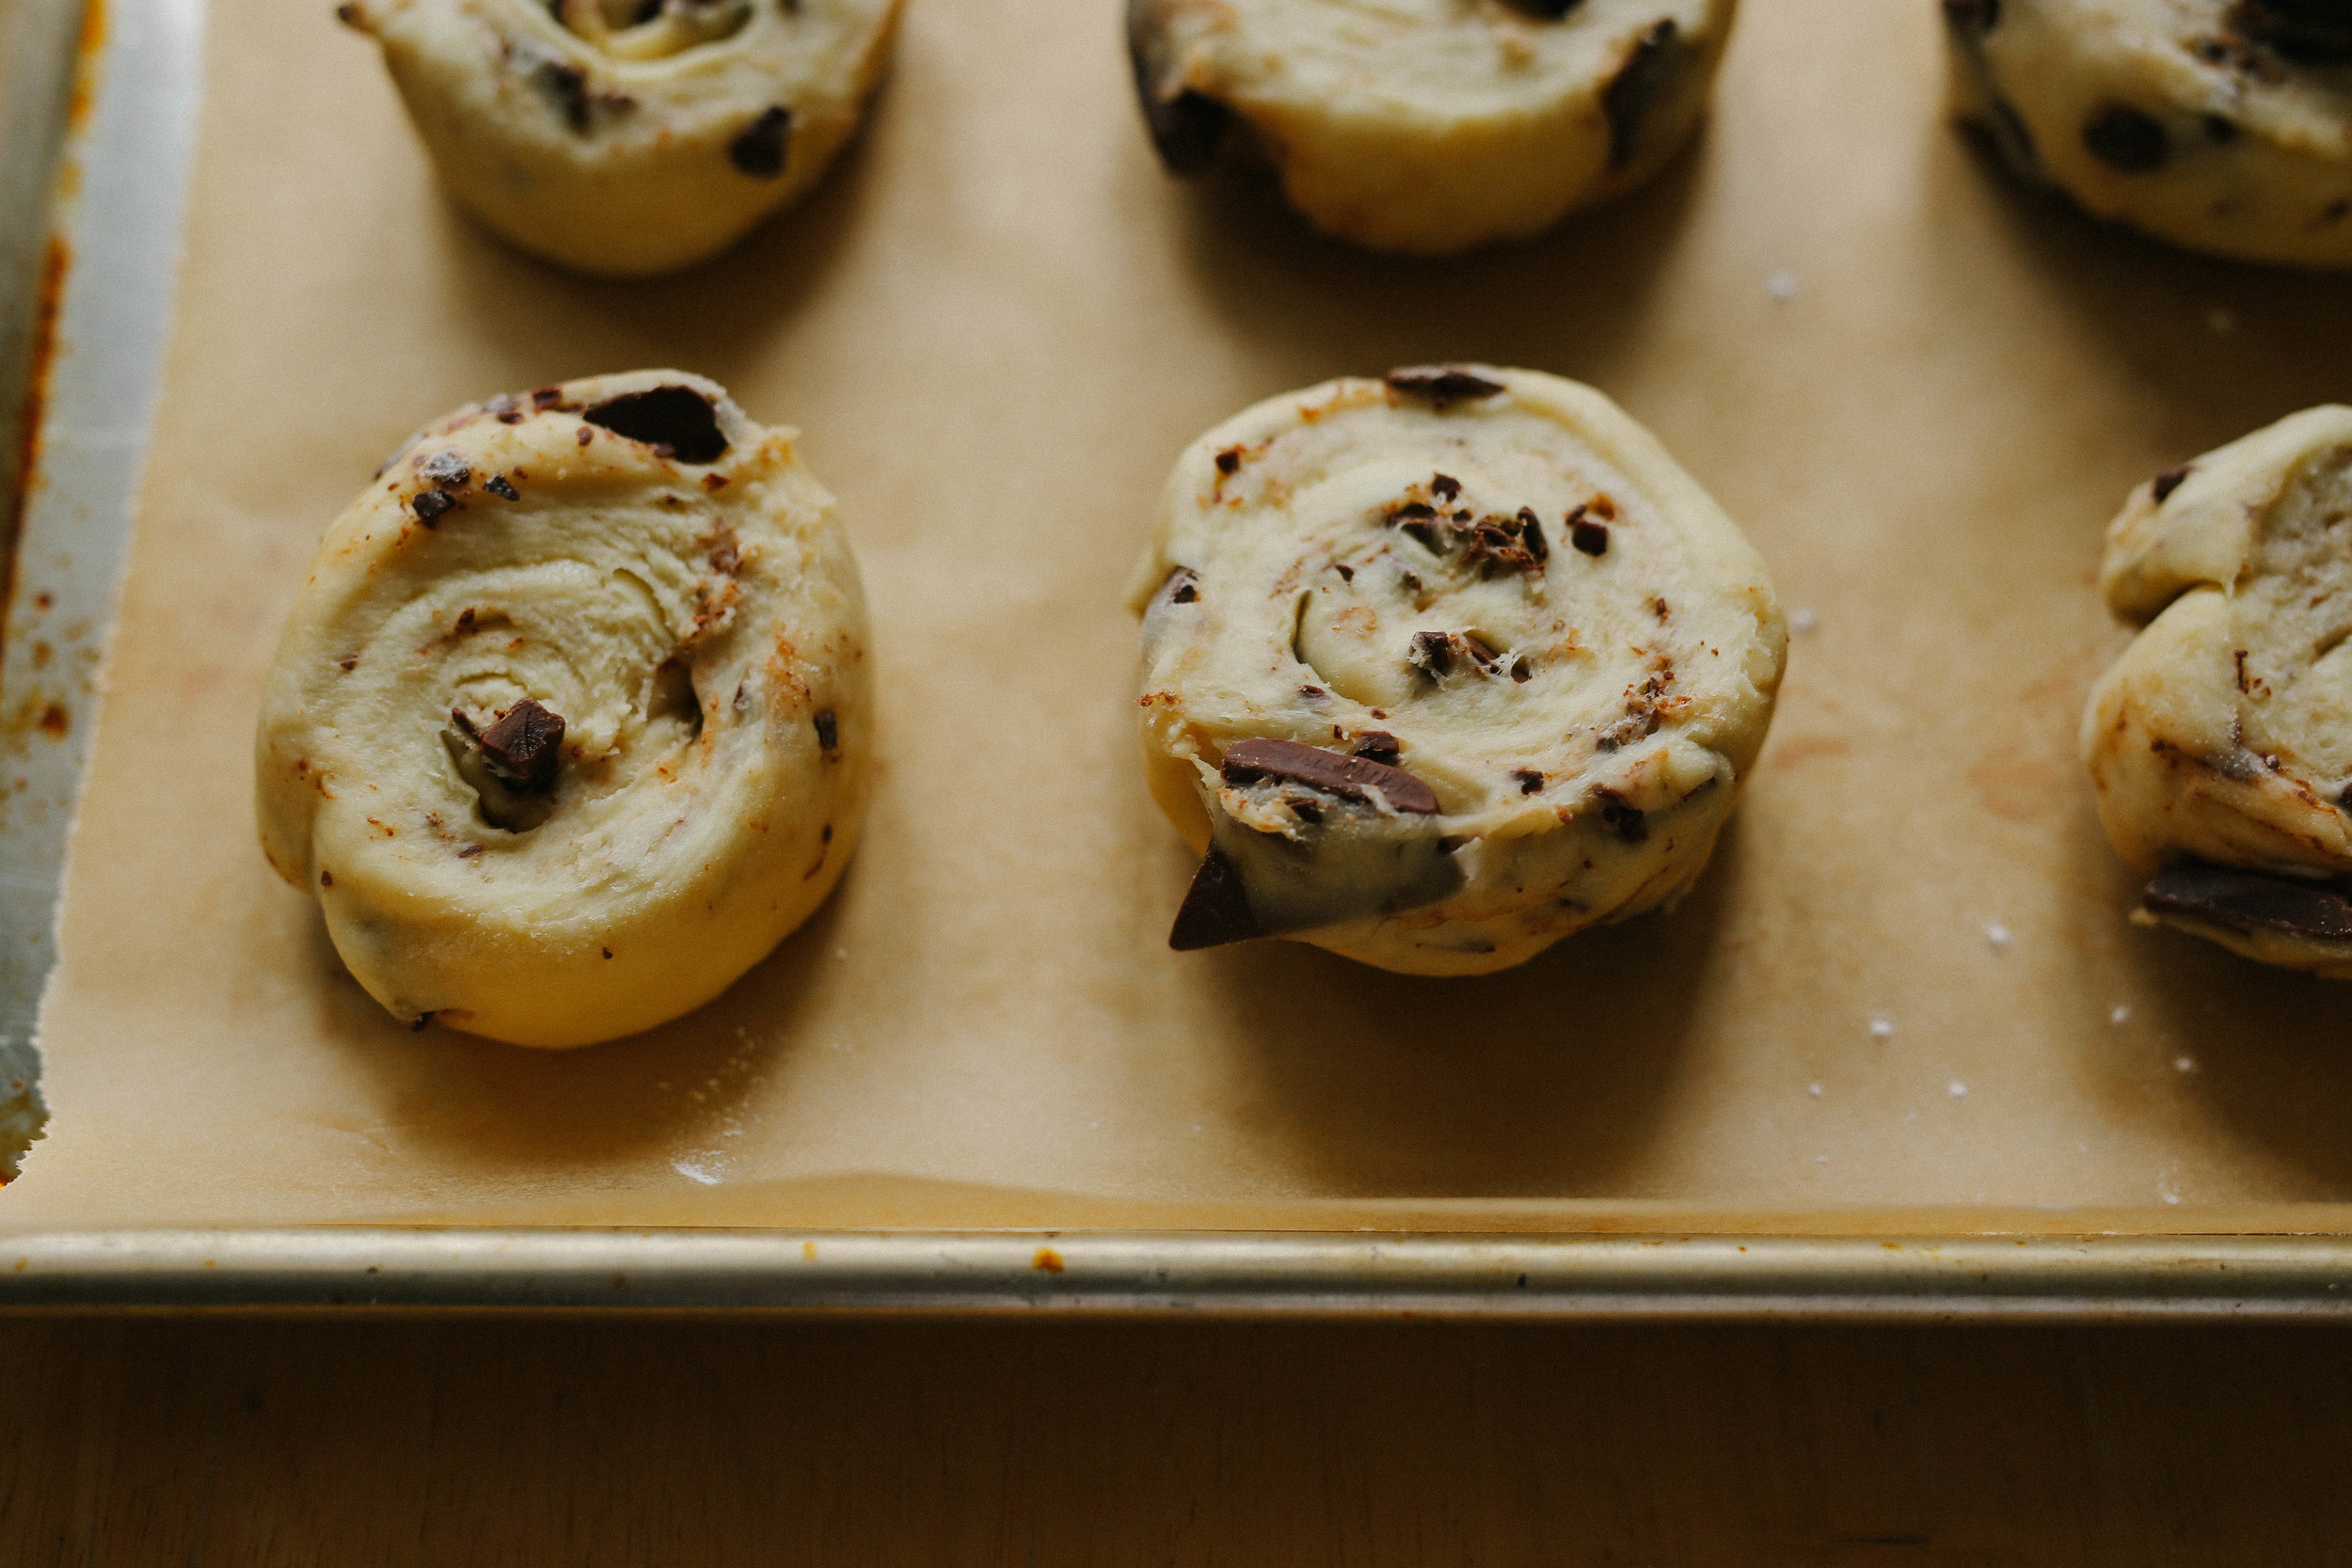
Because Cheese Board Chocolate Things. In Salt Lake City. In our kitchen. That came out of our oven. If you know what the Cheese Board is, then I know you're excited, too. If you don't know what the Cheese Board is, I hope you are at least intrigued by the sheer volume of chocolate folded into this ball of dough. If you know what the Cheese Board is, but you currently live in Berkeley and are thinking "Whatevs, I can get Chocolate Things whenever I want," then shut it. We don't want to hear about it.
(That's a lie, please tell us everything, because goodness knows we're dying over here without our zucchini-corn pizza and oatmeal scones.)

So anyway. What is this Cheese Board thing. Well, it is one of the many magical places in that mystical land known as the Gourmet Ghetto, and it makes amazing breads (and its next-door sister restaurant, Cheese Board Pizza, makes some of the best pizzas in town) and has a crazy cheese selection sourced from all over the planet, and it is one of THE foodie destinations of Berkeley (and it is across the street from Chez Panisse, so you can ogle another institution while you eat your pizza!). Both the pizzeria and the bakery are part of the same collectively owned business (together they are known as the Cheese Board Collective) and they have a pretty unique story of how they've worked to support other collectives/co-ops, and a number of years ago they did everyone a solid and made a cookbook.
And it is glorious.
Everything I've made out of that book is pure gold and tastes almost exactly how I remember Cheese Board pastries and pizza. Sure, I don't have a deck oven or a proofing cabinet, but the essence of every baked good is there. Ownership of this book (and therefore access to all of its secrets) is enough to make a Bay Area expat plant roots in a red state and say "We're good here."
At least for the time being.


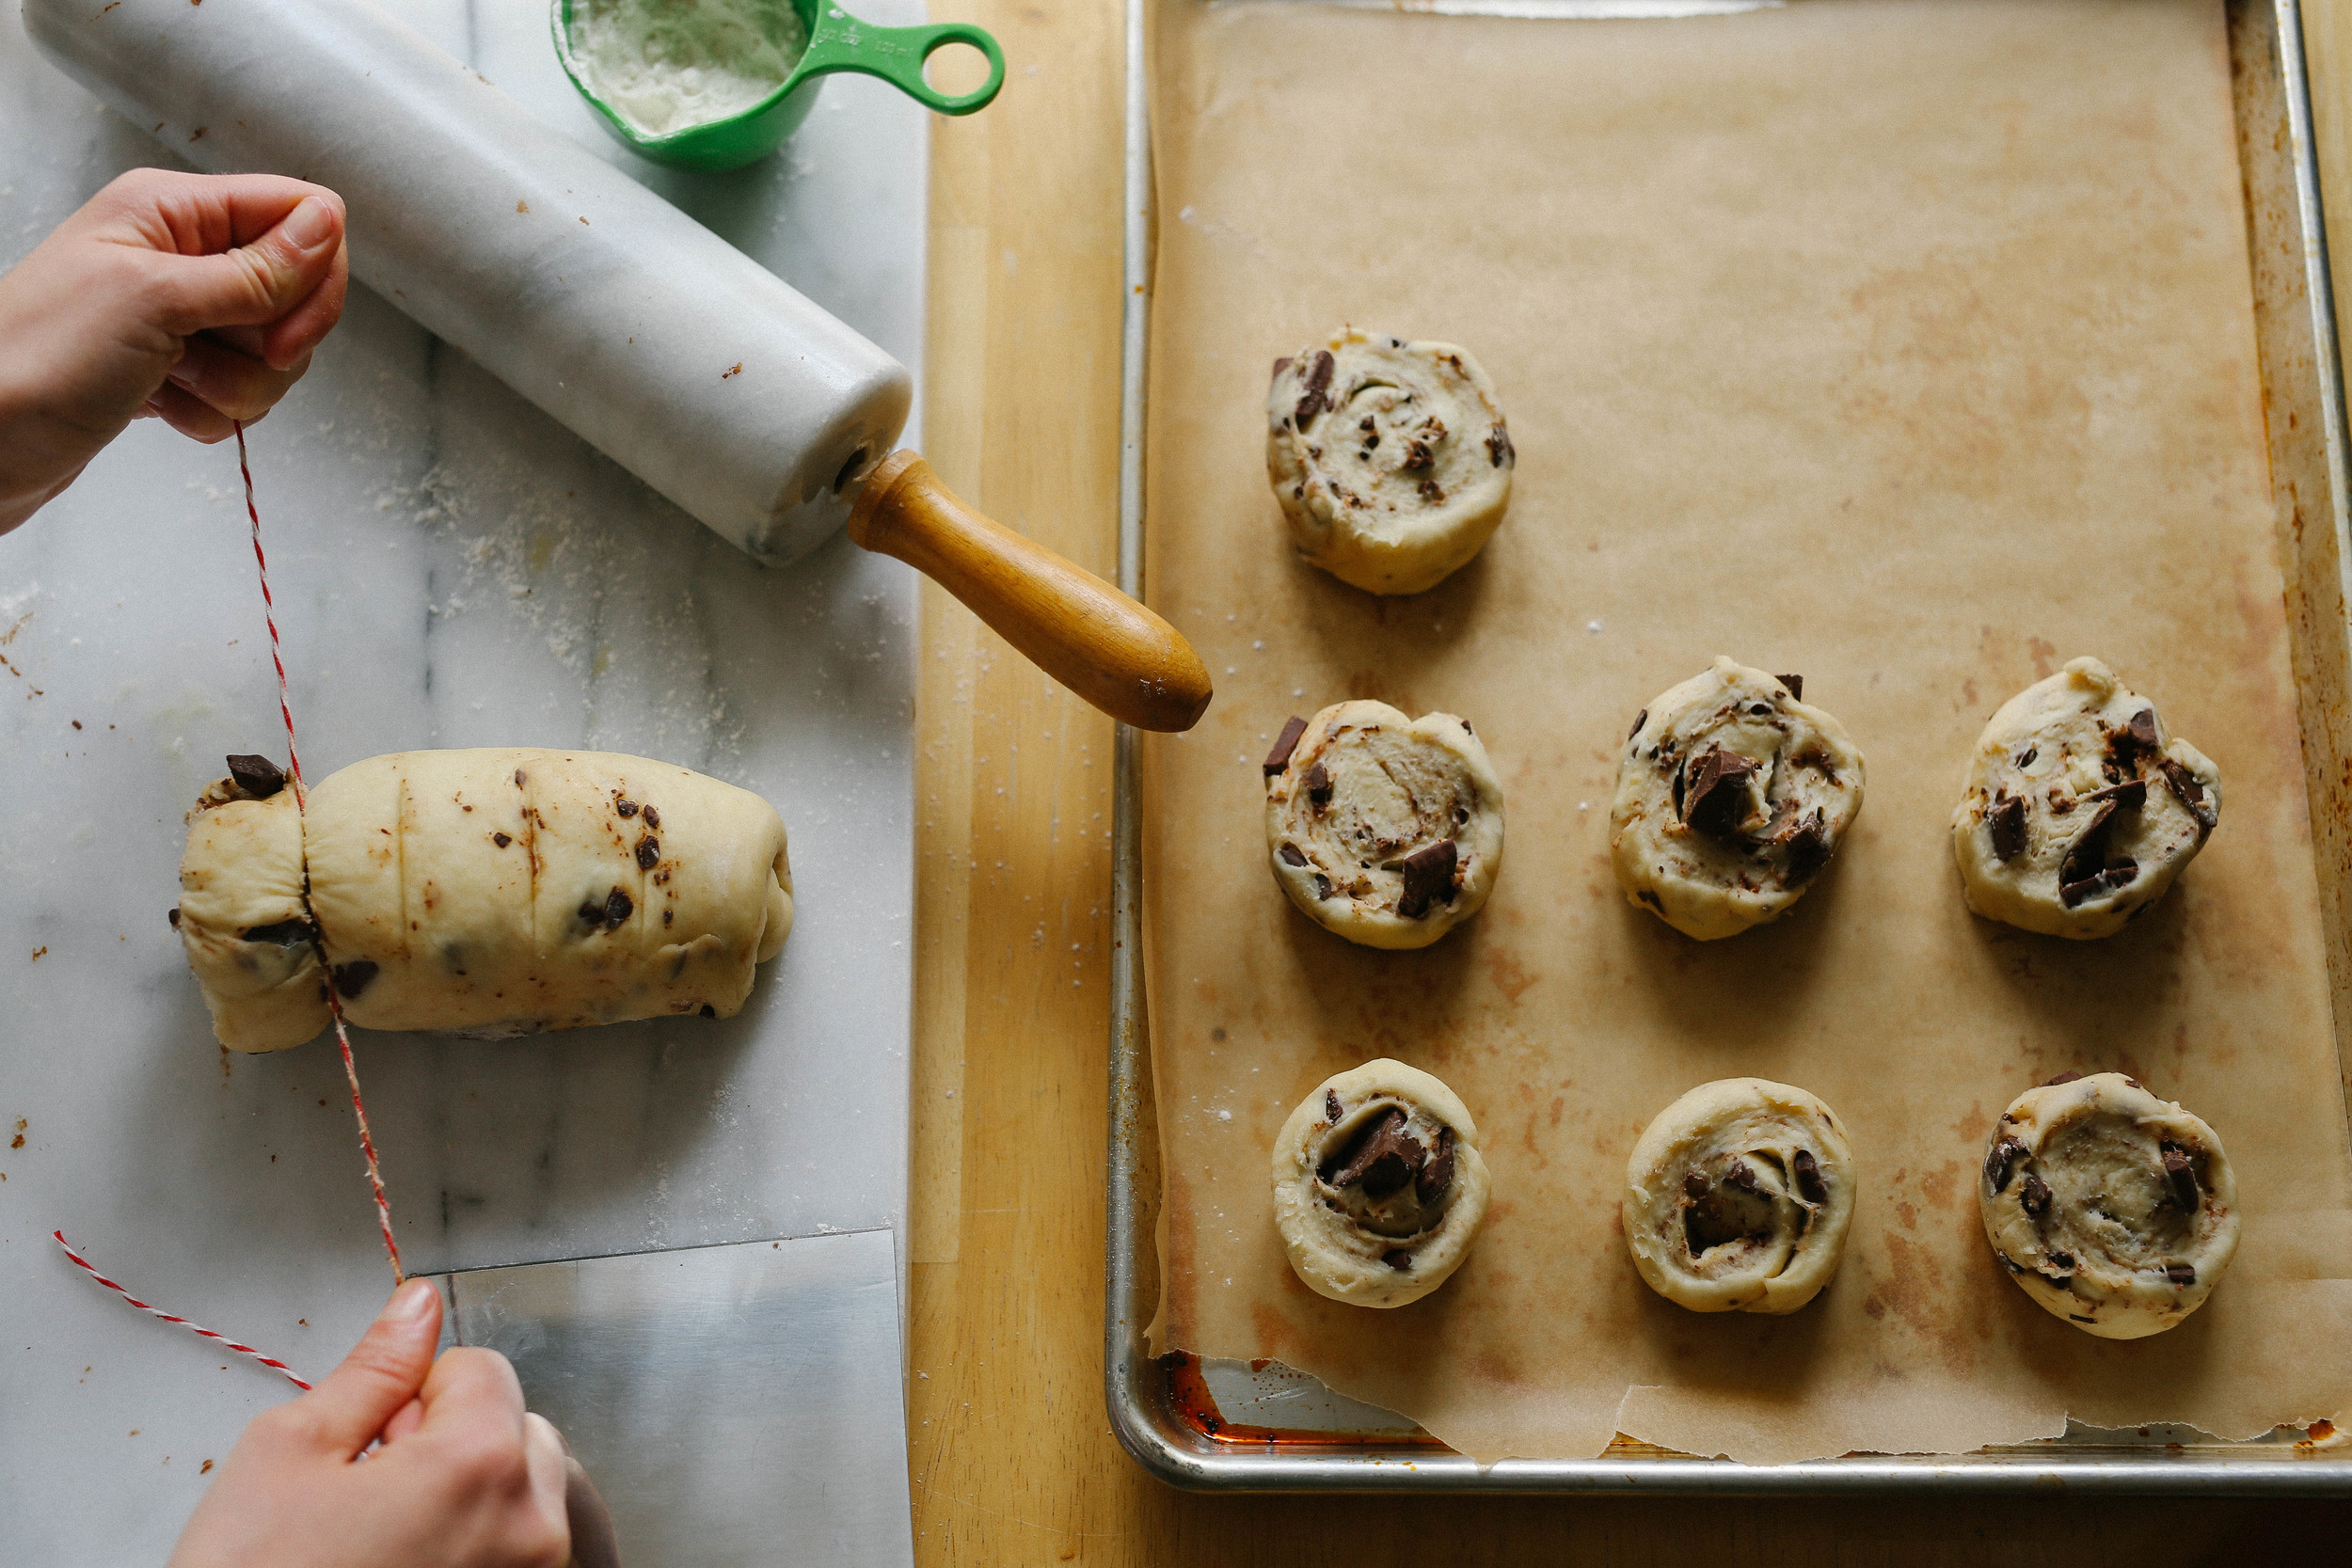
And now a few words from the Voice of Experience to help you achieve your Chocolate Thing dreams! One, do not get super nit-picky about keeping all of the chocolate pieces in the dough when you first mix them in. Some of them will fall out. I'll give you a cheat for working them back in later. Two, use a wire or a floured piece of baker's twine to cut the rolled dough into rounds. This applies equal pressure on all sides of the roll so you end up with neat, photogenic little buns instead of rolls that are all smushed into ovals. Not that there is anything wrong with ovals! We are accepting of all shapes and sizes of rolls over here.
Finally, invite over some friends to help you eat the rolls, because these truly are best eaten warm from the oven while the dough is tender and the chocolate is slightly melty (and this way it saves you from eating all of the rolls yourself in one sitting, though you could probably have worse things happen to you, let's be honest).

Chocolate Things
adapted from the Cheese Board Collective Works cookbook - Makes 12 things
1/2 cup heavy cream
1/2 cup buttermilk
2 1/4 teaspoons active dry yeast
2 1/2 cups unbleached all-purpose flour
6 tablespoons unsalted butter at room temperature
1/3 cup sugar
2 eggs
1 1/2 teaspoon kosher salt
6 ounces dark chocolate, chopped into 1-inch pieces
In a small saucepan, heat the cream and buttermilk over low heat until small bubbles form around the edges of the pan. Pour into a bowl of a stand mixer or a large bowl (if mixing by hand). Let cool until just warm, then whisk in the yeast until dissolved. Let stand for 5 minutes.
If using a stand mixer, add the flour, butter, sugar, 1 of the eggs, and the salt to the bowl. With the paddle attachment on medium speed, mix until the ingredients are combined, about 2 minutes. If the dough is too soupy, add extra flour by the tablespoonful until the dough forms a loose ball around the paddle. Switch to the dough hook and knead on medium speed for 7 minutes, or until the dough is smooth, silky, and elastic. Add the chocolate and knead just long enough to incorporate it (do this step as quickly as possible, as overmixing will result in broken pieces of chocolate and discolored dough).
If making by hand, add the flour, butter, sugar, 1 of the eggs, and the salt to the bowl. Mix with a wooden spoon until combined. If the dough is too soupy, add extra flour by the tablespoonful. Transfer to a lightly floured surface and knead the dough for 10 minutes or until it is smooth, silky, and elastic. Flatten the dough into a 1-inch-thick round and place the chocolate in the center. Gather the dough around the chocolate and knead just long enough to incorporate it.
A quick note: I did a stand mixer/hand mix mash-up where I made the dough with the stand mixer, but kneaded in the chocolate pieces by hand. That seemed easiest to me (and kept chocolate pieces from ricocheting out of my mixer). Just FYI!
Form the dough into a ball and place it in a large oiled bowl. Turn the dough over to cover it with oil. Cover the bowl with plastic wrap or a damp kitchen towel and let rise in a warm, draft-free place for one hour, or until doubled in size. Alternatively, refrigerate the dough to rise slowly overnight. The next morning, remove the dough from the refrigerator and let stand in a warm place for at least an hour before proceeding.
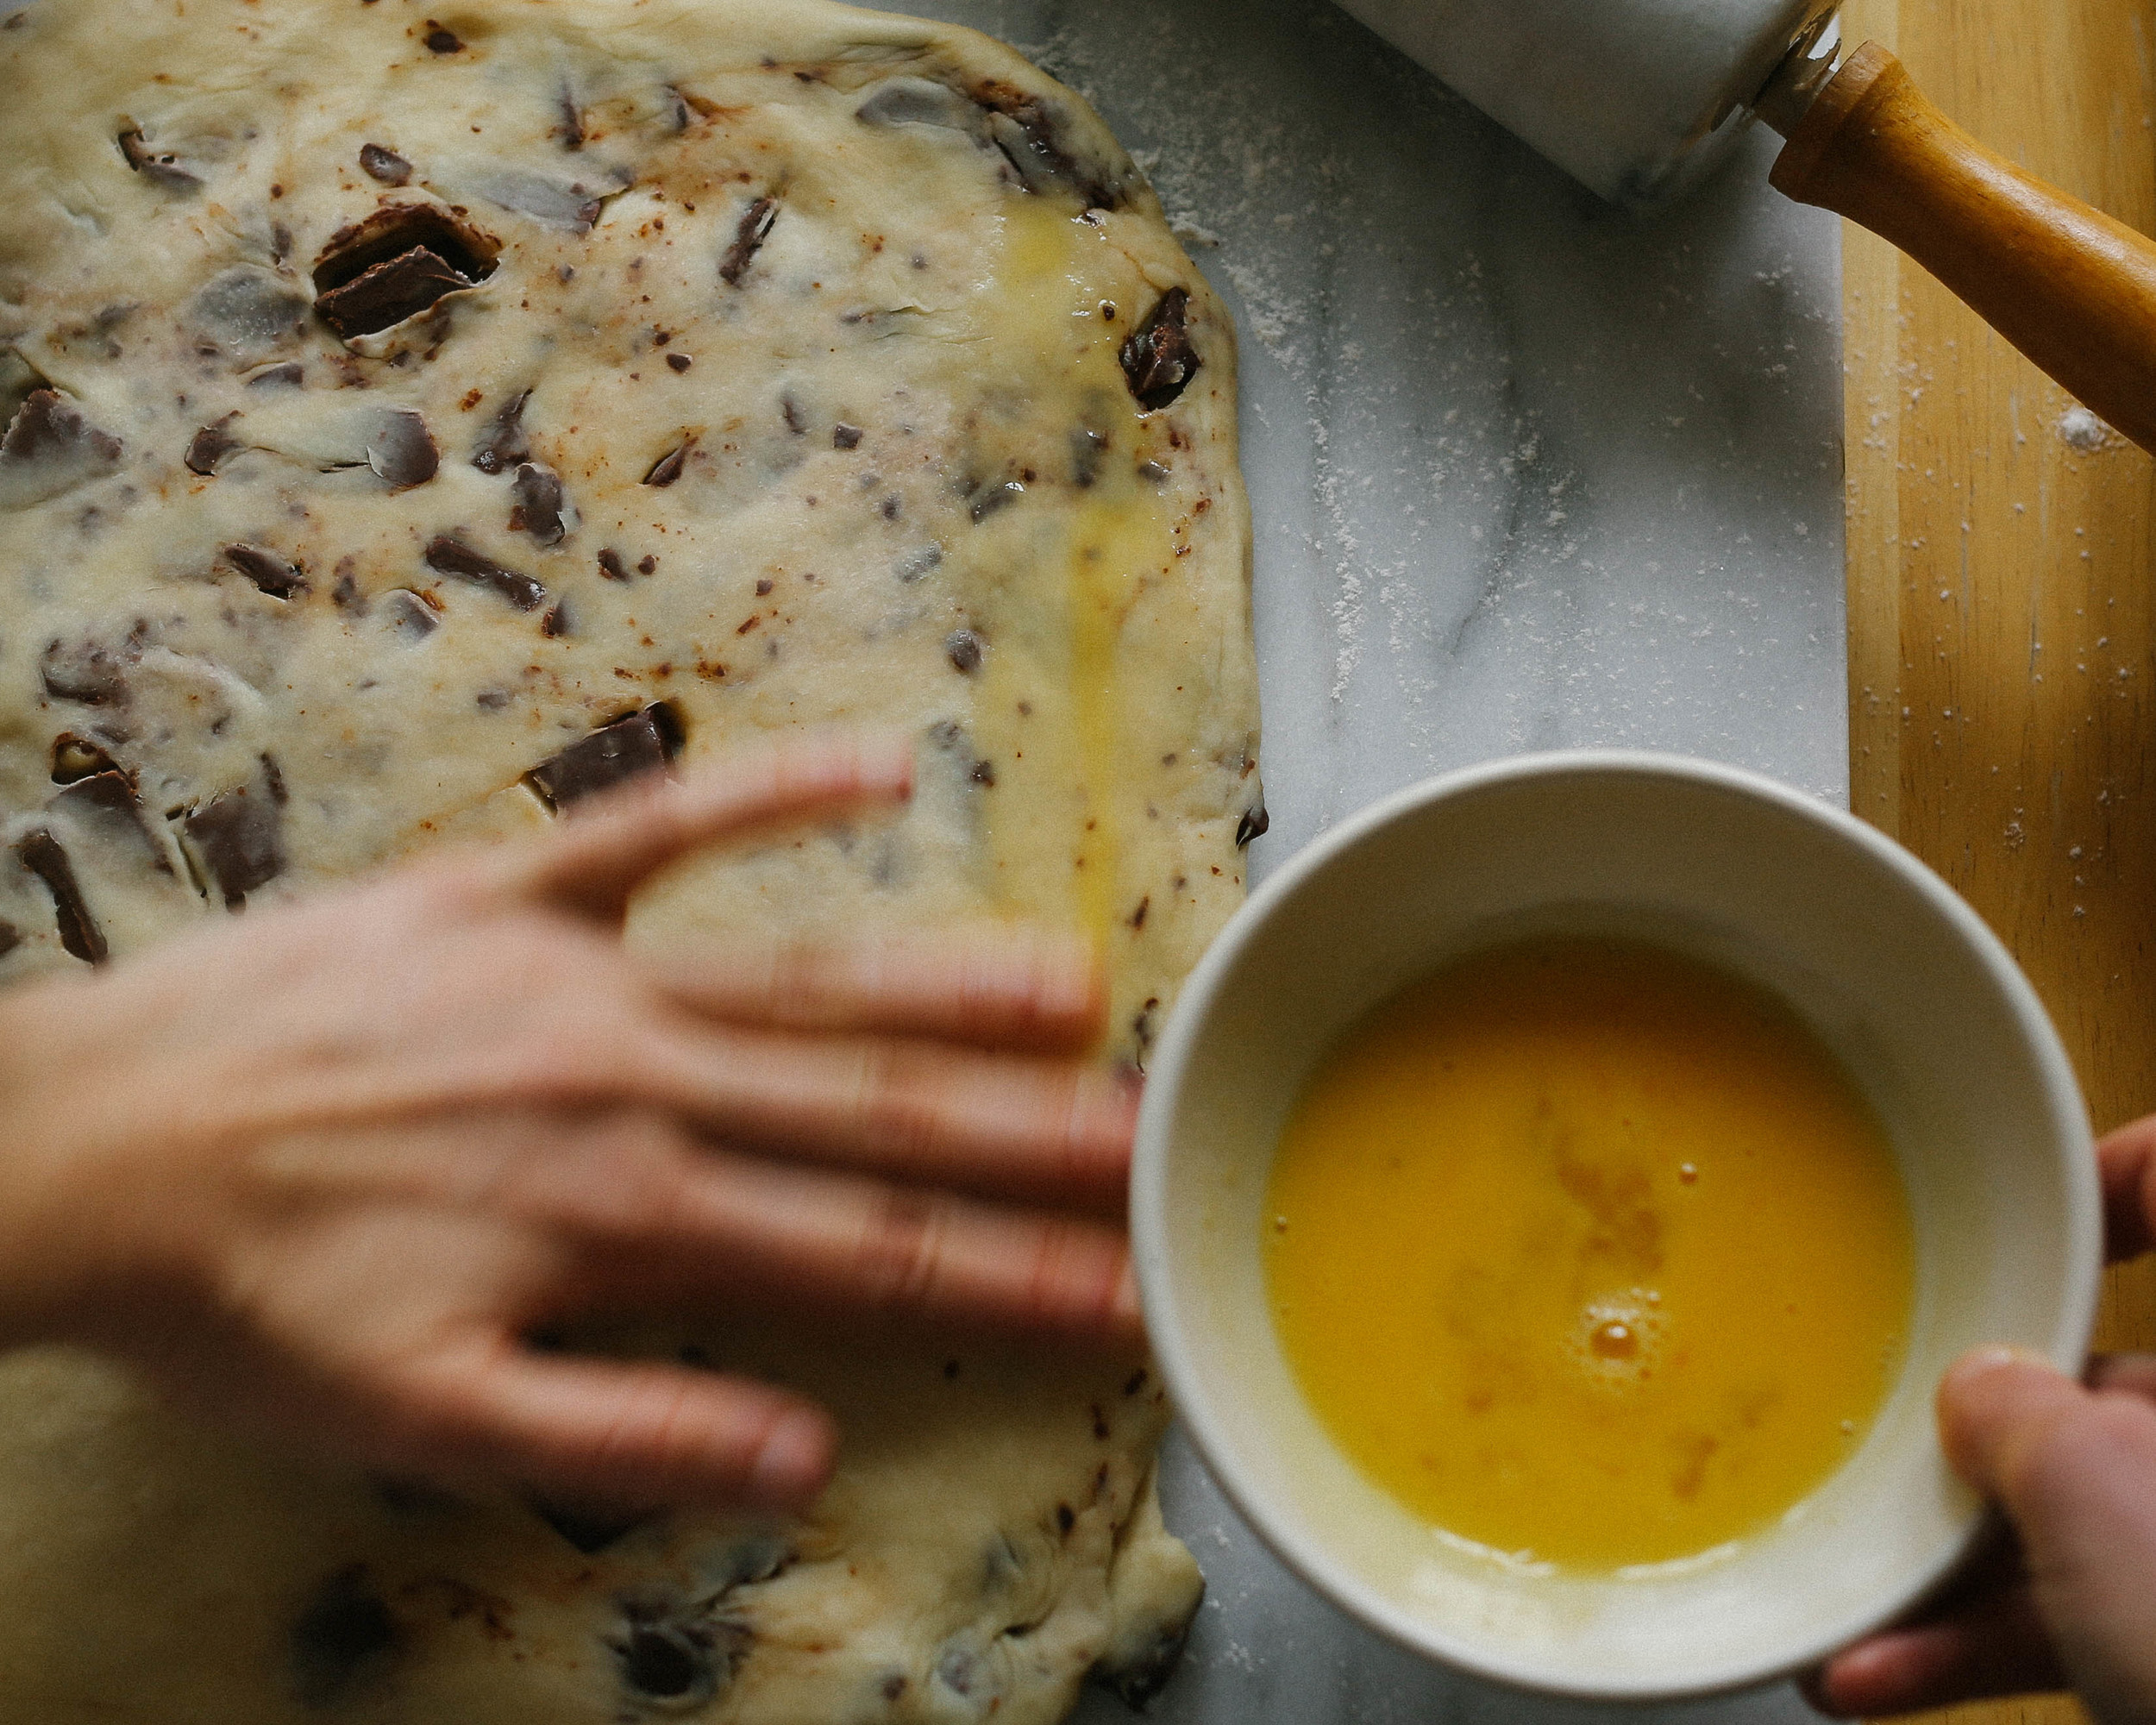
Line a baking sheet with parchment paper or a baking mat. Transfer the dough to a lightly floured surface and roll it out into a 10 by 12-inch rectangle. Don't worry if pieces of chocolate fall out of the dough, just set them aside for the time being. In a small bowl, beat the remaining egg with a whisk. Using a pastry brush (or your fingers, which are easier to clean!) brush a stripe down one of the long edges (and save the leftover egg! You'll use it later!). Take all of the pieces of chocolate that fell out of the dough earlier and scatter them across the dough rectangle. Starting with the non-egg-wash coated edge, roll up the dough lengthwise into a jelly roll shape (rolling up the loose chocolate pieces as you go), using the egg-washed edge to seal the dough roll together. See what we did there? Sneaky, sneaky!
Using a sharp knife, a bench scraper, or a piece of wire or floured baker's twine, cut the roll into twelve 1-inch thick slices and place them on the prepared pan, cut side up, about two inches apart. Cover them with a kitchen towel and let rise in a warm place for 1 hour, or until the rolls are increased in size by one-third.
Fifteen minutes prior to baking, preheat the oven to 350˚F. Using a pastry brush (orrrr your fingerssss), brush the sides and tops of the each roll with the beaten egg. Bake on the middle rack of the oven for 30-35 minutes, or until golden brown. Transfer to a wire rack to cool, or to your face to be eaten.