Posting a cookie recipe around the holidays always feels like risky business because most folks interested in baking and general merry-making seem to have figured out their cookie game plan. So you should feel like you can take or leave this recipe, but I would encourage you to take it if you have a spare evening and some butter lying around. It is a solid chocolate roll-out dough recipe, and you can leave out the chili powder and cinnamon bells and whistles if that feels like too much for you. But to quote a good friend, the "latent, lingering heat [of the spices] is so pleasing." Sort of like liquid jacket, but with cookies.
I've got your attention now, haven't I? ;-)
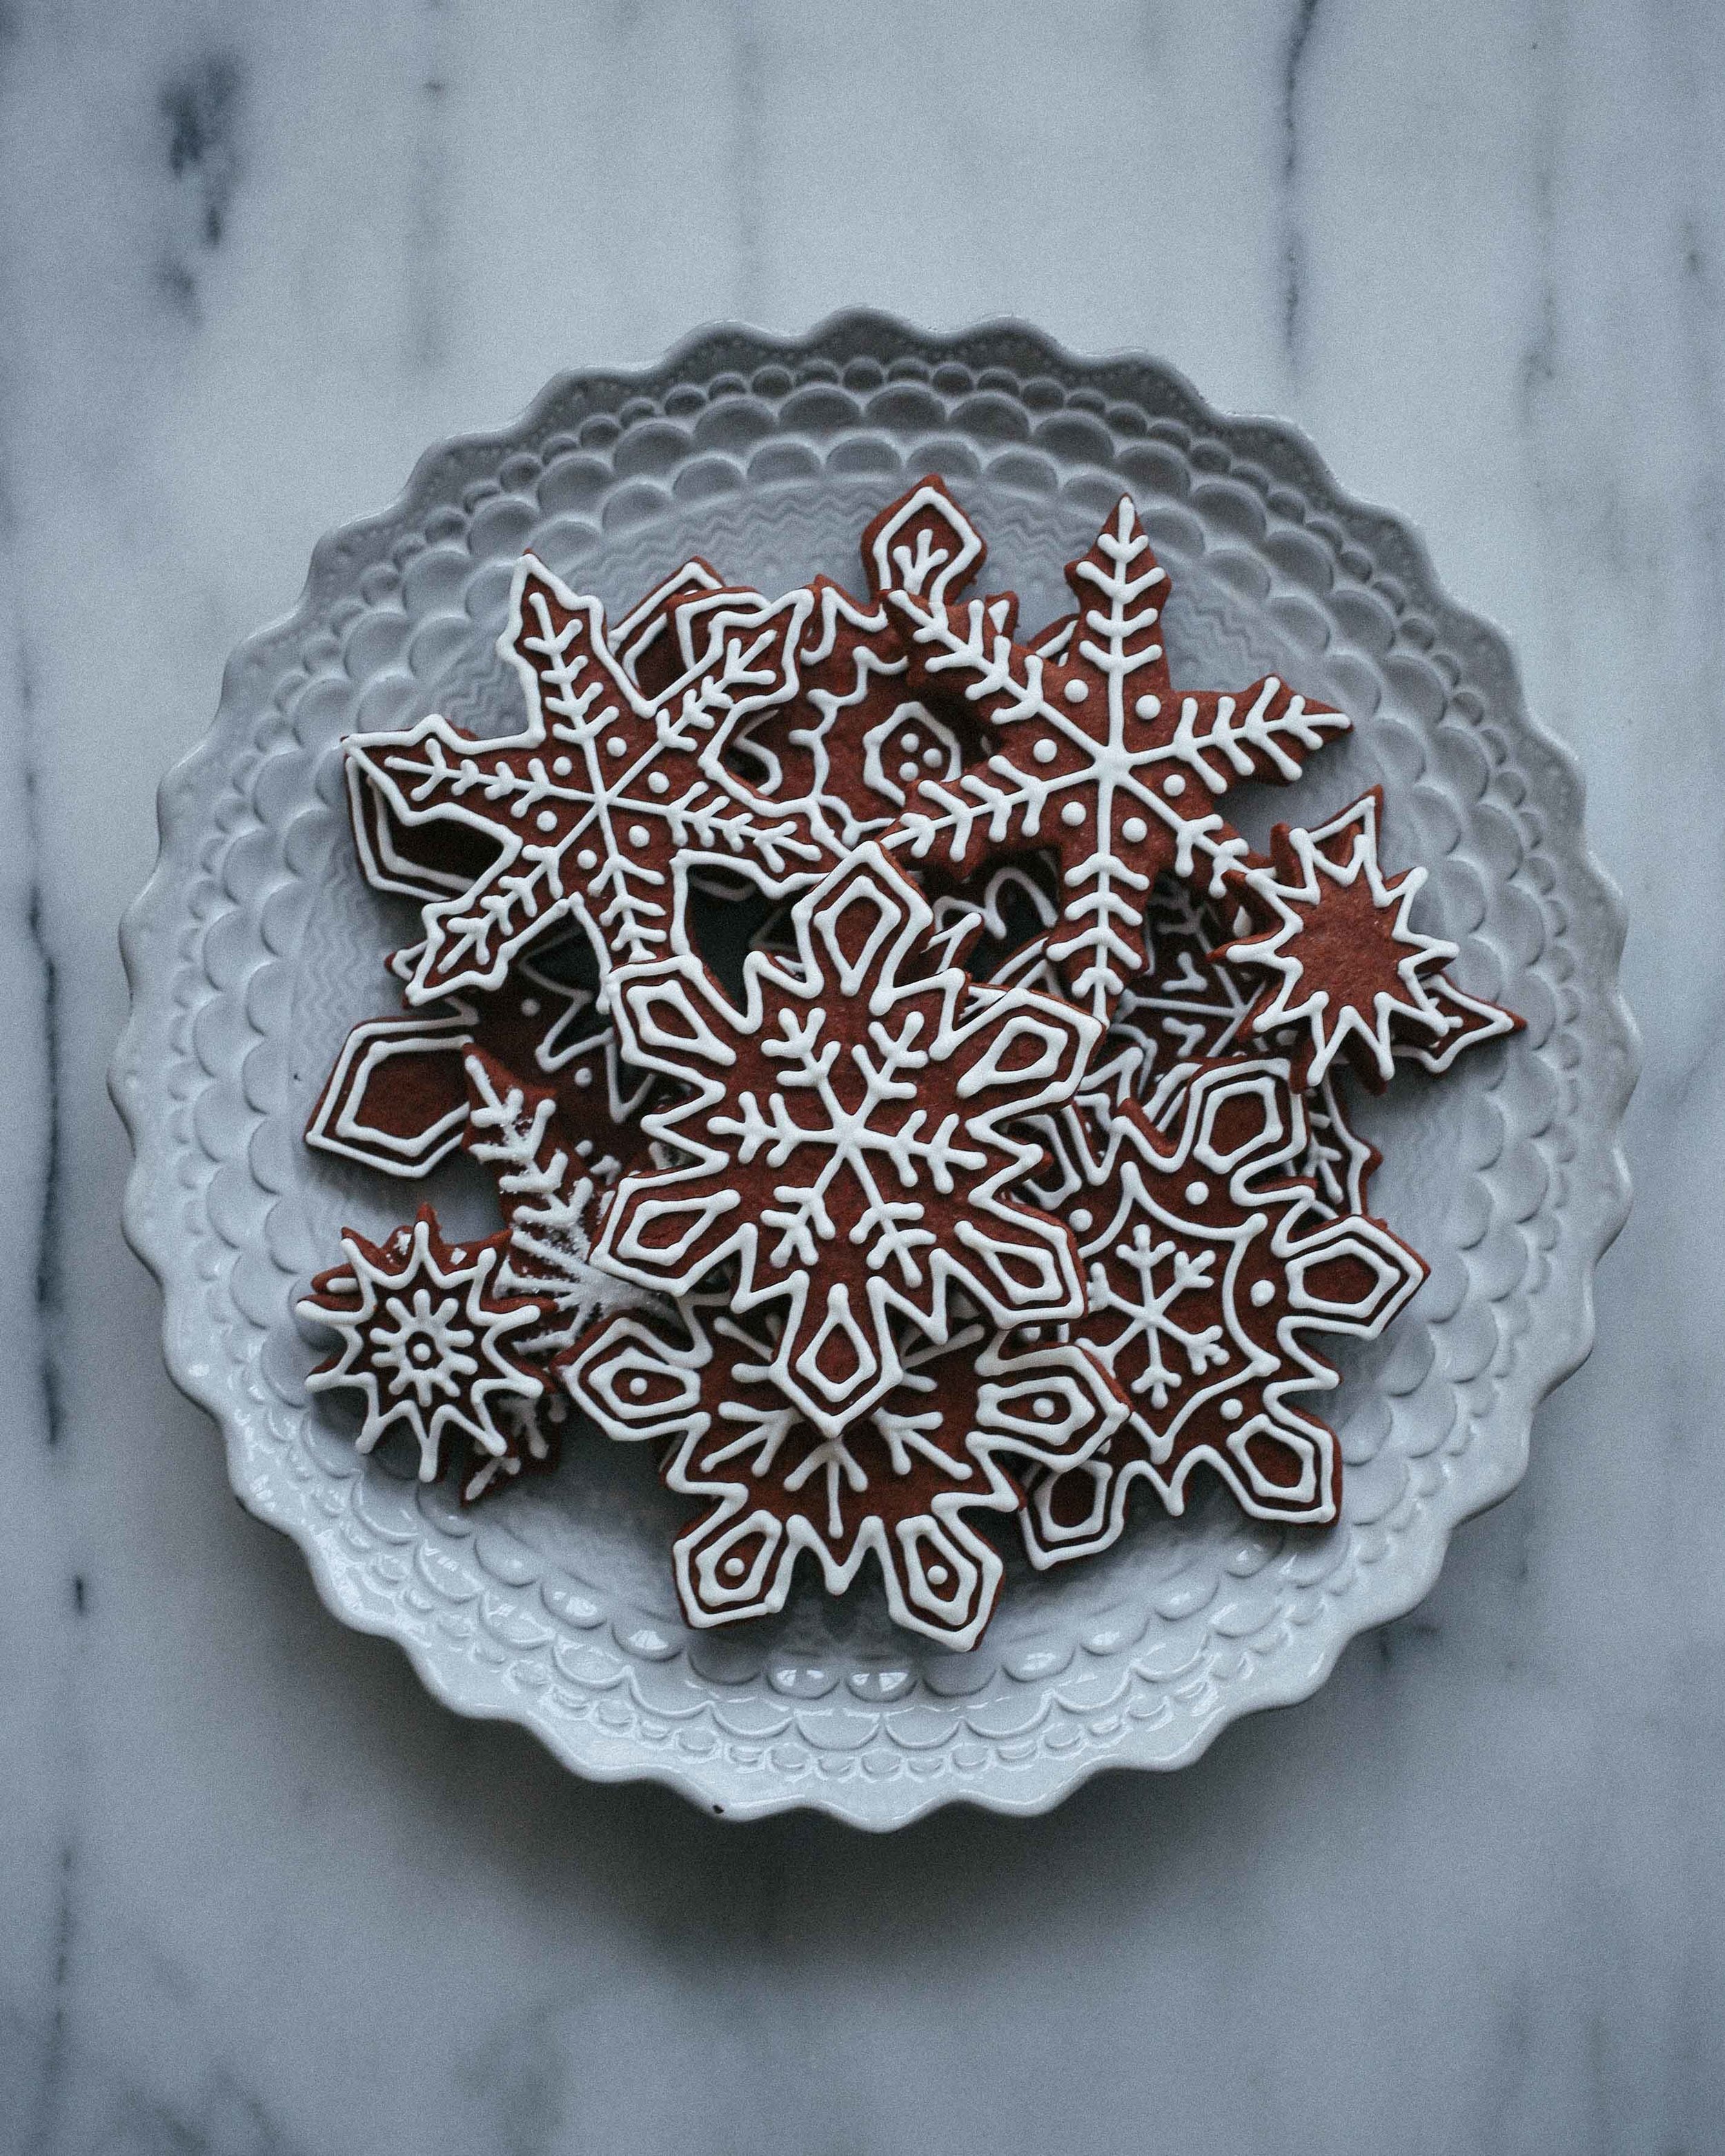
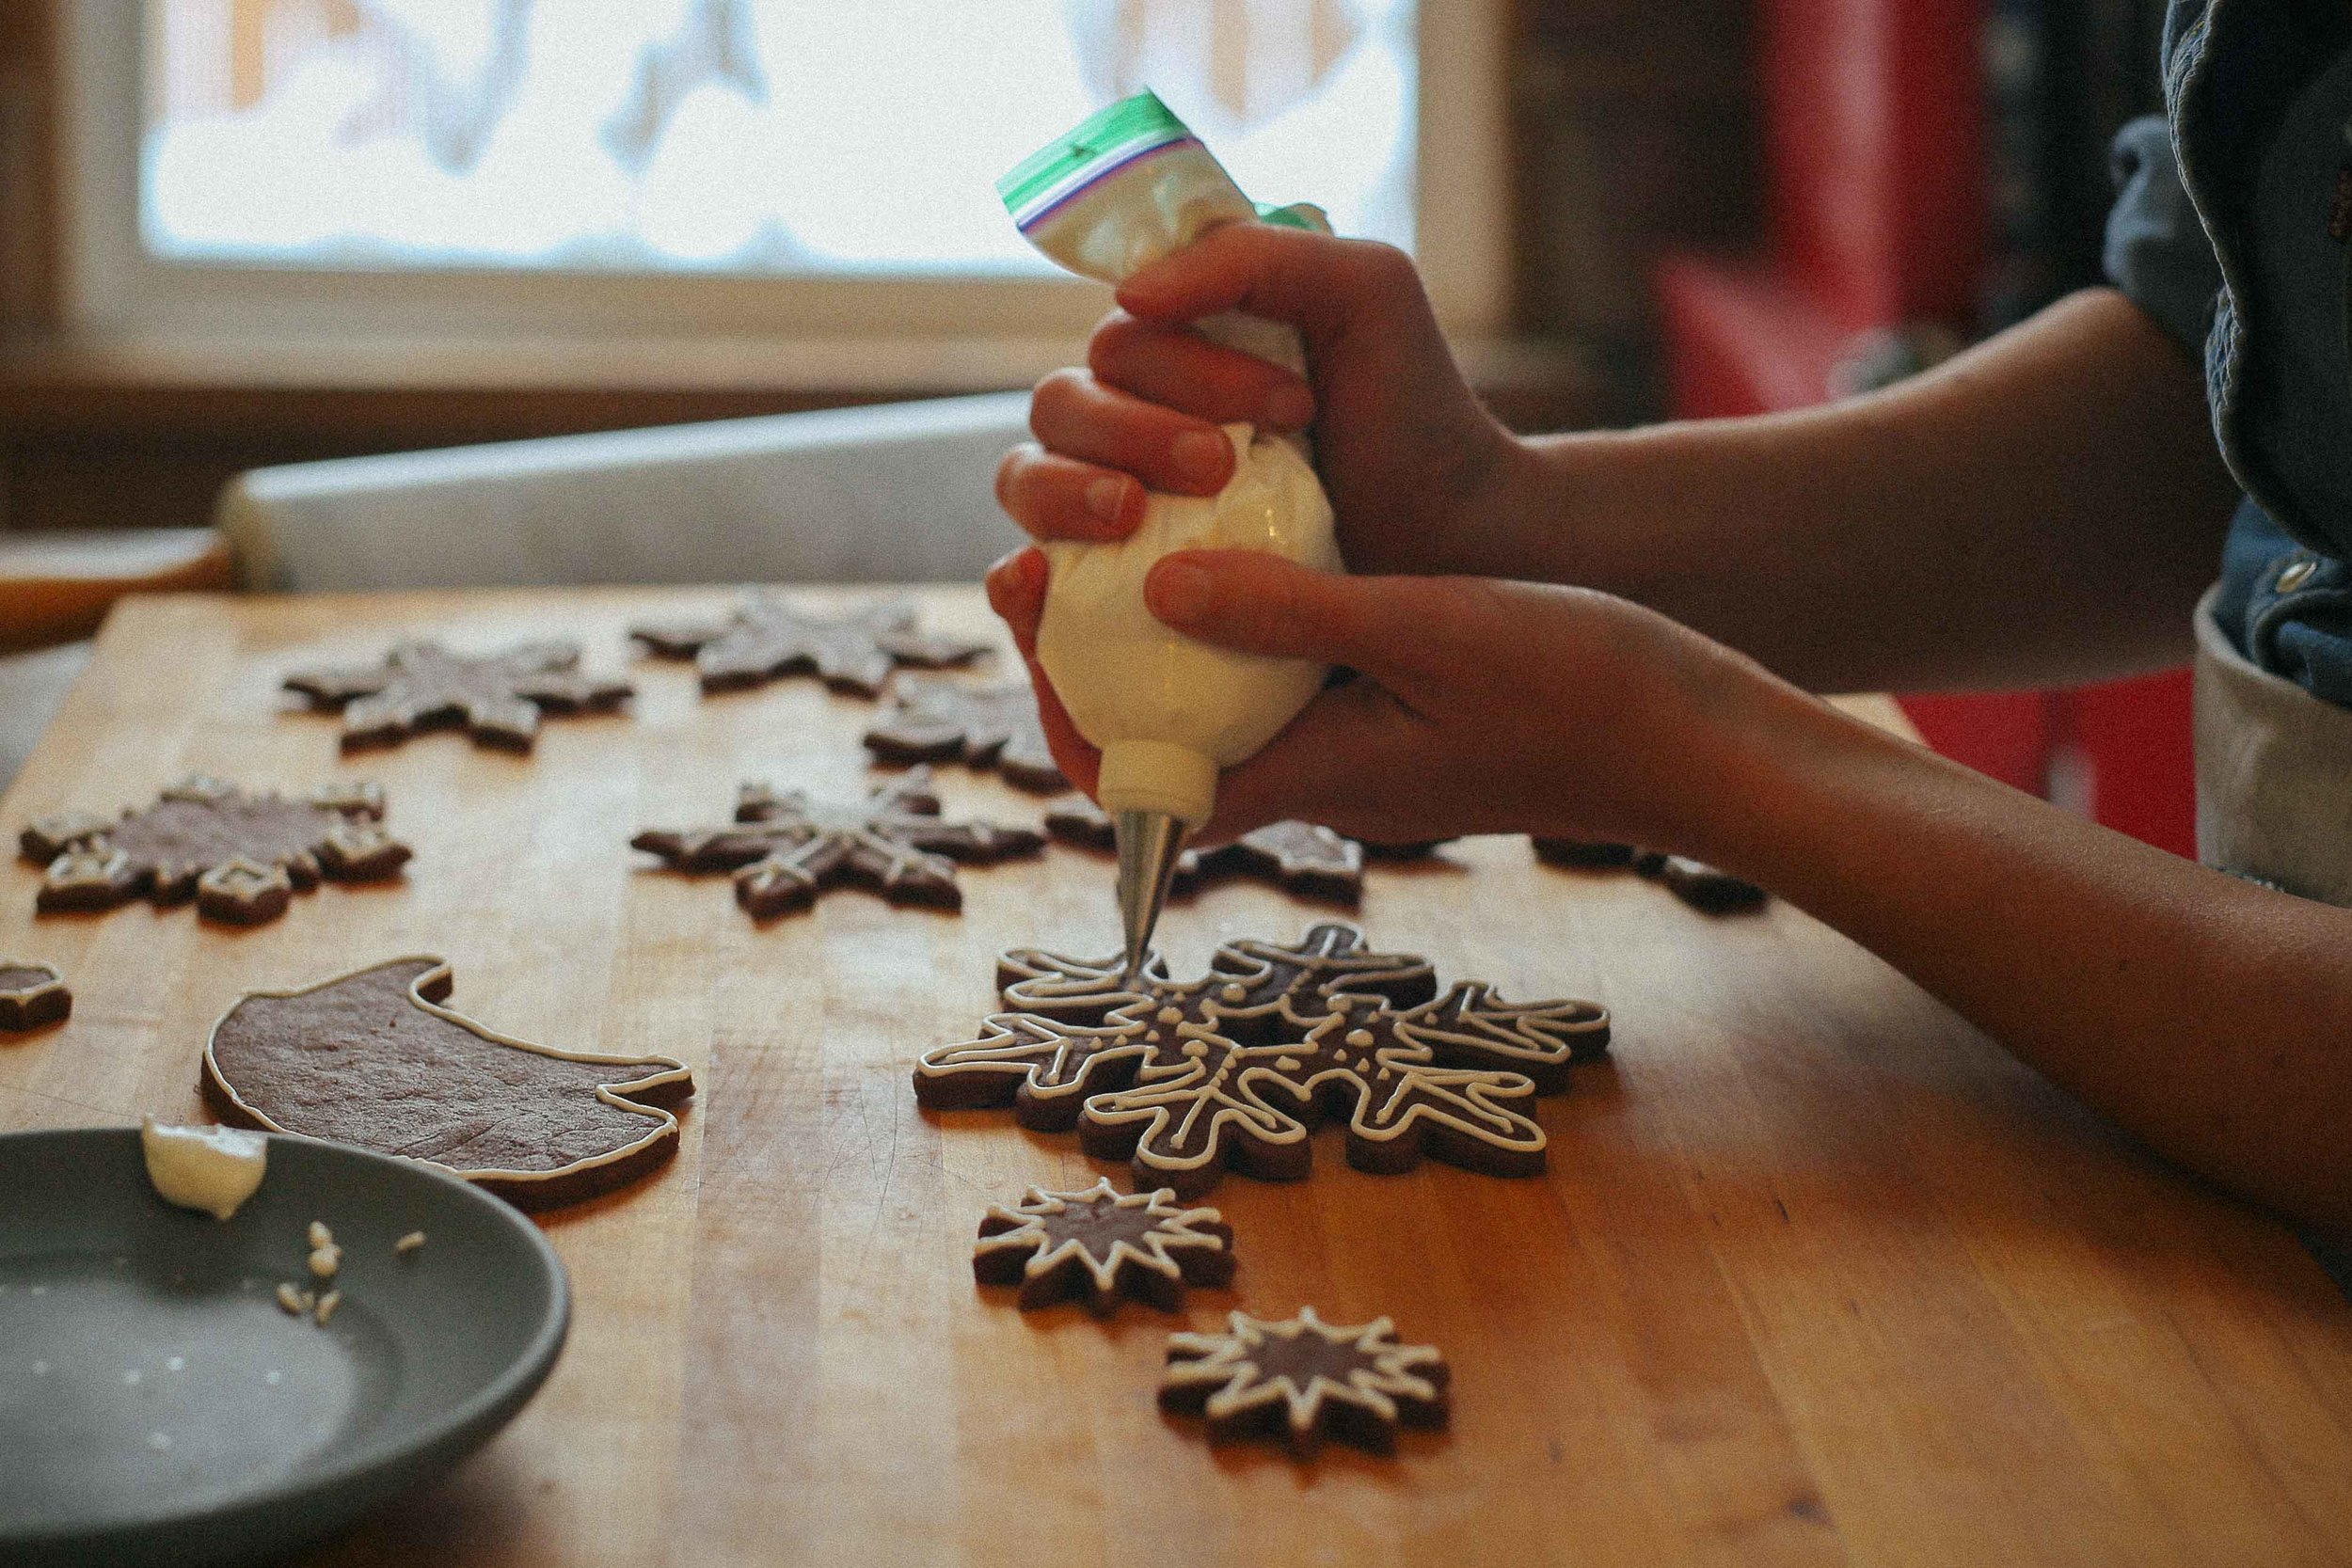
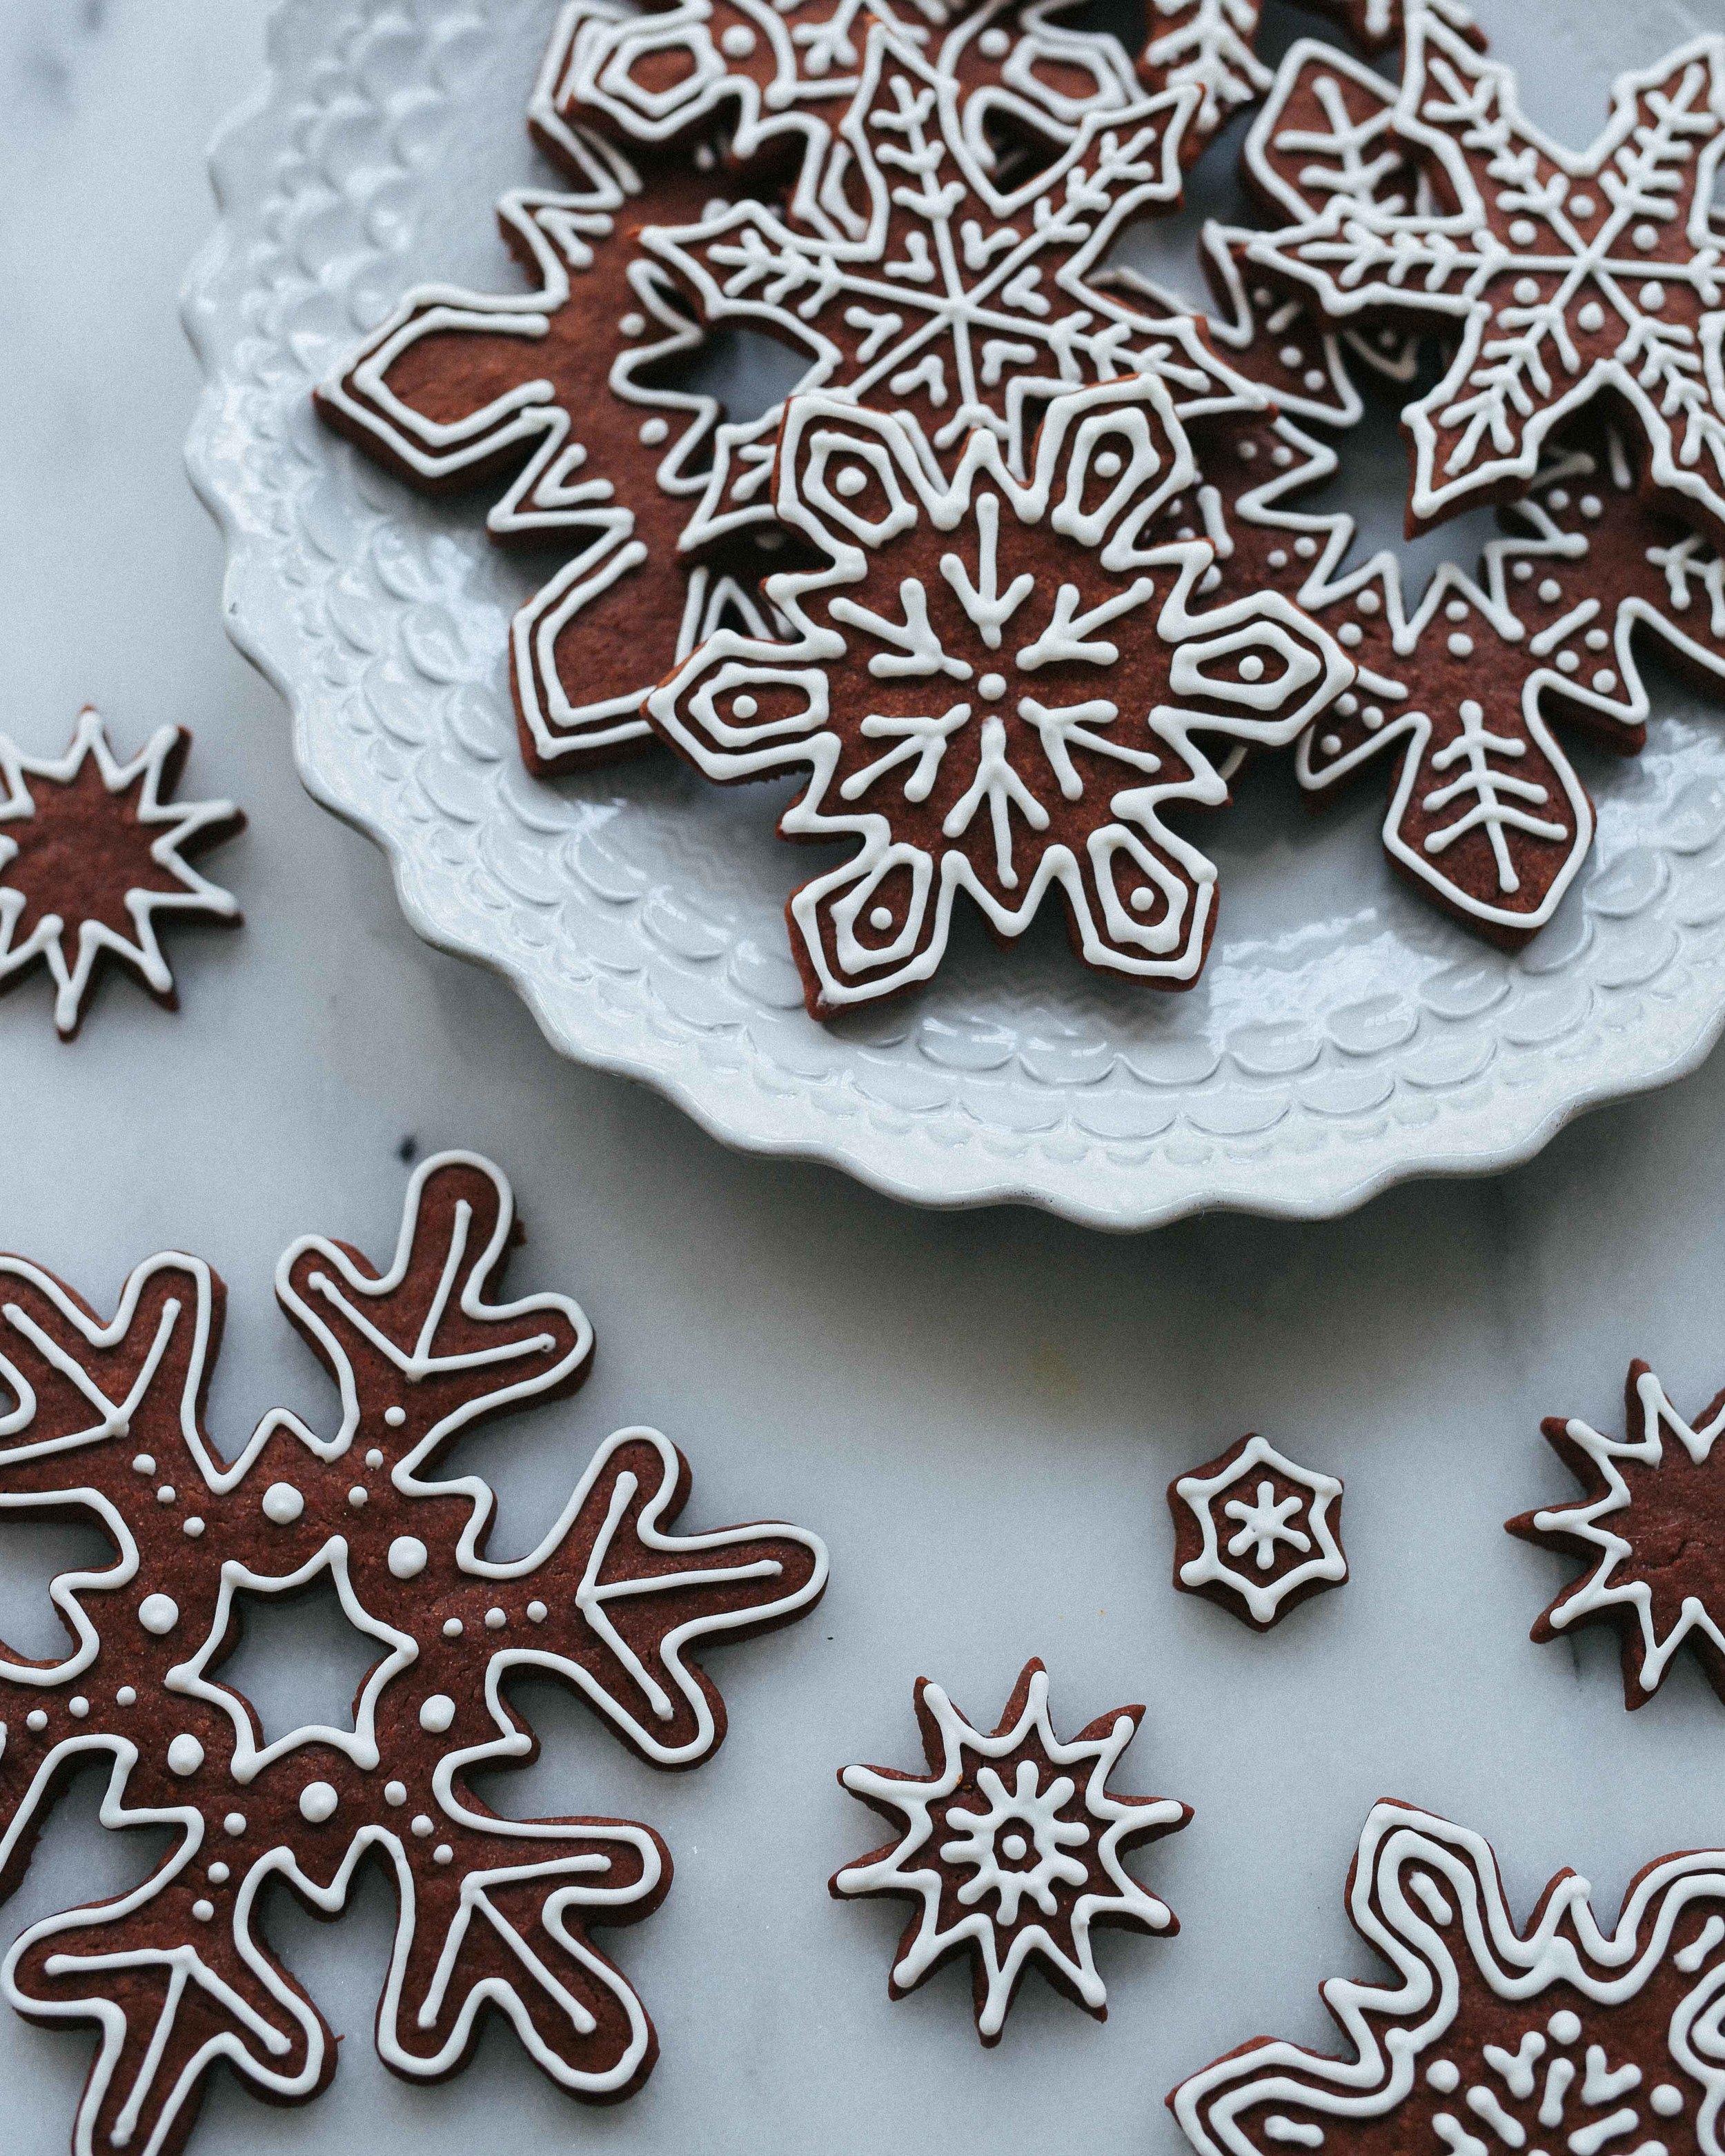
If you're new to the business of royal icing, here are some of handy tips for decorating your cookies with maximum enjoyment and minimal frustration:
1. Invest in a piping tip - you have probably seen people ice cookies using a sandwich bag with the end snipped off, but it is difficult to guarantee that you'll be able to pipe in a straight line and that the thickness of your line will be consistent (since the opening may stretch or tear). You'll more likely set yourself up for a frustrating time if you refuse to use a piping tip or other, rigid tip (such as that of a squeeze bottle, which has its own limitations). I put a piping tip into a sandwich bag so that I could seal the bag and save the icing from drying so that it could be used over multiple days. Find icing tips at gourmet specialty shops (such as Sur la Table) or online. I like using a plain, round tip (such as an Ateco #2 or #4) for royal icing since I make mine somewhat fluid and it won't hold textures or ridges.
2. Move your piping tip at the same speed as the icing flows - moving at the same speed means that you're more likely to create straight lines, and that your lines will be the same thickness as the piping tip. Move too quickly, and you'll create thin lines (or your lines might break as you pipe them). Move too slowly, and you may end up with thicker or clumpy sections in your lines, or your lines may look more wobbly. Practice on a few cookies or on parchment paper to get a feel for your icing's consistency/flow rate.
3. Work from the outside in whenever possible - this helps to ensure consistency in your design and makes it a lot easier to create "perfect" looking cookies.
4. Practice, and don't beat yourself up while you're learning! The point is to have fun with this. Worst case, you can always dump sprinkles on your funkiest designs and they will look fabulous.

adapted from this recipe - makes roughly 3 dozen 3.5 inch cookies
This recipe is a little different from some in that some of the dry ingredients are mixed in with the wet ones before the flour is added. I found that I liked being able to beat the hell out of the batter when adding the cocoa powder without worry of gluten development from flour, so I am a big fan of this method for this particular recipe. If you choose to whisk the spices/baking powder/cocoa powder into the flour, then just continue with the "add the flour in three additions" part of the recipe, and be careful not to overmix your dough.
Also, I used the smaller amounts of spices when making this dough the first time, and while they added a really delightful something to the dough, I also like using them in slightly larger quantities to pack more of a punch.
1 cup butter, at room temperature
1 1/4 cups sugar
2 eggs
1 teaspoon vanilla
3/4 teaspoon baking powder
3/4-1 teaspoon chili powder (I used Rancho Gordo)
1/2-3/4 teaspoon cinnamon
1 teaspoon kosher salt
2/3 cup natural cocoa powder
3 cups all-purpose flour
Royal Icing, to decorate (recipe follows)
Cream together the butter and sugar in the bowl of a stand mixer until light and fluffy. Add the eggs one at a time and mix to combine, scraping down the sides of the bowl with a spatula in between each egg. Add the vanilla, and mix to combine.
Whisk together the baking powder, chili powder, cinnamon, and kosher salt, and add to the bowl. Mix well to combine, scraping down the sides of the bowl if necessary. Add the cocoa powder and again mix well to combine (I just left my mixer running for 2-3 minutes at this point).
Add the flour in three additions, scraping down the sides of the bowl and mixing just to combine in between each addition. Do not overmix. Form the dough into a round and wrap in plastic wrap. Chill in the refrigerator for at least 30 minutes or overnight.
While the dough chills, preheat your oven to 350˚F. Line two baking sheets with parchment paper.
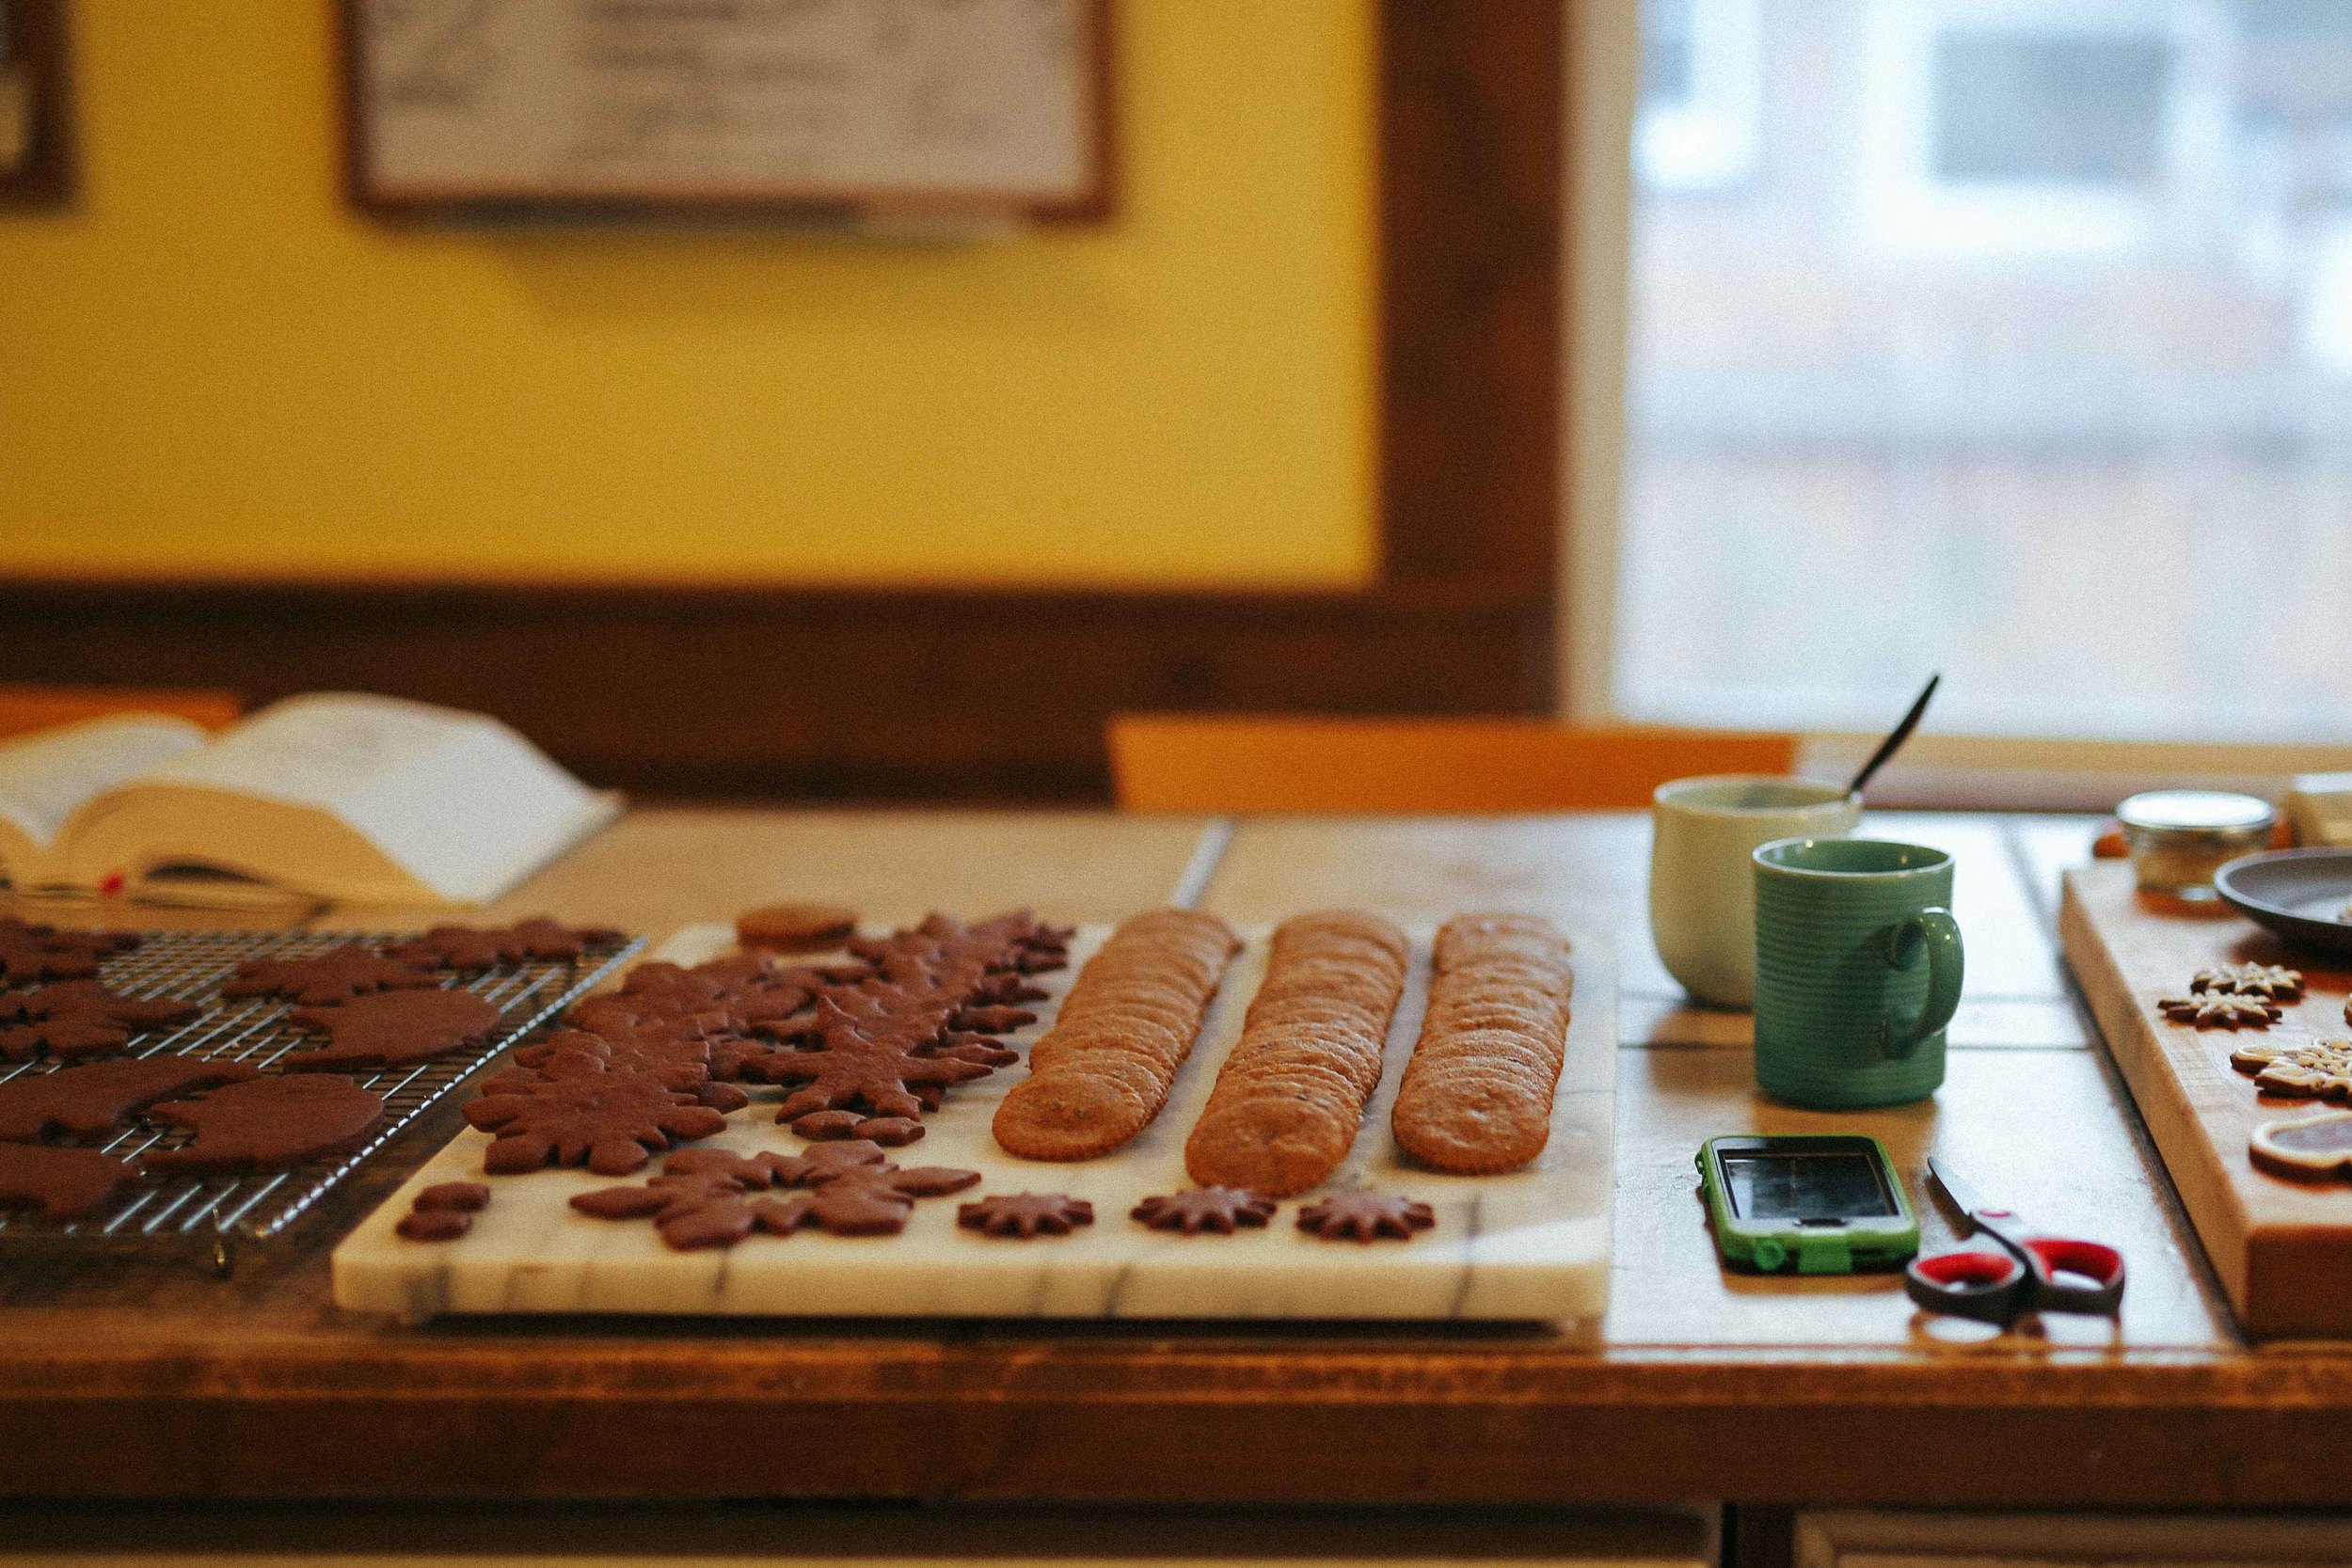
Remove the dough from the fridge and divide in half. Place one half on a floured surface, and wrap the second in the plastic while you work with the first. Roll out into a 1/4-inch thick sheet (if the dough cracks or is hard to work with, let it rest for 15-20 minutes to warm up a bit). Cut into desired shapes and place on the parchment lined baking sheet. Once one baking sheet is full, place it in the oven to bake for 7-10 minutes while you cut more cookies.
Once the cookies are baked (I ended up liking the ones in the 8-9 minute bake range the best), remove them to a wire rack to cool (leave the parchment sheet on the pan for more cookies). Place the second pan in the oven to bake while you cut more cookies. Note: make sure to let the pans cool a little bit before putting unbaked cookies on them... this way they don't melt a little or lose their shape before making it to the oven. Reroll and cut any scraps. Repeat cutting/baking with the second round of dough once you've finished with the first.
Once cooled, cookies may be iced or stored in an airtight container at room temperature for up to a week.
ROYAL ICING
makes 1 cup
There are many different ways to make royal icing depending on whether you're using dehydrated egg whites, meringue powder, or fresh egg whites. I couldn't find dehydrated egg whites, and the meringue powder I found had a lot of funky-sounding additives, so I used a fresh egg white. The double-boiler method allows you to cook the egg white without making scrambled eggs and gives you a pure, white color.
If you can find pasteurized egg whites, Alton Brown has a great recipe here.
1 large egg white
1 cup powdered sugar, divided
Combine the egg white with 1/3 cup of powdered sugar in the bowl of a double-boiler (or in a heatproof bowl set over simmering water) and whisk to combine. Cook gently over the simmering water, whisking constantly, until the mixture reads 155˚F on a thermometer (do NOT stop whisking or let it boil). Remove from the heat and add the remaining powdered sugar, whisking constantly to combine until the sugar dissolves (briefly place it back over the heat if necessary to dissolve any lumps). Add a teaspoon or two of water if your icing seems too thick (I like to pick up a little icing with the whisk or a spoon and trail it over the surface - it should leave a ribbon, but be reabsorbed into the rest of the icing within 5 seconds or so).